NinjaOne
Deploying Umbrella Roaming Client with NinjaOne (Formerly NinjaRMM)
This document is only a basic overview of how to deploy the Cisco Umbrella roaming client using your RMM tool. Cisco does not provide comprehensive support for Ninja. For more information, see Ninja`s documentation.
Note: This document is specific to deploying the Umbrella roaming client on Windows client operating systems; for example, Windows 8 or 10. Cisco does not support the installation of the Umbrella roaming client on Windows Server operating systems. For more information about prerequisites, see Prerequisites. This document assumes you have read these prerequisites and have opened the appropriate firewall ports.
Ninja provides the ability to create Scheduled Actions to deploy products that are not built-in to Ninja’s RMM tool. This document provides instructions on how to add a Scheduled Action to your policies to deploy the Umbrella roaming client to your customer's computers. You must create a Scheduled Action that is unique to each customer. We recommend creating a Scheduled Action/Policy for each customer with a naming convention such as %Client Name% Umbrella roaming client Deployment.
Important
You must enter all customer internal domains before deploying the Umbrella roaming client. Failure to do so will cause problems with accessing internal resources. To do this, in the Umbrella dashboard, navigate to Deployments > Configuration > Internal Domains and enter domains as required. For more information, see Domain Management.
Procedure
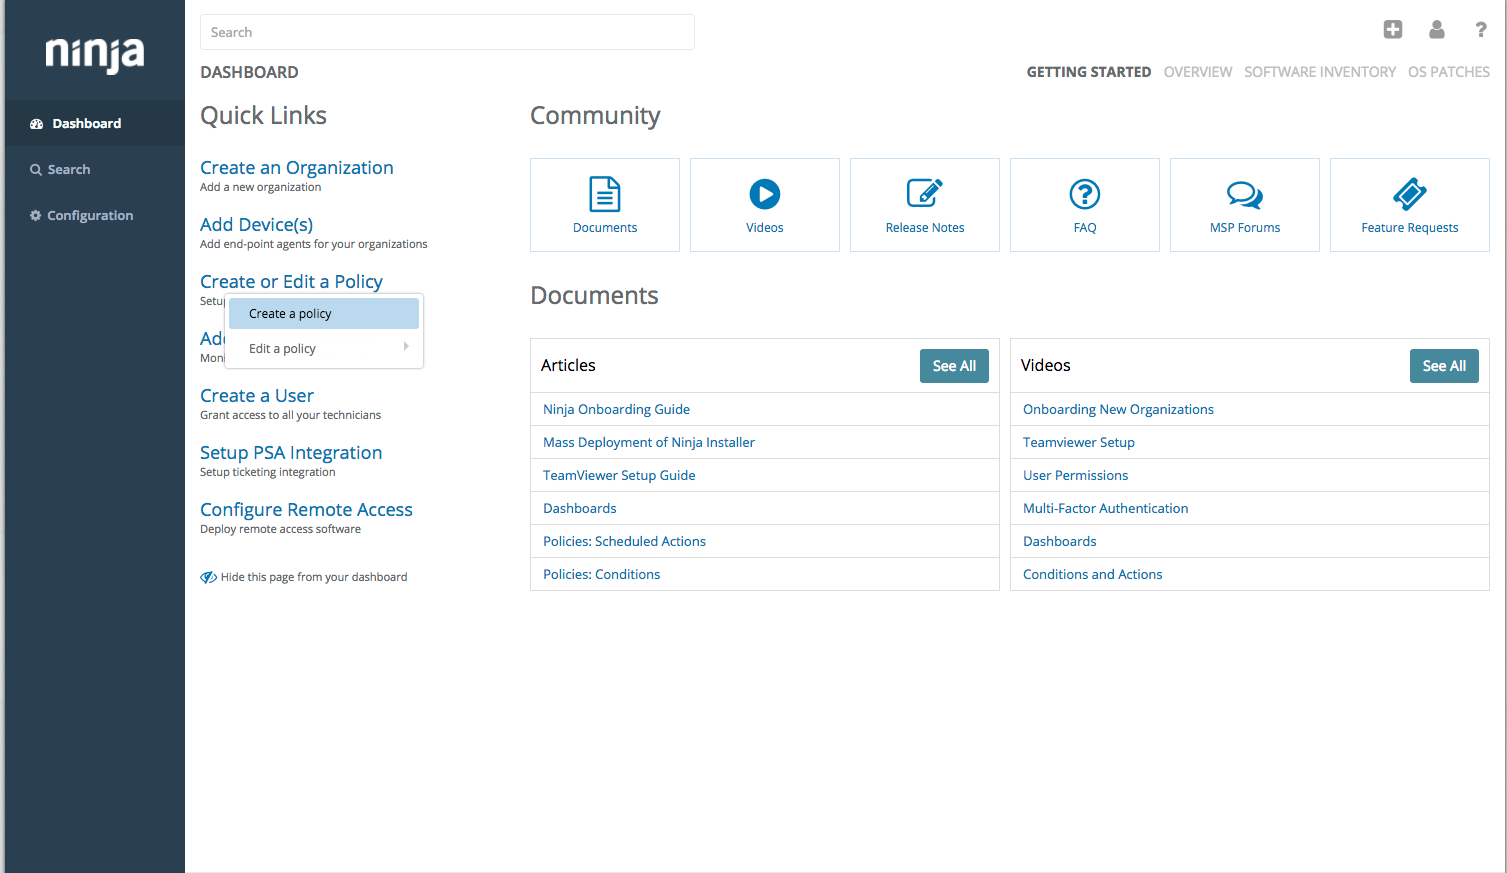
- In the Ninja dashboard, navigate to Create or Edit a Policy and choose either Create a policy or Edit a policy.
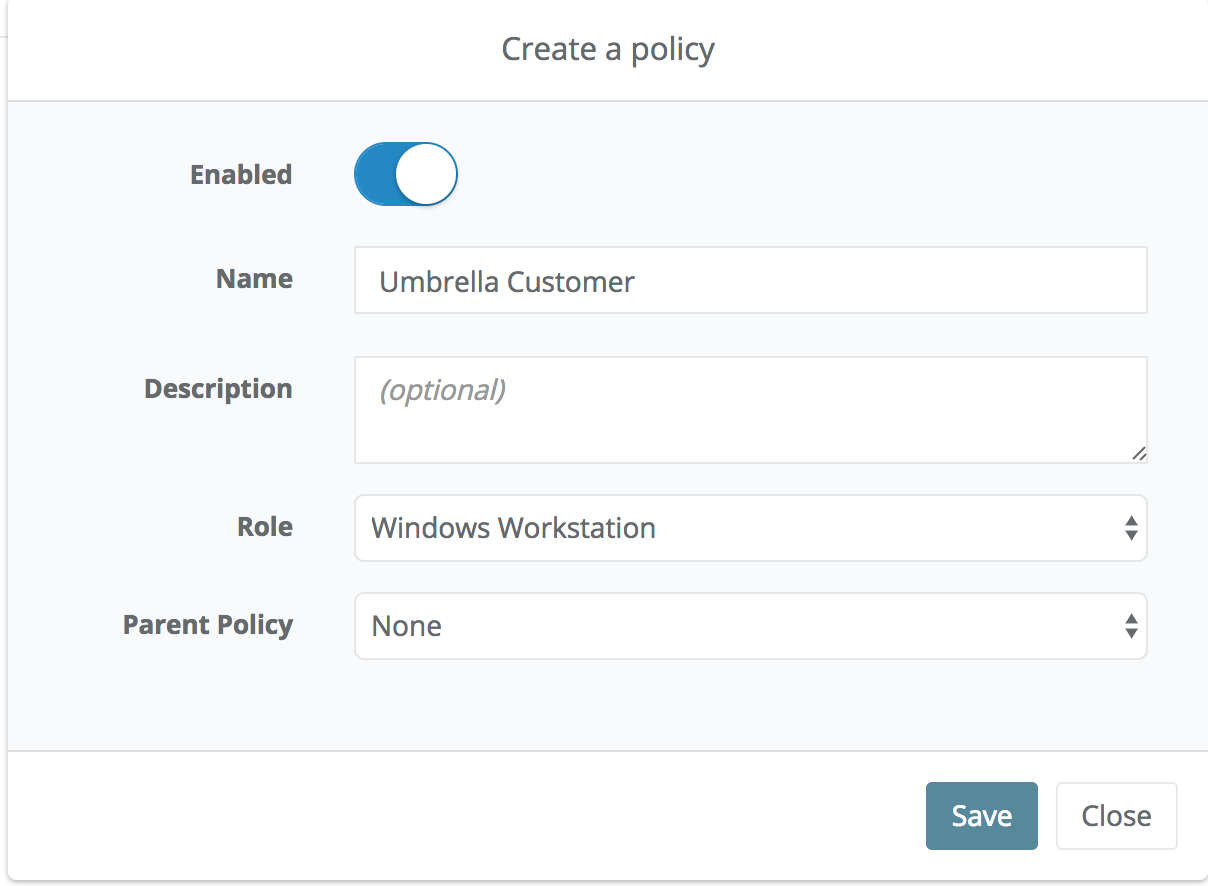
The Create a policy wizard opens.

- Name the policy, choose Role Windows Workstation, and then save the new policy.
Note: Depending on your policy layout, you can use the Parent Policy field to link this to an existing policy. However, please note that the variables are unique per customer, so linking to the wrong policy could result in roaming client in the wrong customer organization.

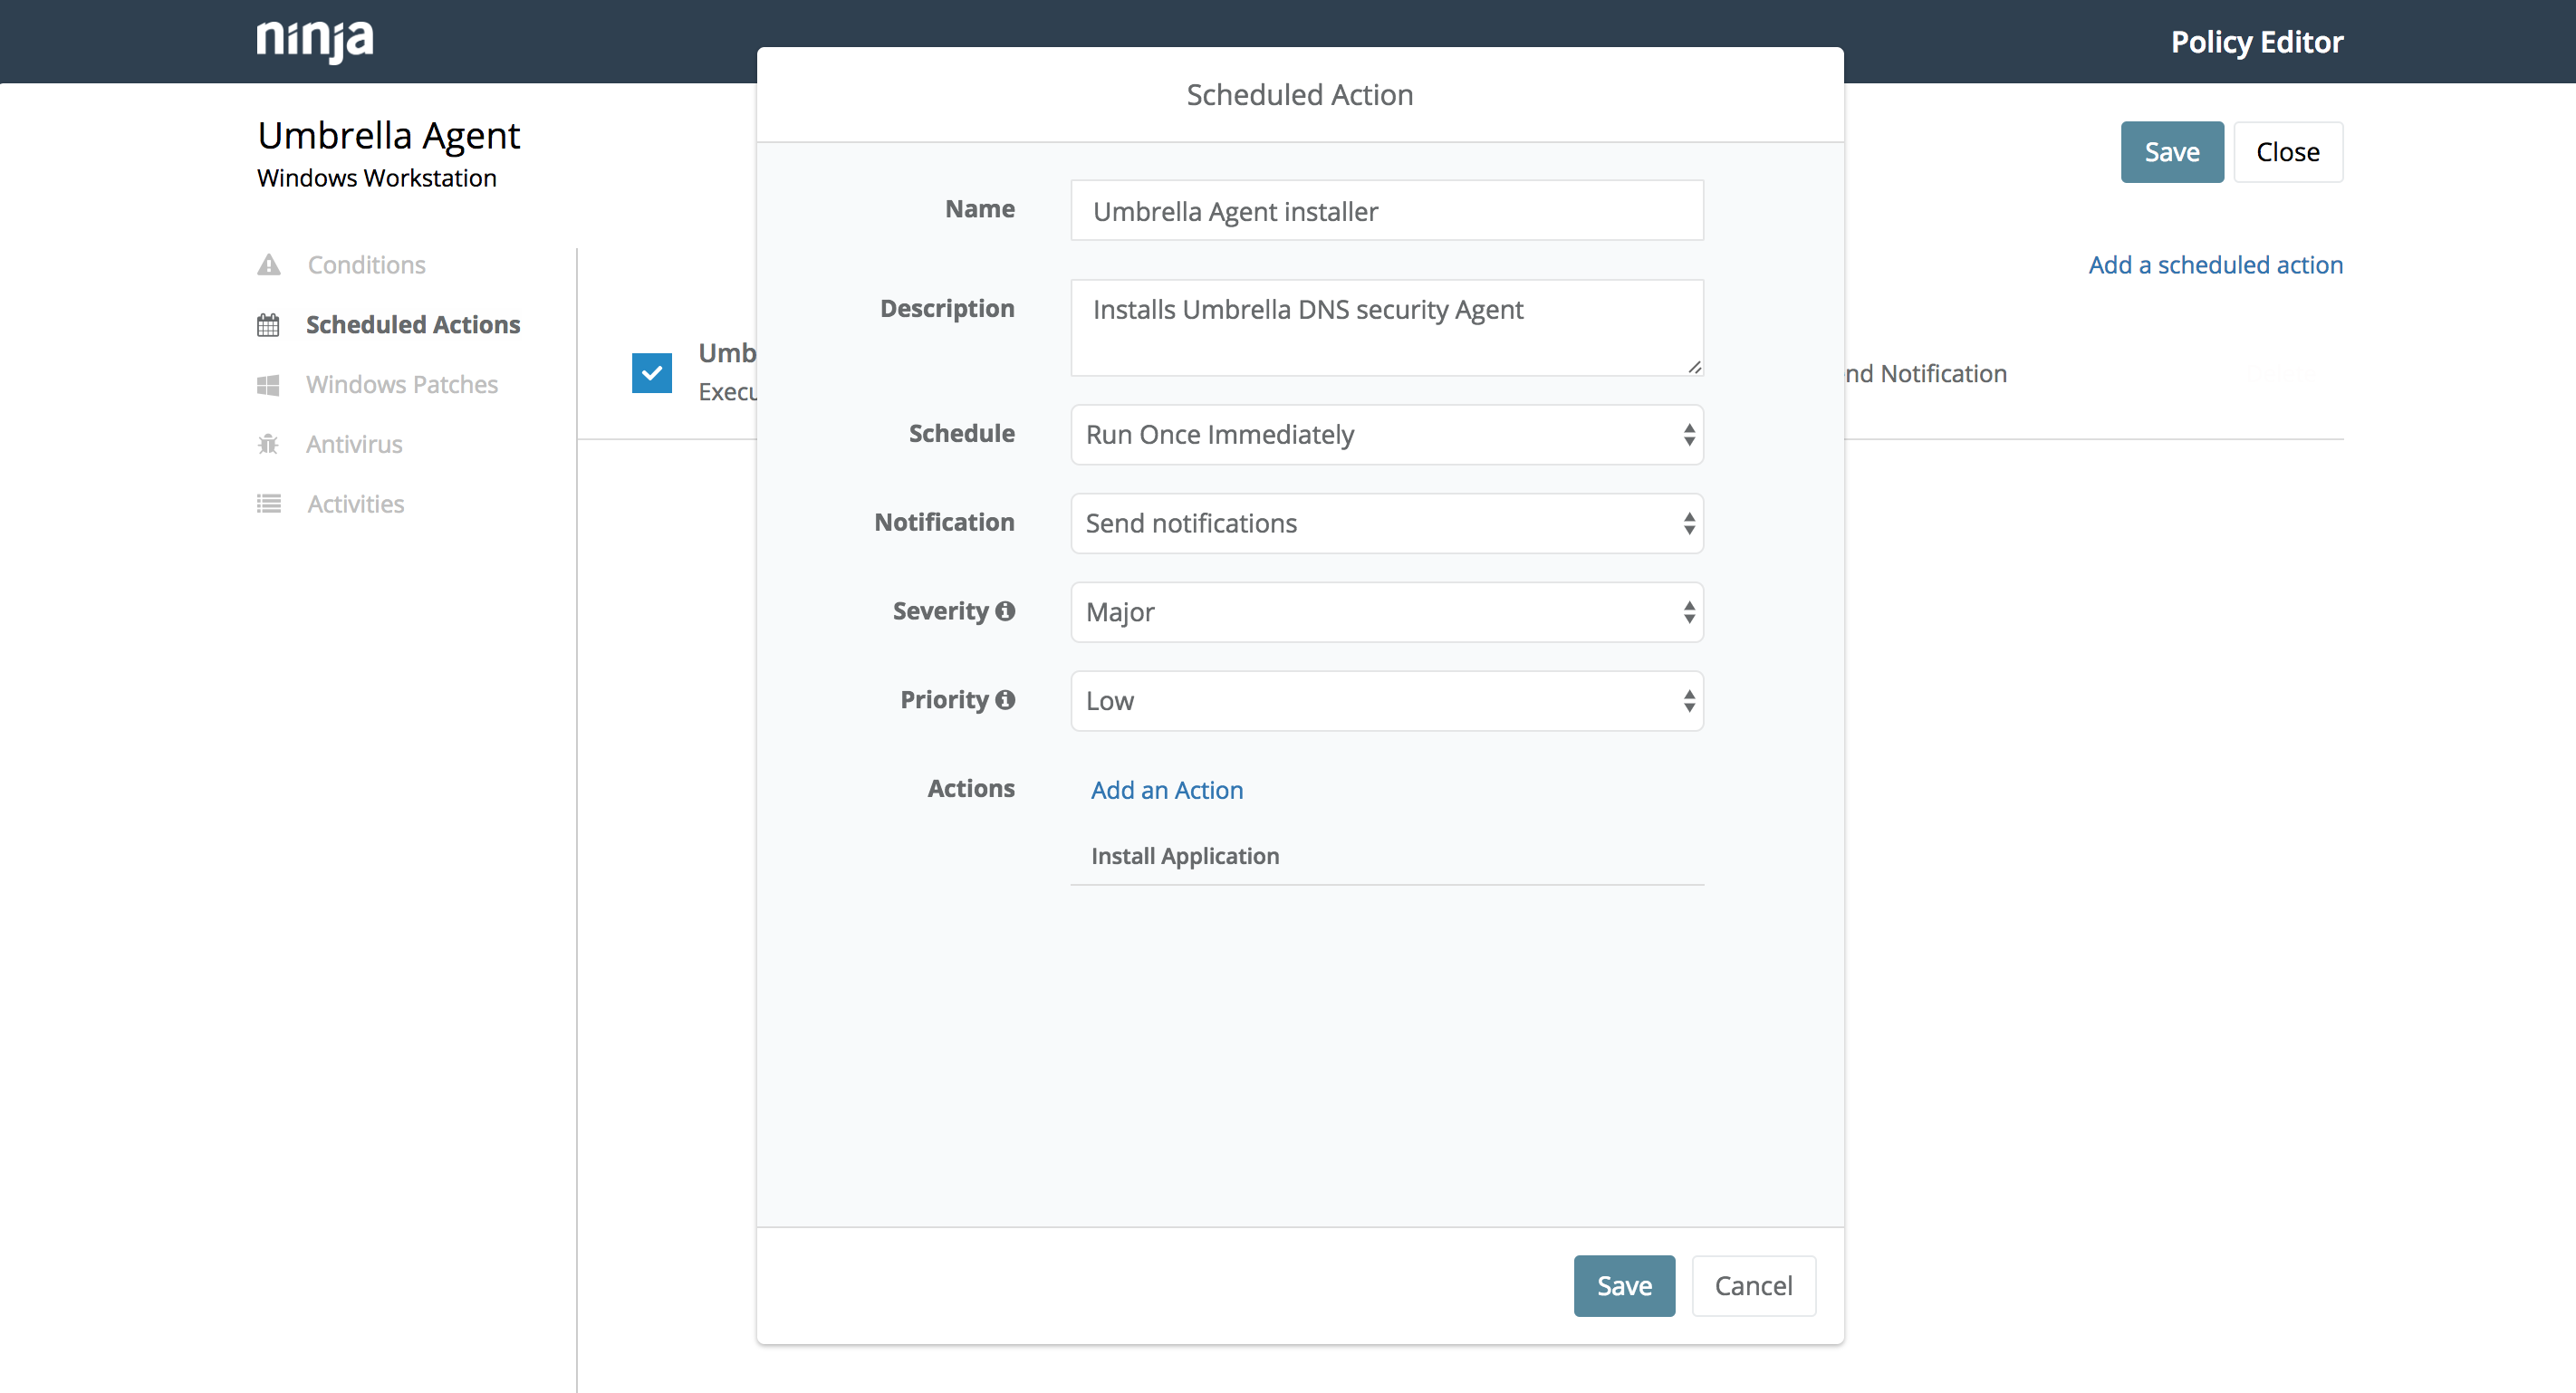
- In the policy editor, create a Scheduled Action, set the parameters as desired and then choose the Action to be Install Application.

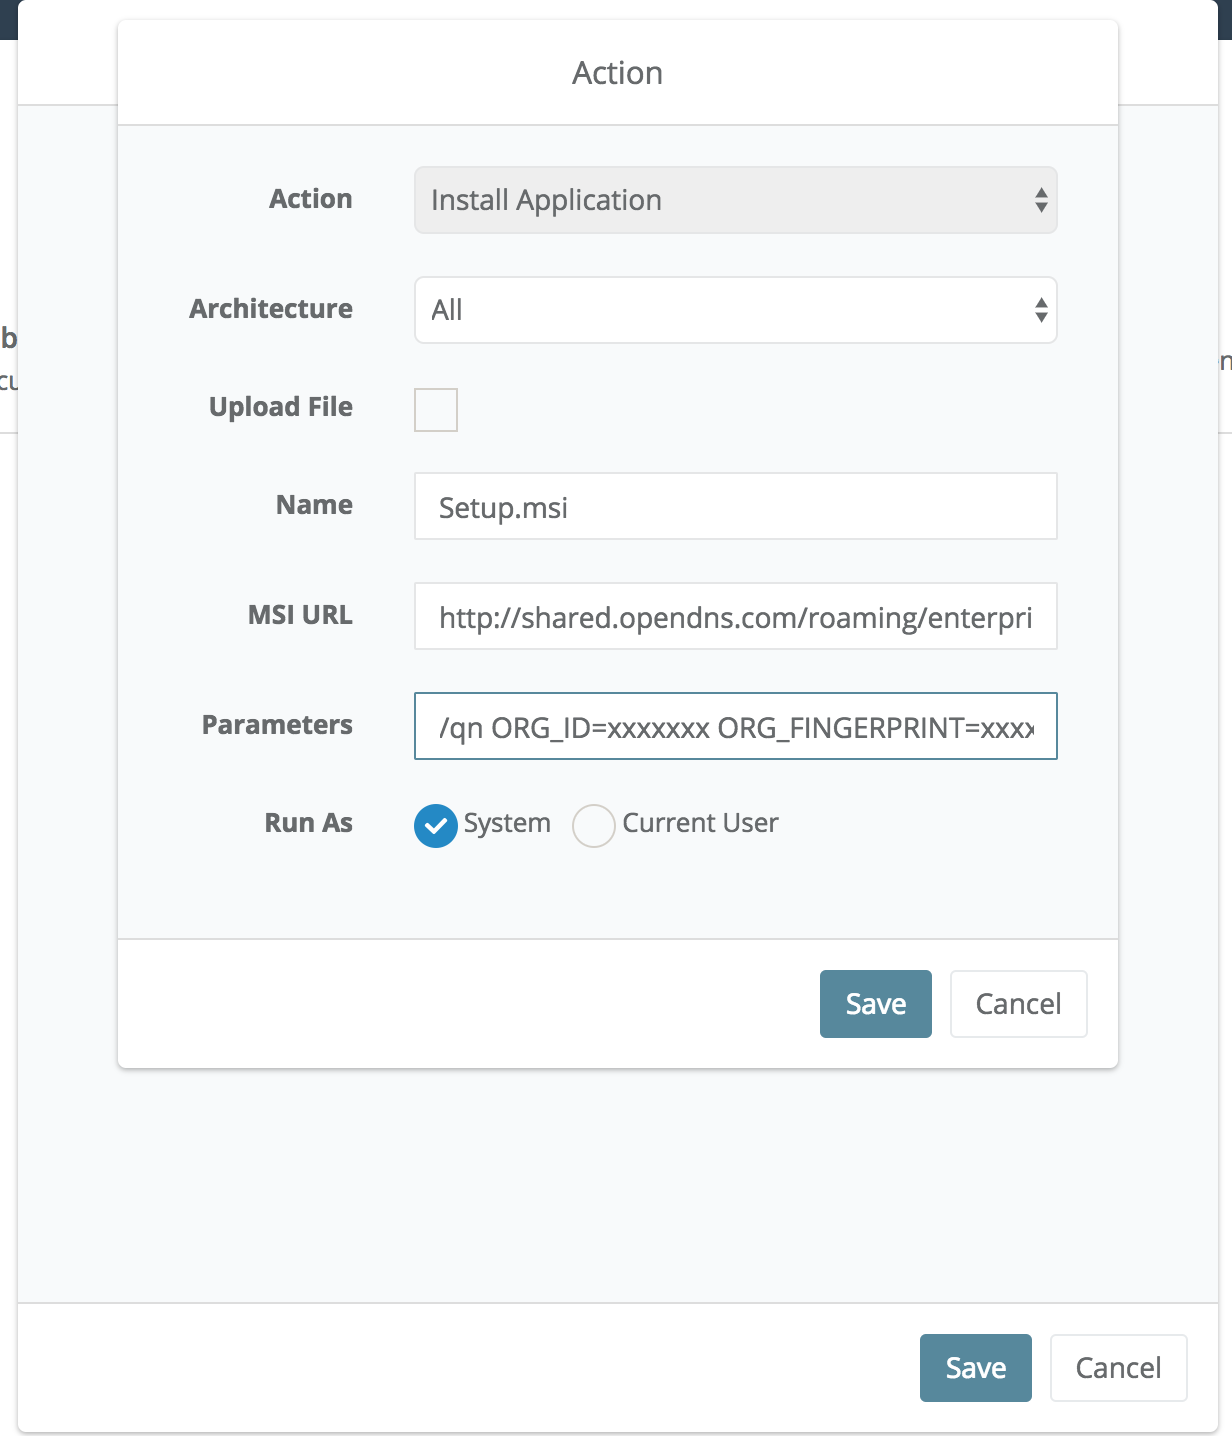
- In the new section, perform the following:
- Name: Setup.msi (Note that this is case-sensitive).
- MSI URL: The location you will host your Setup.msi installer from. To obtain this file, download the latest installation from the dashboard and extract the Setup.msi file.
Note: Although Umbrella is doing an auto-update by default, ensure that you use the latest version of Setup.msi during the initial installation. Do not leave an auto deployment running for the long term. See Mass deployment best practices and common mistakes for Standalone Umbrella Roaming Client for more information.
- In the MSP console, navigate to Customer Management, expand a customer, and scroll to Deployment Parameters.
Umbrella lists the organization's Org ID, Fingerprint and User ID parameters as well as Umbrella's deployment script.


Note: If you want a visible installation, change HIDE_UI and HIDE_ARP to 0 instead of 1. For more information about this and other variables, see Deployment Parameters.
Run As: System
You should end up with something that looks like this:

Confirm Deployment
- In the MSP console, navigate to Customer Management, and click View Dashboard.
- In Umbrella, navigate to Deployments > Core Identities > Roaming Computers.
- Search for the individual host names where the script should have been run.
If the computer is checking in properly, you will notice a green status icon.

Computers without a green status icon are not checking in properly with Umbrella. For more information on the status icons and troubleshooting, see Status, States, and Functionality.
N-Able < NinjaOne
Updated over 1 year ago
