ConnectWise Command
Deploy Umbrella Roaming Client with ConnectWise Command (Formerly Continuum)
The following is an overview of how to deploy the Cisco Umbrella roaming client using your RMM tool. Cisco does not provide comprehensive support for ConnectWise Command. For more information about ConnectWise Command, see ConnectWise Command's documentation.
Note: This document is specific to deploying the Umbrella roaming client on Windows client operating systems; for example, Windows 8 or 10. We do not support the installation of the Umbrella roaming client on Windows Server operating systems. For more information about prerequisites, see Prerequisites. This document assumes you have read these prerequisites and have opened the appropriate firewall ports.
ConnectWise Command provides the ability to create script templates to deploy products that are not built-in to ConnectWise Command's RMM tool. This document provides instructions to configure a template to deploy the Umbrella roaming client to your customer's computers. We recommend creating a deployment script for each individual customer with a naming convention such as %Client Name% Umbrella Client Deployment. This allows for easy deployment to future customers and allows for the scheduling of installations.
Important
You must enter all customer internal domains before deploying the Umbrella roaming client. Failure to do so will cause problems with accessing internal resources. To do this, in the Umbrella dashboard, navigate to Deployments > Configuration > Internal Domains and enter domains as required. For more information, see Domain Management.
Procedure
- Log in to your ConnectWise Command Portal and navigate to Scripts > Essentials > Templates.

- Search or browse to the option Create own application.
- Select Create own application and then click Create a Script From This Template.

- In the MSP console, navigate to Customer Management, expand a customer, and scroll to the Deployment Parameters section, expand Show install command and copy the Deployment Parameters string beginning with
/qn ORG_ID=.
The install string uses three parameters to register the roaming client to the correct Umbrella dashboard: ORG_ID, FINGERPRINT, and USER_ID. For more information, see Umbrella Roaming Client Deployment Parameters for Mass Deployment (MSP).
Note: The msiexec /i Setup.msi portion of the install string is not necessary, and will cause the script to fail.


Create the Installer
- Click Create a Script From the Template.
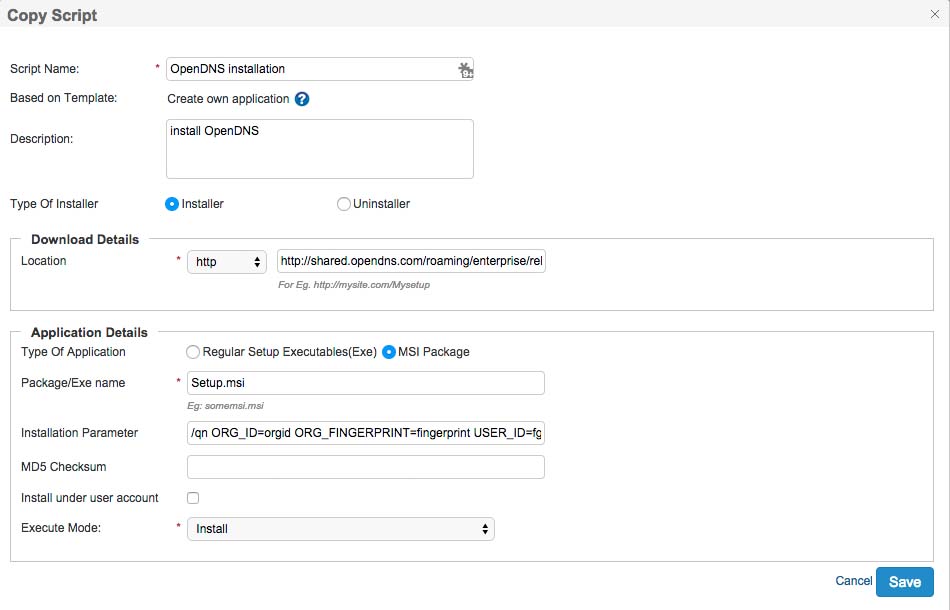
- Update the following:
For Windows
- Script Name—%Customer Name% Umbrella Roaming Client Deployment
- Description—Installation script for the Umbrella Roaming Client for %Customer Name%
- Location— The location you will host your Setup.msi from. To obtain this file, download the latest installation from the dashboard and extract the Setup.msi file.
Note: Although Umbrella is doing an auto-update by default, ensure that you use the latest version of Setup.msi during the initial installation. Do not leave an auto deployment running for the long term. See Mass deployment best practices and common mistakes for Standalone Umbrella Roaming Client for more information. - Type of Application—MSI Package
- Package/Exe name—Setup.msi (Note that this is case-sensitive.)
- Installation Parameter—Deployment parameters copied in step 4
Note: If you want a visible installation, you can change the HIDE_UI and HIDE_ARP to 0 instead of 1. For more information, see Umbrella Roaming Client Deployment Parameters for Mass Deployment (MSP). - MD5 Checksum—Leave this blank.
- Install under user account—Leave this unchecked.
- Execution Mode—Set to Install.
For MacOS
Some deployment details differ for MacOS. For more information, refer to Umbrella Roaming Client Deployment Parameters and Deployment using Apple Remote Desktop.
- Click Update or Save.
You are returned to your list of partner applications.
Create a Job
Create a job using this template to deploy the Umbrella roaming client. We recommend testing your script on a single machine to verify it works as expected before deploying to a large group.
- In the Scripts Home, click Essentials > Jobs and Instances and then, click Add Job.
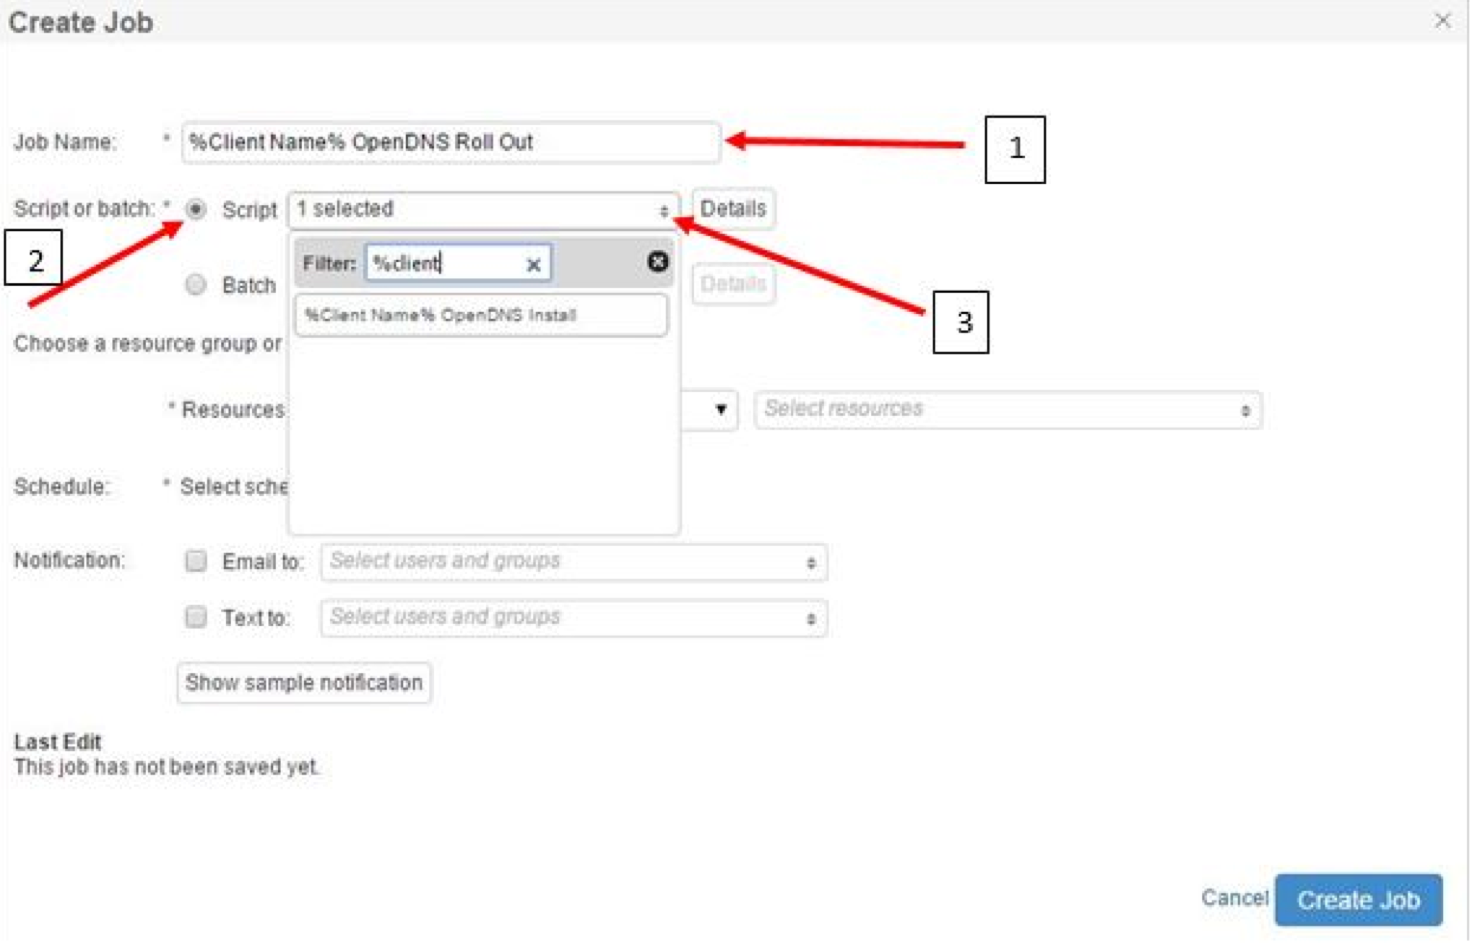
- Set the Job Name (1).
- Click the radio button next to Script (2).
- Click the arrows (3) and start to type the name of the script you created in the "Filter" section then click on the script template you created.
- Optionally, configure email alerts from ConnectWise Command with summary information about the Job you have scheduled.
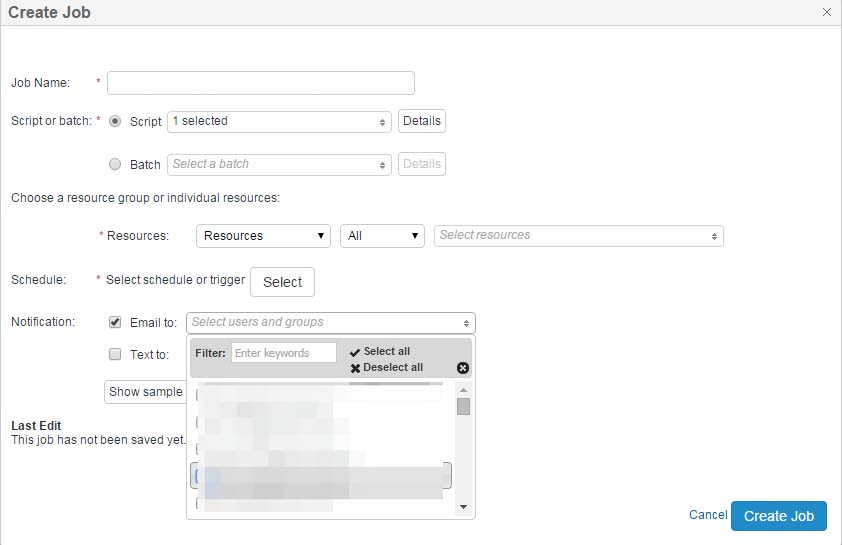
- Choose Sites, Desktops, and the location you are deploying to.

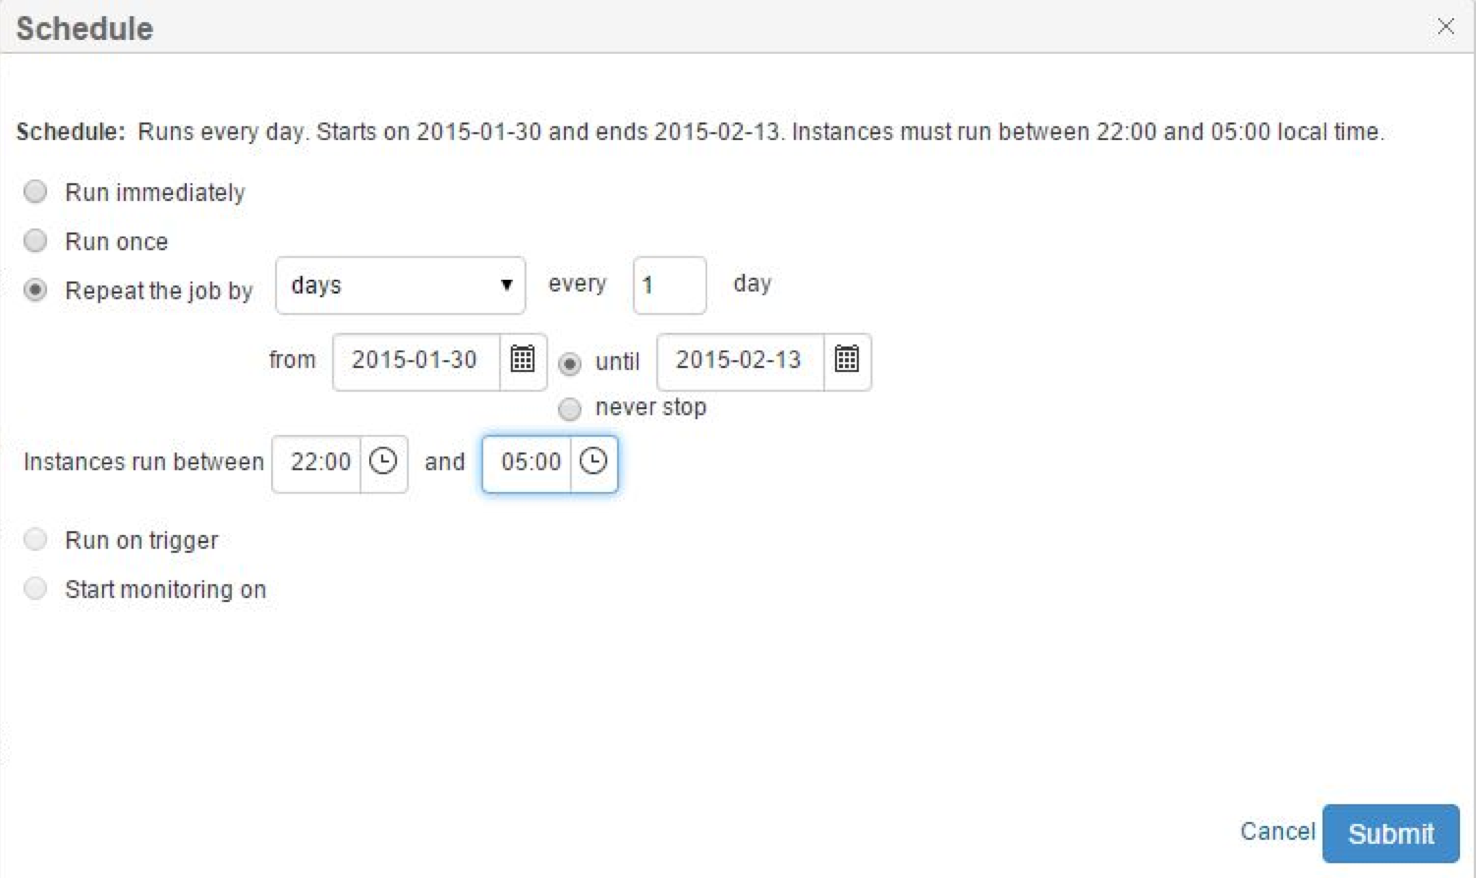
- Choose the scheduled time to run the script, or execute immediately.
Confirm Deployment
- In the MSP console, navigate to Customer Management, and click View Dashboard.
- Navigate to Deployments > Core Identities > Roaming Computers
- Search for the individual host names where the script should have been run.
If the computer is checking in properly, you’ll notice a green status icon.
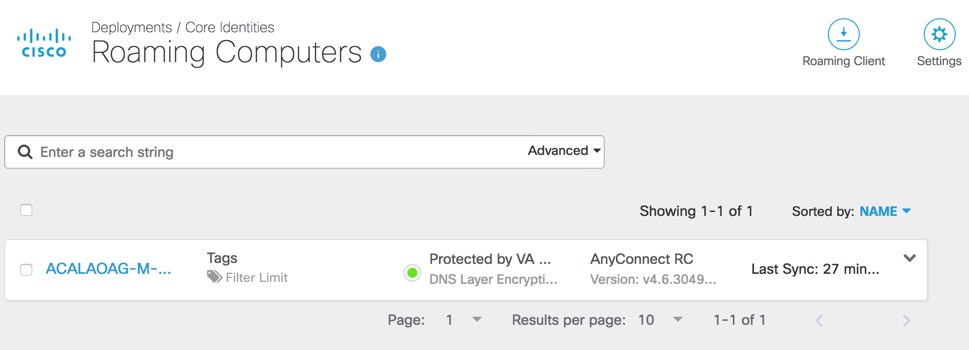
Computers without a green status icon are not checking in properly with Umbrella. For more information on the status icons and troubleshooting, see Troubleshooting.
Updated over 1 year ago
