Change Default Policy
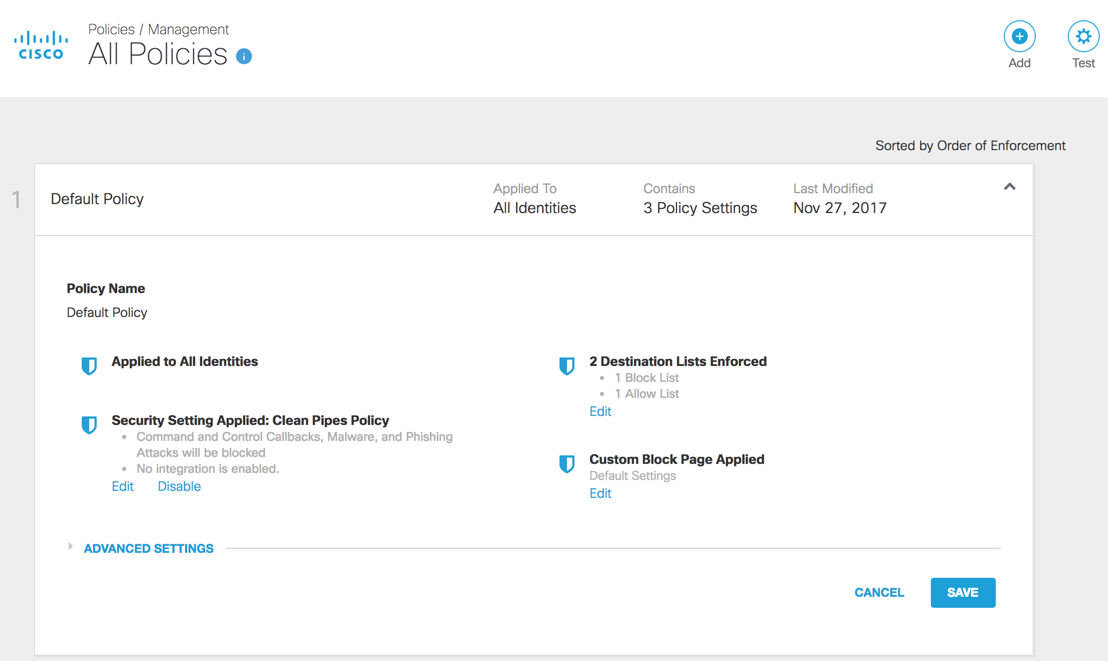
Easy Protect’s Default policy is a catch-all that ensures all identities within your organization receive a baseline level of protection.
Best practices for Easy Protect are to only apply the Default policy to your identities. If your organization has unique protection requirements (for example, blocking a destination), update the Default policy to meet those needs so that all of your identities are protected.
- Navigate to Policies > Management > All Policies and expand the Default policy.

- Click Edit for the setting you need to update.
You are taken to that section of the policy wizard. - Make updates as needed and click Set & Return.
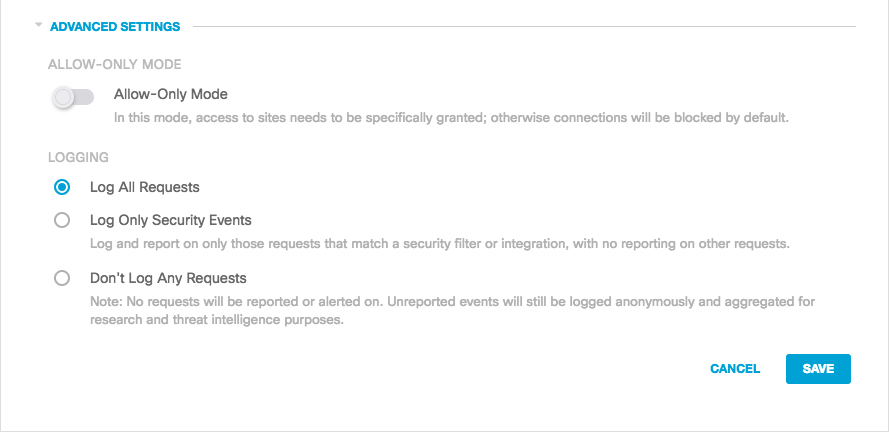
Changes are saved and you return to the Summary page. - From the Summary page, click Advanced Settings, make changes as needed and click Save.
-
Allow-Only Mode—Blocks access to all sites except those specifically allowed. We recommend that you only enable Allow Only Mode in cases where you wish to allow access to a small subset of domains and block all other domains. Since the result of enabling this feature is to effectively block the internet except for that part you've defined to allow, please use caution if enabling this feature.
-
Logging—Provides logging for requests and security events. Settings are:
- Log All Requests—Log all requests for content, security and so on. This option is available only for default policy and not for any newly created policies.
- Log Only Security Events—For security logging; this option gives users more privacy.
- Don't Log Any Requests—Disable all logging. If you select this option, most of the reporting for Identities with this policy is not helpful as there is no log to report.

Manage Policies < Change Default Policy > Add A New Policy
Updated about 3 years ago
