Configure Destination Lists
A destination list is a list of internet requests (for example, domain name or IP address) that is used to manage—block or allow—org access to specific internet destinations.
Allow list entries always take precedence over block list entries. Allow lists also take precedence over security-related blocks, so if you feel a domain is being blocked incorrectly, adding it to an allow list will let you access it while you investigate or report it to Umbrella support.
- Blocking domain.com and adding mail.domain.com to an Allow List will still allow mail.domain.com.
- Adding domain.com to an Allow List and blocking sub.domain.com will still allow sub.domain.com.
If you add domain.com to a block list, and add mail.domain.com to an Allow list, assuming both lists are applied on the same policy, we will still allow mail.domain.com.
We recommend adding domains in the format "domain.com" rather than www.domain.com to ensure *.domain.com is included (a wildcard is implicit). However, if you only wish to block subdomain.domain.com, then be more specific when you define the entry here. You can also bulk upload destinations. See Bulk Upload.
Note: For Cisco Umbrella for MSPs Advanced, you can also add URLs to block lists. For more information, see Enable the Blocking of URLs.
- Navigate to Centralized Settings > Destination Lists.

- Click Add A Setting and choose either Add Block List or Add Allow List or expand an existing destination list setting.

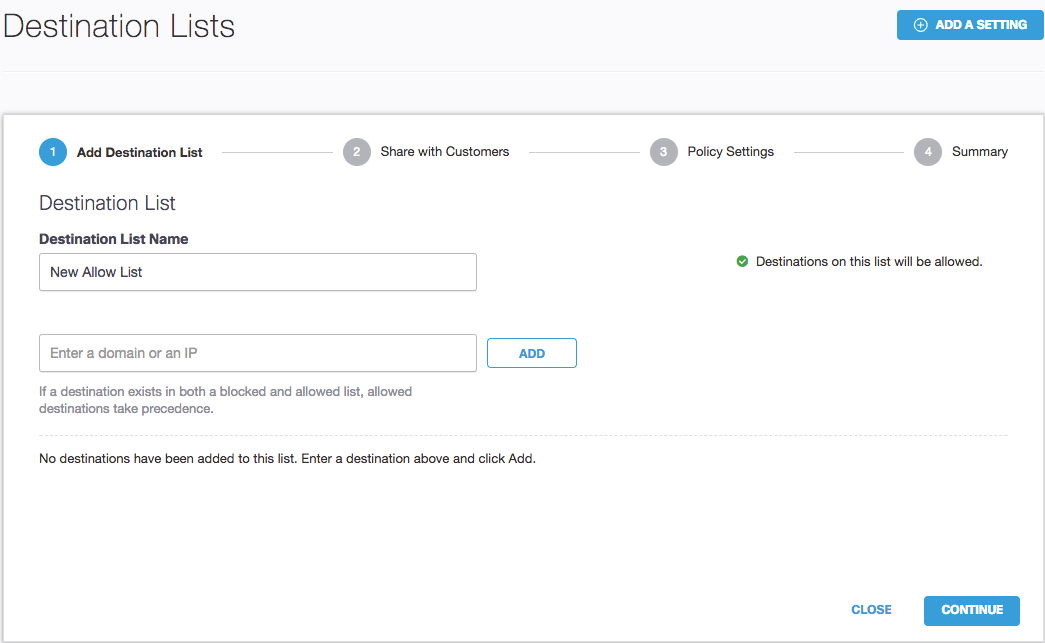
- Give your destination list a meaningful name, type destinations (for example, domain name) and click Add.
Note: An entry such as "domain.com" will include all subdomains, such as "mail.domain.com", or "www.domain.com".
If a domain exists in both a blocked and allowed destination list, the allow list takes precedence.
Once you've added an entry to your destination list, it appears in a list at the bottom of the card.
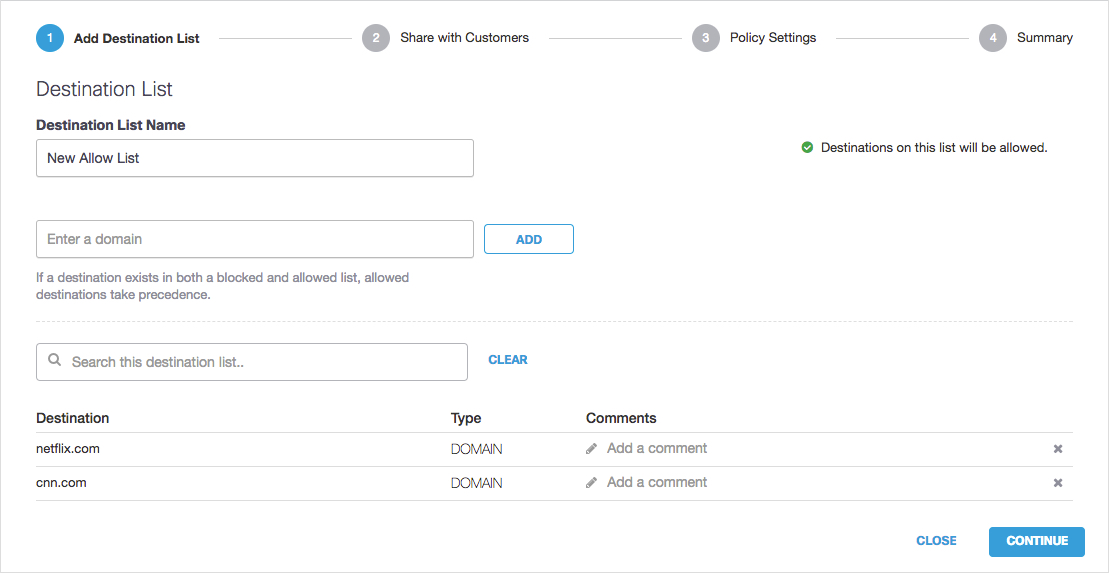
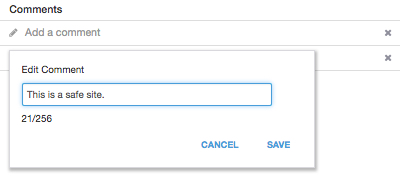
- Click Add a comment to add a comment to an entry in your list. This can help you keep track of why you've added a particular entry to your destination list. Add a comment and click Save.
Note: Your comment is limited to a maximum of 256 characters.
- Click Continue.
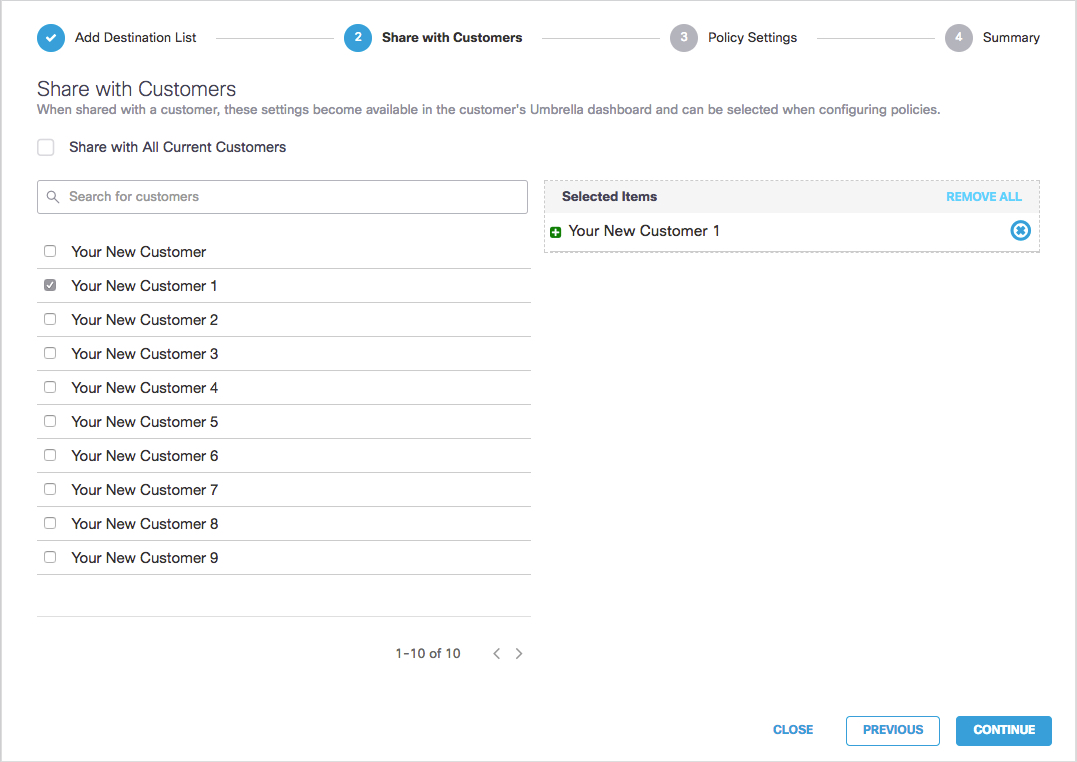
- Select the customers with whom you want to share this destination list and click Continue.
When shared with a customer, these settings become available in the customer's Umbrella dashboard and can be selected when configuring policies. You can also choose not to share a destination list with customers by clicking Continue without selecting any customers.
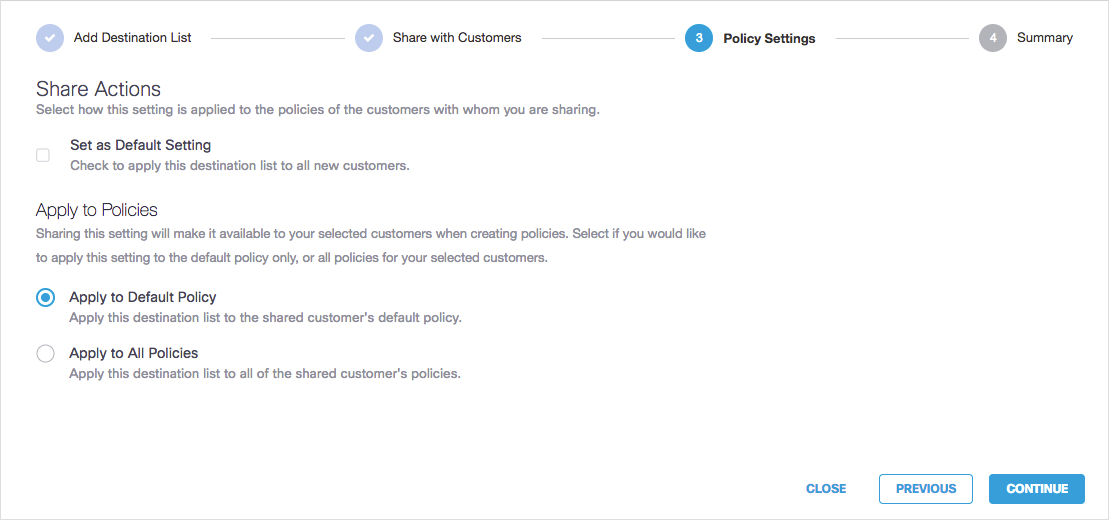
- From the Policy Settings page, choose how you would like to have this destination list applied to the Umbrella policies of both your existing customers and any new customers you might add. Choose from the following options:
- Set as Default Setting—If selected, this destination list will be applied to the default policy of any new customers that you add. This setting is not applied to the default policy of existing customers in Umbrella.
Note: You must always have at least one default destination list and you can have more than one default destination list. Having more than one default destination list allows you to have more than one destination list automatically added to policies (for example, both an allow list and a block list) when you add new customers. A destination list that has Set as Default Setting selected cannot be deleted until that setting has been de-selected. - Apply to Default Policy—When selected, this destination list is applied only to the default Umbrella policy of the customers you selected in the previous step—Share with Customers. All other Umbrella policies for the selected customers remain the same.
- Apply to All Policies—When selected, this destination list is applied to all of the Umbrella policies for the customers you selected in the previous step—Share with Customers. This includes the selected customers' default policy.
Note: When you select Apply to all Policies, the next time you access this setting it appears that it has reset to Apply to Default Policy. It has not and your Umbrella policies are not changed. Once configured, to change Apply to All Policies to Apply to Default Policy, you must select Apply to Default Policy and click Save & Close.
- Click Continue.
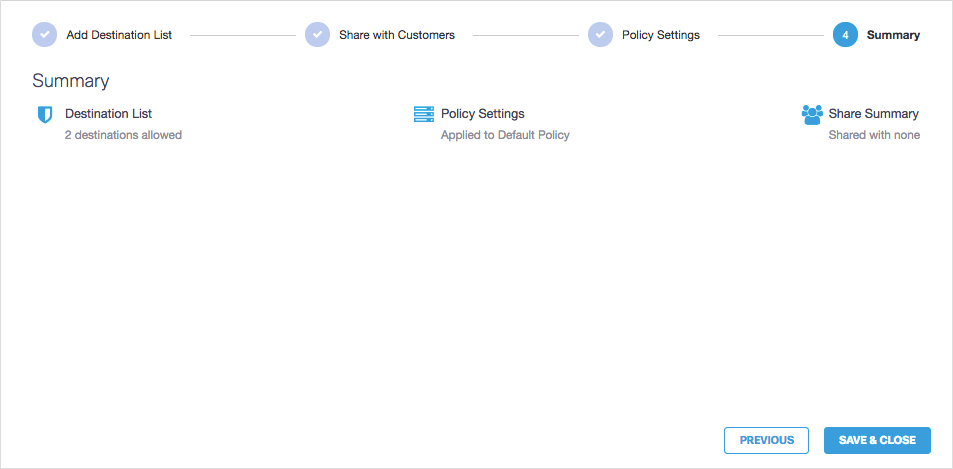
- Review your destination list settings and click Save & Close.
Each link under Share Summary opens a modal window that lets you view which customers will share this destination list.
Bulk Upload
After you have created a destination list and saved it, you can go back to it and perform a bulk upload of destinations. You can upload up to 5000 destinations at once. List your destinations in a .txt file, one per line. You cannot perform a bulk upload when you are creating a destination list.
- Create a .txt file that lists destinations—one per line.
- Navigate to Centralized Settings > Destination Lists and expand a destination list.
- Click Upload.
The Upload button is only available when you are editing a destination list.

- Select or drag and drop the .txt file that contains your destinations and click Apply.
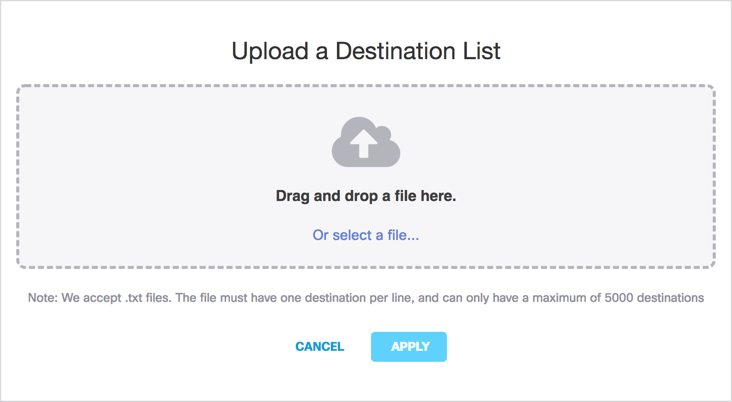
Destinations are added to your destination list in bulk.
Note: If your bulk upload includes unsupported destinations, the upload does not fail, but only supported destinations are successfully added. Unsupported destinations are returned to you in a downloadable spreadsheet that you can use to determine which destinations failed and why.


- Click Save & Close.
Access Centralized Settings and the Overview Page < Configure Destination Lists > Configure Block Pages
Updated almost 3 years ago
