Add a Network Identity to Protect Your Customer's Network
Once you've added a customer through the MSP console, you can add a Network identity to Umbrella for that customer to extend protection to any device that connects to the internet from that customer's network space. A Network identity contains all of the computers within a typical network. For network identities, both IPv4 and IPv6 IP addresses are supported; however, dynamic IP addresses are only supported for IPv4.
Wait, what's an identity?
An identity is simply an entity that you can enforce policy against and report on. It can be very high level—an entire network can be an identity—or very granular—down to the individual logged in user in Active Directory.
Step 1 – Select the Appropriate Network
First, determine the network to which you will associate your identity. If you don't know the public IP of that network, find it here: http://www.whatismyip.com.
Note: If you attempt to add a network other than the one currently being used to access the Umbrella dashboard, you will be prompted to contact Support for manual verification. You'll also need manual verification from support for IP ranges larger than a /29 network. Verification cases are created automatically and you'll receive an update as soon as it's reviewed.
Step 2 – Add a Network Identity
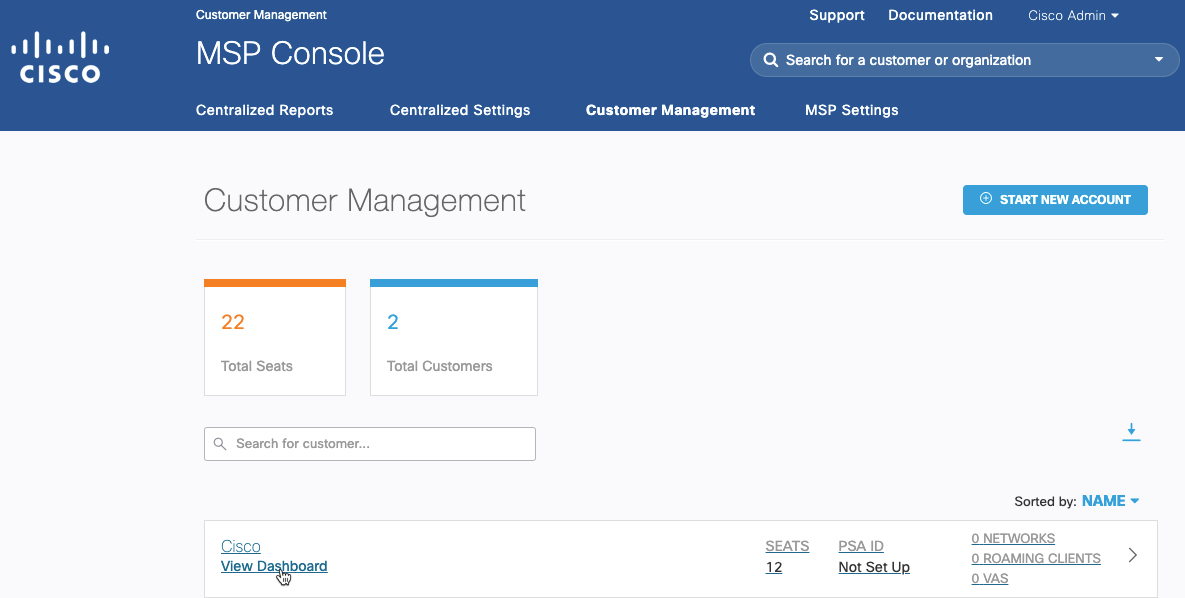
- In the MSP console, navigate to Customer Management and click View Dashboard.
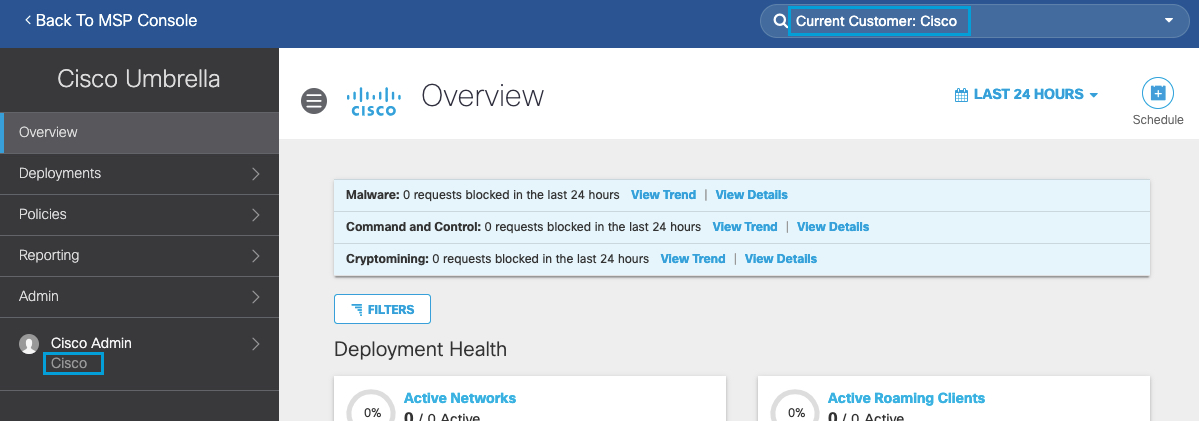
The Umbrella dashboard for that customer opens.

- You can confirm that you're navigating to the customer's Umbrella dashboard be reviewing sign in information listed under the left-side navigation. The customer name is listed.
As well, the customer's name is listed in the search bar.

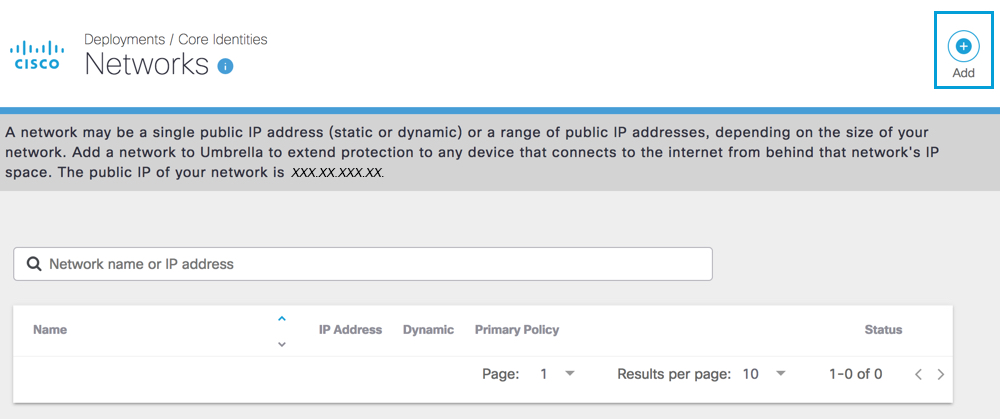
- In Umbrella, navigate to Deployments > Core Identities > Networks and click Add.

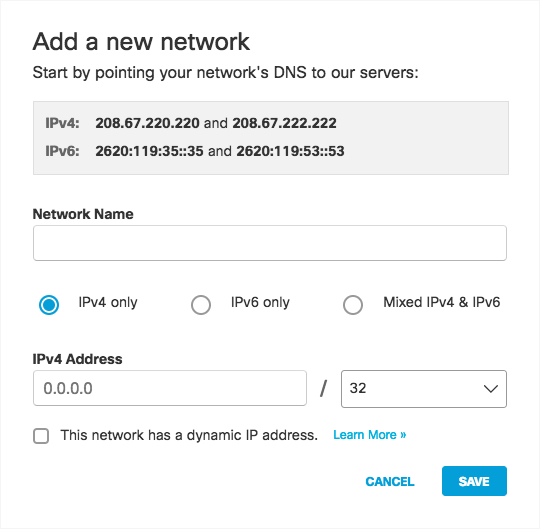
- In the Add a New Network modal, give your new identity a meaningful Network Name.
Giving your identity a good network name will help you find it easily when you later add a policy against it through the Policy wizard.

- Select an internet protocol.
Based on the Umbrella IP address you have configured your router to point to. - Add the network's IP address along with the subnet mask, usually a /32 subnet for IPv4 and /64 subnet for IPv6.
For IPv4 only, if it's a dynamic IP address, check Dynamic and download the Umbrella Dynamic IP Updater:
- Windows IP Updater
- Mac IP Updater
- Linux IP Updater
Note: Dynamic IP addresses are only supported for IPv4.
- Click Save.
Once the service validates your IP address, the network appears in the list at Deployments > Core Identities > Networks. Initially, Umbrella lists your new network identity's status as Inactive. Network status only changes to Active when DNS traffic is sent to Umbrella from the network.
The policy applied to your new identity depends on your policy settings. If you have a policy configured that includes network identities, Umbrella applies that policy; otherwise; Umbrella applies the Default policy.


Your Network identity is now configured. Next, point your network’s DNS traffic to the Umbrella global network.
Add a Network Identity to Protect Your Customer's Network > Delete a Network Identity
Updated about 6 years ago
