Add a Ruleset to the Web Policy
Plan Your Configuration of the Web Policy
Before you start adding and configuring the Web policy, we recommend that you read through these sections in full. Decide before you start as to how the Web policy's rulesets and rules will define security and access controls for your identities.
Some settings require the pre-configuration of component settings outside of the Web policy.
The Web policy is made up of rulesets and their rules. Through these configurations, the Web policy defines how security and access controls are applied to identities and the destinations they visit. By adding and configuring rulesets and rules, you determine when and how traffic is inspected and then allowed, blocked, restricted, or isolated. As such, there are two parts to configuring the Web policy:
- Part One – Add a Ruleset.
Select ruleset identities and then configure settings to determine protection options for the ruleset. - Part Two – Add Rules to a Ruleset.
Set rule actions—allow, warn, block, and isolate—against individual identities and the destinations those identities attempt to access.
Ruleset settings match on identity, while rules match on both identity and destination. Once the Web policy matches against a ruleset, it evaluates that ruleset's rules. And once a ruleset match is made, the Web policy stops evaluating against other rulesets.
Note: Not all of the features described here are available to all Umbrella packages. To determine your current package, navigate to Admin > Licensing. For more information, see Determine Your Current Package. If you encounter a feature described here that you do not have access to, contact your sales representative for more information about your current package. See also, Cisco Umbrella for Government Packages.
Prerequisites
- Identities Added—All identities are added to Umbrella and configured. See Manage Identities.
Note: Only Networks, Users, Groups, Tunnels, and Roaming Computers—with the AnyConnect SWG Agent service running—identities are supported and available for the Web policy. - Certificates installed—If you enable HTTPS Inspection, you must install a CA root certificate—either Umbrella's or your own. As well, for Umbrella to properly display a block or warn page, a CA root certificate must be installed in all browsers. For more information and procedures, see Manage Certificates.
- Web Destination Lists Added—Web destination lists are added to a ruleset through rules. Before you can add a destination list to a rule, you must first add the Web destination list to Umbrella through Umbrella's Policy Components. For more information, see Add a Web Destination List.
- Custom Block and Warn Pages Configured—Block and warn pages are added through rulesets. Before you can add a custom block or warn page to a ruleset, you must first add it to Umbrella through Umbrella's Policy Components section. For more information, see Customize Block and Warn Pages.
Procedure
- Navigate to Policies > Management > Web Policy and click Add.
There is only one Web policy. When first configured, it includes only the default Web policy, which is also your default ruleset. This is your ruleset of last resort and is applied to any identity that fails to be matched against any other ruleset you might add to the Web policy.

- Under Ruleset Settings, configure settings as needed:
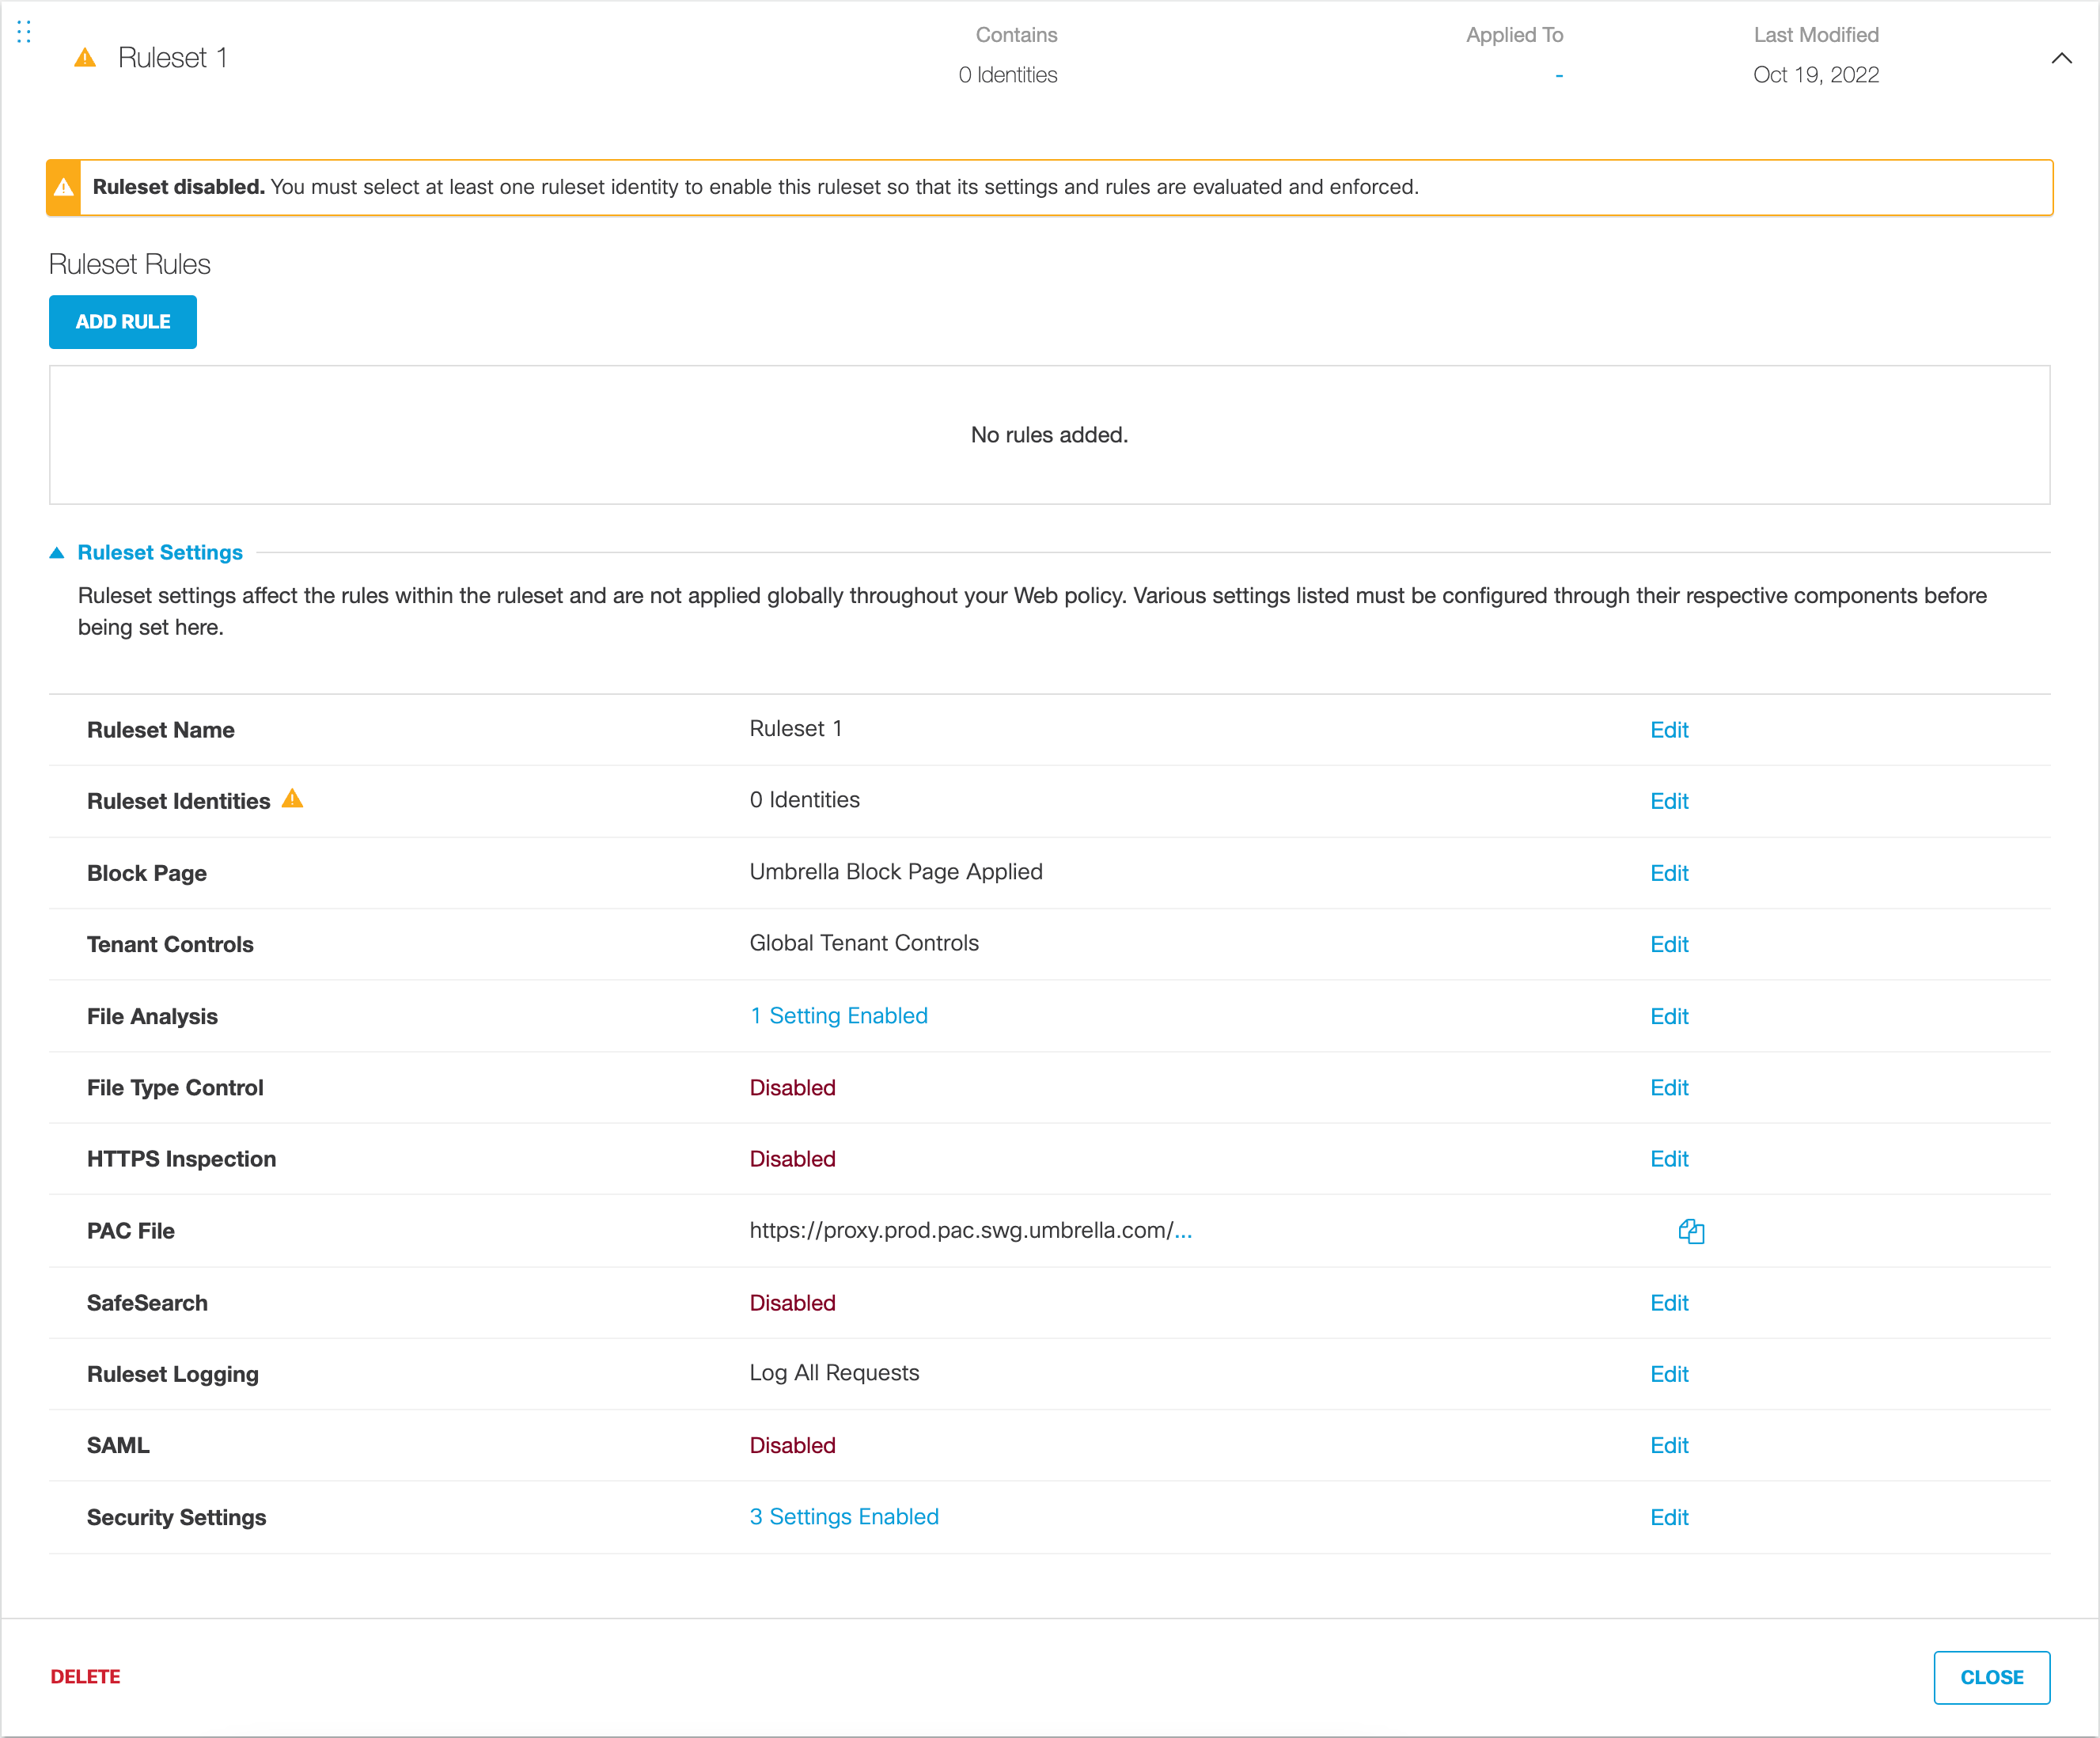
A. Edit Ruleset Name:
a. For Ruleset Name, click Edit.

b. Give your ruleset a meaningful name and click Save.
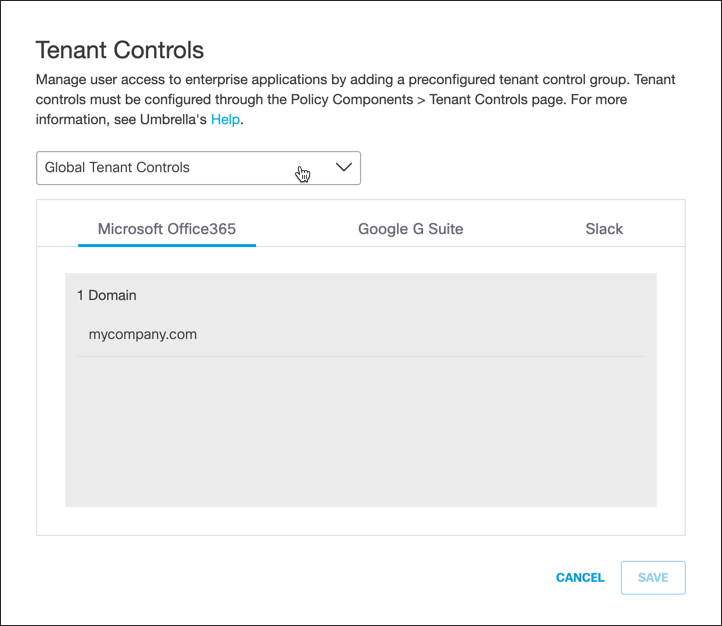
B. Edit Ruleset Identities:
a. For Ruleset Identities, click Edit.
Note: You must add identities to the ruleset to enable the ruleset.

b. Select identities and click Save.
This enables the ruleset.
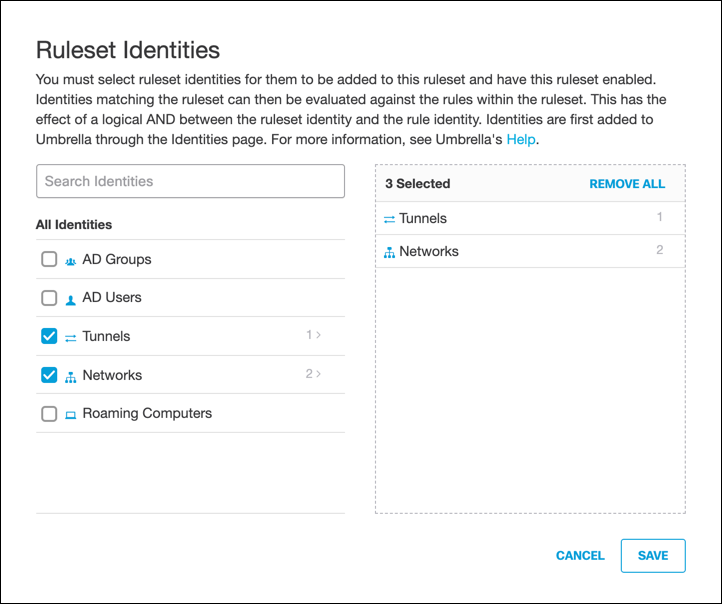
C. Edit Block Page:
a. For Block Page, click Edit.

b. Select Custom Appearance and from the Choose an Existing Appearance pulled-down choose a preconfigured Block or Warn page.
For more information about adding block and warn pages to Umbrella, see Customize Block and Warn Pages.
c. Click Save.
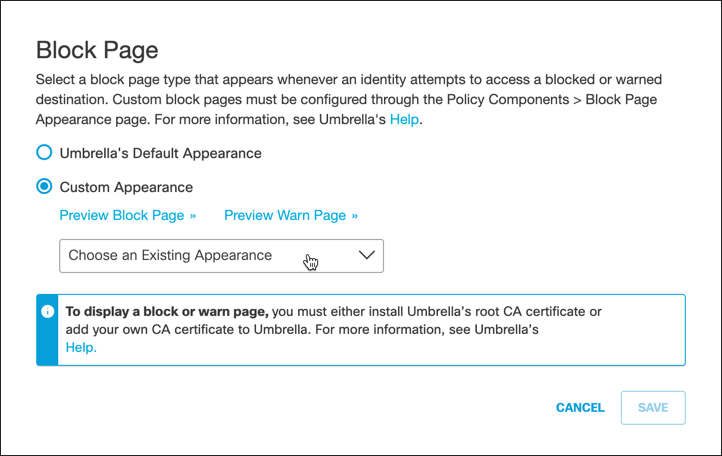
D. Edit Tenant Controls:
a. For Tenant Controls, click Edit.

b. From the Tenant Controls pull-down, choose a preconfigured tenant controls setting and click Save.
For more information about adding a Tenant Controls setting to Umbrella, see Manage Tenant Controls.
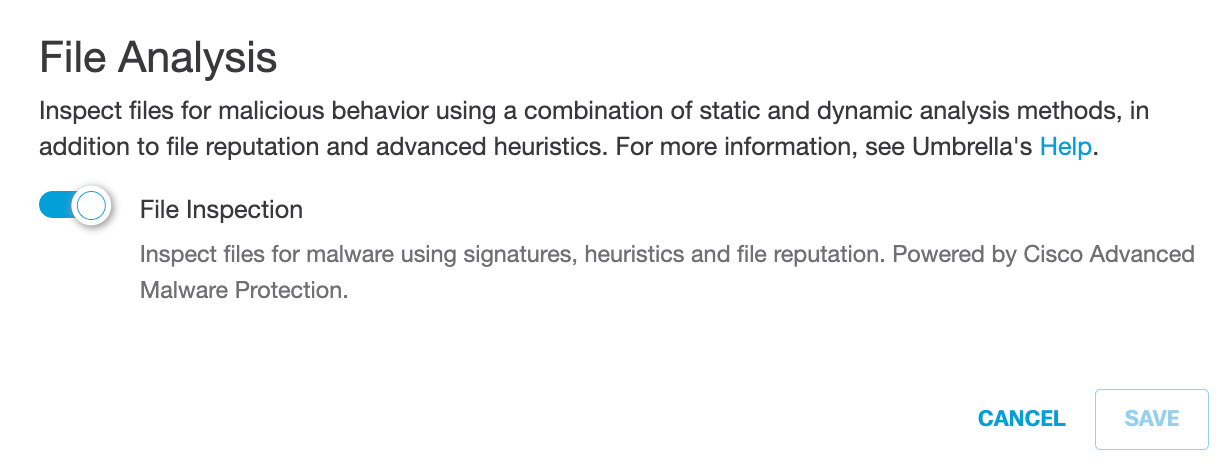
E. Edit File Analysis:
a. For File Analysis, click Edit.

b. Enable or disable File Inspection.
c. Click Save.
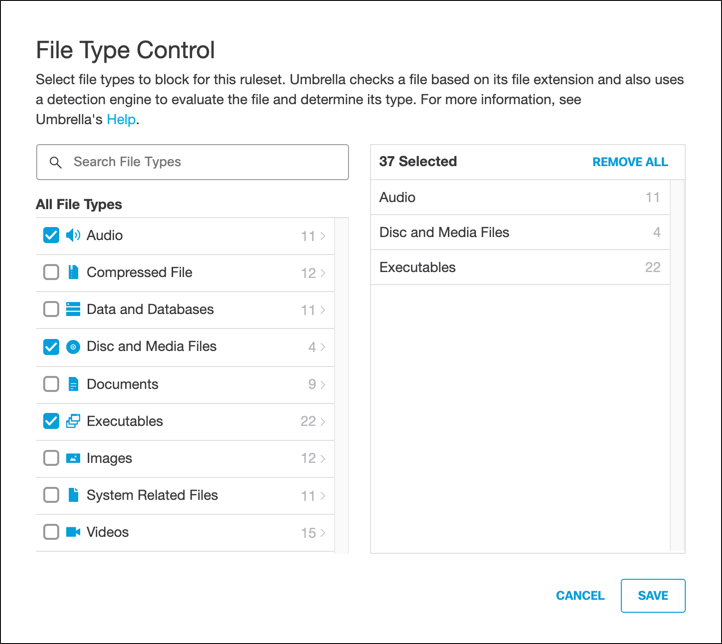
F. Edit File Type Control:
a. For File Type Control, click Edit.

b. Select File Types to block and then click Save.
For more information about file types, see Manage File Type Control.
G. Edit HTTPS Inspection:
a. For HTTPS Inspection, click Edit.

b. Choose how this policy will handle HTTPS traffic:
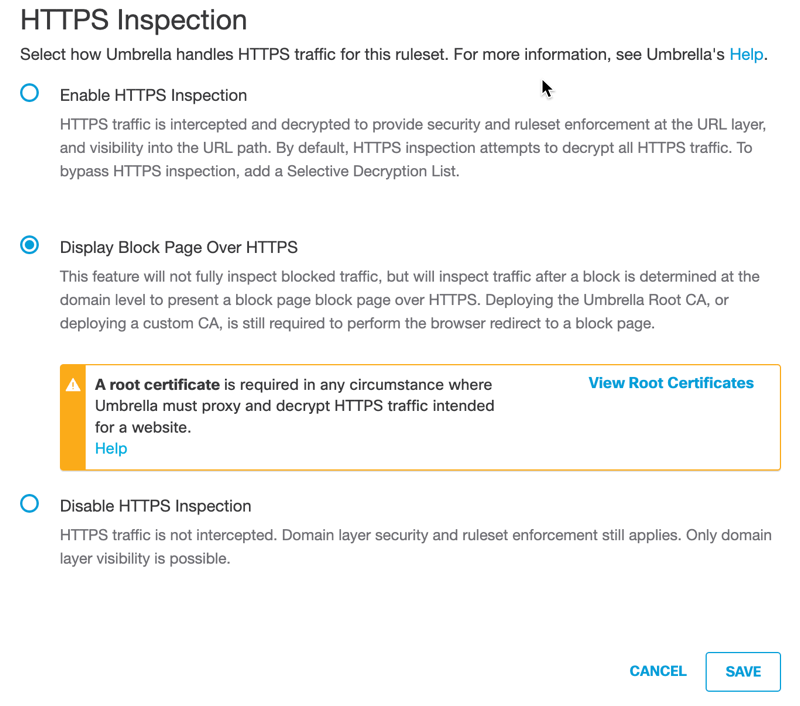
- Enable HTTPS Inspection—Umbrella inspects HTTPS traffic. Umbrella uses Cisco Talos web reputation plus other third-party feeds to determine if a URL is malicious. If it is not—and there is no other block action configured in the ruleset that the URL matches—Umbrella retrieves the requested content from the web server and scans it using an anti-virus (AV) engine including Cisco AMP file reputation.
You must enable HTTPS inspection to enforce application settings, Tenant Controls, SafeSearch, and file type control.
You must also install the Umbrella root CA or a custom CA in all browsers. For more information about certificates, see Manage Certificates.- Display Block Page Over HTTPS—Umbrella only inspects HTTPS traffic and displays a block page when Umbrella has blocked the domain. You must also install the Umbrella root CA or a custom CA certificate in all browsers.
- Disable HTTPS Inspection—HTTPS traffic is not intercepted. Only domain-layer security is possible. Ruleset enforcement still applies.
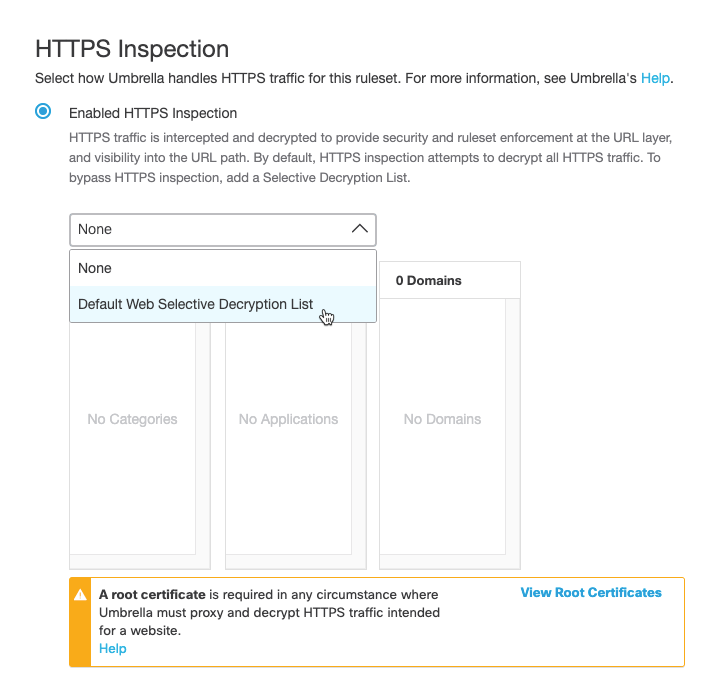
Selective Decryption
With Enable HTTPS Inspection selected, you can optionally add content categories and domains that will be exempt from HTTPS inspection for this ruleset—selections that are added to the Web Selective Decryption list.
a. From the pull-down menu, select a preconfigured Selective Decryption List.
Note: Only the first 100 domains in the list are visible in the drop-down.
For more information about adding a Selective Decryption List, see Add a Web Selective Decryption List.
c. Click Save.
H. Copy PAC file:
a. Deploy Umbrella's proxy auto-config (PAC) file URL to the browser you will be using to reach destinations. PAC file downloads and usage are limited to fixed networks registered in Umbrella. PAC files are not supported for roaming computers, tunnels, or other connection mechanisms. As well, if you're behind a firewall, you may also need to deploy Umbrella's PAC file to configure your firewall to allow some outbound ports to Umbrella's infrastructure.
For more information, see Manage Umbrella's PAC File.

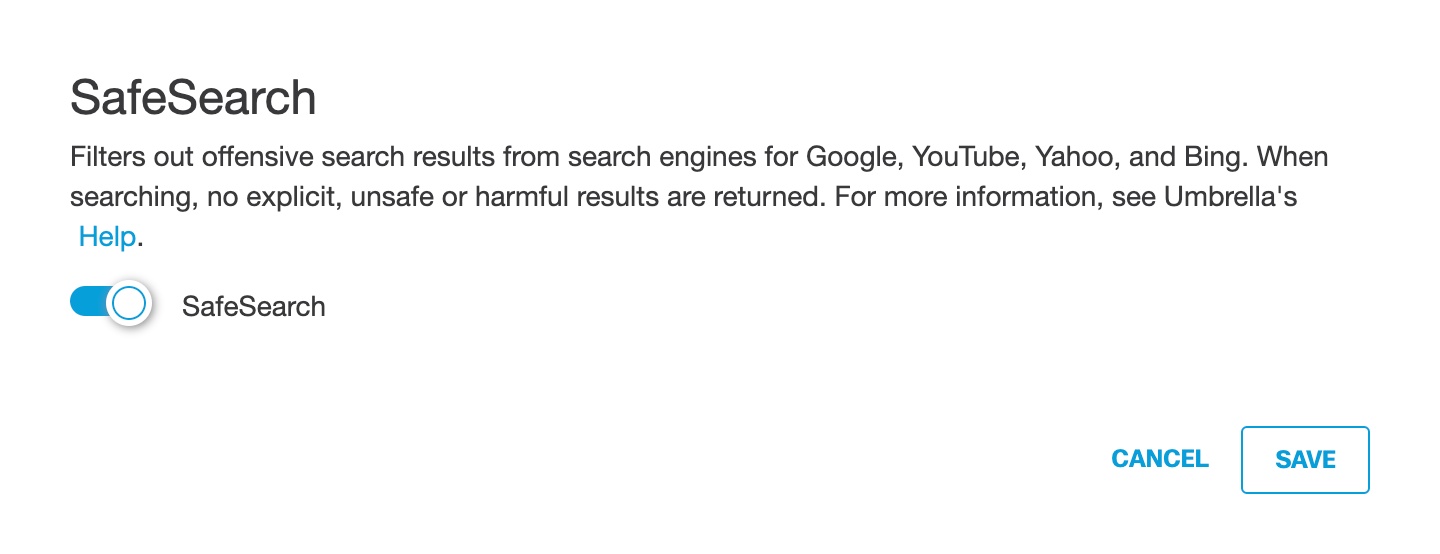
I. Edit SafeSearch:
a. For SafeSearch, click Edit.
Note: HTTPS inspection must be enabled to enable SafeSearch.
SafeSearch is a search engine filter that blocks search results for explicit content such as pornography, violence, gore, and other offensive adult content. When enabled, SafeSearch is automatically enabled on all devices—identities—that are added to the ruleset. SafeSearch can not be disabled on an end-user device for any applicable search engine or site. SafeSearch is supported for Google, YouTube, Yahoo, and Bing. For more information about SafeSearch and how to test it, see Confirm SafeSearch for a Web Policy Ruleset

b. Enable SafeSearch and click Save.
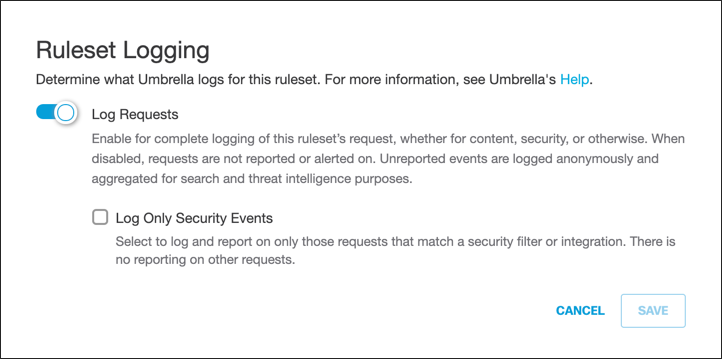
J. Edit Ruleset Logging:
a. For Ruleset Logging, click Edit.

b. Configure logging and click Save.
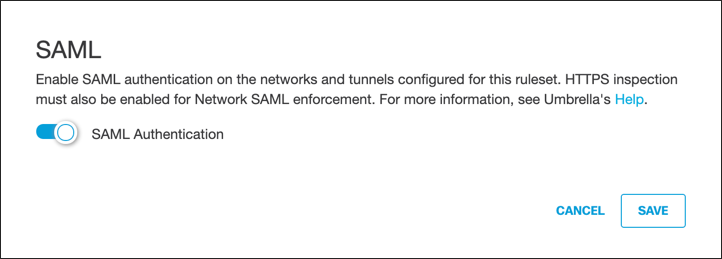
K. Edit SAML:
a. For SAML, click Edit.

b. Enable SAML Authentication and click Save.
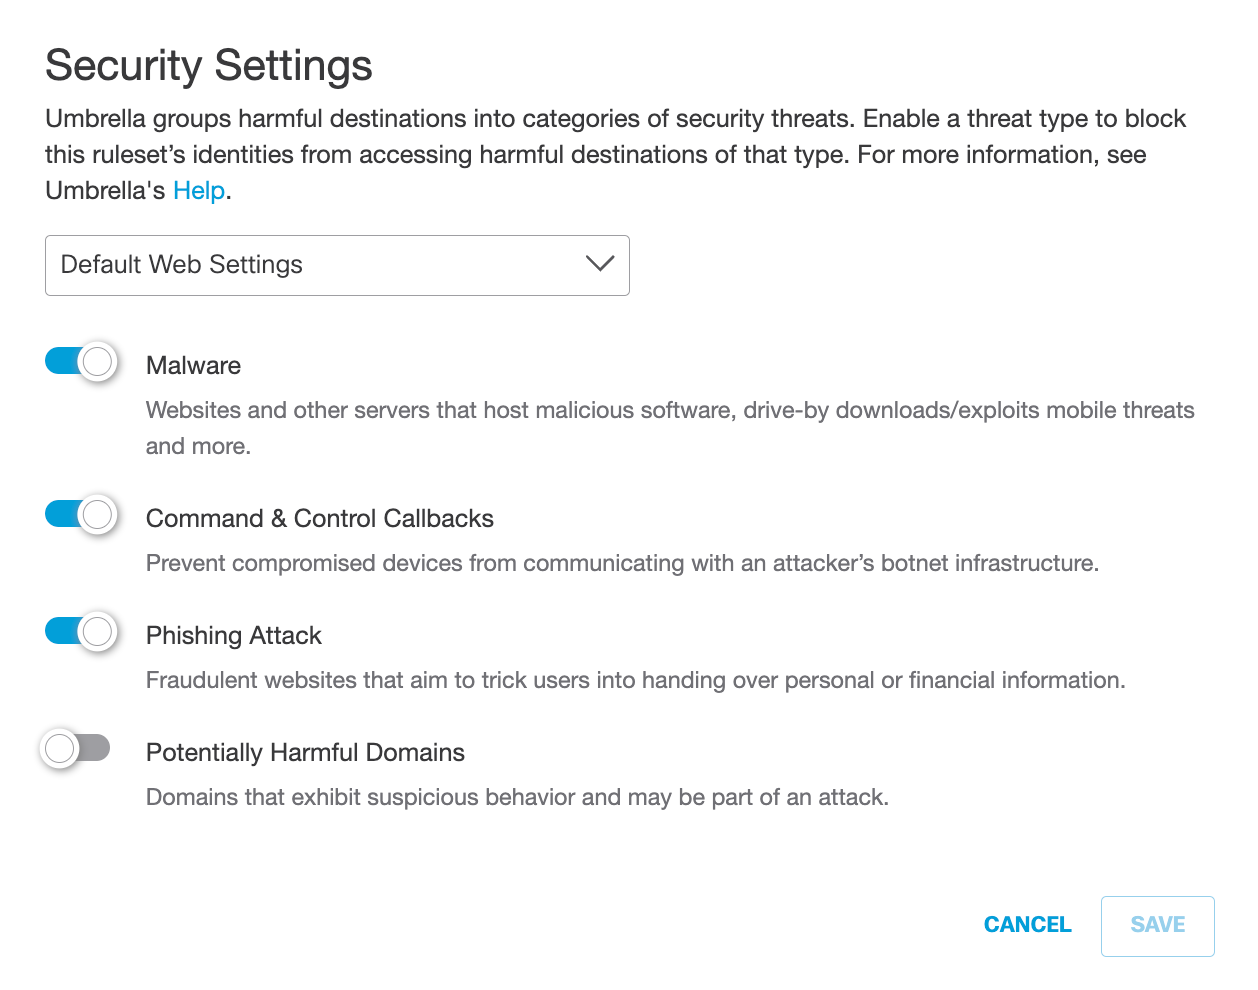
L. Edit Security Settings:
a. For Security Settings, click Edit.

b. Enable security settings.
For more information, see Add a Web Security Setting.
d. Click Save.
- Add rules to your ruleset. See Add Rules to a Ruleset.
Manage the Web Policy < Add a Ruleset to the Web Policy > Add Rules to a Ruleset
Updated about 1 year ago
