Deploy the Chromebook Client
Cisco Security for Chromebook client allows you to enable both DNS layer and SWG layer protection for Chromebook users.
DNS Layer Protection
For DNS layer protection, DNS over HTTPS (DoH) is used to send DNS queries to Umbrella for Government resolvers. These DNS queries are sent using DoH templates, which capture the Chromebook identities. The Chromebook identities are hashed using a salt value that you configure. After the salt value is configured on the Umbrella console, you can copy the DoH templates, configure the Enterprise policy on the Google Admin console, and propagate the DoH templates to the Chromebooks.
SWG Layer Protection
For SWG protection, Chromebooks are listed as identities in the web policy. Chromebooks are immediately protected by the default rule set and rules of the web policy. At any time, you can add your own rule sets and rules to the web policy and customize your Chromebook protection. For more information, see Add a Chromebook Specific Web Policy Ruleset.
The JSON file downloaded from Umbrella during the client deployment procedure contains information required for the Cisco Umbrella Chromebook client to operate with Umbrella. Information held within this file is required to access Cisco Security for Chromebook client through the Chrome Web Store. During the deployment process, this file is uploaded to Google, which is then able to push Cisco Security for Chromebook client to all your Chromebooks. After the client is installed in a Chromebook, allow a few hours for Chromebook traffic to appear on your Umbrella dashboard.
Deploy Cisco Security for Chromebook Client
Deploy Cisco Security for Chromebook client using the Umbrella dashboard and the Google Admin console. Use the Umbrella dashboard to configure a salt value, get the URL for the DoH templates, and download the JSON file. The configuration and deployment procedures take approximately, 30 minutes.
Umbrella Dashboard
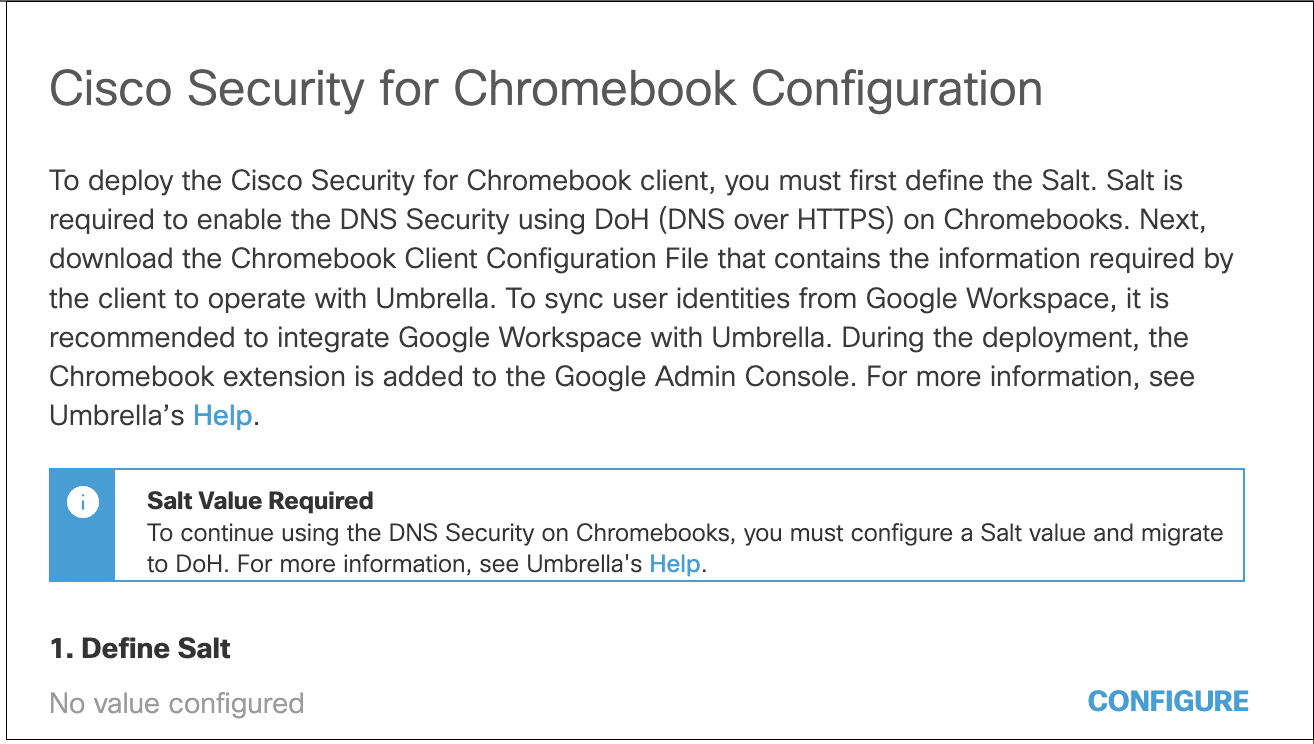
- From the Umbrella dashboard, navigate to Deployments > Core Identities > Chromebook Users and click the Configure icon.

- To enable DoH protection, you must configure a salt value. To configure this value, click CONFIGURE adjacent to Define Salt.
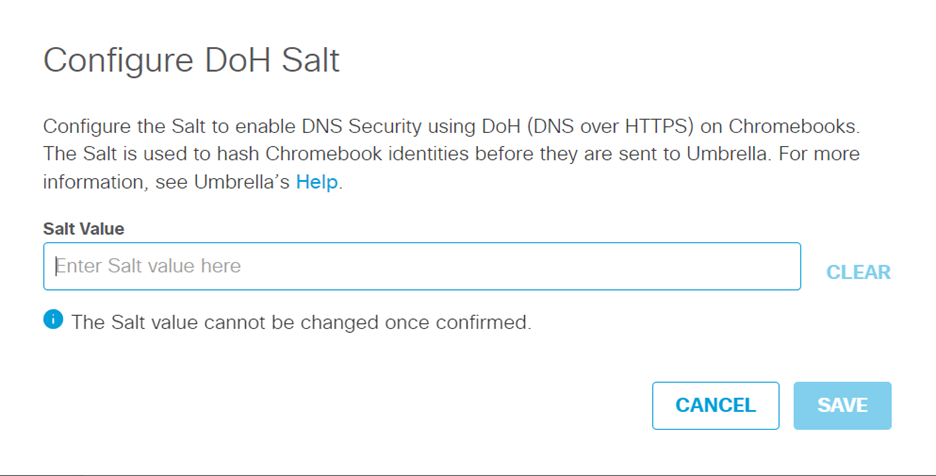
- Enter the salt value, which can be between 8 and 32 characters, and include a combination of letters and numbers. Special characters are not allowed.
Note
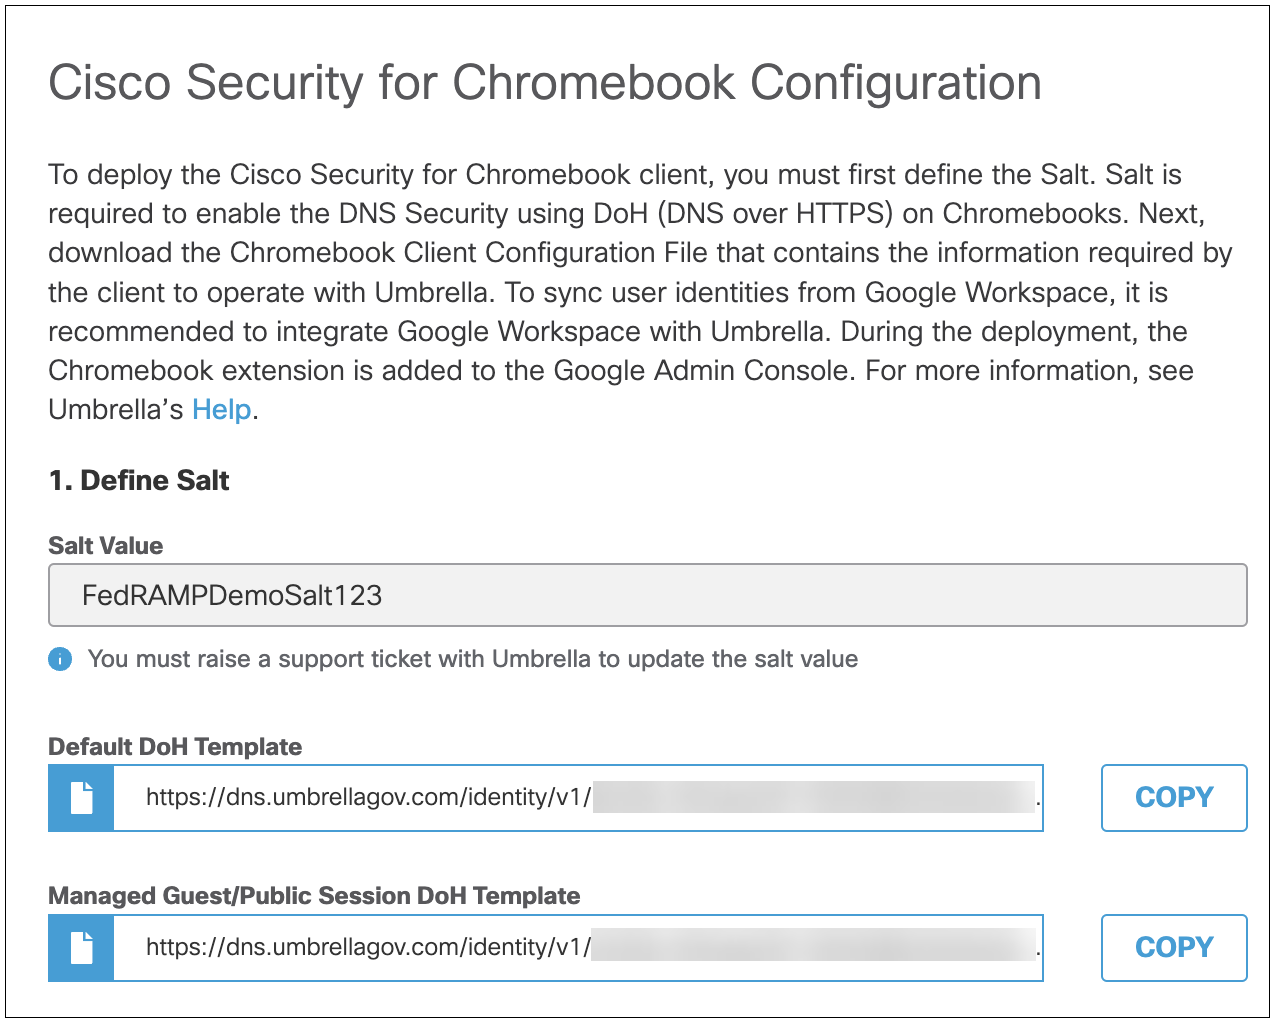
The salt value cannot be changed once it is saved and confirmed. You will have to raise a support ticket with Umbrella to change the salt value.
- After the salt value is configured, two DoH templates are created. The first template is the default template, which is used for all the managed Chromebooks. The second template is the managed guest session template, which is used only for managed guest session devices. Copy and save the configured salt value and the DoH template URLs. They will be required later when deploying Cisco Security for Chromebook client from the Google Admin console.
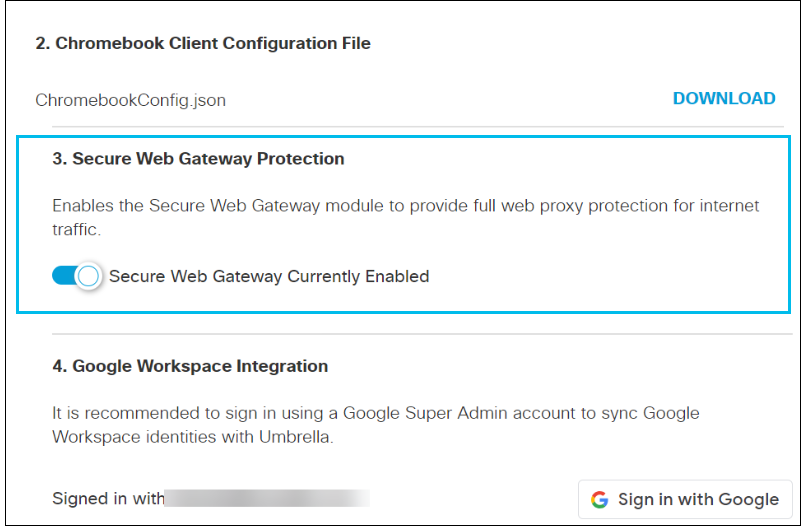
- Click Configure and download the Chromebook Client Configuration JSON file. Save this file to a known location.
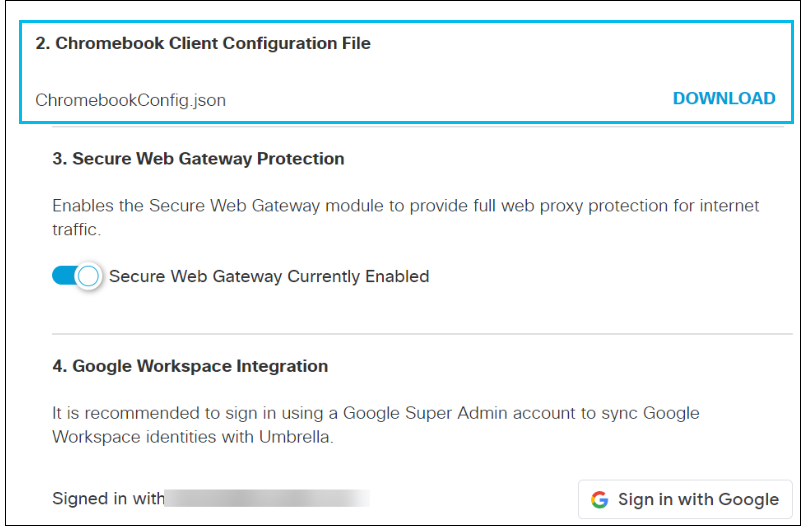
- Enable the Secure Web Gateway module if you want to provide full web proxy protection for your internet traffic.
Google Admin Console
You can configure the default and the managed guest session DoH templates using the Google Admin console.
Configure Default Template
- Log in to the Google Admin console.
- Navigate to Devices > Chrome > Settings > Users & browser settings.
- Cisco Security for Chromebook is in the process of transitioning from Manifest V2 to Manifest V3 for Chrome extensions. In the meantime, Google recommends that you use the Manifest V2 Extensions Availability policy to ensure the continued functioning of Manifest V2 extensions. To enable the availability of Manifest V2 extensions, filter the settings for Manifest.
The Manifest V2 Extension Availability setting is displayed.
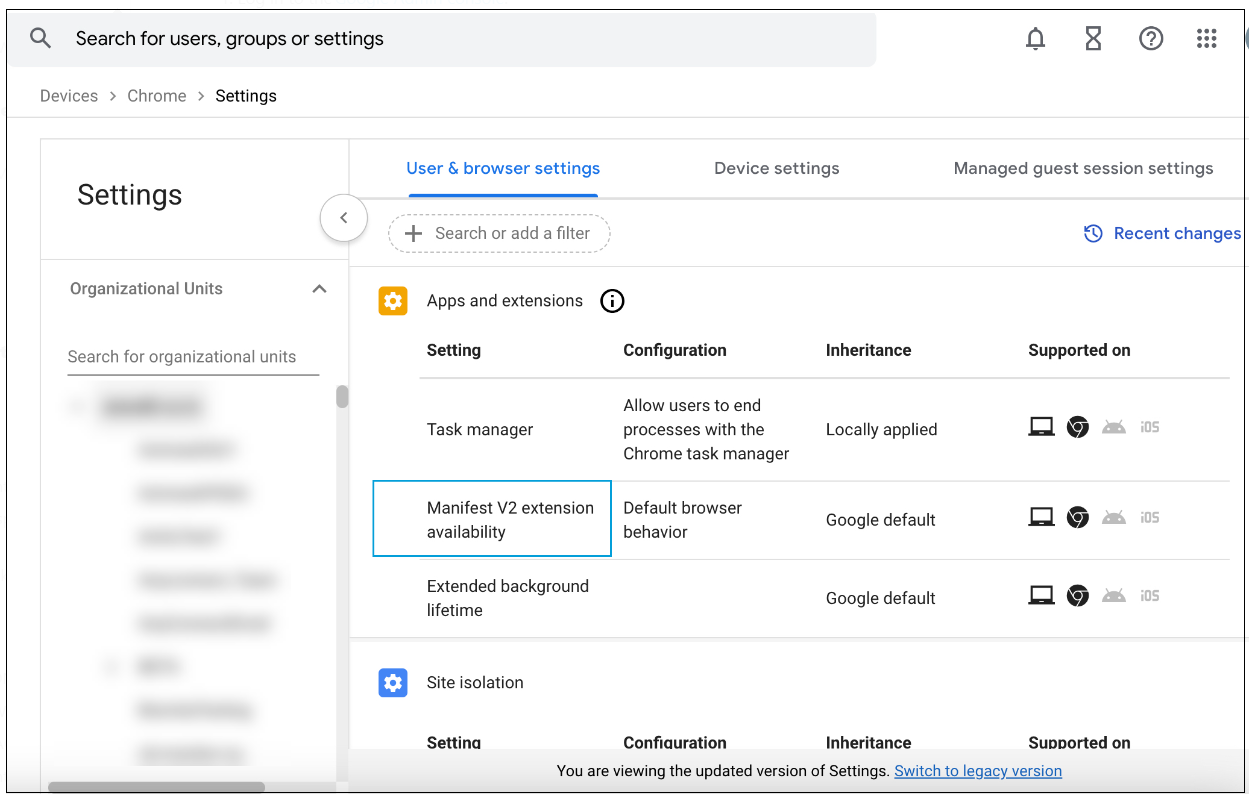
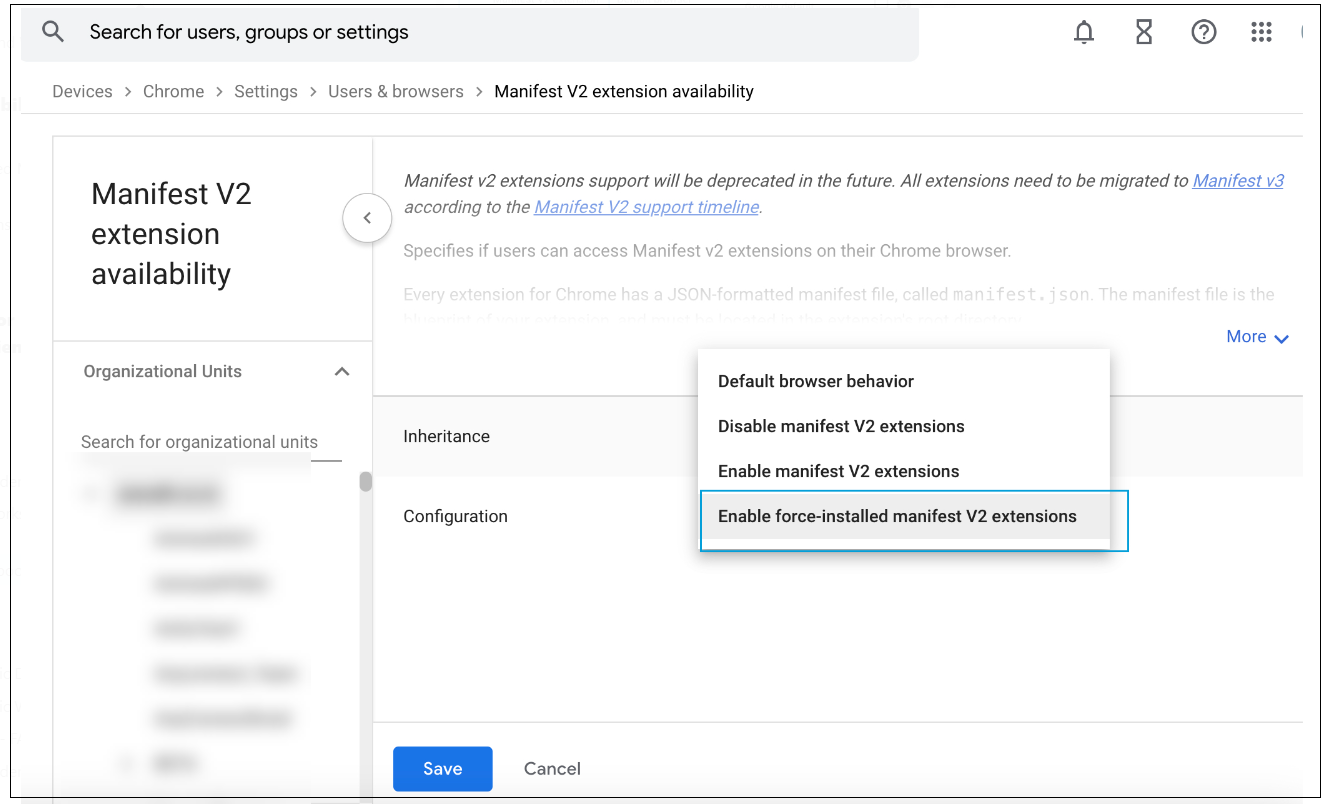
- Select the parent organizational unit on which you want to enable the Force Installed Manifest V2 extensions. Click Manifest V2 extension availability.
- From the Default browser behavior drop-down list, choose Enable force-installed manifest V2 extensions.
- Filter the settings for DNS.
The DNS settings are displayed.
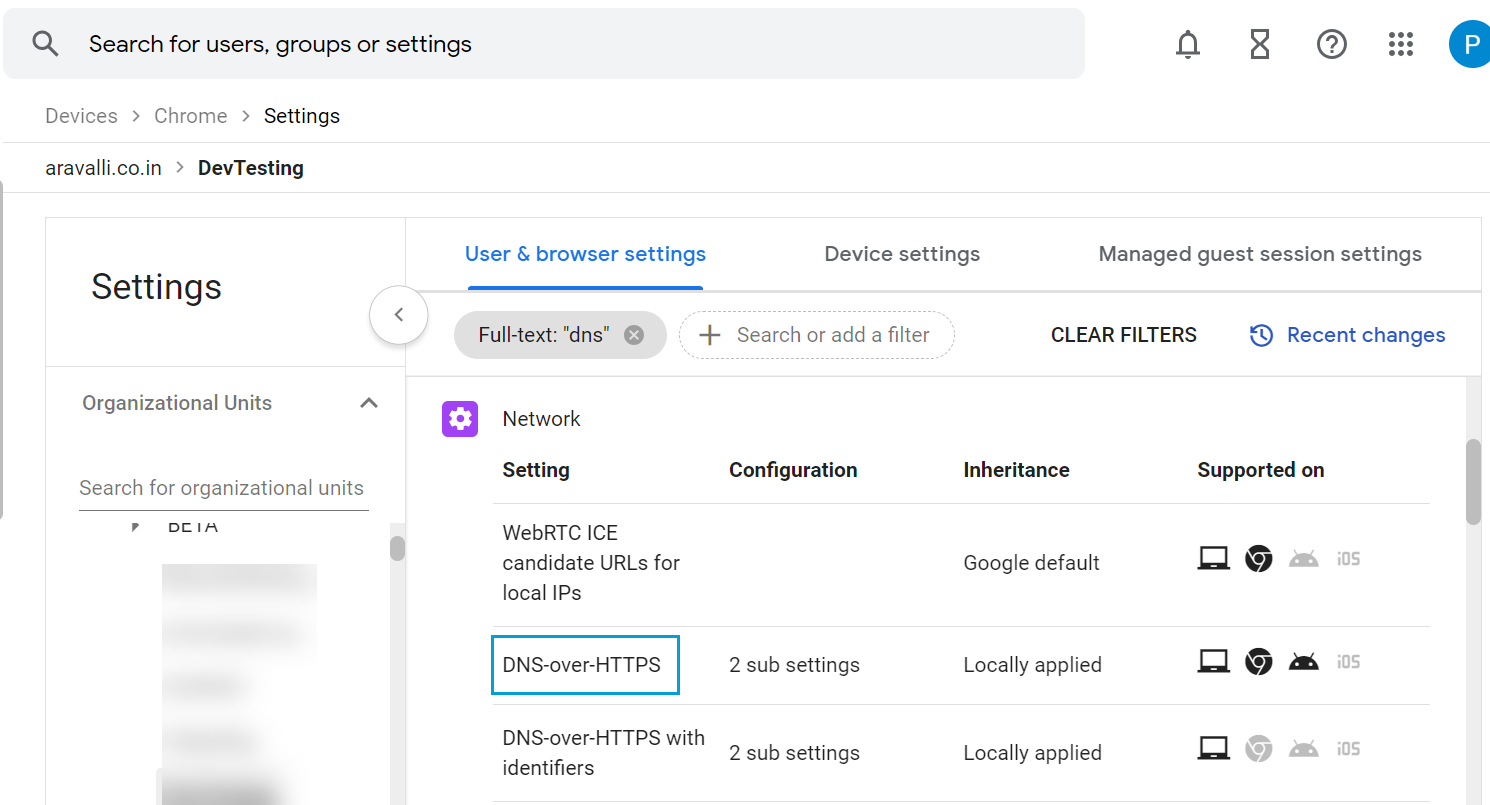
- Click DNS-over-HTTPS and configure it to Enable DNS-over-HTTPS with insecure fallback.
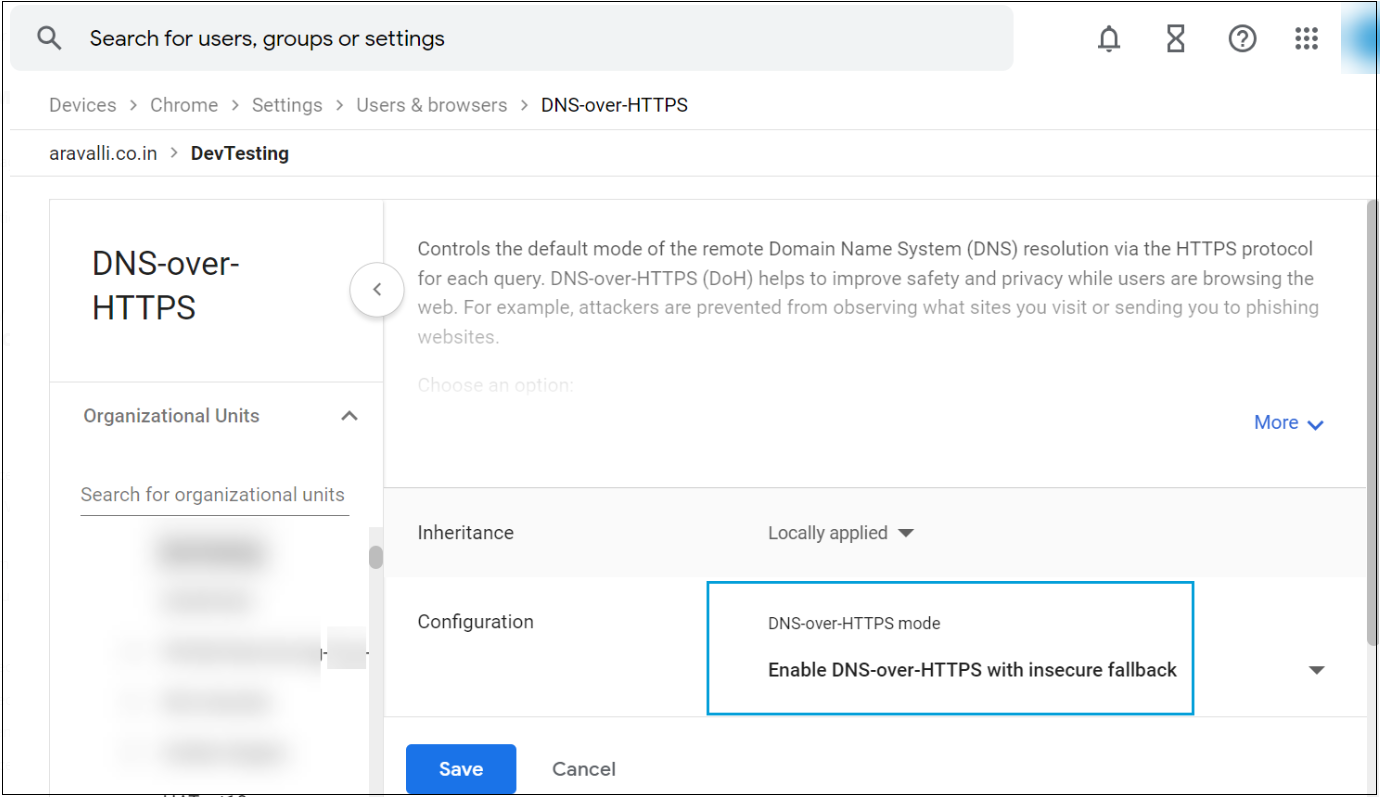
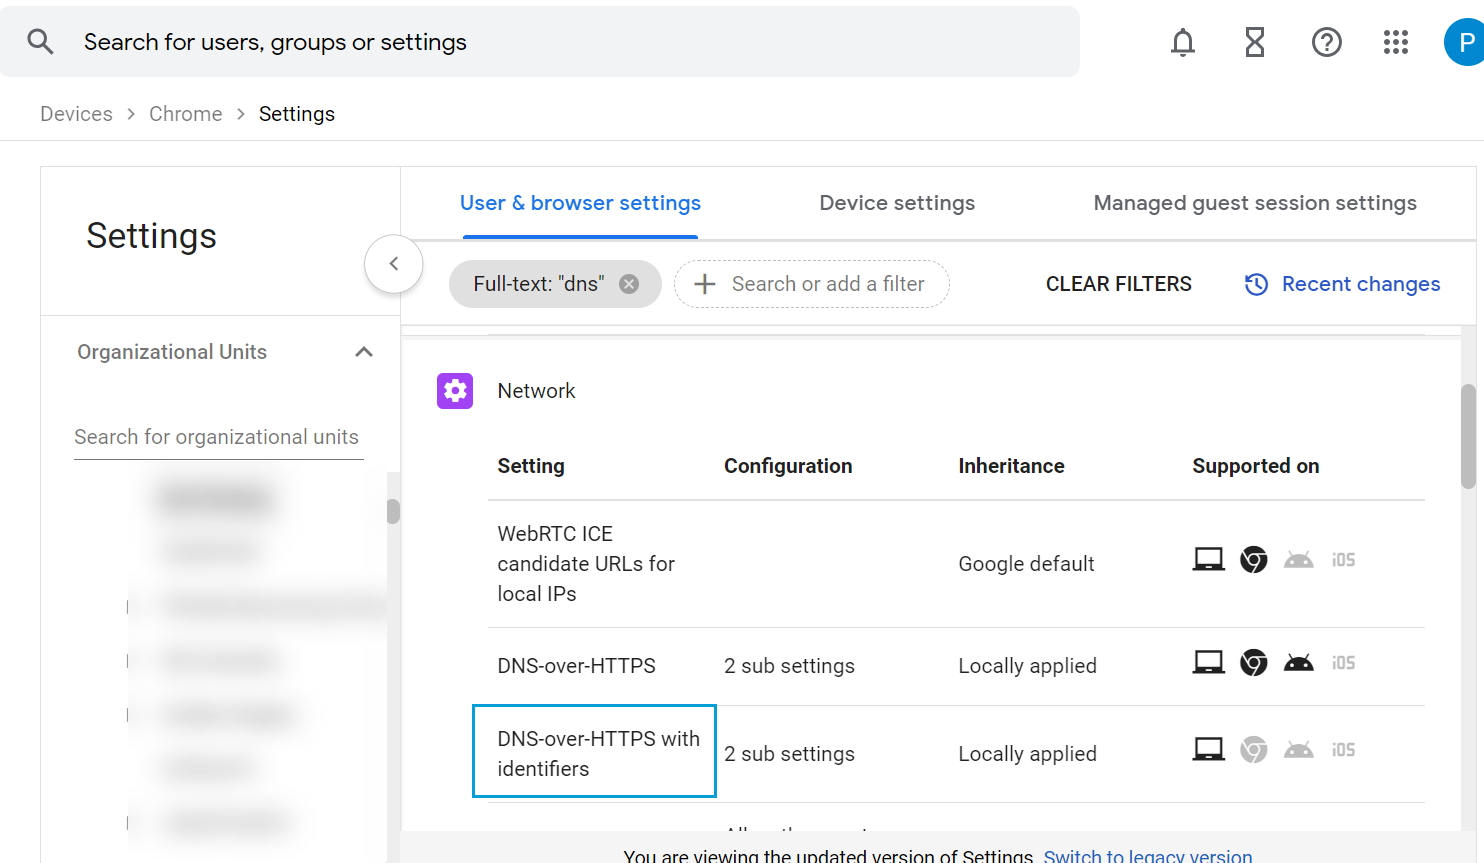
- Return to the Users & Browser Settings page and click DNS-over-HTTPS with Identifiers.
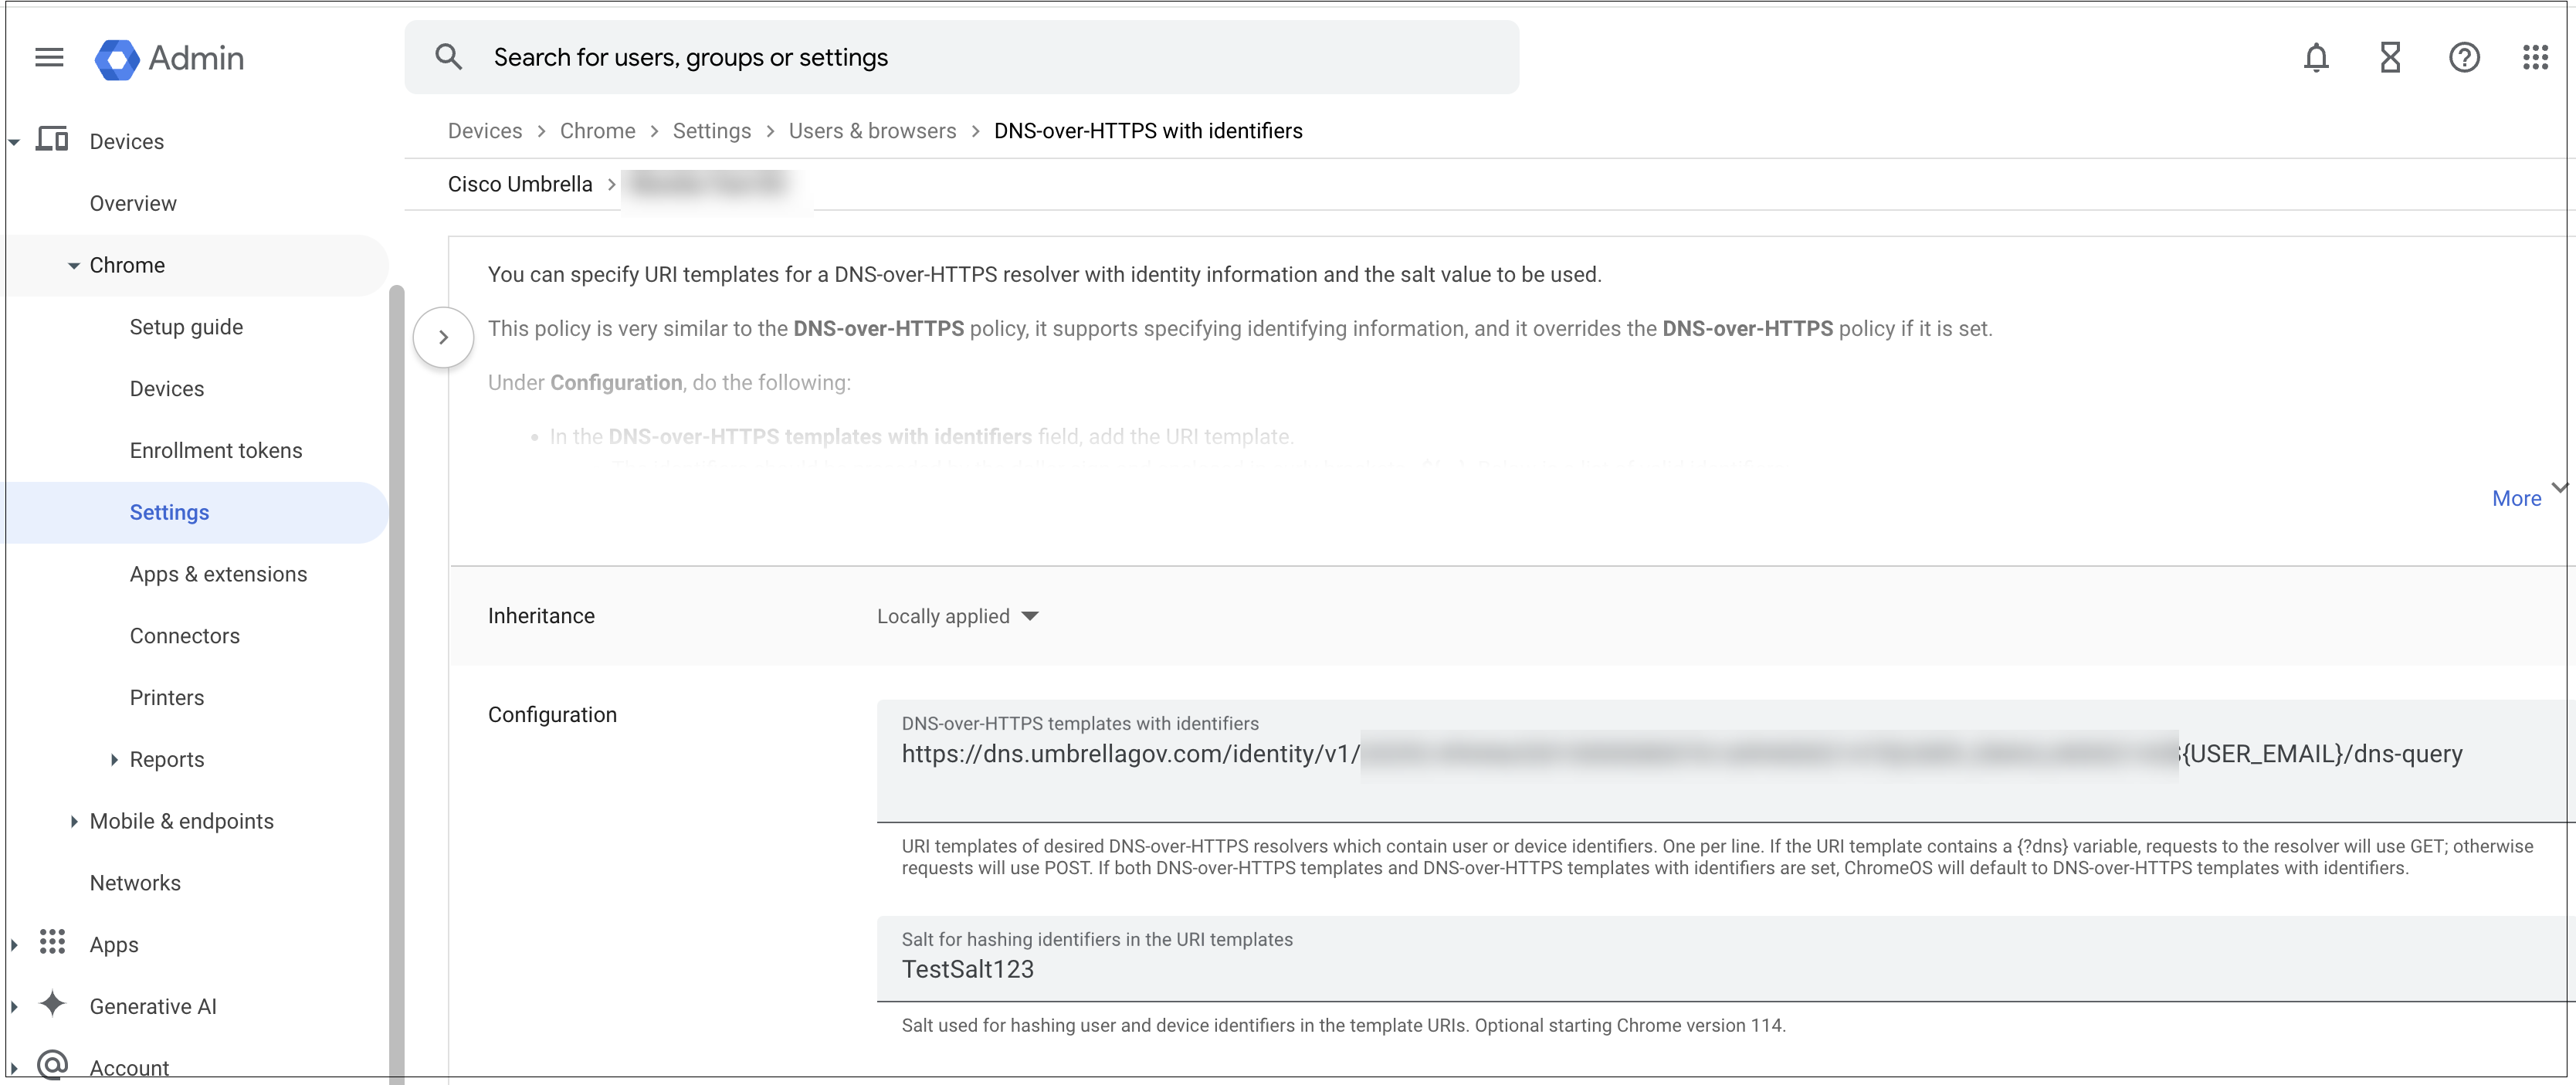
- Enter the URL of the Default DoH template and the salt value that you copied from the Umbrella dashboard earlier, and click Save.
- From Apps & Extensions, navigate to Users & browsers > Organizational Units.
- Expand Organizational Units and choose the organization to which you want to deploy Cisco Security for Chromebook client.
- Click the + (Expand) icon and select Add from Chrome Web Store.
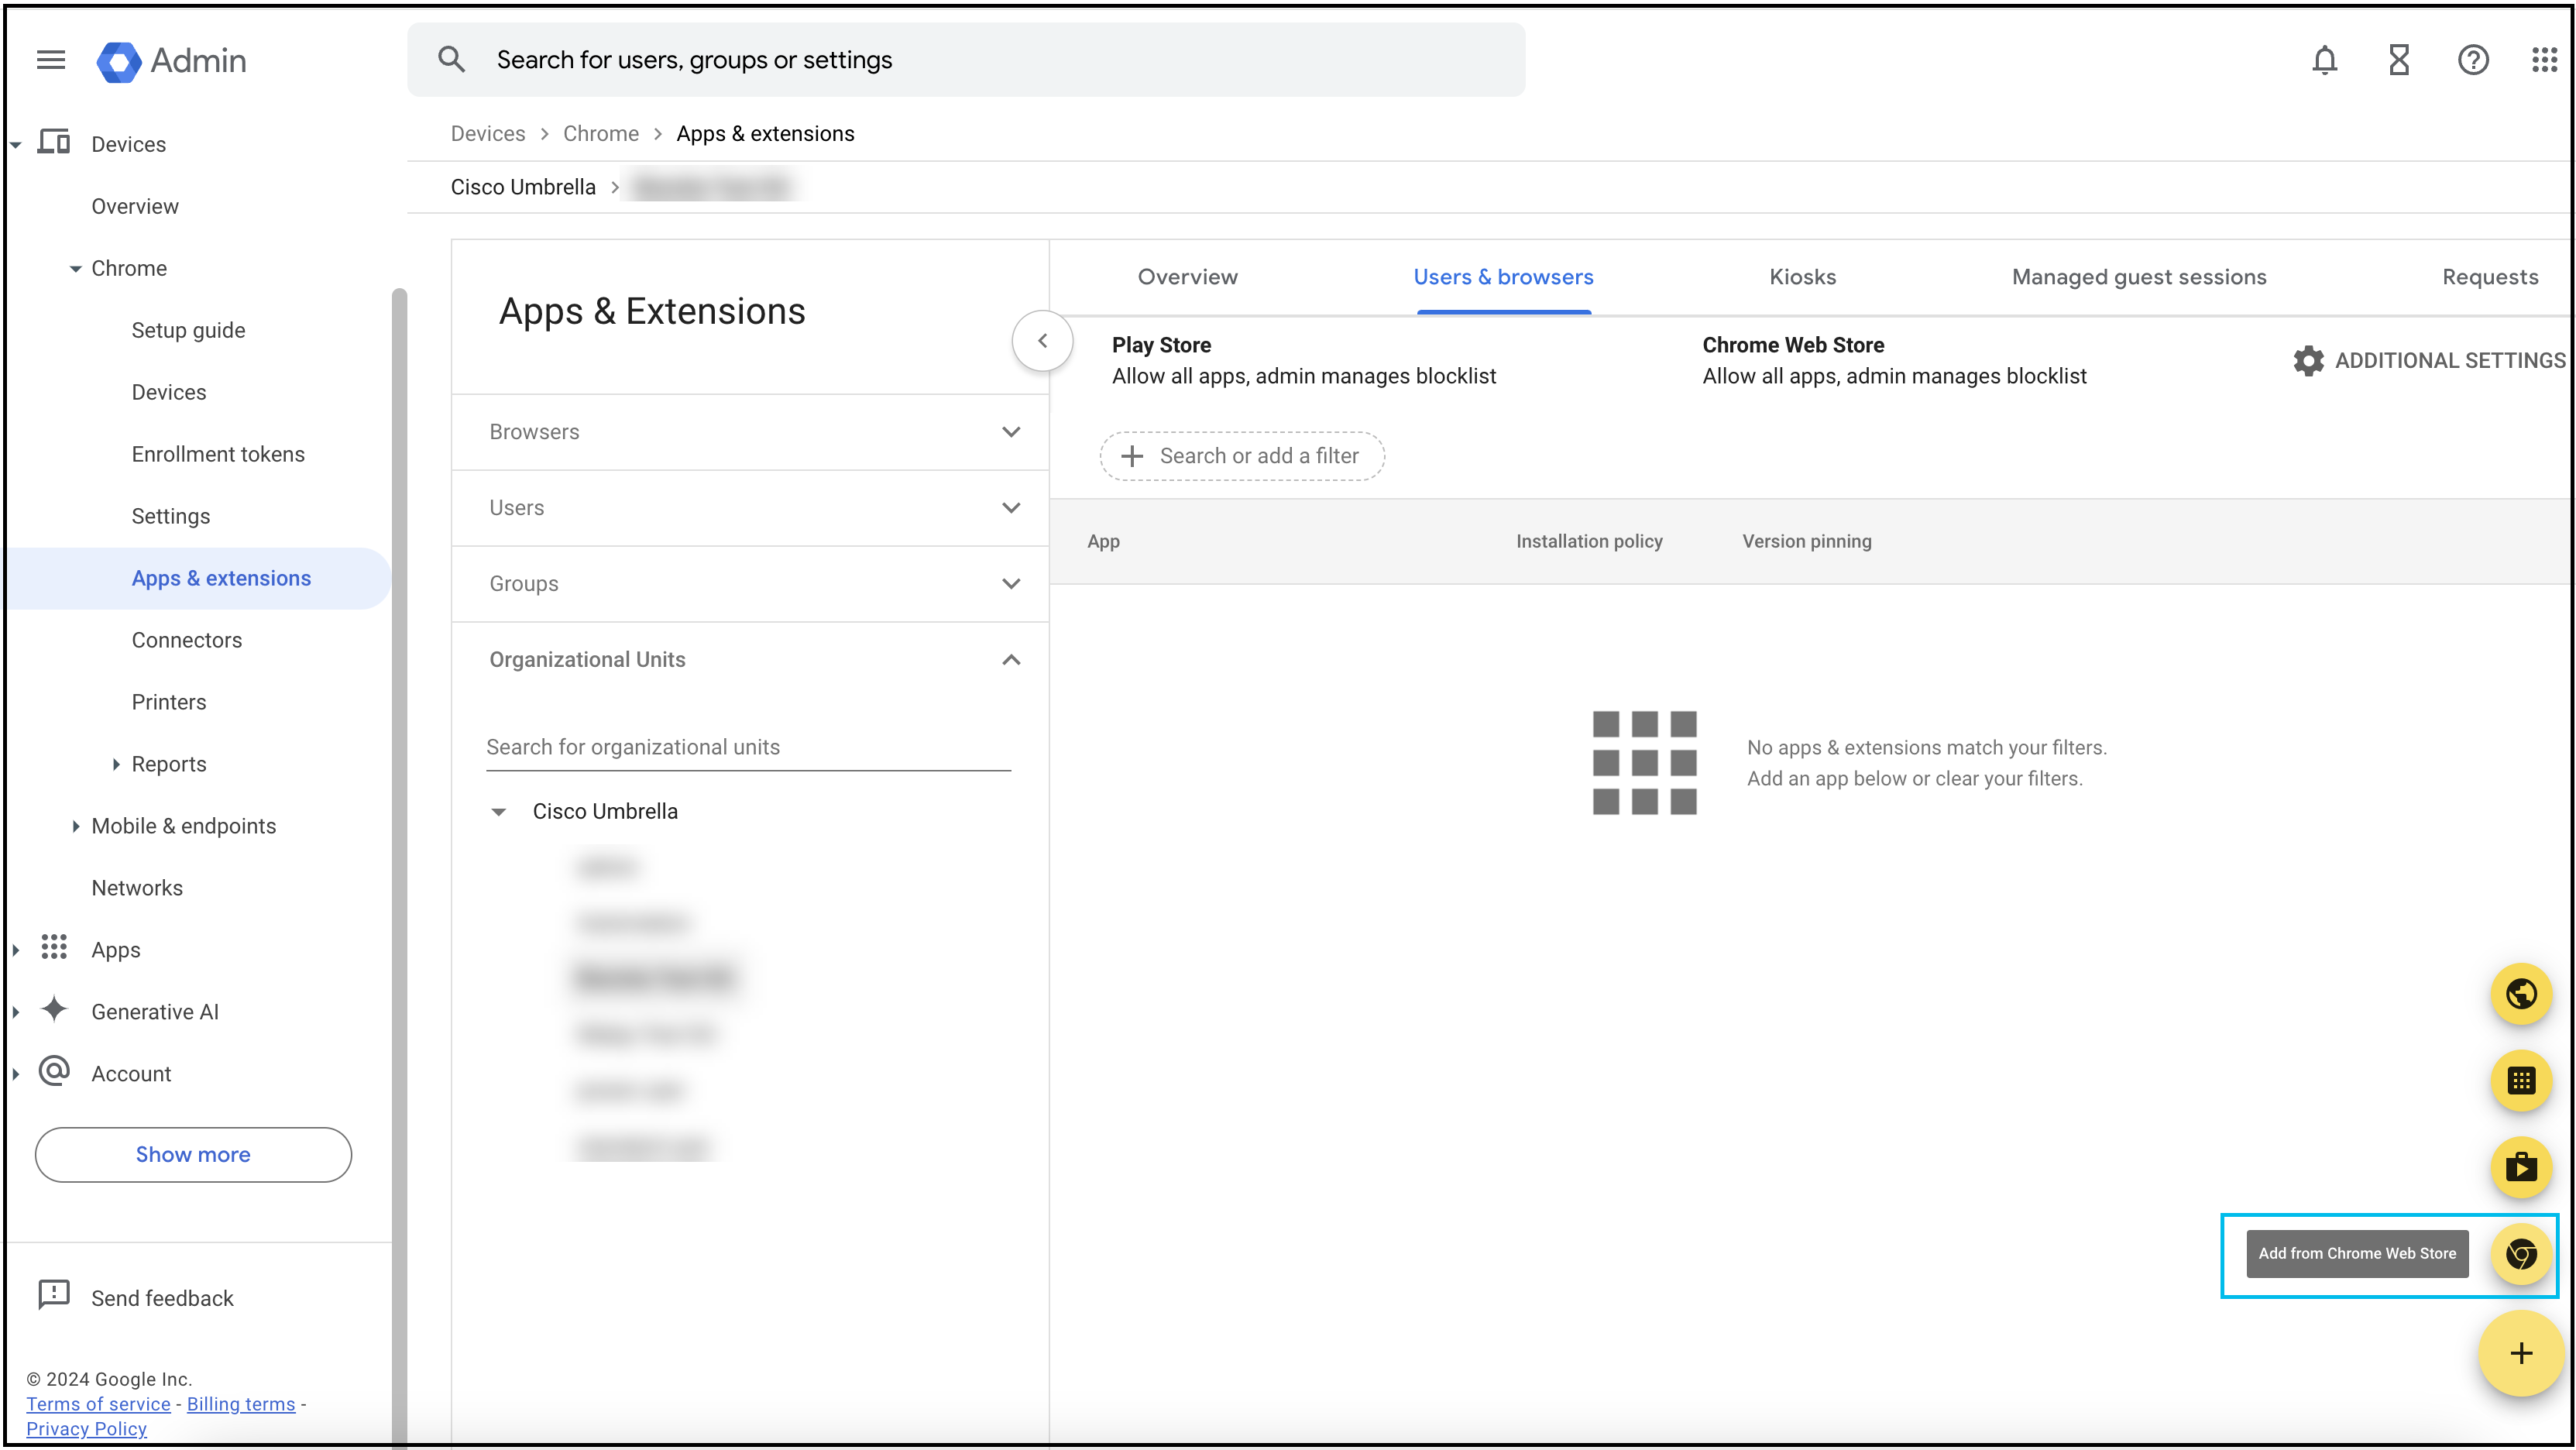
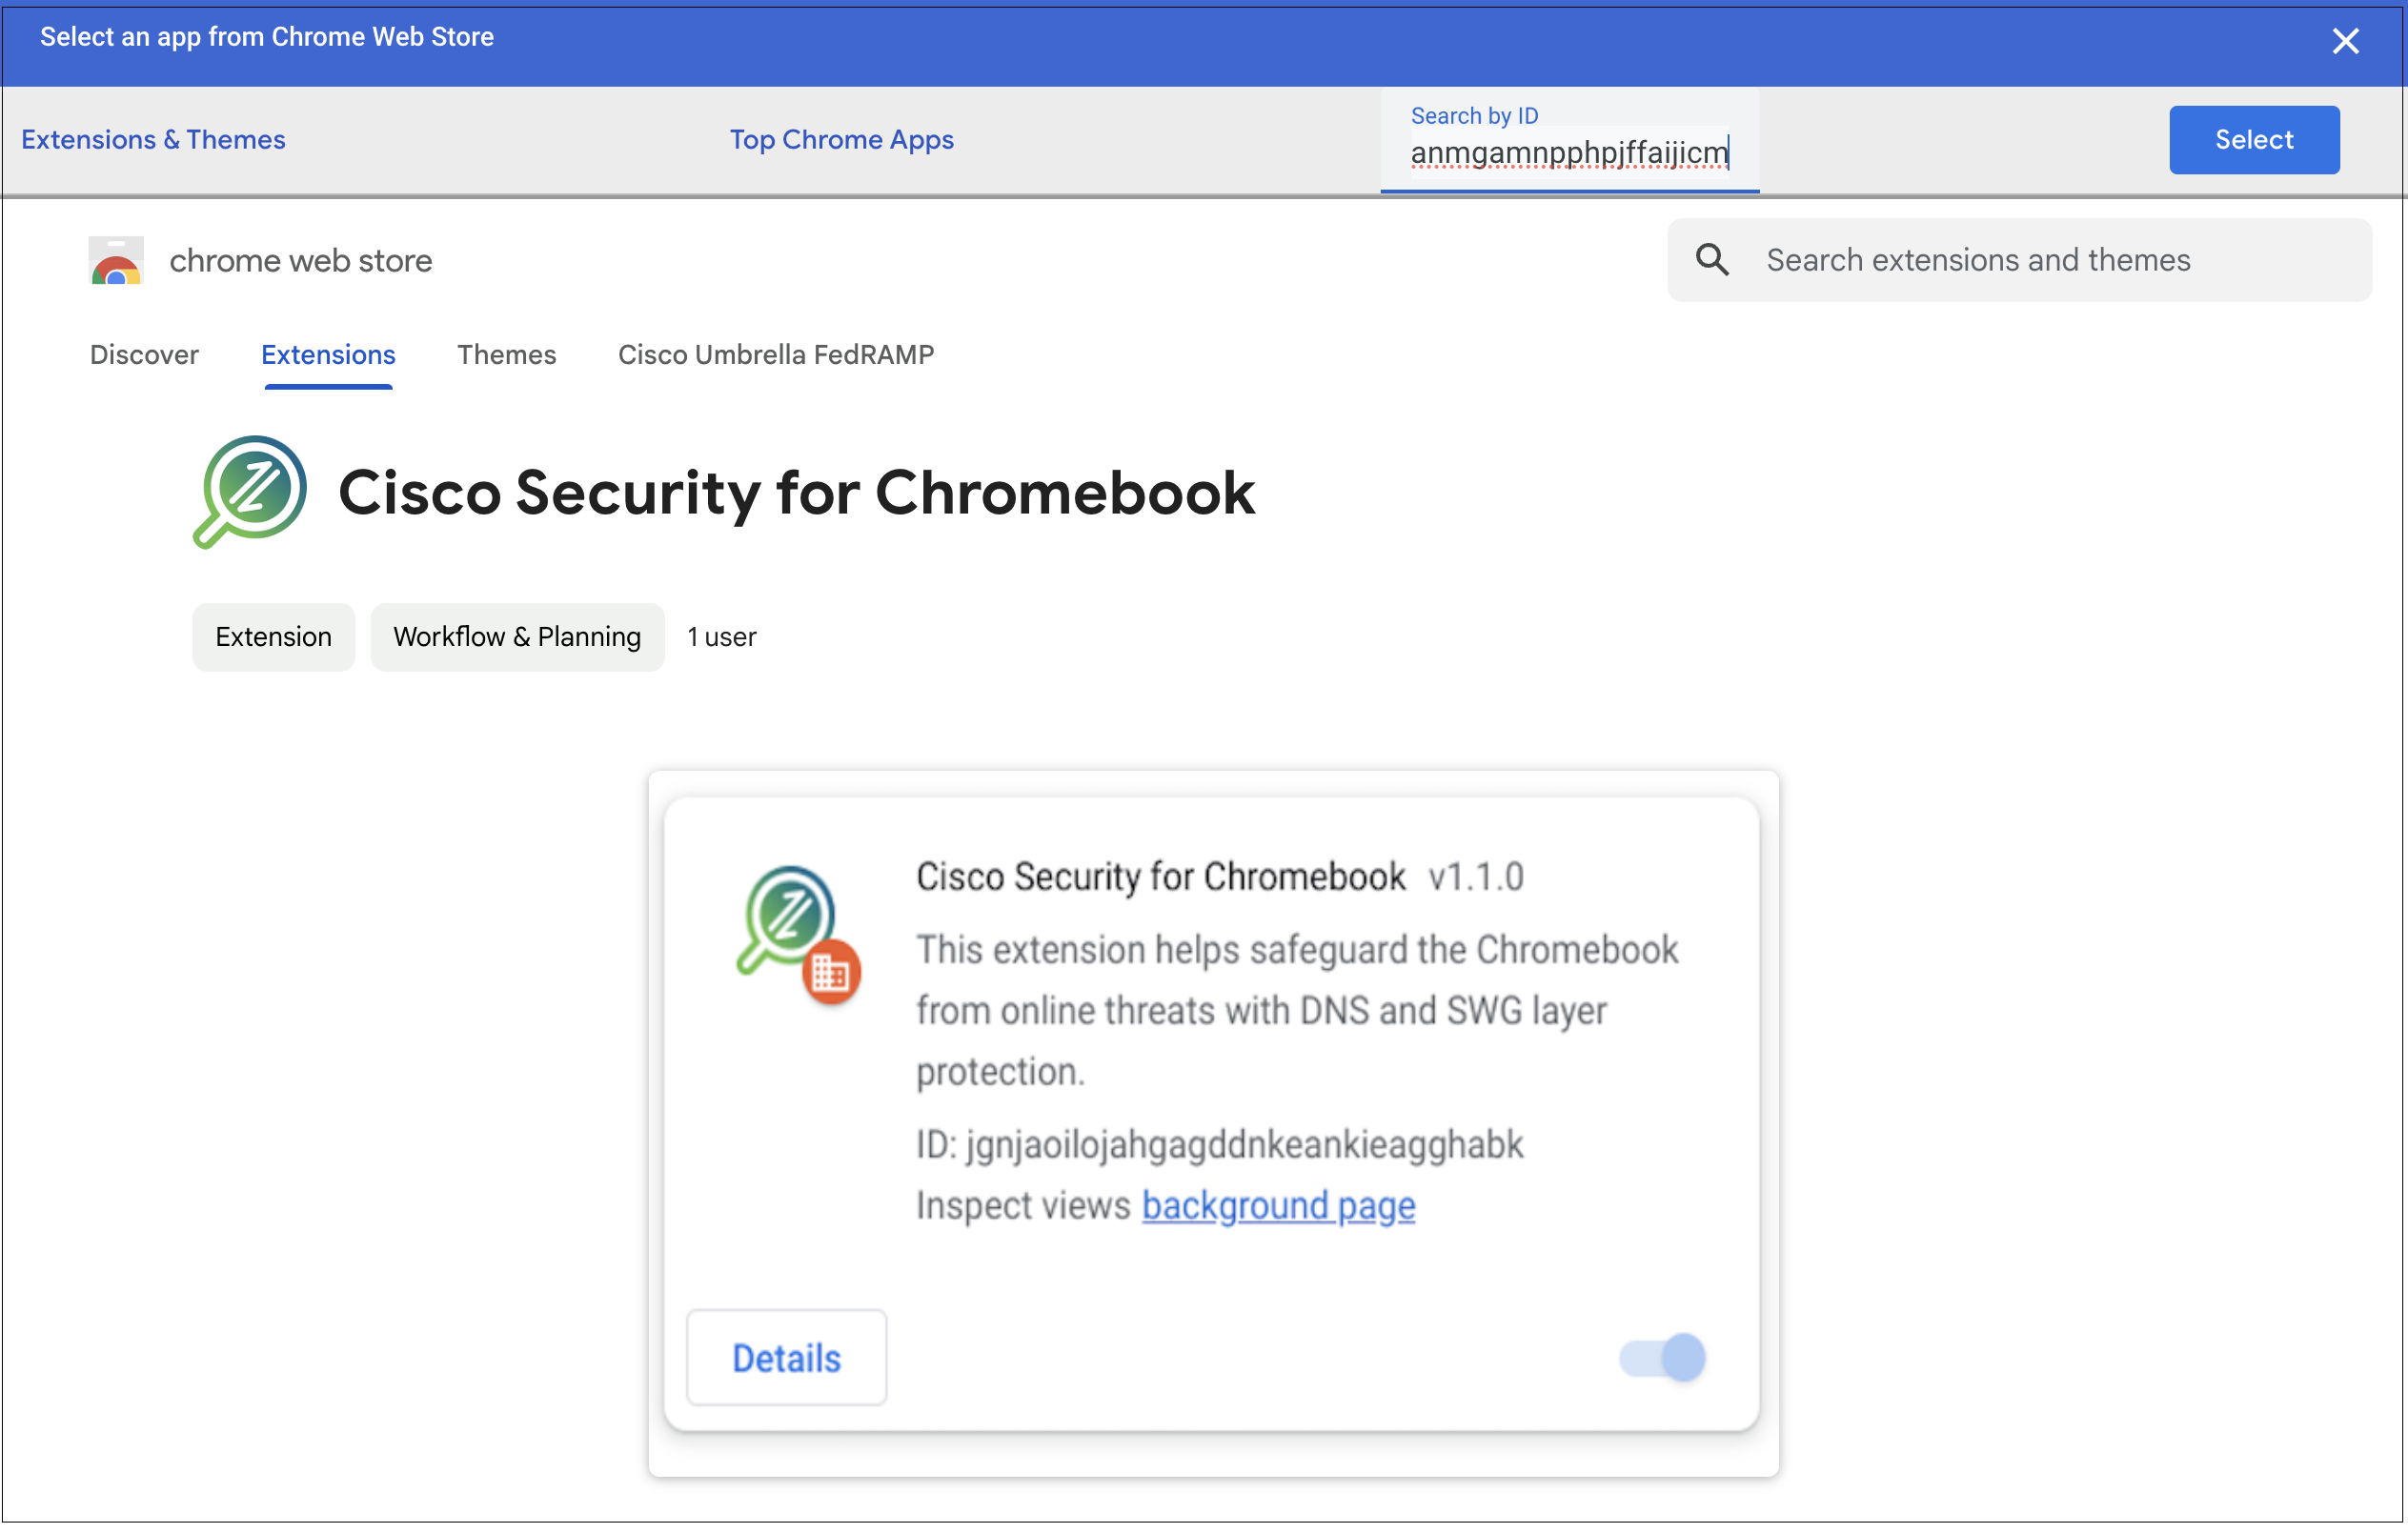
- In the Chrome Web Store, navigate to Extensions and search for the Cisco Security for Chromebook client extension using the ID aiaoiippnjfkanmgamnpphpjffaijicm
Note: When copying and pasting the extension ID into the search field, ensure there are no spaces before or after it. This will help you locate the Cisco Security for Chromebook client extension.
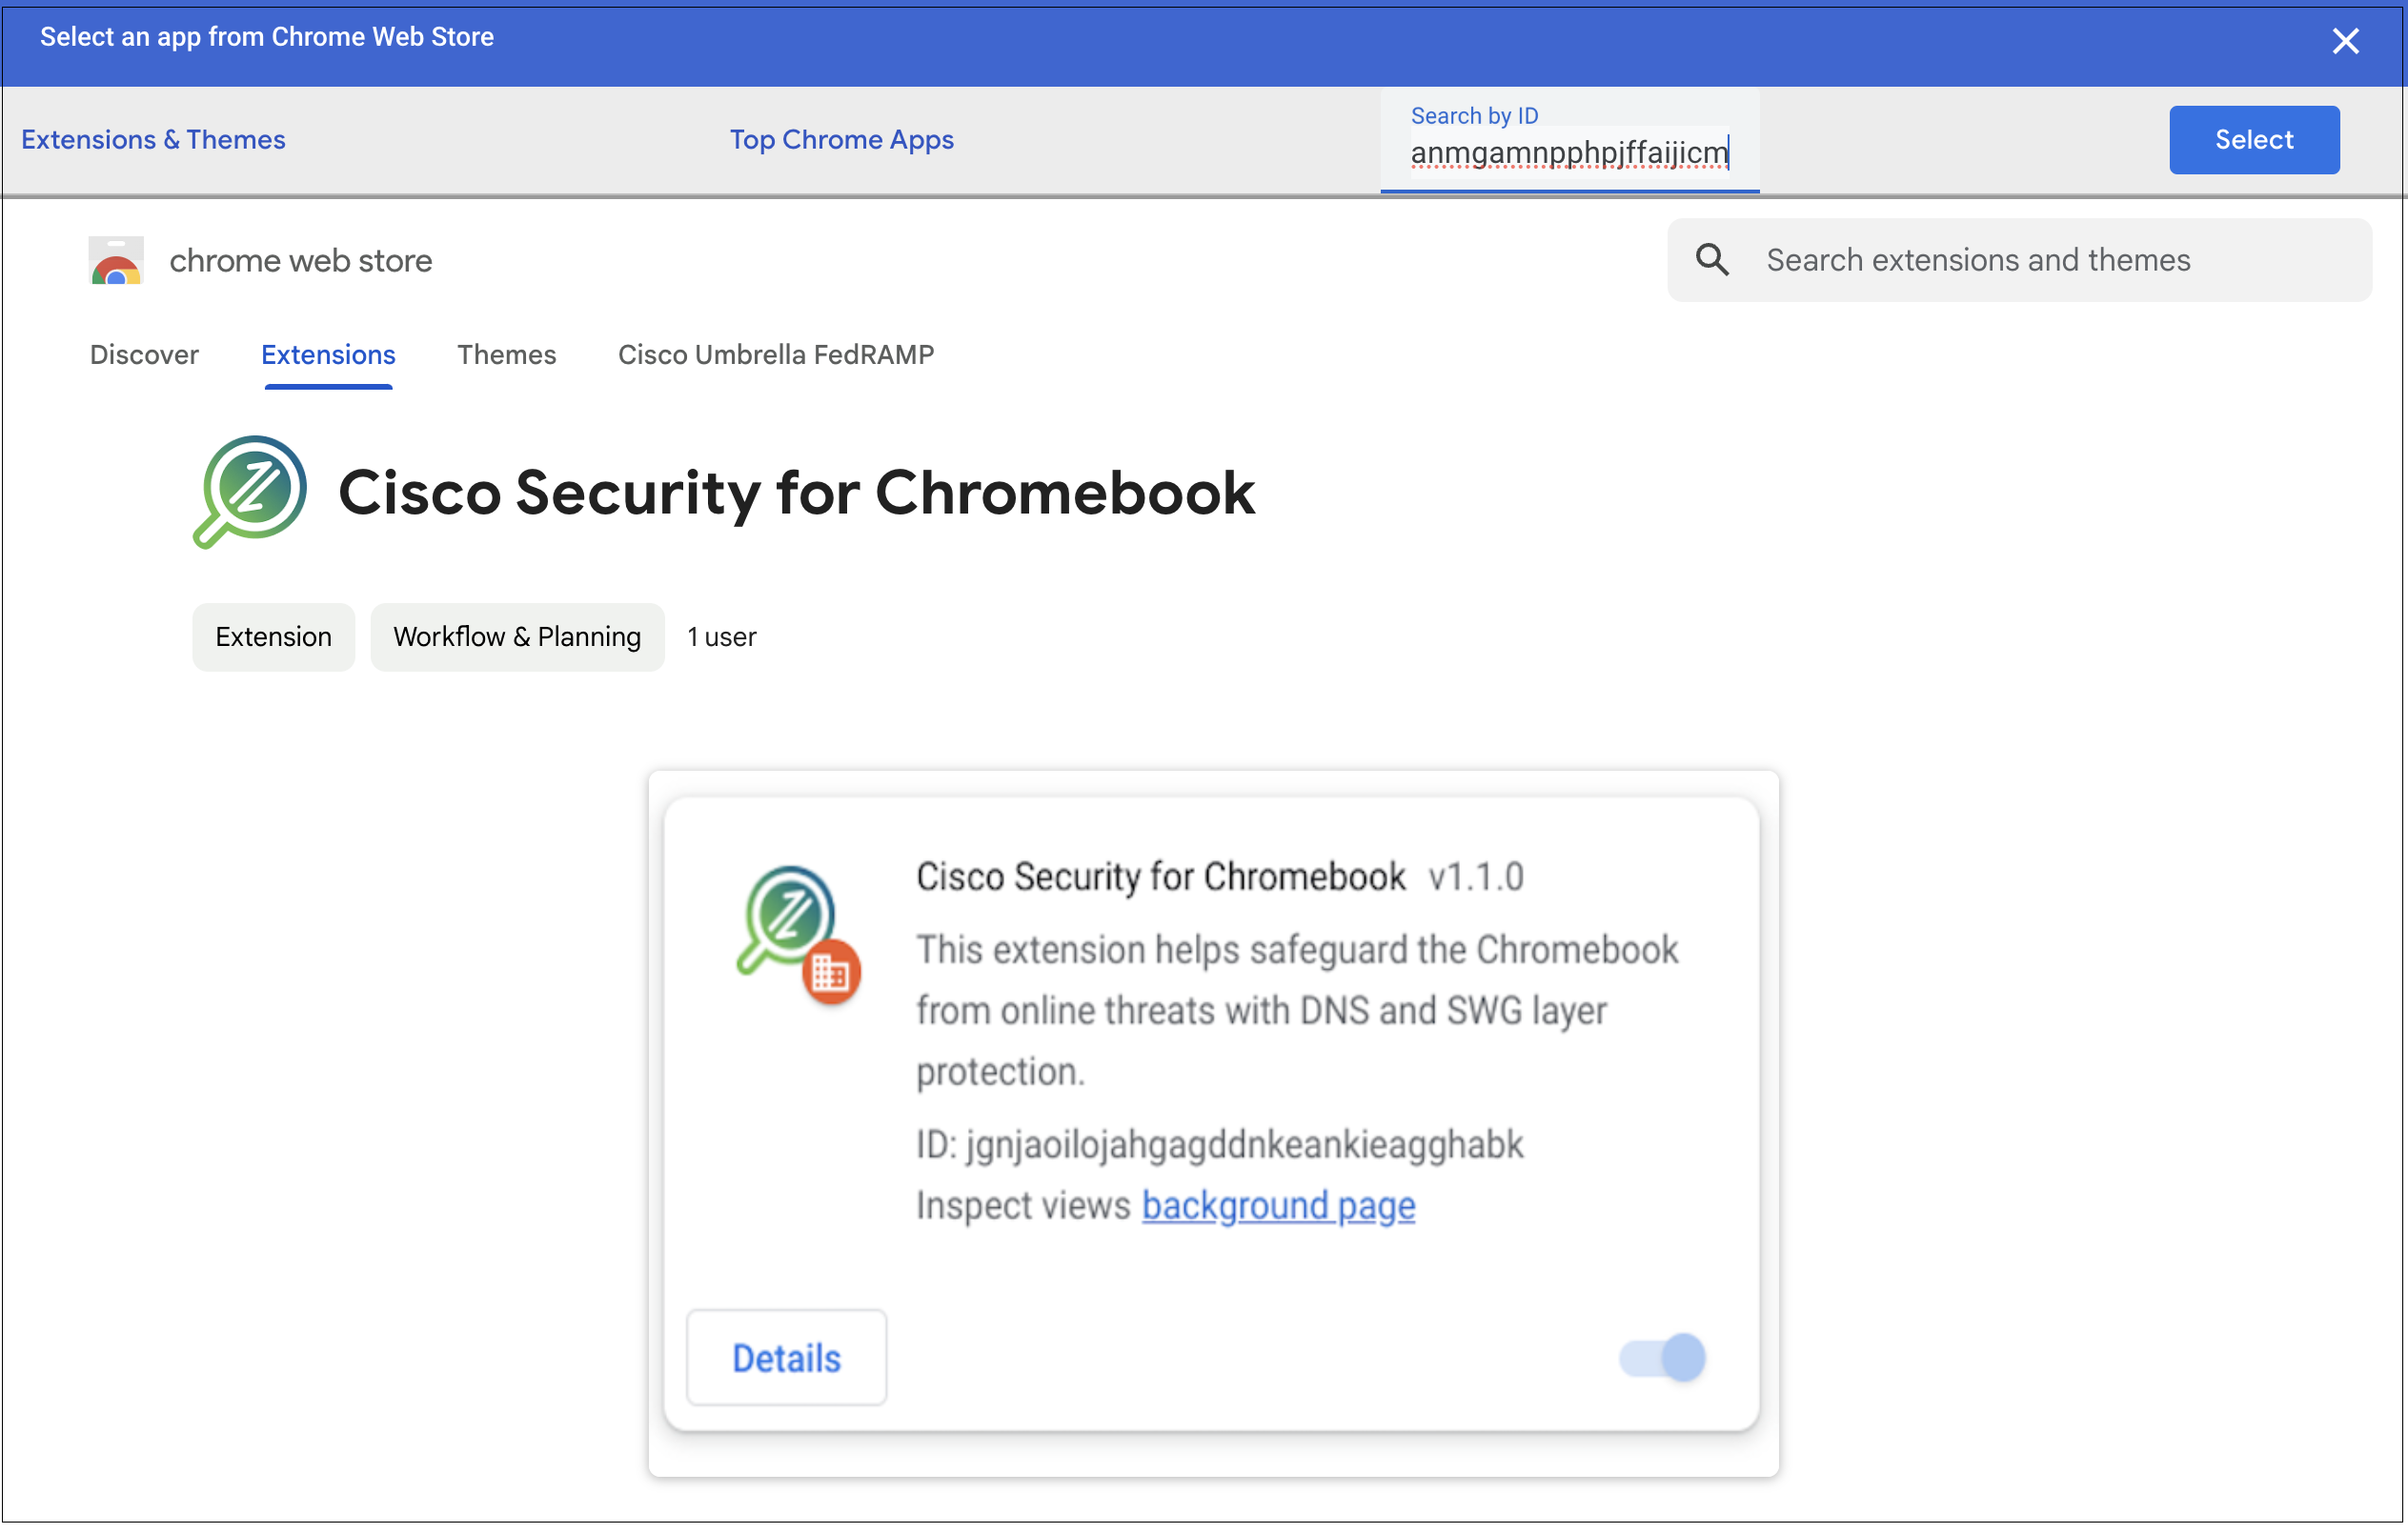
- Click Select.
The extension is added to the selected organization unit.
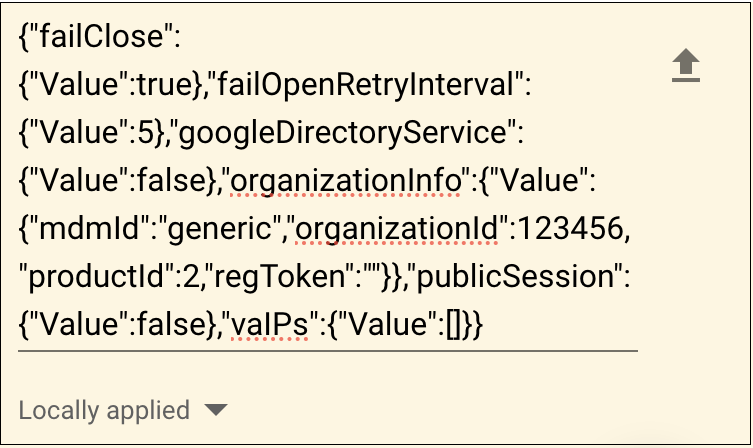
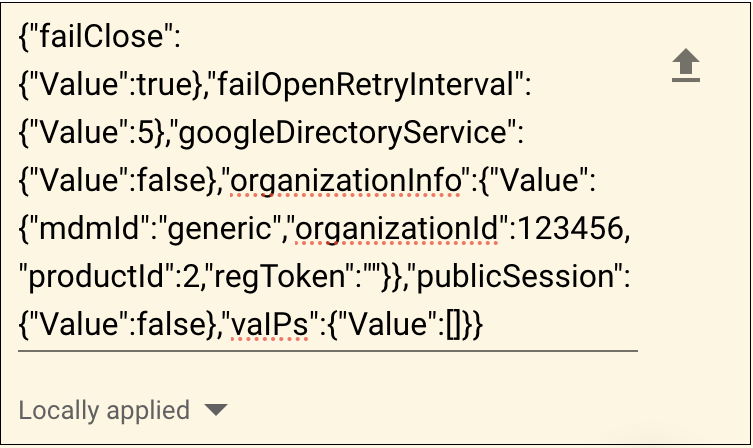
- Copy the JSON file that you downloaded and paste it into the Policy for extensions section.
Note
The JSON configuration parameters googleDirectoryService and vaIPs apply only to Cisco Umbrella Chromebook client and not to Cisco Security for Chromebook client.
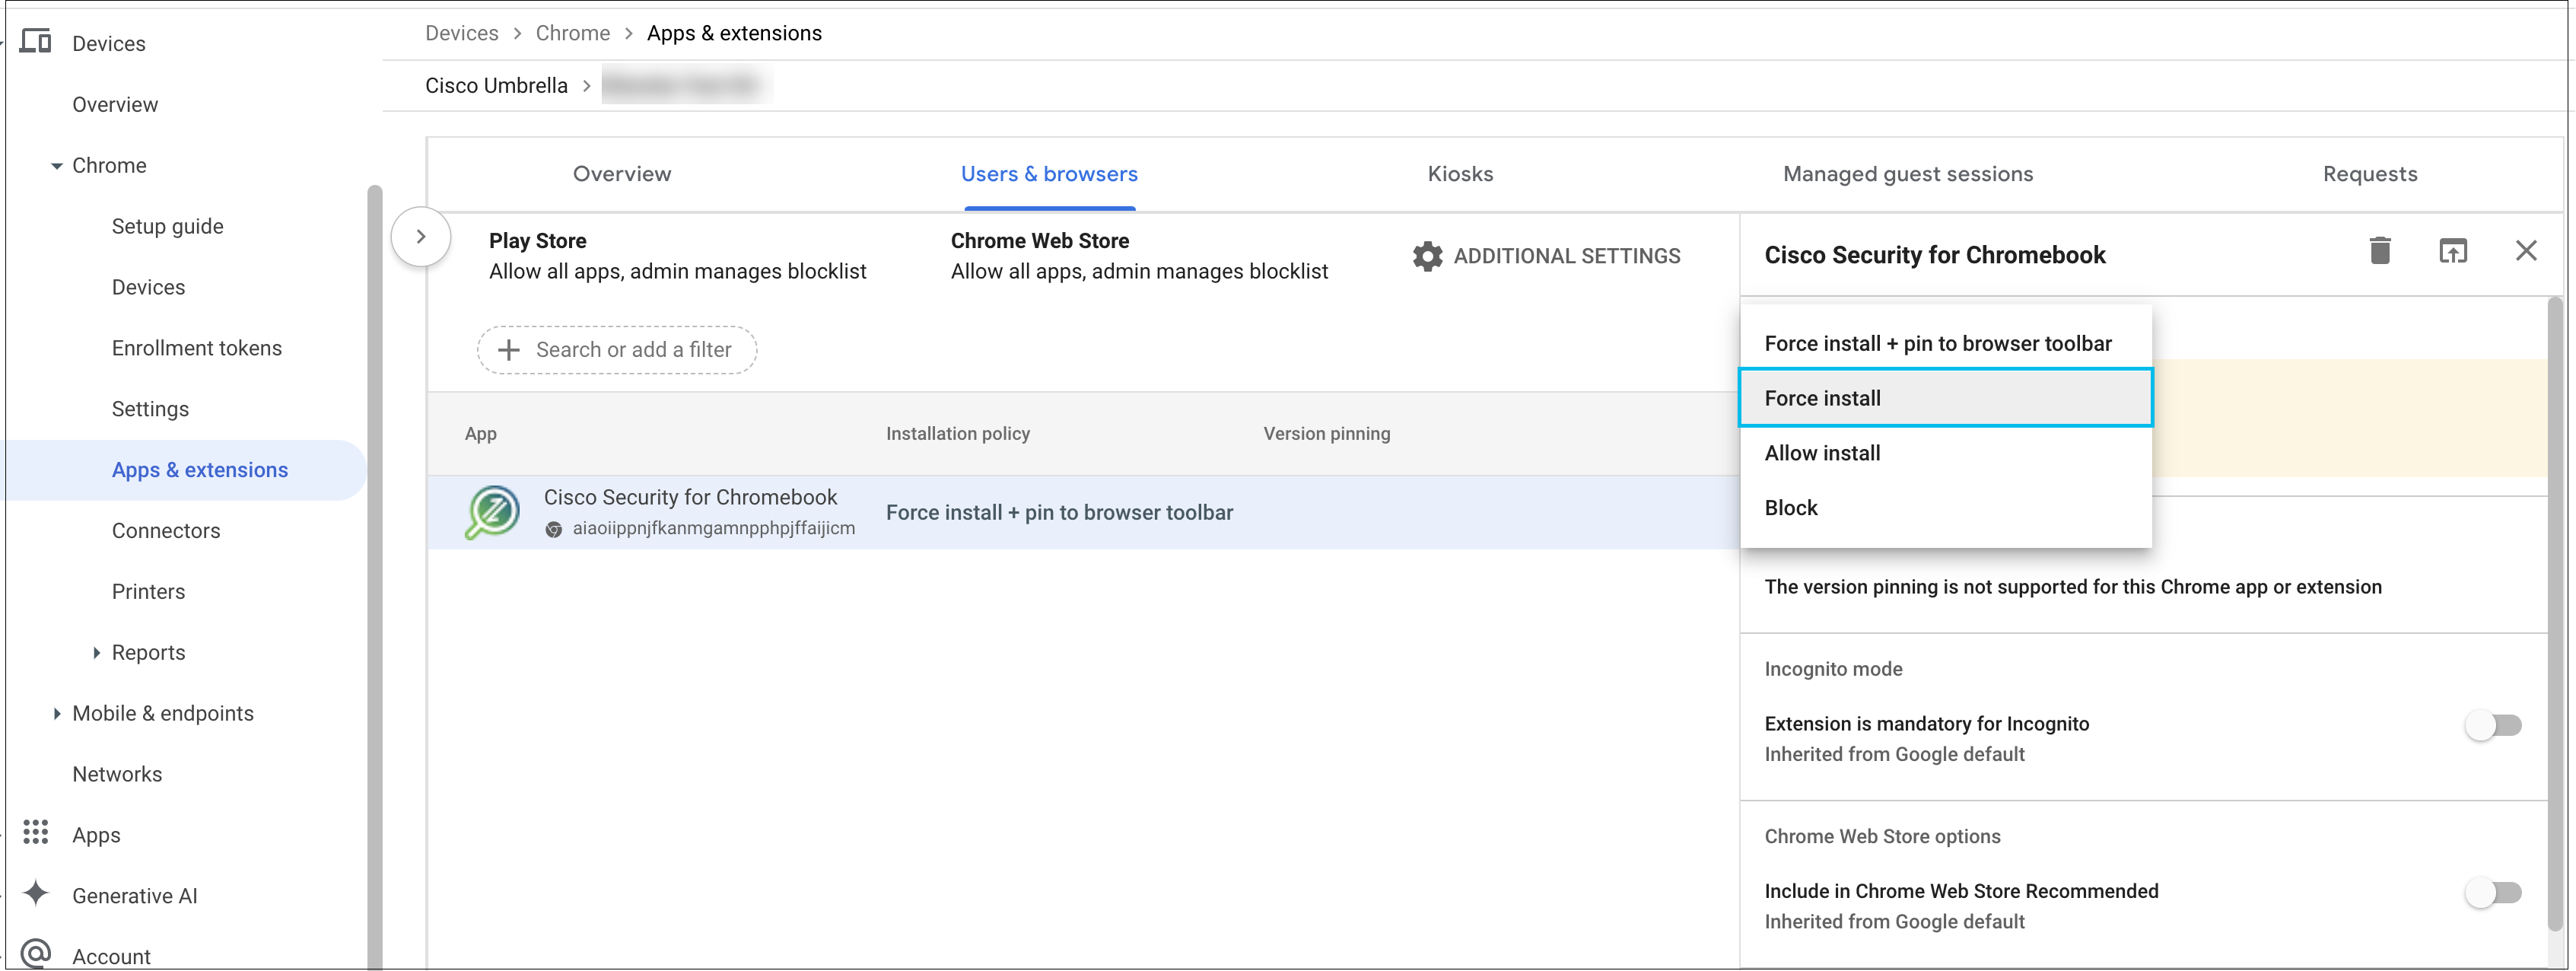
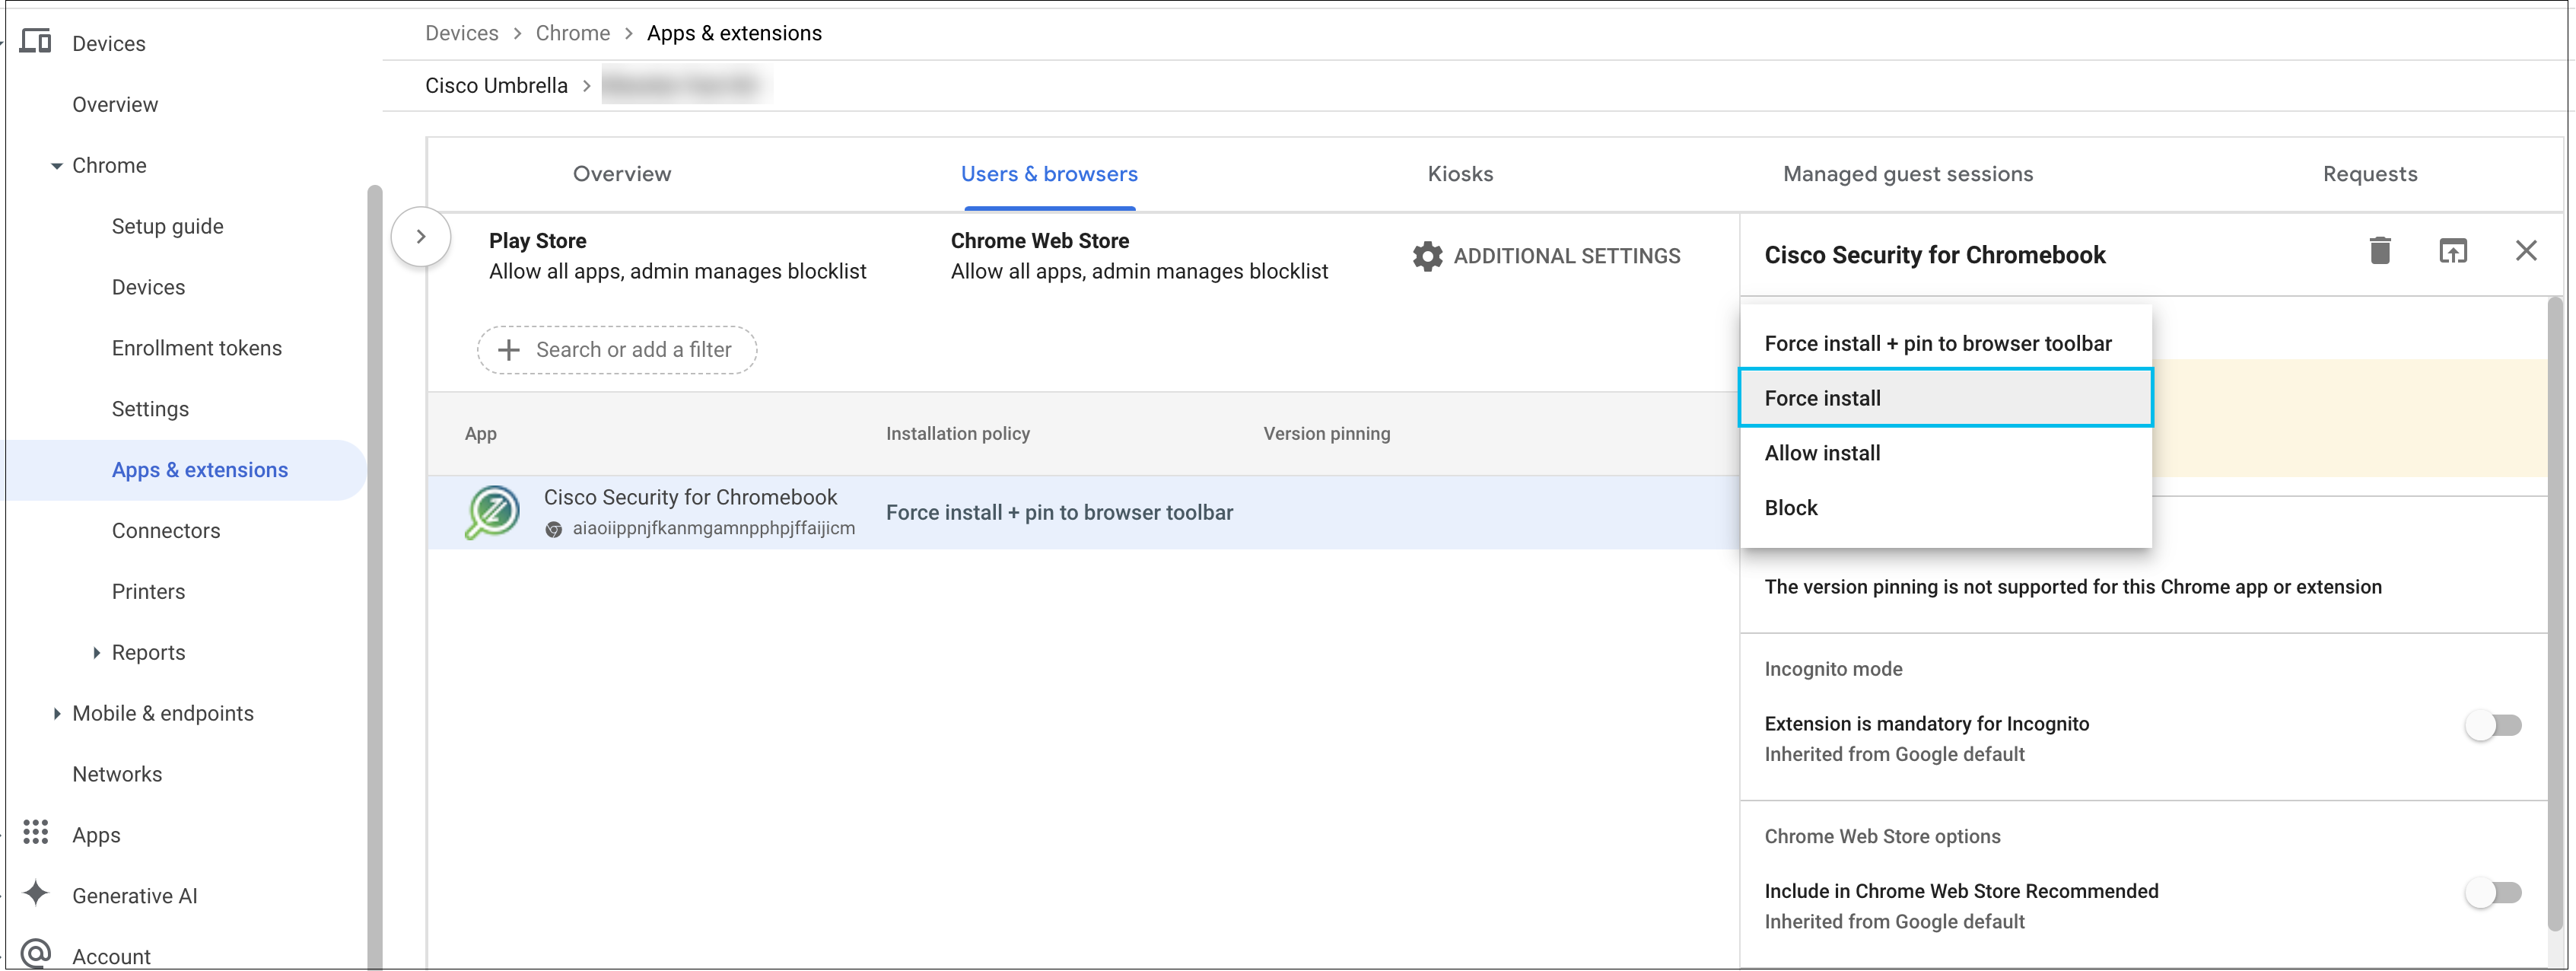
- Choose Force install and then click Save.
The Cisco Security for Chromebook client extension is installed. Force install ensures that Chromebook users in the selected organization unit cannot remove or disable the extension.
Important
Once the configuration is done and pushed to the device, the user will be prompted with a SAML pop-up window to authenticate based on the integrated IDP. For more information, see SAML Configuration. On successful authentication, the device will be registered and protected by Umbrella. If the user fails to authenticate, the prompt will repeat until correct credentials are provided. The user will need to re-authenticate after the IDP authentication expiry limit is reached.
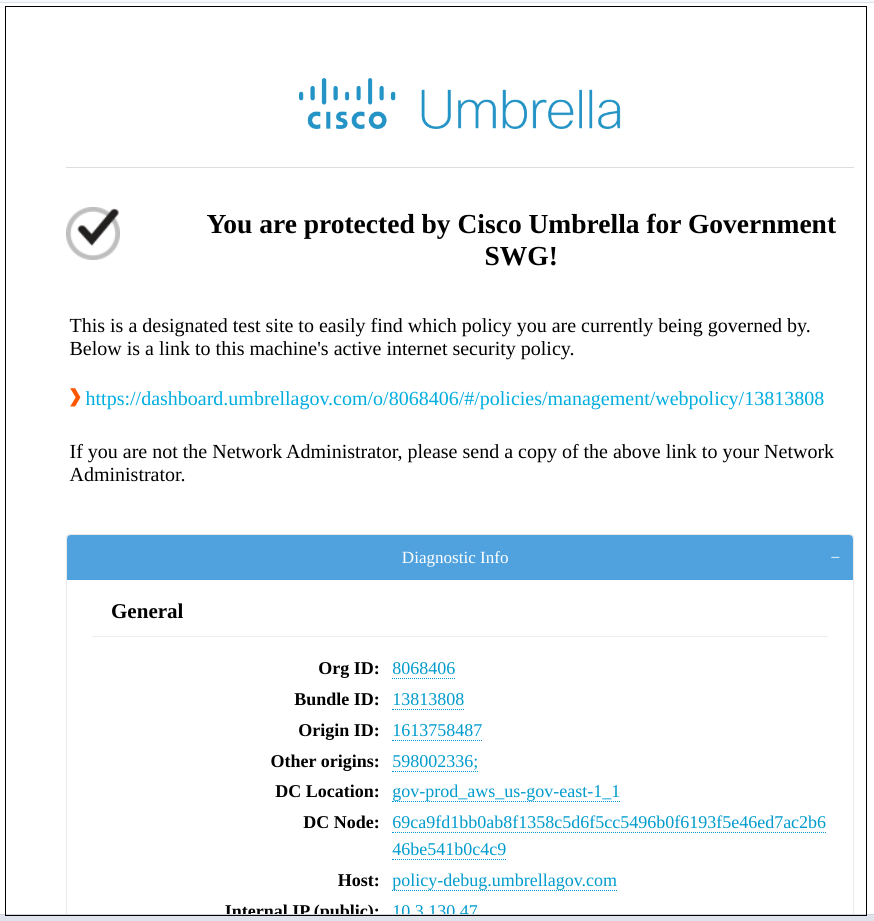
- Access the URL https://policy-debug.umbrellagov.com and verify if the device is being protected by Umbrella. For DNS customers, the “You are protected by Cisco Umbrella DNS!” message is displayed.
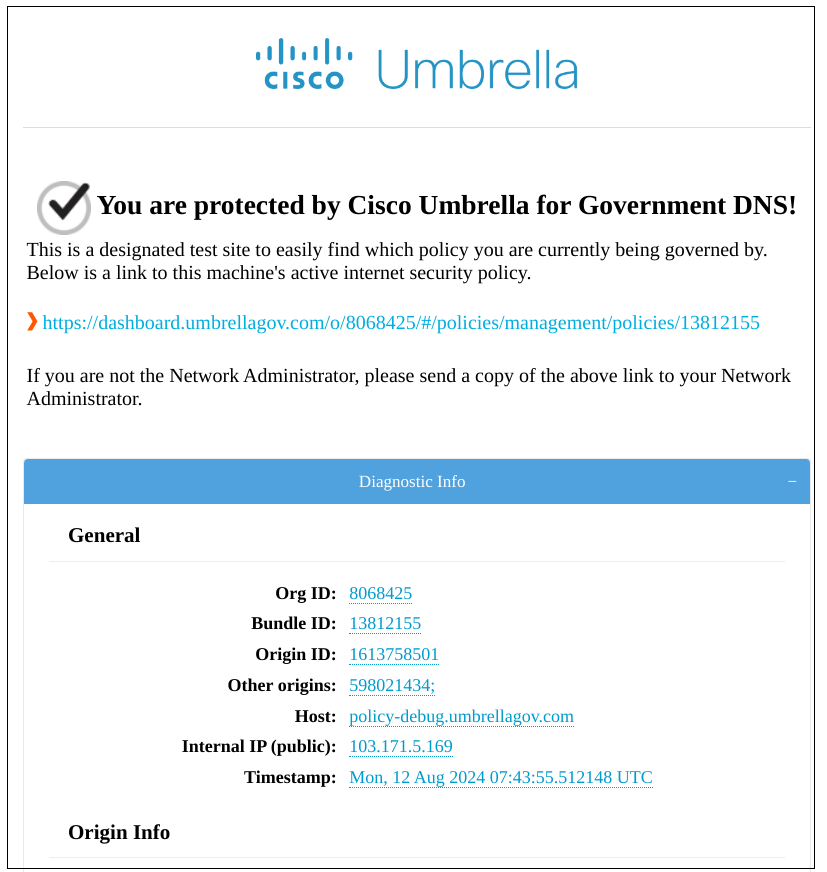
For SIG customers, the “You are protected by Cisco Umbrella SWG!” message is displayed.
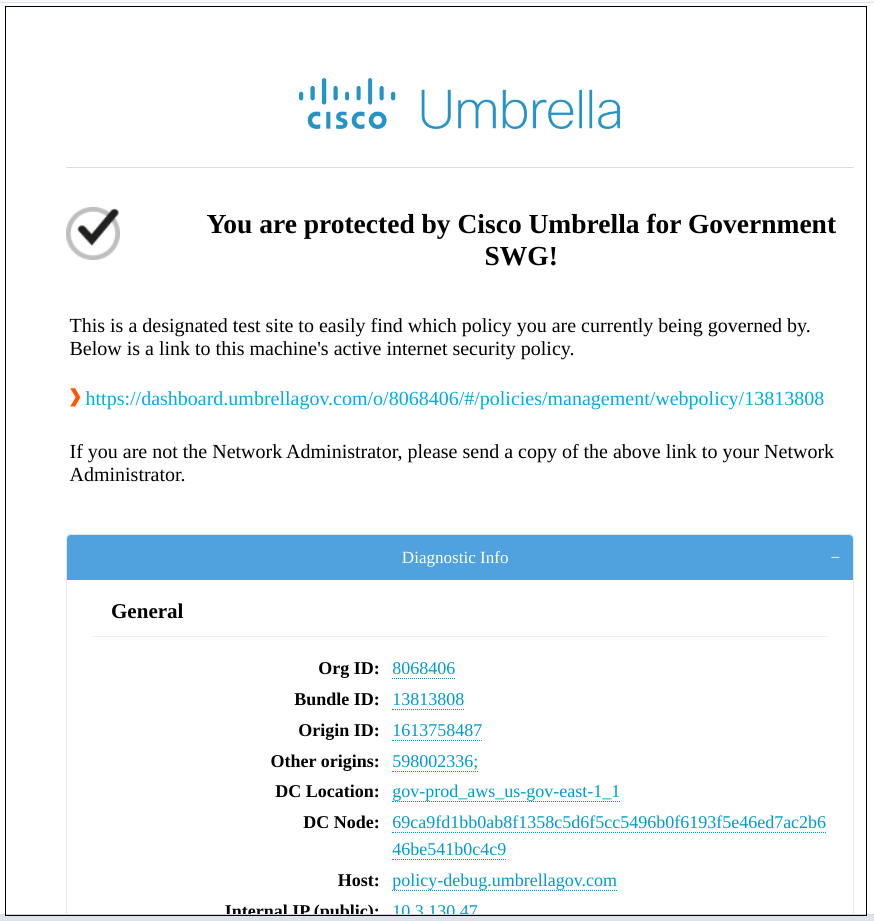
It may take Google up to eight hours to push the Chrome extension to all your Chromebooks. After the client is installed in a Chromebook, allow a few hours for Chromebook traffic to appear on your Umbrella dashboard.
Note
Chromebooks must be connected and logged in.
Configure Managed Guest Session Template
- Log in to the Google Admin console.
- Navigate to Devices > Chrome > Settings > Managed guest session settings.
- Cisco Security for Chromebook is in the process of transitioning from Manifest V2 to Manifest V3 for Chrome extensions. In the meantime, Google recommends that you use the Manifest V2 Extensions Availability policy to ensure the continued functioning of Manifest V2 extensions. To ensure the availability of Manifest V2 extensions, filter the settings for Manifest.
The Manifest V2 Extension Availability setting is displayed.
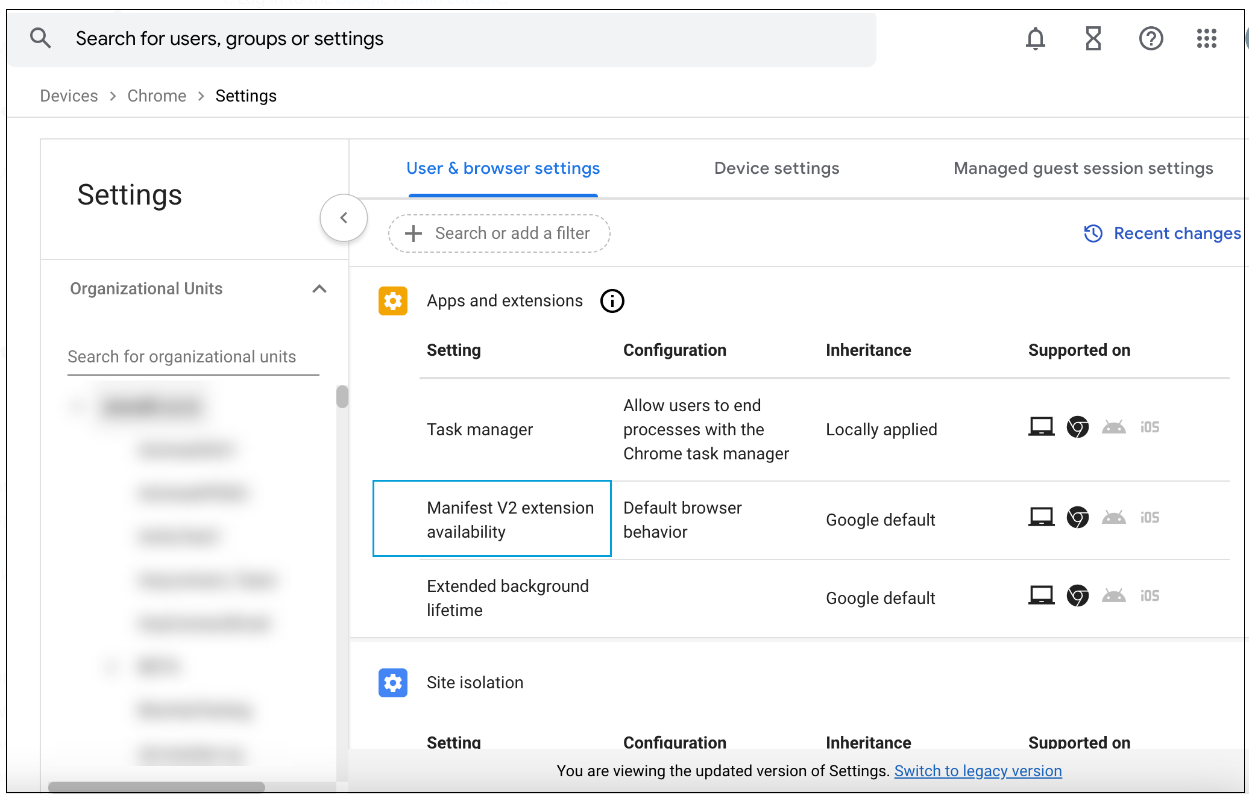
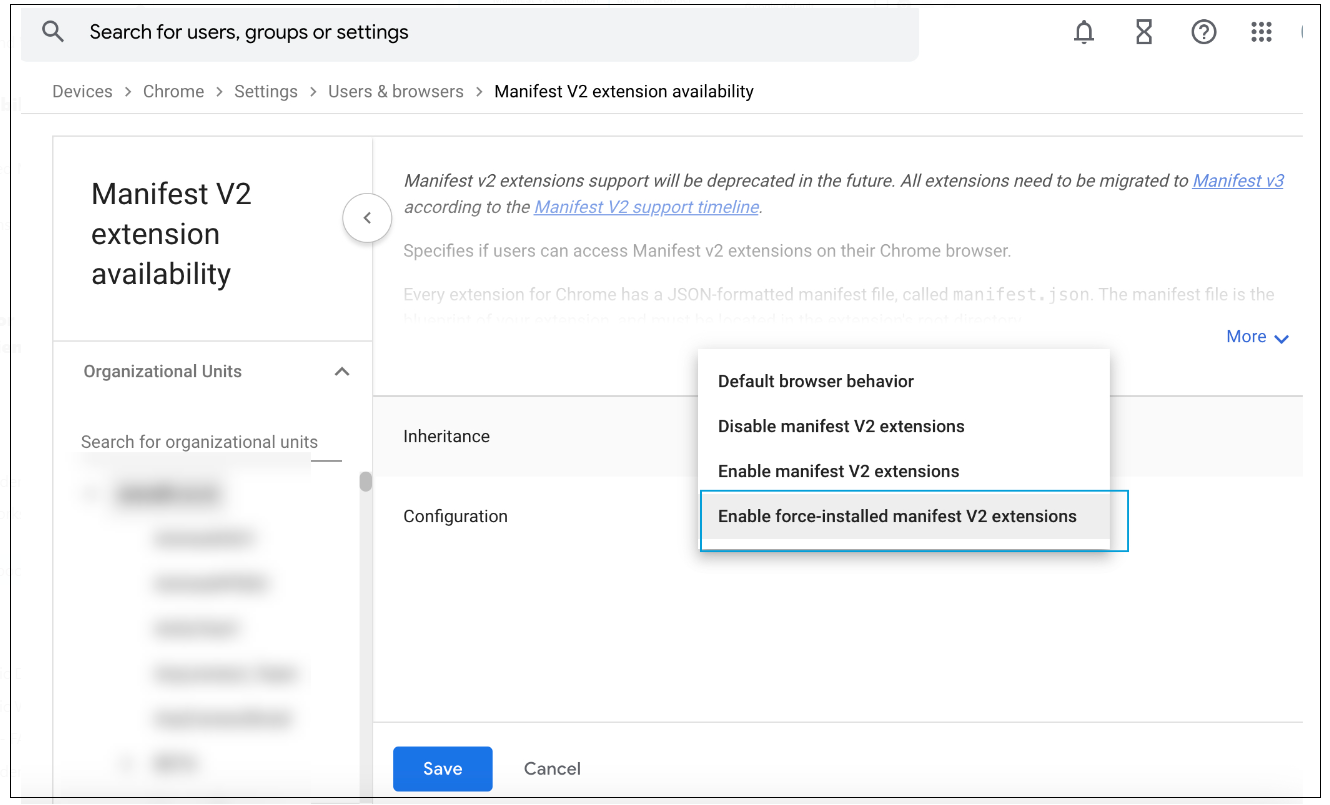
- Select the parent organizational unit on which you want to enable force-installed Manifest V2 extensions. Click Manifest V2 extension availability. From the Default browser behavior drop-down list, choose Enable force-installed Manifest V2 extensions.
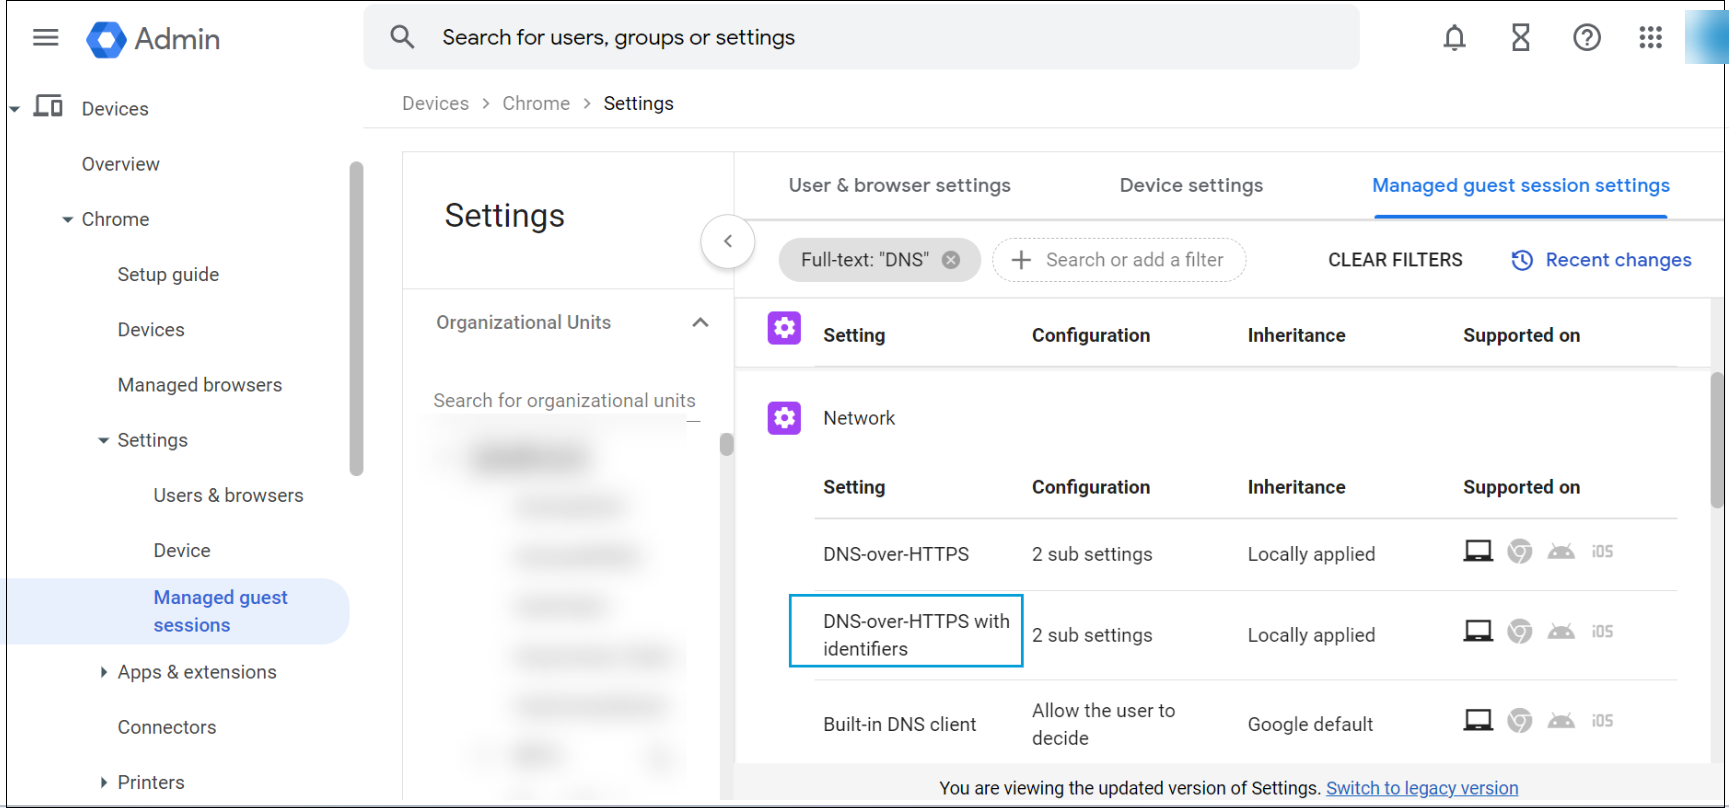
- Filter the settings for DNS.
The DNS settings are displayed.
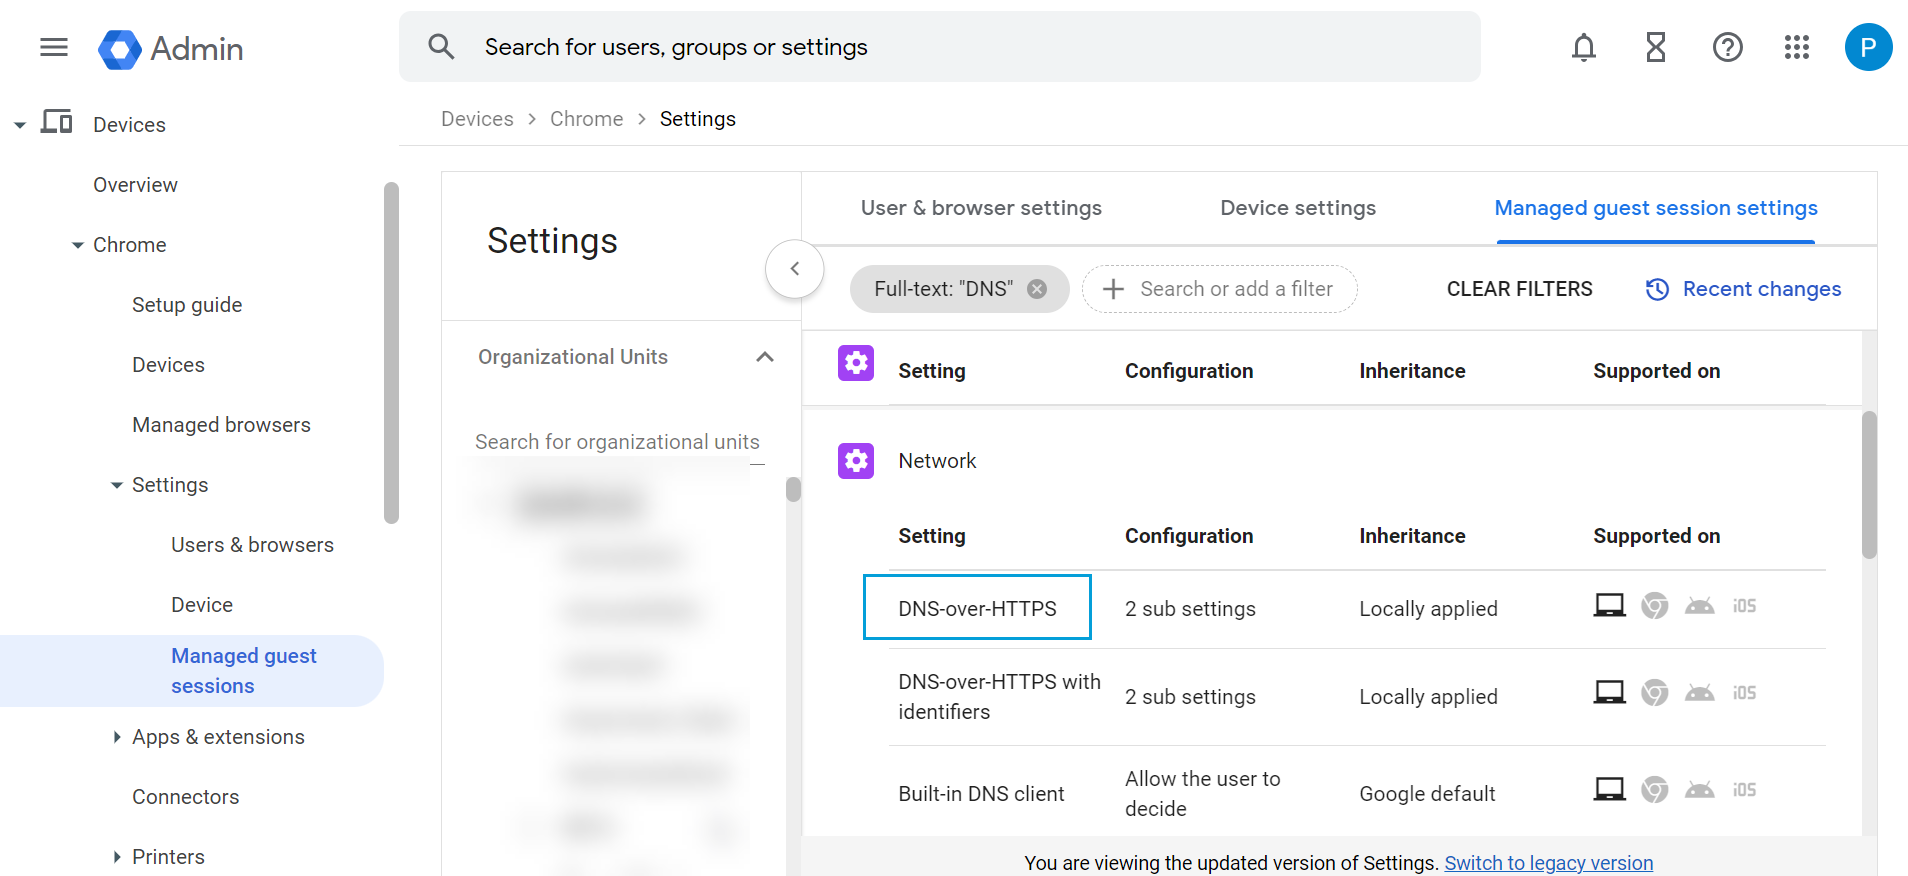
- Click DNS-over-HTTPS and configure it to Enable DNS-over-HTTPS with insecure fallback.
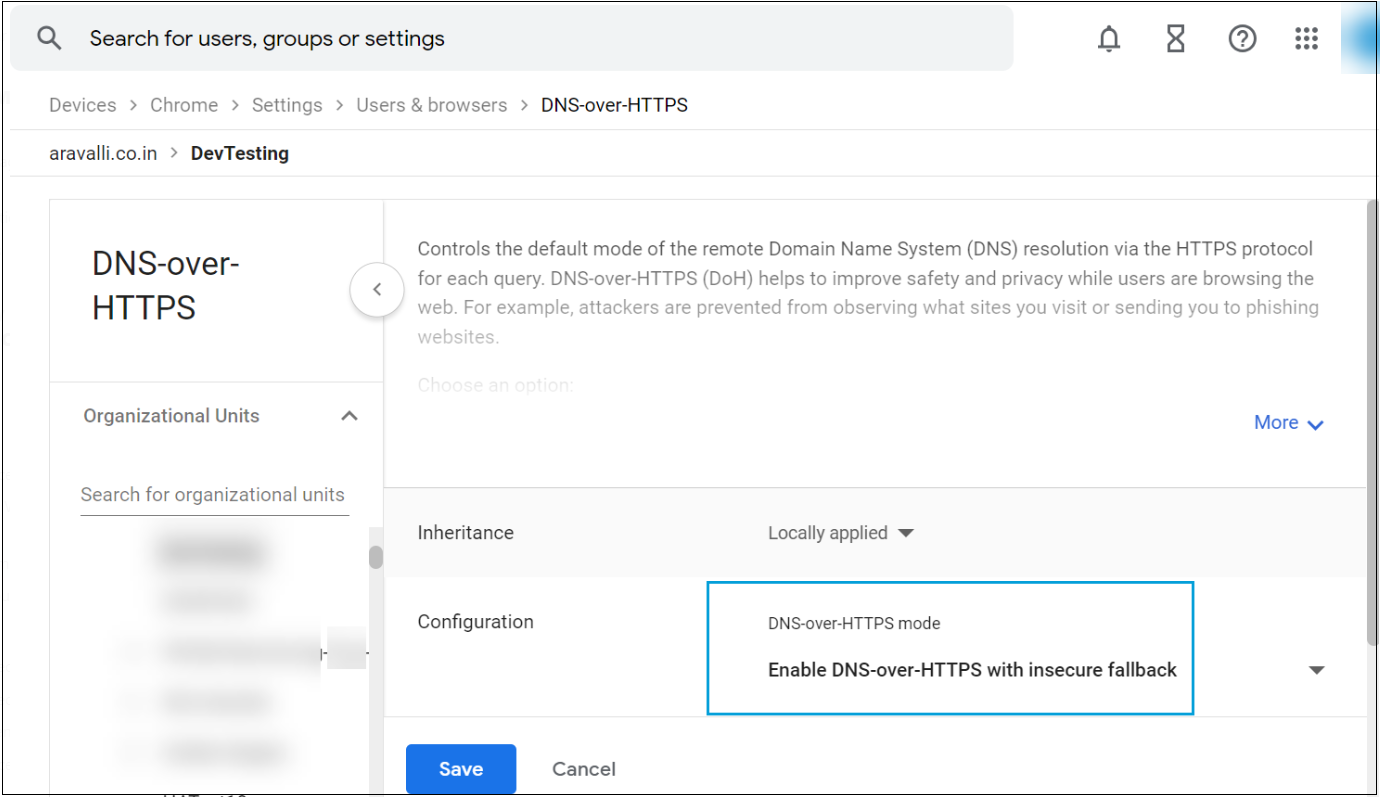
- Return to Managed guest session settings and click DNS-over-HTTPS with Identifiers.
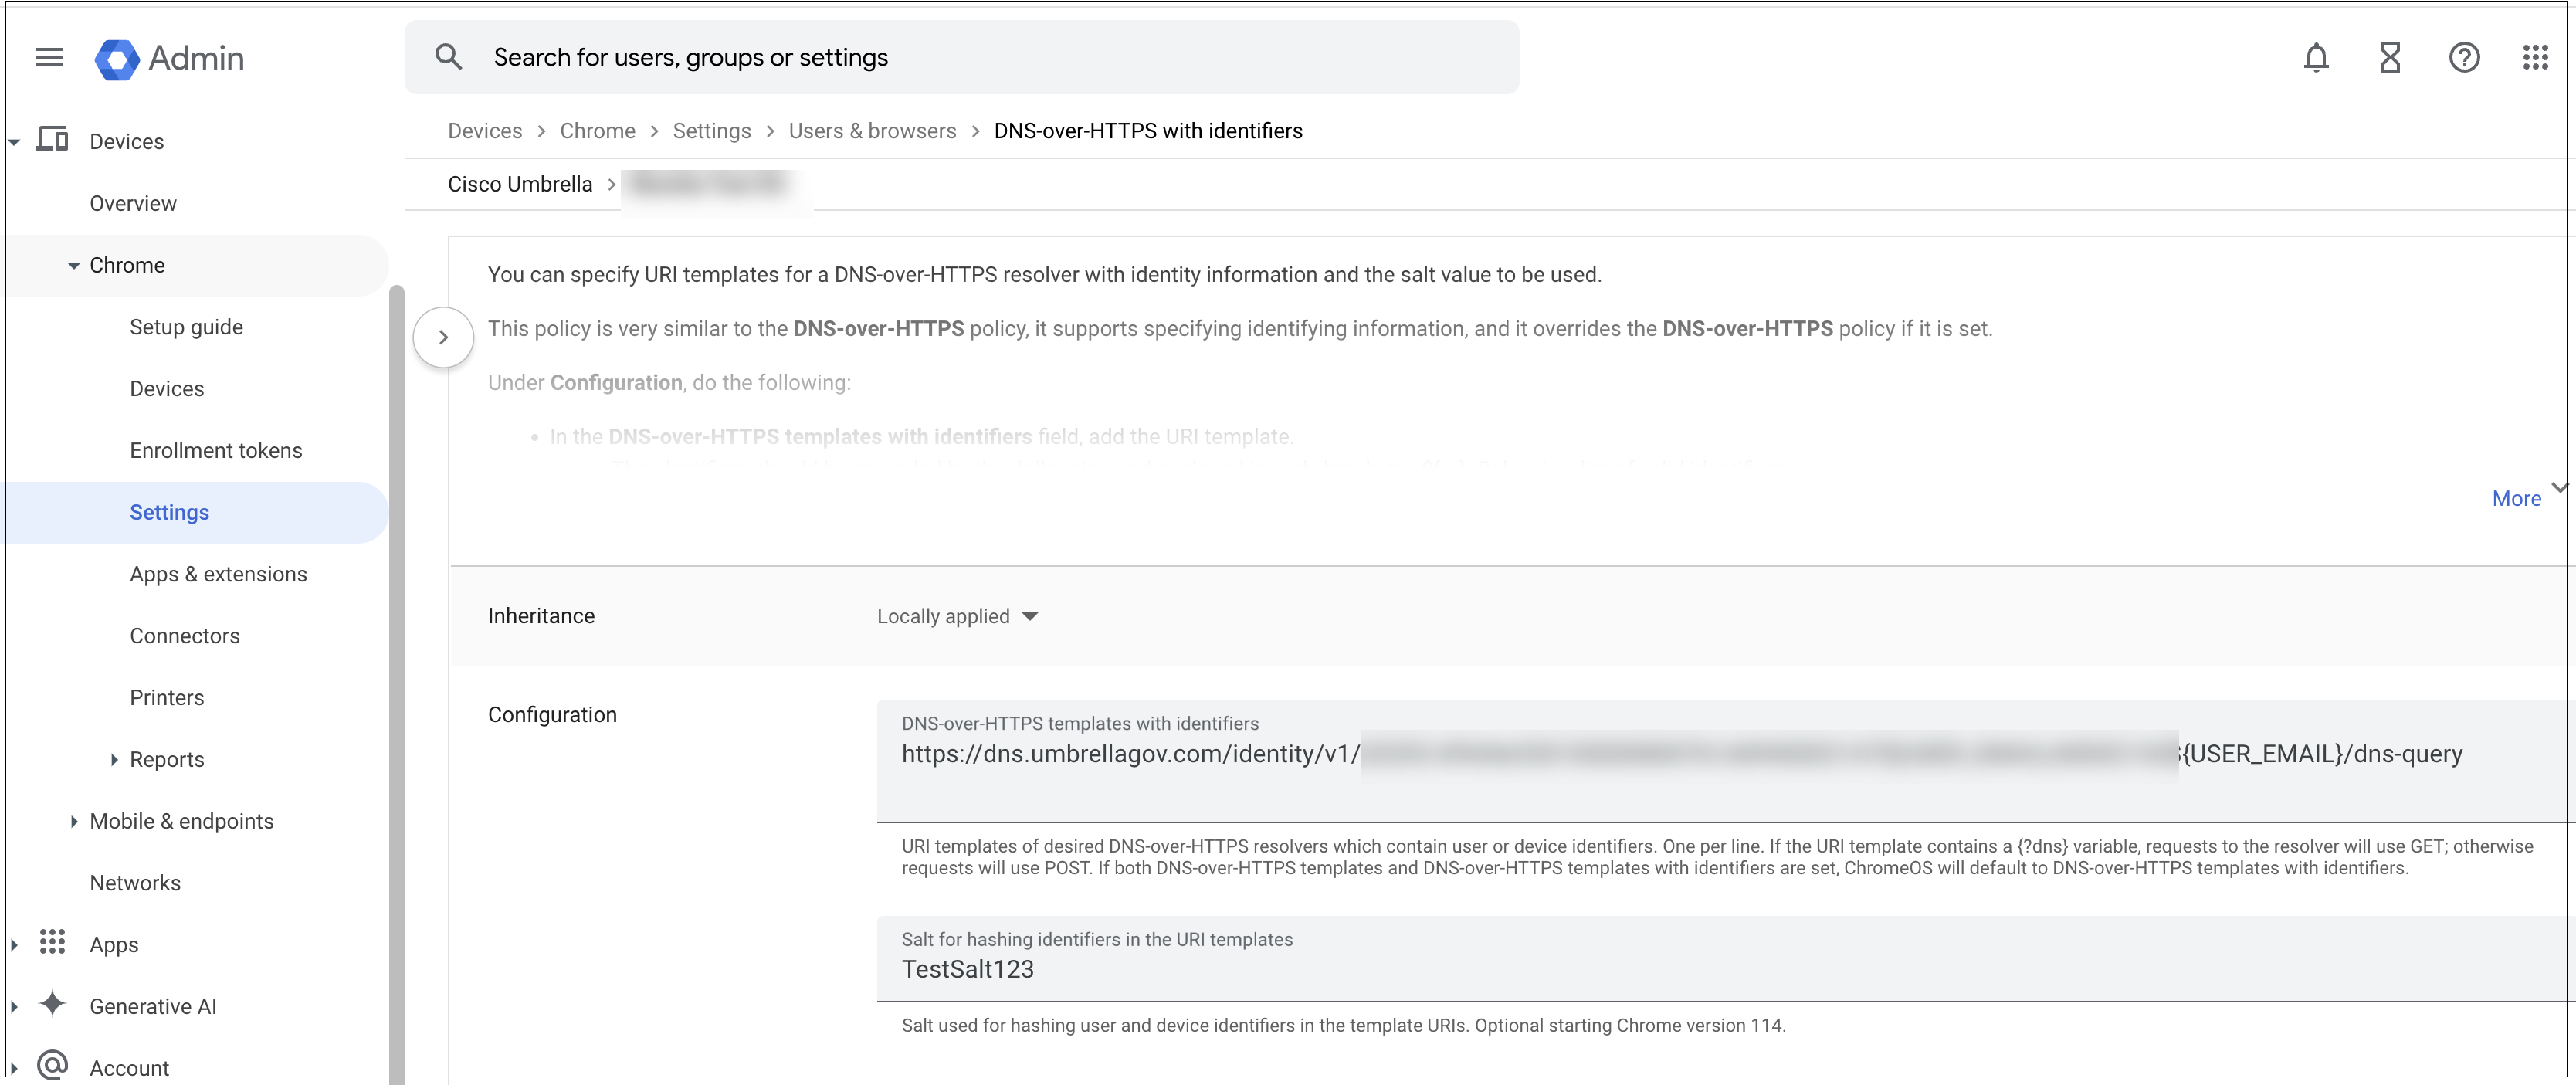
- Enter the URL of the Managed Guest Session DoH template and the salt value copied from the Umbrella dashboard, and click Save.
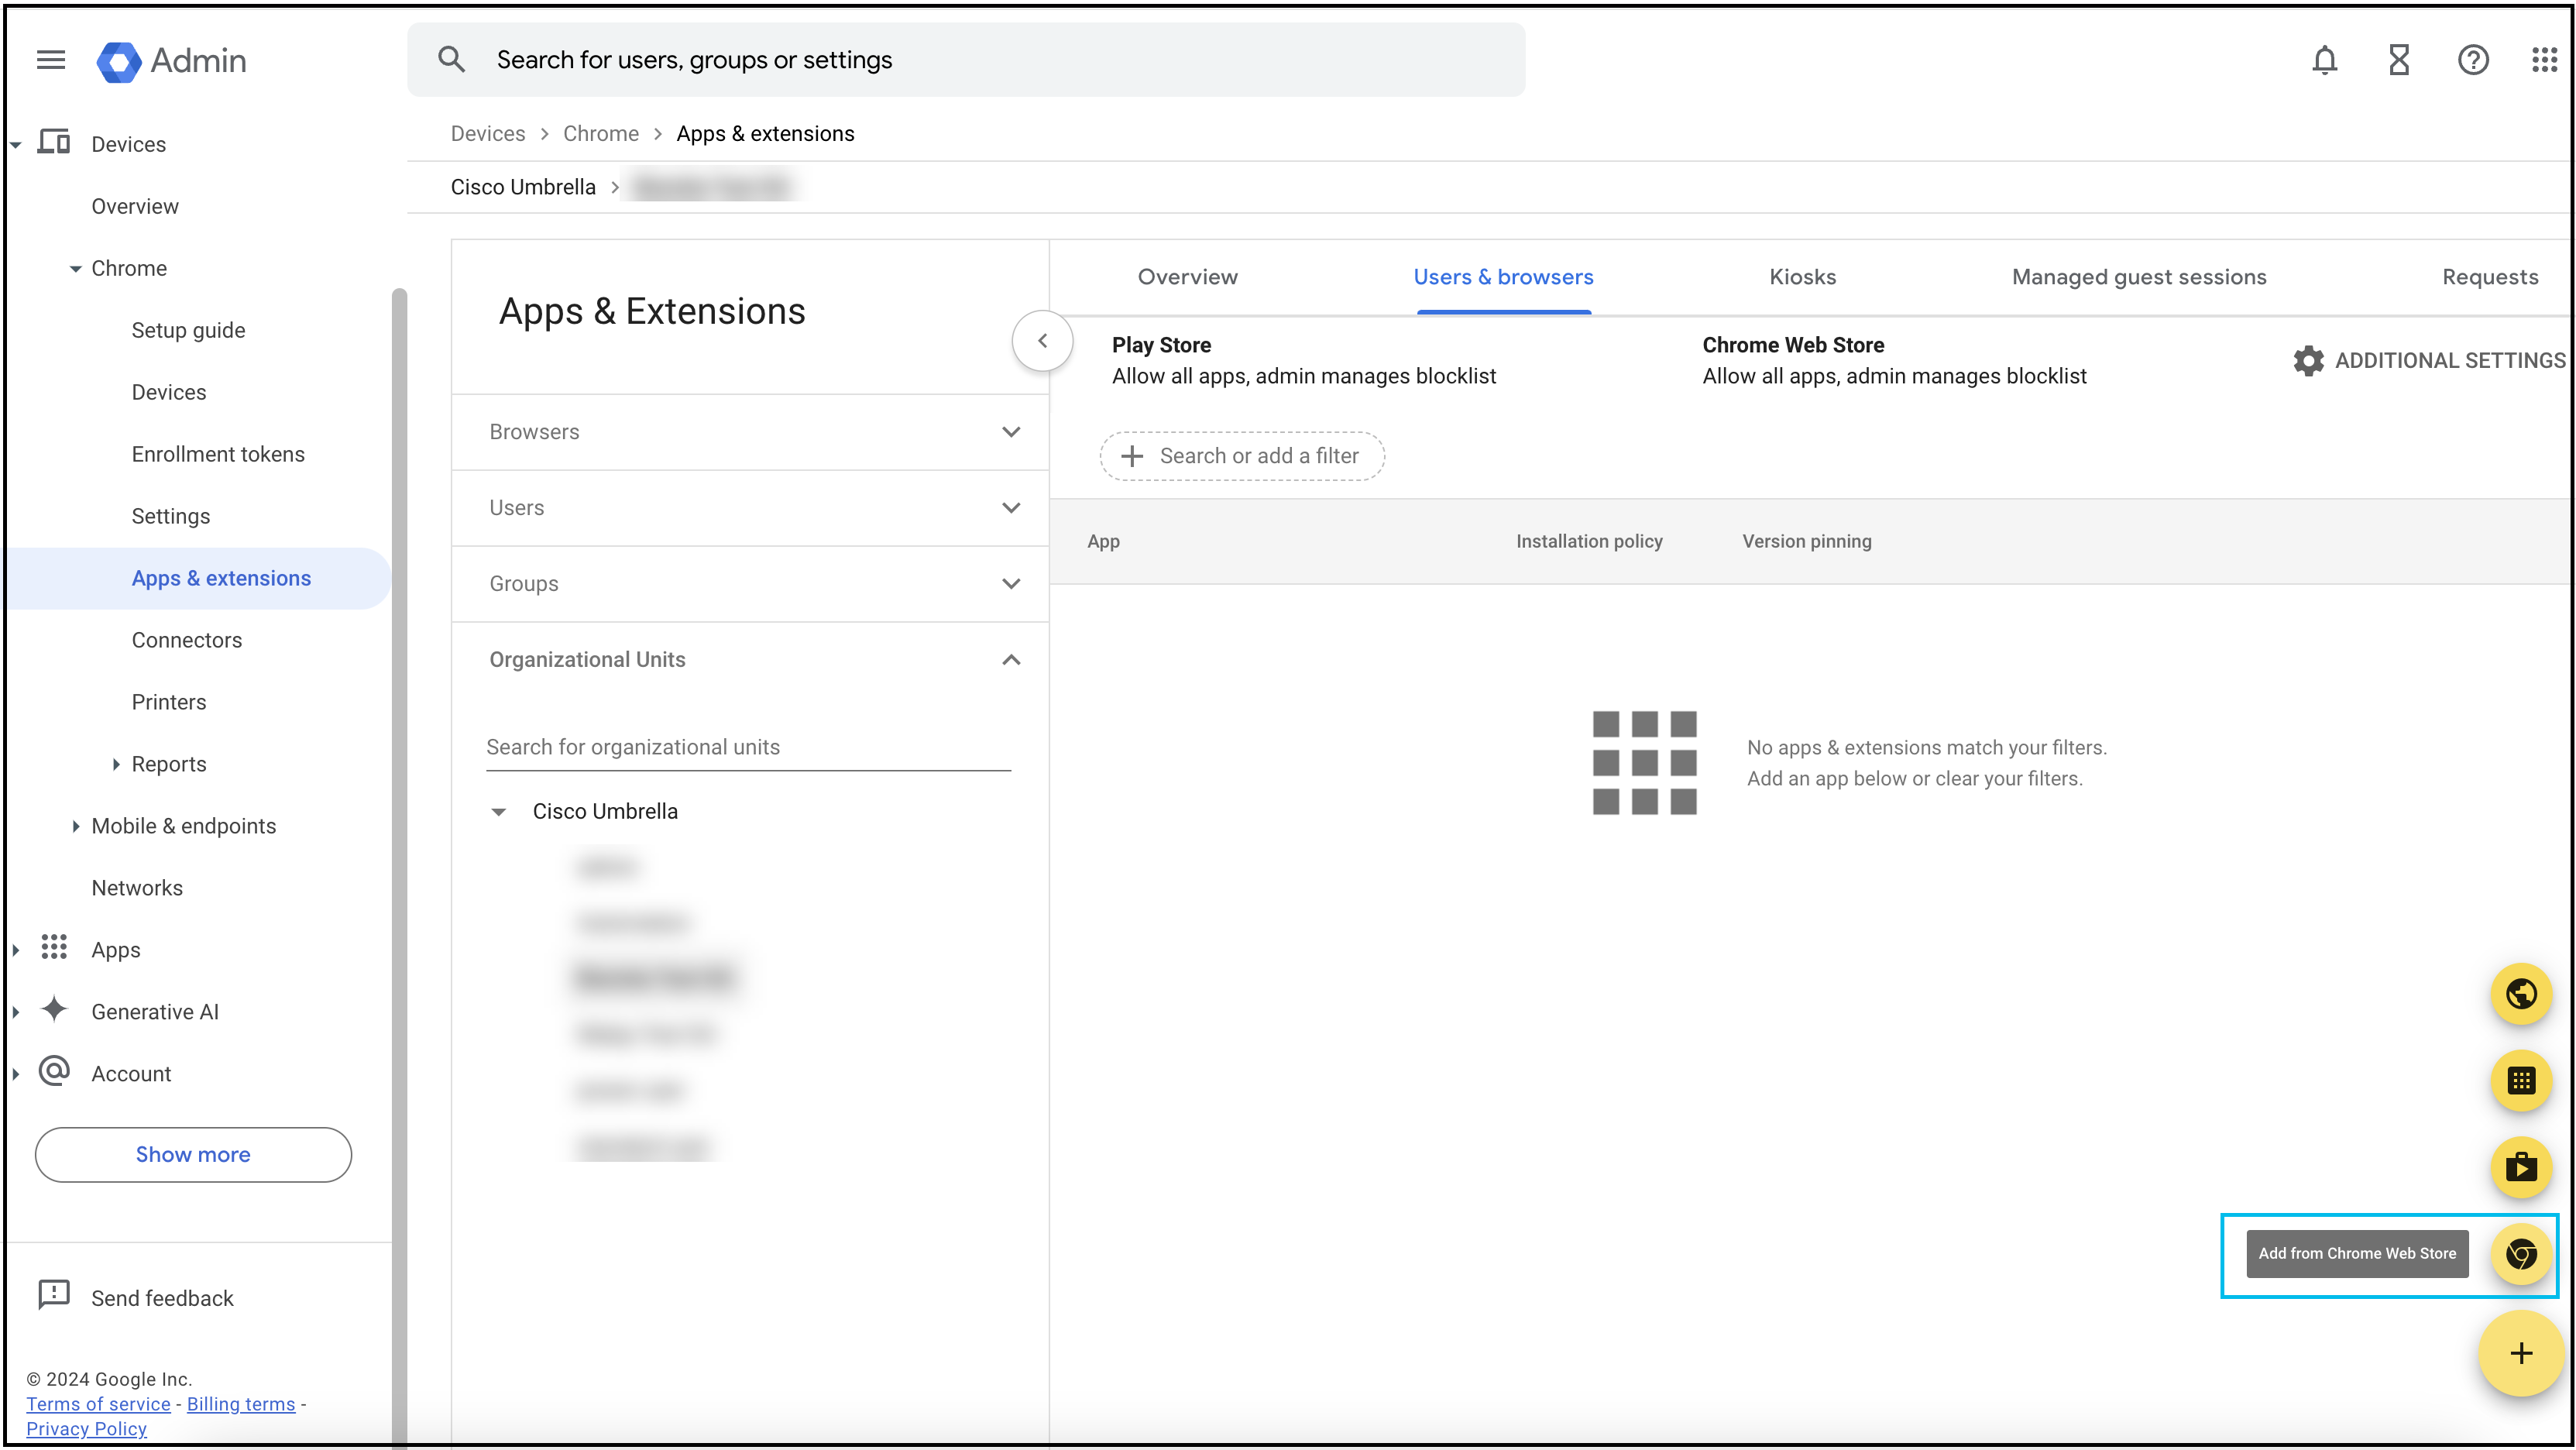
- From Apps & Extensions, navigate to Managed Guest Session > Organizational Units.
- Expand Organizational Units and choose the organization to which you want to deploy Cisco Security for Chromebook client.
Important
If you are an existing Umbrella Chromebook customer and are migrating to the new Cisco Security for Chromebook client, block or delete Cisco Umbrella Chromebook Client (both app and extension) before you install Cisco Security for Chromebook client.
- Click the + (Expand) icon and select Add from Chrome Web Store.
- In the Chrome web Store, navigate to Extensions and search for the Cisco Security for Chromebook client extension using the ID aiaoiippnjfkanmgamnpphpjffaijicm.
- Change the publicSession value to true in the JSON file that you downloaded, and copy the JSON file and paste it into the Policy for Extensions section.
- Choose Force Install and click Save.
The Cisco Security for Chromebook client extension is installed. Force install ensures that Chromebook users in the selected organization unit cannot remove or disable the extension.
Once the configuration is done and pushed to the device, the user will be prompted with a SAML pop-up window to authenticate based on the integrated IDP. For more information, see SAML Configuration. On successful authentication, the device will be registered and protected by Umbrella. If the user fails to authenticate, the prompt will repeat until correct credentials are provided. The user will need to re-authenticate after the IDP authentication expiry limit is reached.
- Open the URL < https://policy-debug.umbrellagov.com> and verify if the device is being protected by Umbrella. For DNS customers, the “You are protected by Cisco Umbrella DNS!” message is displayed.
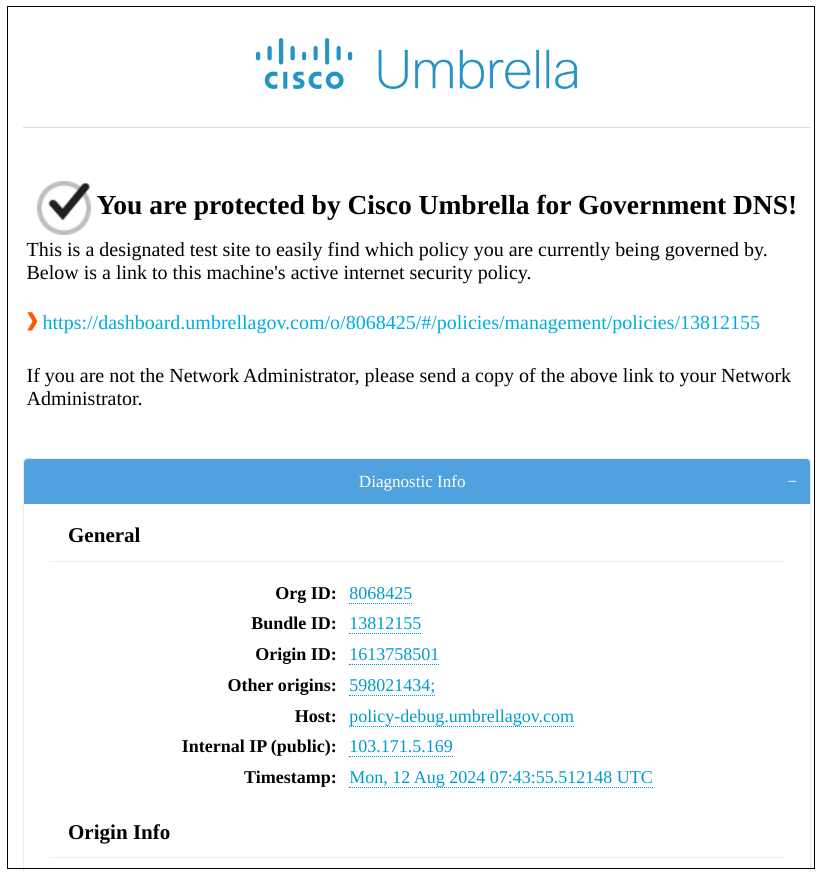
- For SIG customers, the “You are protected by Cisco Umbrella SWG!” message is displayed.
It may take Google up to eight hours to push the Chrome extension to all your Chromebooks. After the client is installed in a Chromebook, allow a few hours for Chromebook traffic to appear on your Umbrella dashboard.
Note
Chromebooks must be connected and logged in.
For information on verifying the deployment and on debugging, see Verify and Debug.
Integrate Google Workspace Identities > Deploy the Chromebook Client >Bypass Internal Domains from DNS-over-HTTPS (DoH)
Updated 9 months ago
