Create and Test a Regex Policy
This is a step-by-step walkthrough of creating a regex policy to monitor occurrences of a (fictional) company’s customer ID numbers in documents and other objects. The customer ID numbers can appear in one of two forms:
- 1 letter and 7 numbers
- 8 numbers
The way to begin, of course, is to create a new Custom Regex policy. Next step is to start creating the regular expression itself.
Procedure
Step 1: Match the first character
The first character of the customer ID can be a letter or a number. To search for a character that might be a letter or a number we can use three basic expressions:
[a-z] matches any lower-case letter
[A-Z] matches any upper-case letter
[0-9] matches any numeric character
Those can be tested individually, and combined as [a-zA-Z0-9]. A simple test shows that this matches upper-case letters, lower-case letters, and digits.
Step 2: Match the next 7 characters
The following 7 characters of the customer ID are digits. The predefined character class \d matches digits, and we can specify exactly 7 by using brackets, like this: \d{7}. When tested, this should match any string of 7 digits, and not a string including any characters other than digits.
Step 3: Combine the expressions
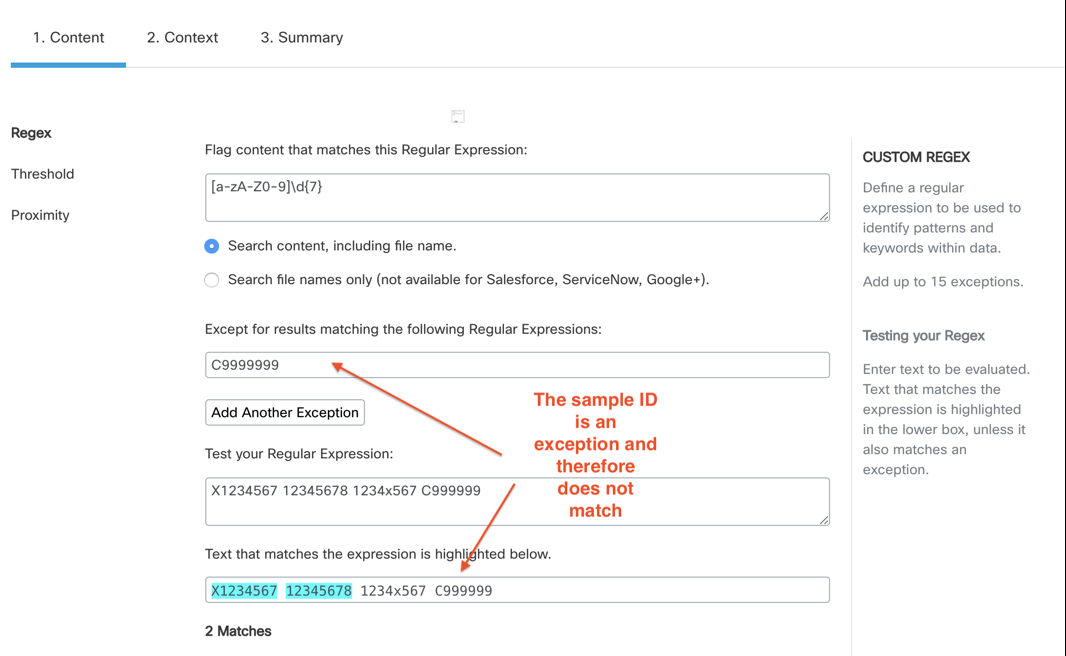
At this point we have two separate expressions: [a-zA-Z0-9] and \d{7}. The goal is to have a single regex, and putting them together couldn’t be easier: [a-zA-Z0-9]\d{7}. Testing the expression shows that it matches the valid customer numbers X1234567 and 12345678, but does not match 1234x567, which is not a valid customer number. This is close to what we need, but it could result in too many matches — documents could easily contain similar strings that have nothing to do with customer numbers.
Step 4: Add a proximity expression
We want to match only the strings that represent actual customer numbers. We’ve created a way to identify strings that have the right format, but we can look for additional clues as well. For instance, the string “Customer Number” or "Customer No.” might be likely to appear somewhere near the number. We can create a proximity expression to find those strings close by the possible customer numbers we locate. The following table shows how the expression could be created, step by step:
| Regex | Results | Notes | |
|---|---|---|---|
| 1 | Customer Number | Matches “Customer Number”, misses “Customer number” | |
| 2 | [Cc]ustomer [Nn]umber | Matches “customer number”, misses “customer no.” | [Cc] matches upper- or lower-case “c” |
| 3 | [Cc]ustomer [Nn]umber|[Cc]ustomer No | Matches “Customer number”, “Customer No”, or “Customer not listed” misses “customer no.” | The vertical bar stands for “or”. |
| 4 | [Cc]ustomer [Nn]umber|[Cc]ustomer [Nn]o. | Matches “Customer number”, “Customer No”, and “customer no.”, misses “Customer not listed” | The dot by itself matches any character, so the backslash is needed. |
Hint
You can also use the regex tester in the policy’s Regex panel to test the proximity expression. Remember to save your regex first!
Step 5: Skip Known Exceptions
Sometimes you know there is a string in the documents you’re monitoring that your regex will match, but does not really represent a problem. Training documents, for example, might include a customer ID that follows the pattern and is close to the string “Customer Number”, but is known as an example. To make sure something like this does not result in an incident, you can add an exception regex to the policy. If your organization’s “example ID” is always “C9999999”, simply add an expression matching that pattern in the policy’s Exception field.

Now you have a policy that can match customer numbers with greater accuracy and avoid matches that are “false positives”. As a final step, you might want to differentiate the significance of a document containing one customer ID as compared to one containing 100 or more.
Step 6: Thresholds and Severity
A document containing one customer ID should trigger an incident, and so should a document containing dozens or hundreds. But you might not want the severity of those incidents to be the same. You can create incidents with different severity by using the Threshold value. To do so, follow these steps:
- Copy your regex and proximity expression into a second policy.
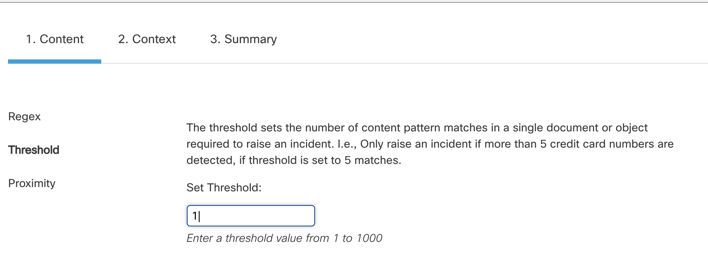
- In the original policy, set the threshold to 1, and set the Severity to “Alert”.

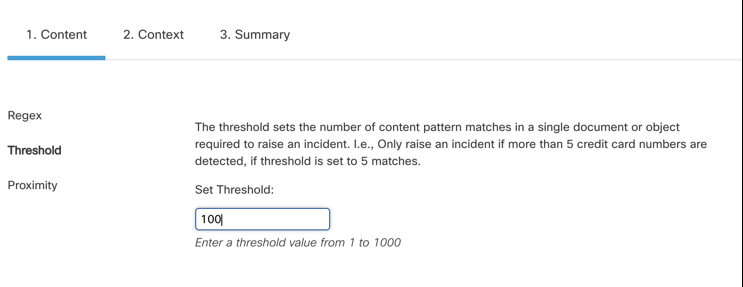
3.In the second policy, set the threshold to 100 (or a value you choose), and set the Severity of that policy to “Critical”.

With these two policies, a document containing a large number of customer IDs generates a Critical incident, while a single ID still generates an incident, but at the lower Alert level. (The document with multiple IDs will actually trigger two incidents, because the Alert-level policy will still result in a match.)
Updated over 3 years ago
