Manage Roles
Table of Contents
Available Roles
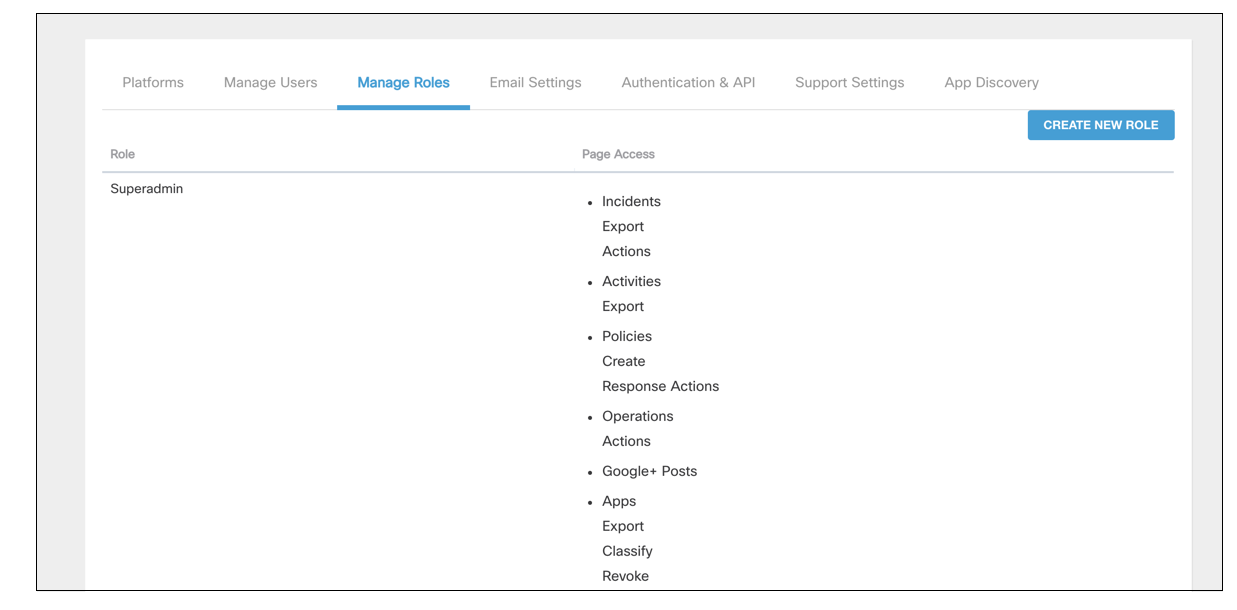
Cloudlock provides many predefined roles with specific access to pages depending on the role:
Superadmin
- Incidents—Export, Actions
- Activities—Export
- Policies—Create, Response Actions
- Operations—Actions
- Apps—Export, Classify, Revoke
- Search—Export, Actions, Modify
- Audit—Export
- Settings—Manage Users, Grant Superadmin, Authentication & API, Platform, Manage Roles, Integration, Selective Encryption, Email Settings, SAML Settings
Read-Only
- Incidents—Read-only
- Activities—Read-only
- Policies—Read-only
- Operations—Read-only
- Apps—Read-only
- Search—Read-only
- Settings—Read-only: Manage Users, Authentication & API, Platform, Manage Roles, Integration, Email Settings, Support Settings
The Read-Only role is not available for all customers. Please see your customer support manager for more information.
Policy Manager
- Incidents—Export, Actions
- Activities—Export
- Policies—Create, Response Actions
- Apps—Export, Classify, Revoke
Configuration Manager
- Settings—Manage Users, Authentication & API, Platform, Manage Roles, Integration, Selective Encryption, Email Settings,
Auditor
- Audit—Export
Operations Manager
- Incidents—Export, Actions
- Activities—Export
- Operations—Actions
- Apps—Export, Classify, Revoke
- Search—Export, Actions, Modify
Incident Manager
- Incidents—Export, Actions
- Activities—Export
- Apps—Export, Classify, Revoke
Administrator
- Incidents—Export, Actions
- Activities—Export
- Policies—Create, Response Actions
- Operations—Actions
- Apps—Export, Classify, Revoke
- Search—Export, Actions, Modify
- Audit—Export
Developer
- Settings—Integration
Create or Edit a Role
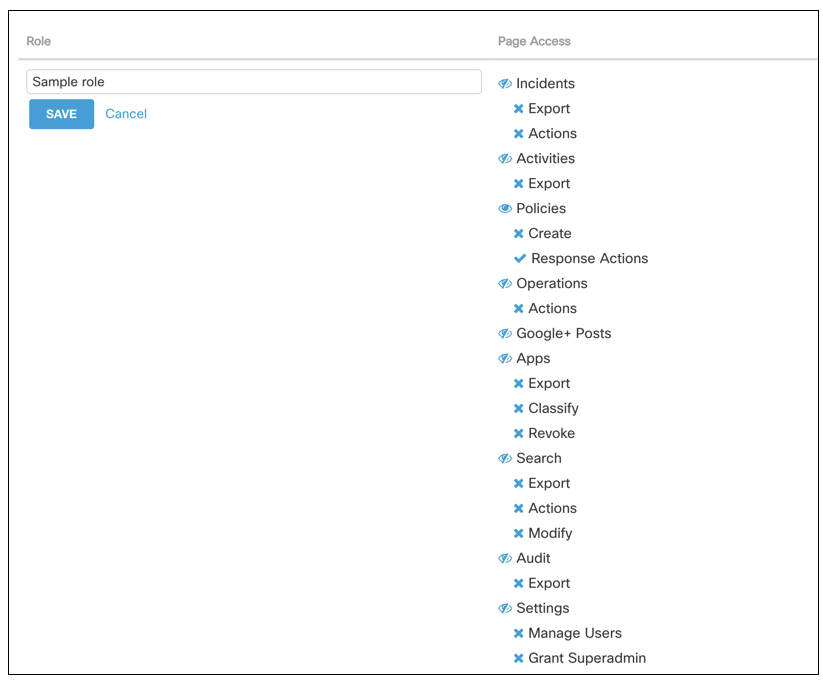
In addition to the roles provided by Cloudlock, you have the ability to add new customized roles.
To add a role"
- Select Create New Role and provide a name for your role. Alternatively, to edit a role click Edit under the role name.

- Use the eye icon to give "view only" access and the checkmarks to enable or disable sections of a page for access.
- Select Save to save the role.

Updated about 2 years ago
