
Webex as a new Platform
Prerequisites
General Prerequisites
- An account either in Webex, Google, O365, Dropbox, Box, or Okta to log into Cisco Cloudlock.
- To enable the installation process, temporarily disable the private browsing modes, and pop-up and ad blockers in your browser - If you see the message "An error occurred while activating the platform," ensure that you are not using the Firefox "private browsing mode", and that any pop-up or ad blockers have been turned off;
Webex Prerequisites
- Full Administrator Privileges in Webex Messaging, and the Compliance Officer role.
Exceptions for Block External Communication Policy
- By default, the Block External communication is turned off to notify the admin or the user . If you have not turned it off, you need to allow the Bot ID for the Bot that is used for the RA.
Bot Allowed listing
Procedure
- Go to Webex Admin Hub, click the Management tab
- Under Management, select Apps.
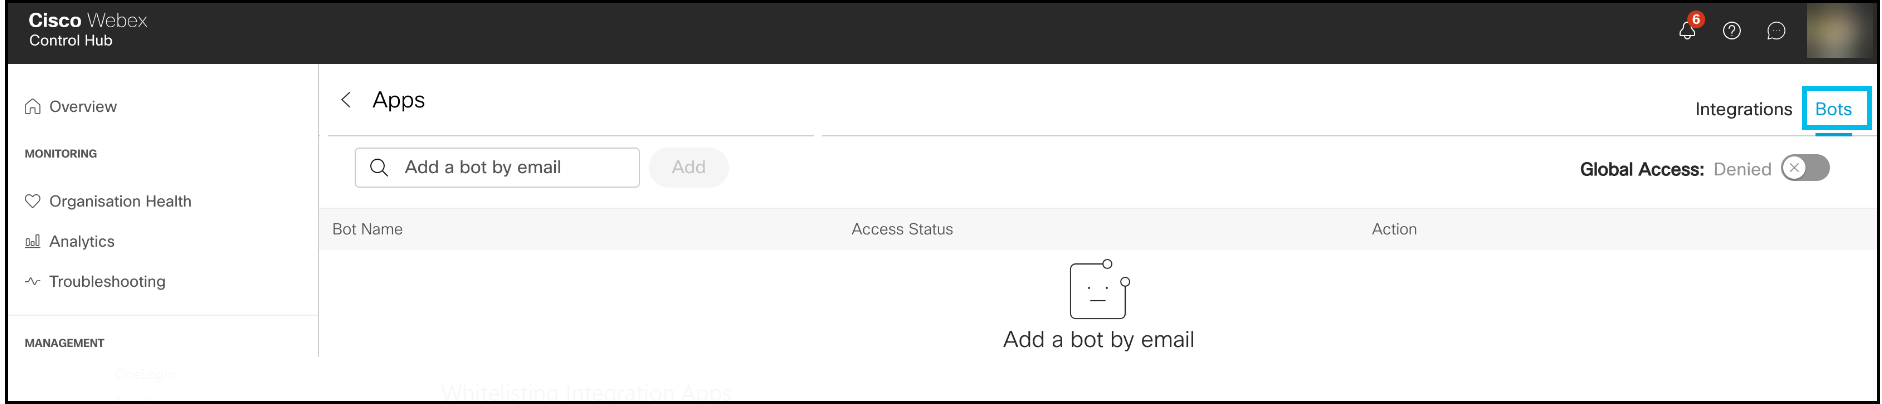
- On the Apps page, click Bots [Integrations and Bots options are on the top right corner].
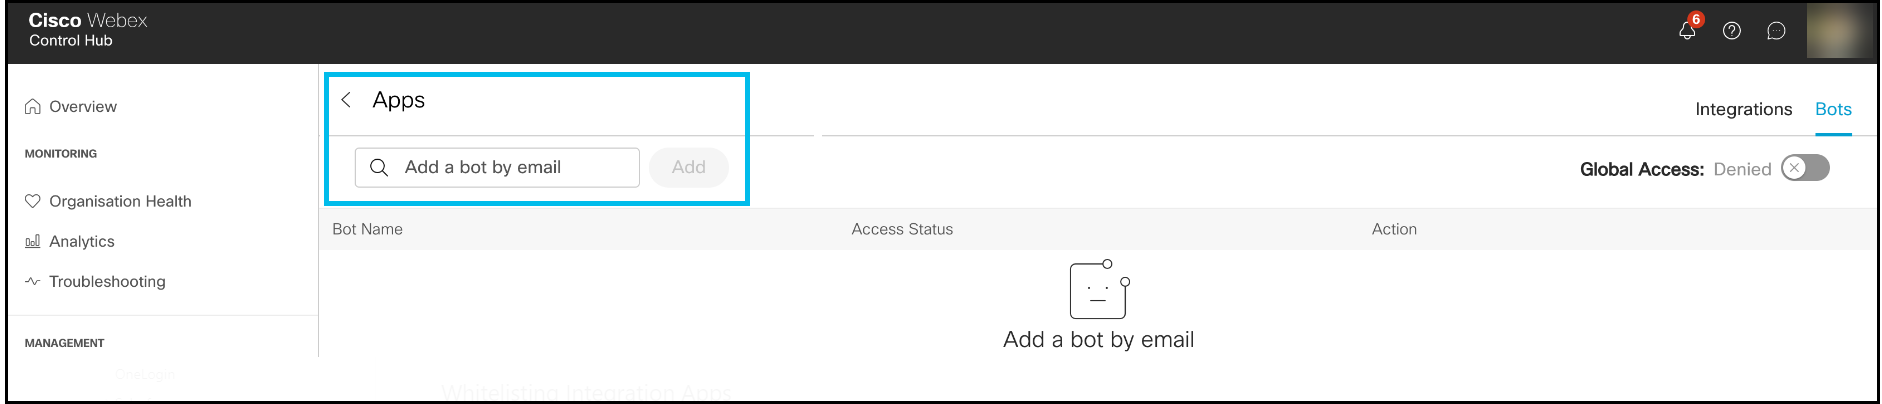
- Add the email in the Add a bot by email field for the bot to be allowed list.
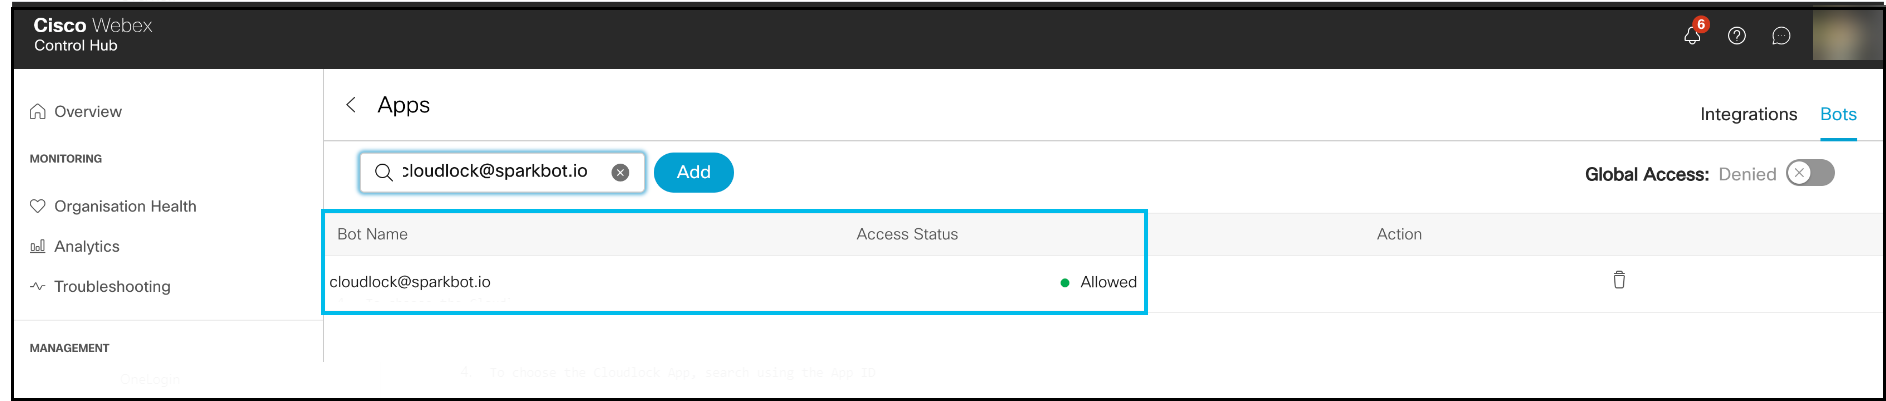
- Type the bot email [email protected] and click Add to make it allowed list.
Bot email
Allowed Listing Integration Apps
For the Cloudlock Webex integration to work, you need to authorize the Integration app using your Webex Account. For this, allow list the Integration App ID:
Integration App ID
Y2lzY29zcGFyazovL3VzL0FQUExJQ0FUSU9OL0NiOTgxN2M2MGE5YjhiZTJkMmNlZWI4ZWQyO
WI3YmQzOTQ2Y2Y4ZGEyYjc5NmQ0MjIzODc4YmYxMmRiYWFjZmI3
Procedure
- Go to Webex Admin Hub, click the Management tab
- Under Management, select Apps.
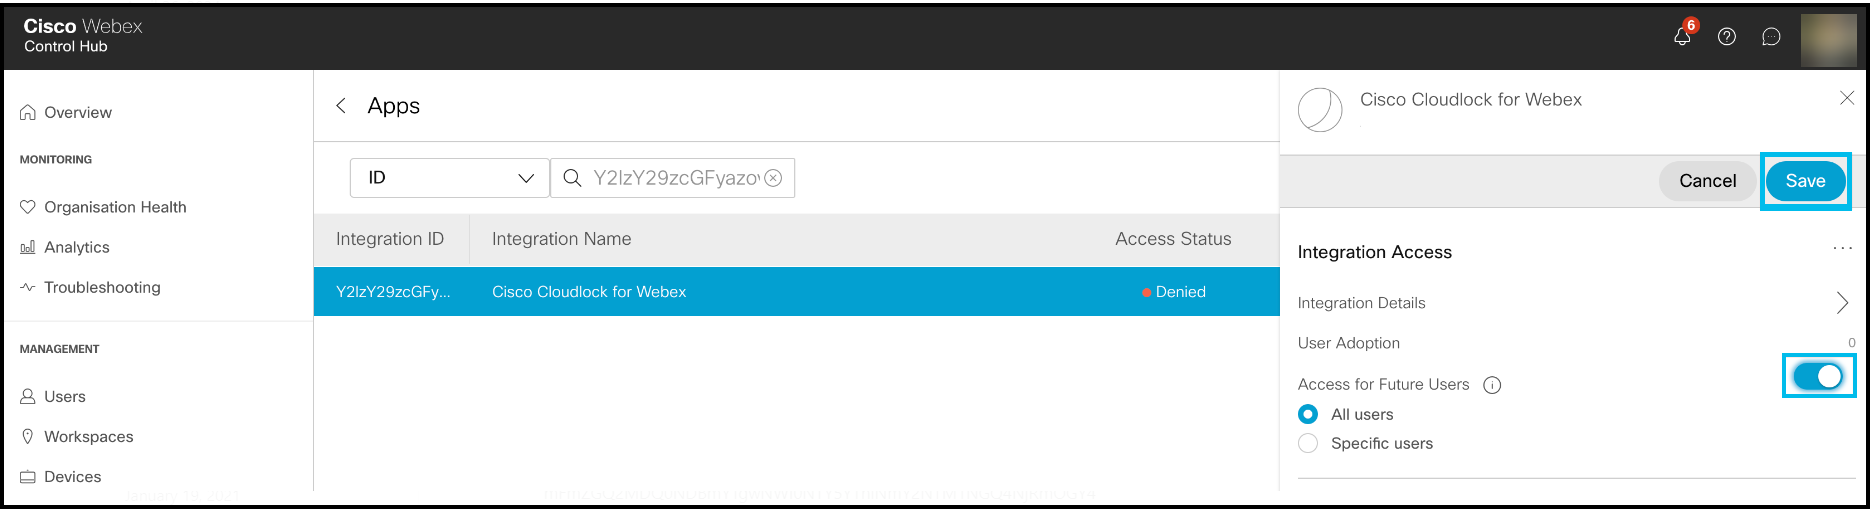
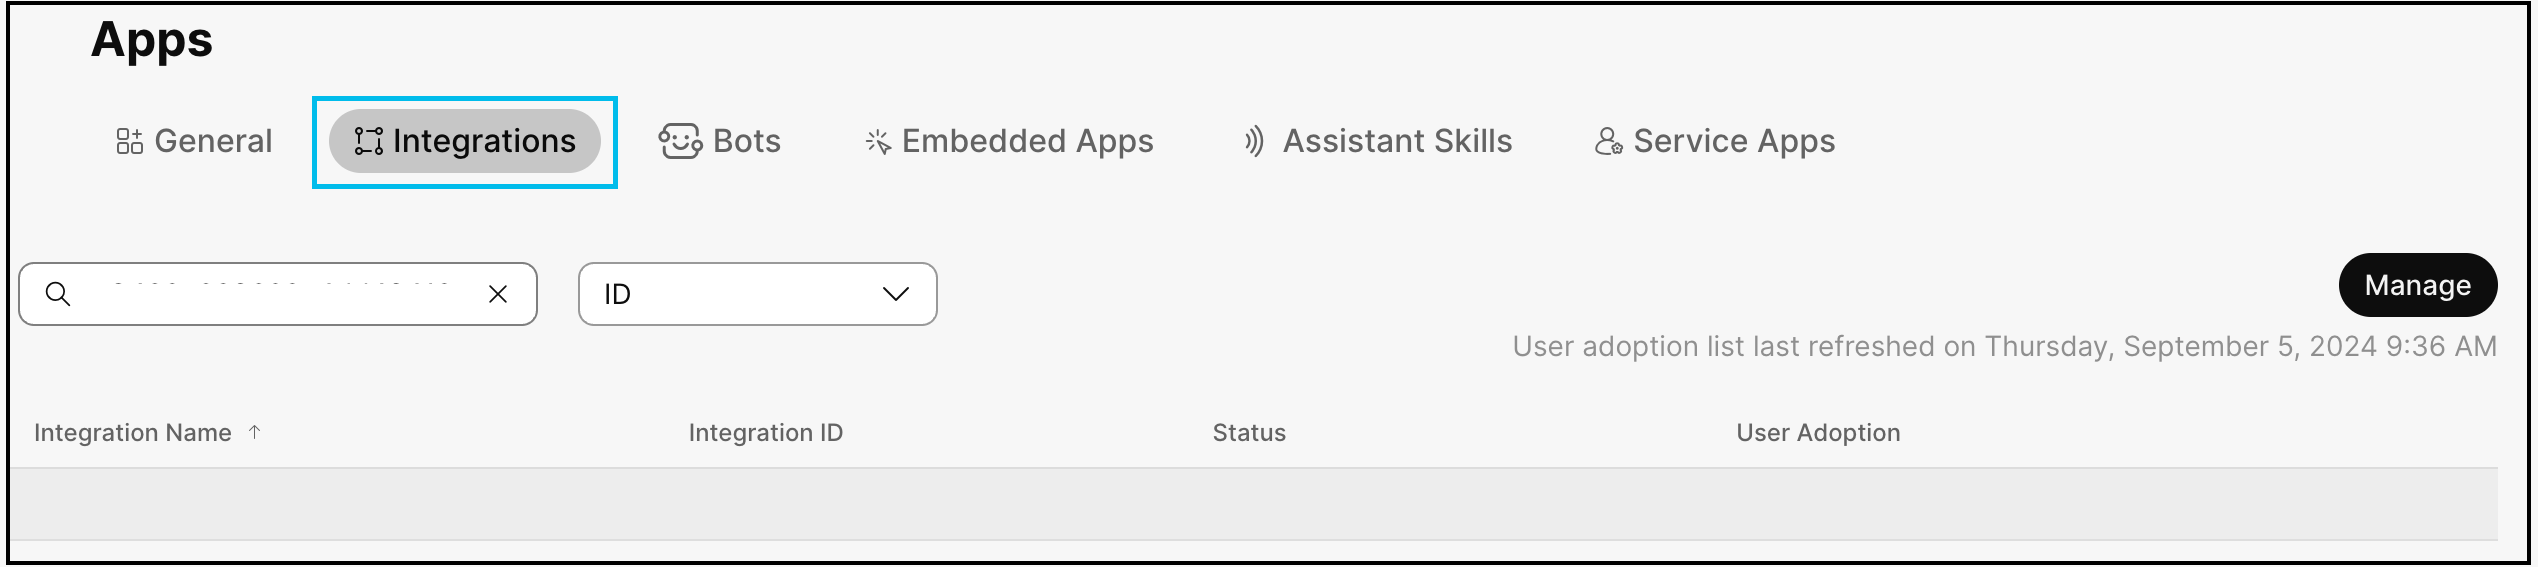
- On the Apps page, click Integrations [Integrations and Bots options are on the top-right corner].

- To choose the Cloudlock App, search using the App ID.

- To enable integration access for users, go to Integration Access > Access for Future Users, and check the For all users option.
- Click Save.
Gatekeeper App
When accessing the Cloudlock application, you have the option to authenticate using your Webex account. For this, allow list the Gatekeeper App ID:
Gatekeeper App ID
Y2lzY29zcGFyazovL3VzL0FQUExJQ0FUSU9OL0NkM2EwMjU3NWNjZDc3NmU1YzJiY2Y3YjNiZ
mFmZGQ2MDQ0NDBmYTgwNWI0NTY5YThiNmY2NTM1NGQ4NjRmOGY4
Procedure
- Go to Webex Admin Hub, click the Management tab.
- Under Management, select Apps.
- On the Apps page, click on Integrations [Integrations and Bots options are on the top-right corner].
- Choose the Cloudlock App, search using the App ID.
- To enable integration access for users, go to Integration Access > Access for Future Users, and check the For all users option.
- Click Save.
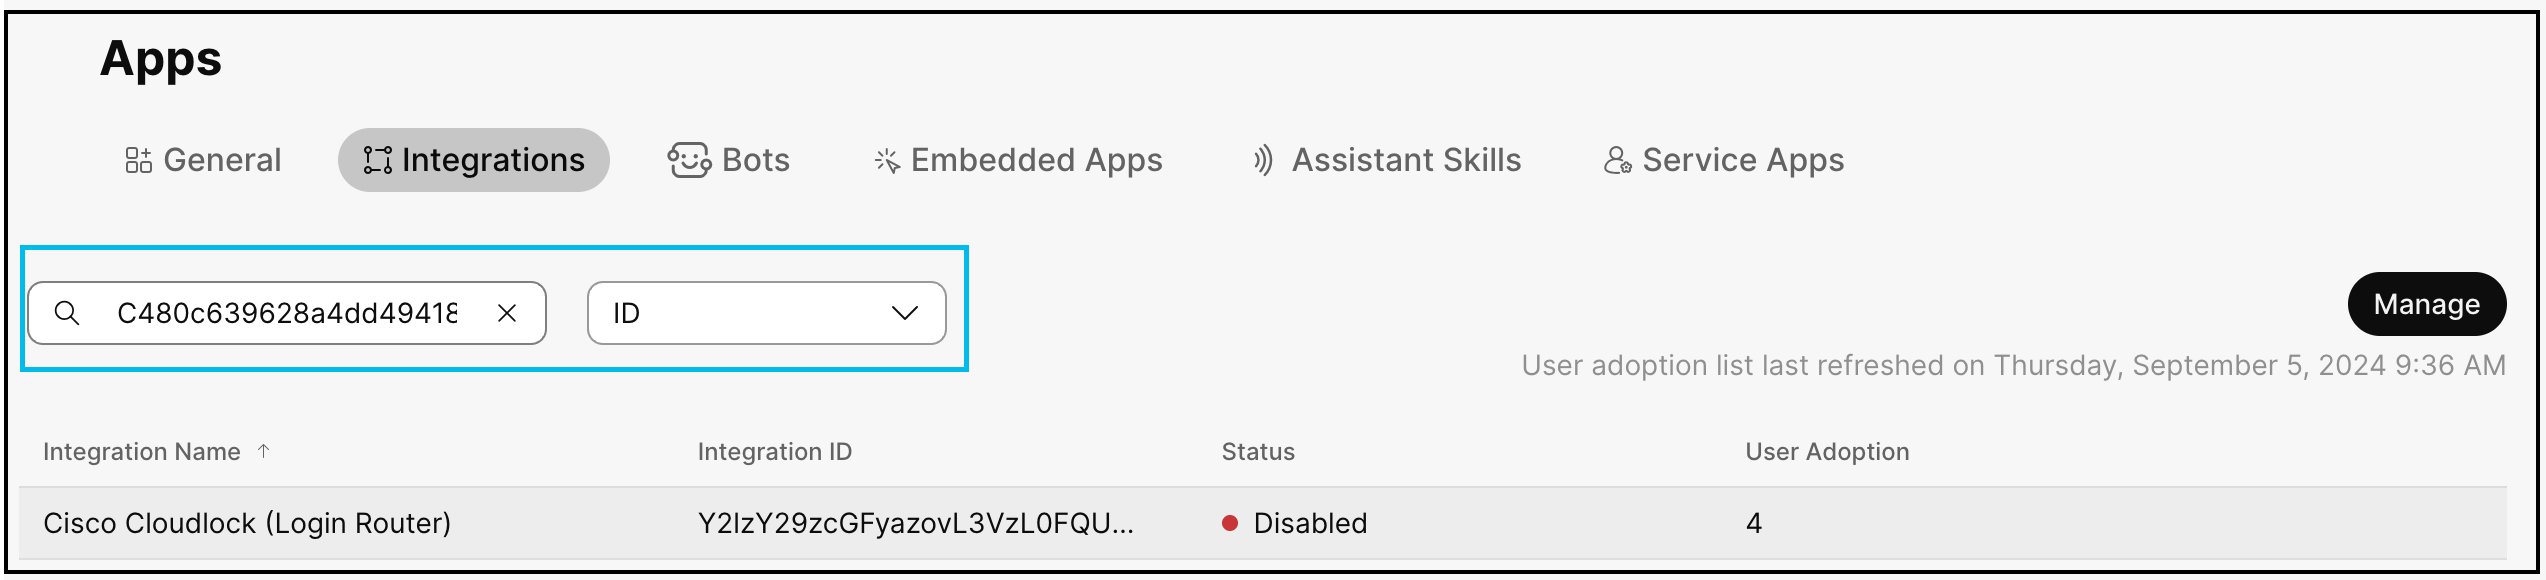
Cisco Cloudlock (Login Router)
When accessing the Cloudlock application, you have the option to authenticate using your Webex account. For this, allow list the Cisco Cloudlock (Login Router) ID:
Integration ID
Y2lzY29zcGFyazovL3VzL0FQUExJQ0FUSU9OL0M0ODBjNjM5NjI4YTRkZDQ5NDE4MjQ5MzhmZGIwNTMyODY4YTQ2N2VmZTU0MjZjNjFkYjE4YmRmZjc0MGUyMjQ5
Procedure
- Go to Webex Admin Hub, click the Management tab.
- Under Management, select Apps.
- On the Apps page, click on Integrations .
- Choose the Cloudlock App, search using the App ID.
- To enable integration access for users, go to Integration Access > Access for Future Users, and check the For all users option.
- Click Save.
Setup Data Classifications for Spaces
To setup Space classifications, follow these instructions, see Data Classifications for Spaces in Webex App.
Set Up Webex as a New Platform in Cloudlock
- Open the Settings > Platforms tab.
- Under the Actions column of the Webex platform, click Edit.

- To enable DLP, under the Configure Platform window, select either or both the platforms:
- Webex Messaging (Teams)
- Webex Meetings
- Click Authorize.

- If your browser does not contain information about active authorized session for Webex Messaging (Teams) , Webex Meetings, or both, you are redirected to the login screen.
- Enter Webex credentials for a user with Full Administrator Privilegesin Webex, and the Compliance Officer role.
The following authorization window displays if Webex Messaging (Teams) alone is selected during authorization.

- To authorize the Cloudlock application, click Accept.
The following window displays if both Webex Messaging (Teams) and Webex Meetings are selected during authorization.
![]()
- To authorize the Cloudlock application, click Accept.
When you see the Success message, you have finished setting up Webex as a new platform in Cloudlock.
Permissions Window
If this authorization was previously granted with Only ask when requesting new permissions selected, this permissions window does not appear.
Updated about 1 year ago