Deploy the Chromebook Client
The Cisco Umbrella Chromebook client provides Umbrella's DNS layer protection to Chromebook users. After you deploy the Umbrella Chromebook client to your Chromebooks, you can view your Chromebooks as identities in a policy. Your Chromebooks are immediately protected by the default DNS policy. At any time, you can add your own policies and customize your Chromebooks' protections. For more information, see Add a Chromebook Specific Policy.
Table of Contents
Prerequisites
- G Suite admin account
- Umbrella login credentials
- Chromebooks with ChromeOS v55 or later
- Chromebooks are not in Kiosk mode
- Port 53 UDP accessible to 208.67.220.220 and 208.67.222.222
- https://registration.polaris.qq.opendns.com is accessible
- Chromebooks must be connected and logged in
- Cisco Umbrella root certificate installed — To avoid certificate errors when accessing an Umbrella block page, you must install the Cisco Umbrella root certificate on your Chromebooks. See Install the Cisco Umbrella Root Certificate.
For more information about how to push the Umbrella root certificate from Google's admin console to all of your Chromebook devices, see Set up TLS (or SSL) inspection on Chrome devices. - In the G Suite Admin console, disallow the incognito window. From the Incognito mode menu, choose Disallow incognito mode. For more information, search for Incognito Mode in Chrome Enterprise and Education Help.
Trusted Network Detection
If you are implementing trusted network detection (TND), we recommend that your DHCP server provides Chromebook devices with the same virtual appliance (VA) IP address as other devices on your network. For more information, see Enable Trusted Network Detection.
Procedure
Deploying the Umbrella Chromebook client is a multi-step process:
- Step 1: Download Umbrella Chromebook Configuration
- Step 2: Install the Cisco Umbrella Chromebook Client Extension
- Step 3: Install the Cisco Umbrella Chromebook Client Application
The JSON file downloaded from Umbrella during this procedure contains information required by the Umbrella Chromebook client so that it can operate with Umbrella. Information held within this file is required to access the Cisco Umbrella Chromebook client through Google's Chrome Web Store. During the deployment process, the Chromebook client config file is uploaded to Google, which is then able to push the Umbrella Chromebook client to all of your Chromebooks. After the client is installed in a Chromebook, allow a few hours for Chromebook traffic to begin appearing in your Umbrella dashboard.
Step 1: Download Umbrella Chromebook Configuration
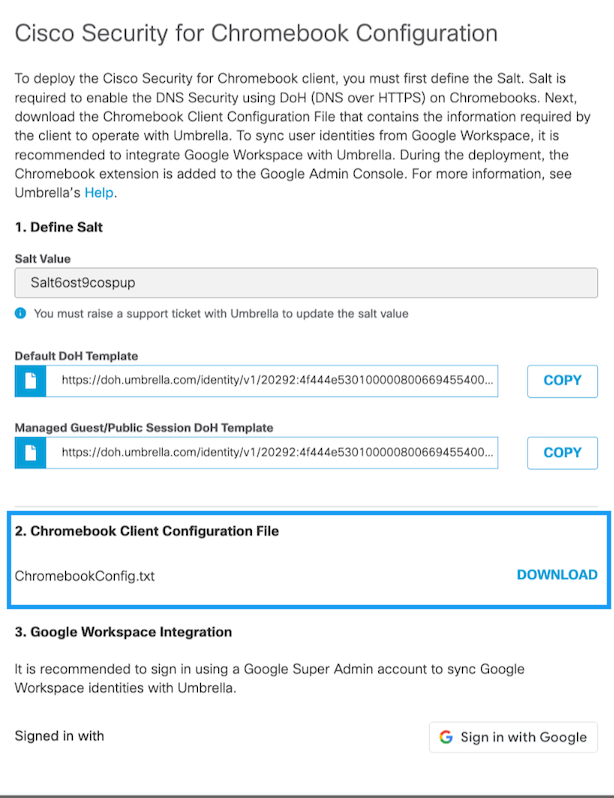
- Navigate to Deployments > Core Identities > Chromebook Users and click Configure.

- Click Download and download the configuration file.
Note: Save this file to a known location. The regToken value listed in this file is required during the installation of the Cisco Umbrella Chromebook client application.
{"failClose":{"Value":false},"failOpenRetryInterval":{"Value":5},"googleDirectoryService":{"Value":false},"organizationInfo":{"Value":{"organizationId":<ORG-ID>,”productId":3,"regToken”:”<REG-TOKEN>”}},”publicSession":{"Value":false},"vaIPs":{"Value":[]}}
- (Optional) Integrate the G Suite Identity Service with the Umbrella Chromebook client. For more information, see Integrate the G Suite Identity Service.
- (Optional) Set up trusted network detection (TND). To use the Umbrella Chromebook client in a network with Umbrella virtual appliances (VAs), you must add the IP addresses of your VAs in the Umbrella Chromebook configuration file before uploading it. For more information, see Enable Trusted Network Detection.
Step 2: Install the Cisco Umbrella Chromebook Client Extension
You cannot deploy the Umbrella Chromebook client directly to your Chromebooks. You must deploy the client from the Google Admin console.
- Log into the Google Admin console.

- Navigate to Devices > Chrome > Apps & Extensions > Overview.
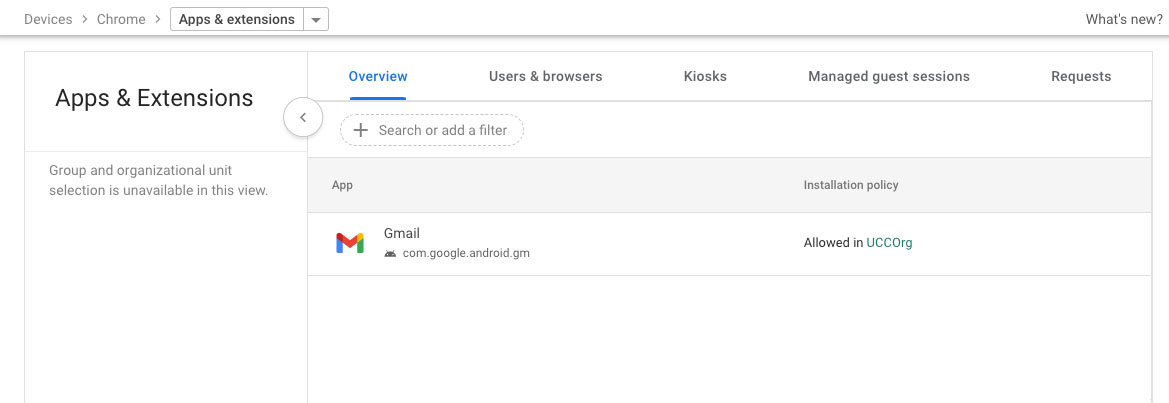
- From Apps & Extensions, navigate to Users & browsers > Organizational Units.

- Expand Organizational Units and choose the organization in which you want to deploy the Umbrella Chromebook client.
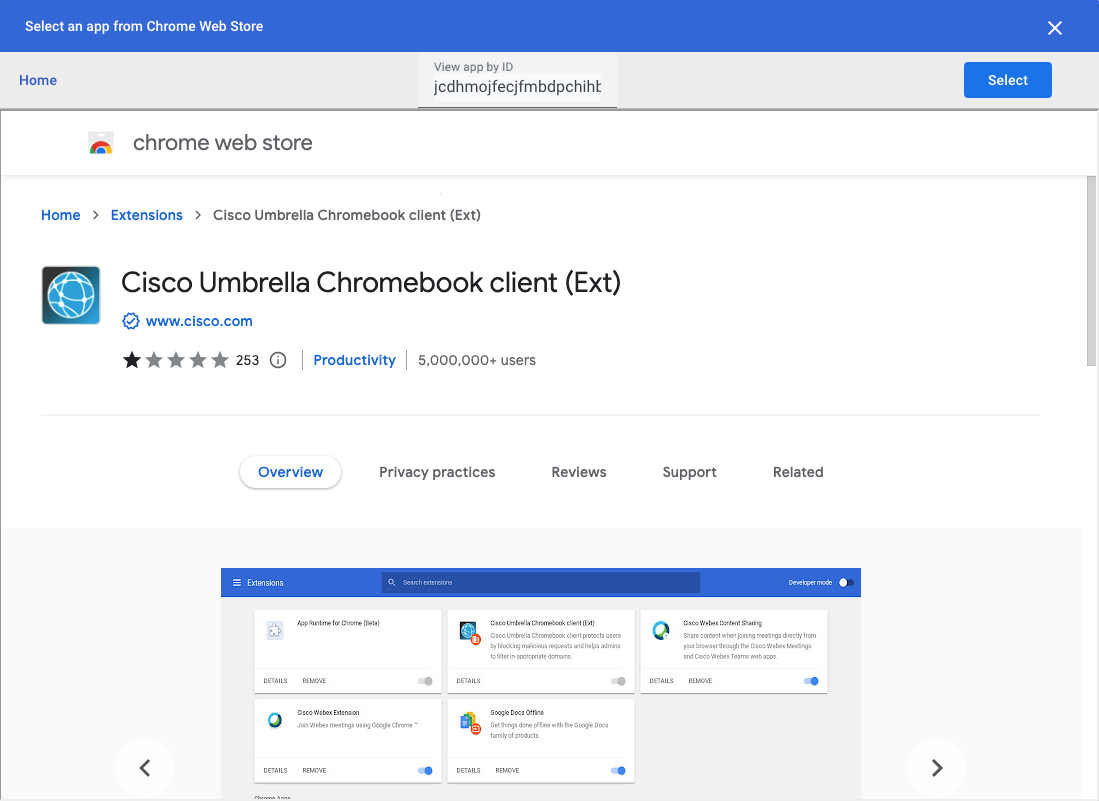
- Click the + (Expand) icon and choose Add from Chrome Web Store.
![]()
- In the Chrome Web Store, navigate to Extensions and then search for the Cisco Umbrella Chromebook client extension using the Cisco Umbrella Chromebook Client ID jcdhmojfecjfmbdpchihbeilohgnbdci.
- Click Select.
The extension is added to the selected Organization Unit (OU).
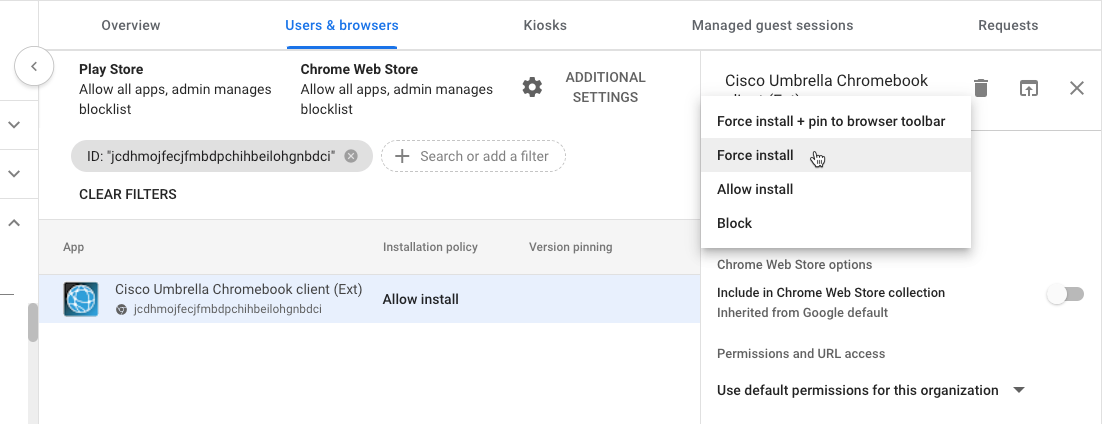
- Choose Force Install and then click Save.
The Cisco Umbrella Chromebook client extension is installed. Force Install ensures that Chromebook users in the selected OU cannot remove or disable the extension.

Step 3: Install the Cisco Umbrella Chromebook Client Application
- Return to the Google Admin console.
- Click the + (Expand) icon and choose Add from Chrome Web Store.
![]()
- Search for the Cisco Umbrella Chromebook client app using the unique Cisco Umbrella Chromebook Client ID cpnjigmgeapagmdimmoenaghmhilodfg.
Note: This ID is specific to the client app. Do not use the ID for the client extension listed earlier.
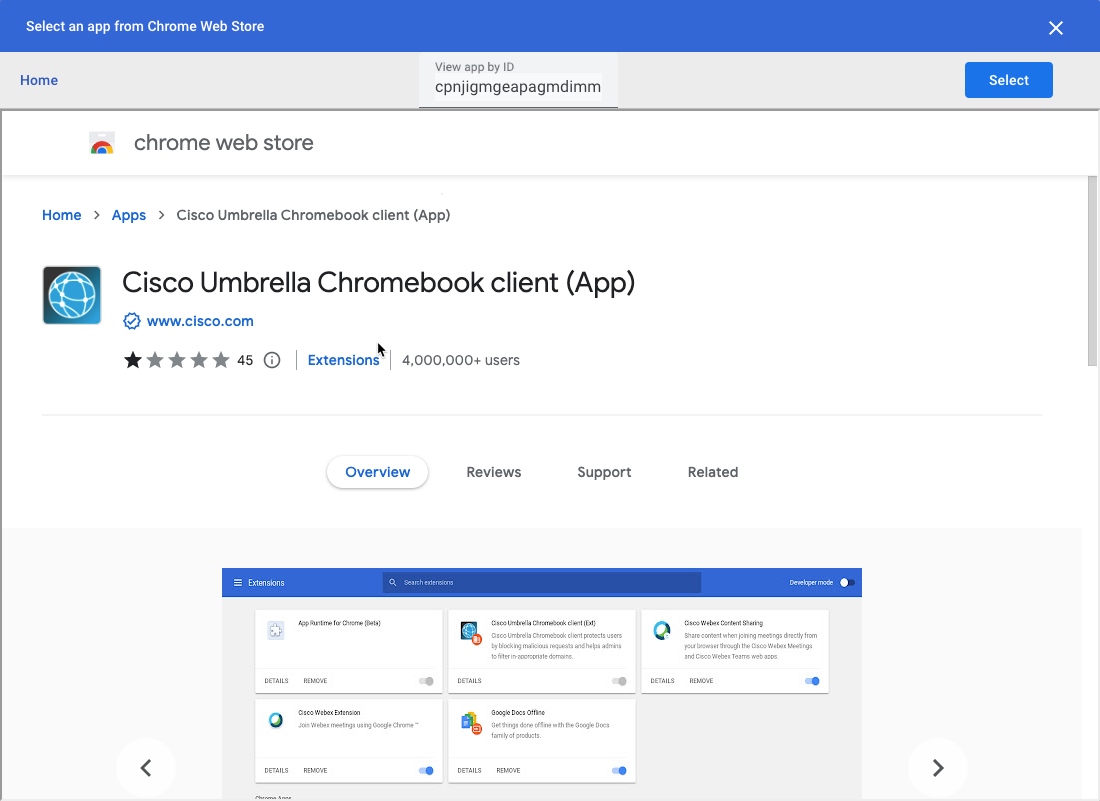
- Click Select.
The app is added to the selected organization unit. - Choose Force Install and then click Save.
The Cisco Umbrella Chromebook client app is installed. Force Install ensures that Chromebook users in the selected Organization Unit cannot remove or disable the app.
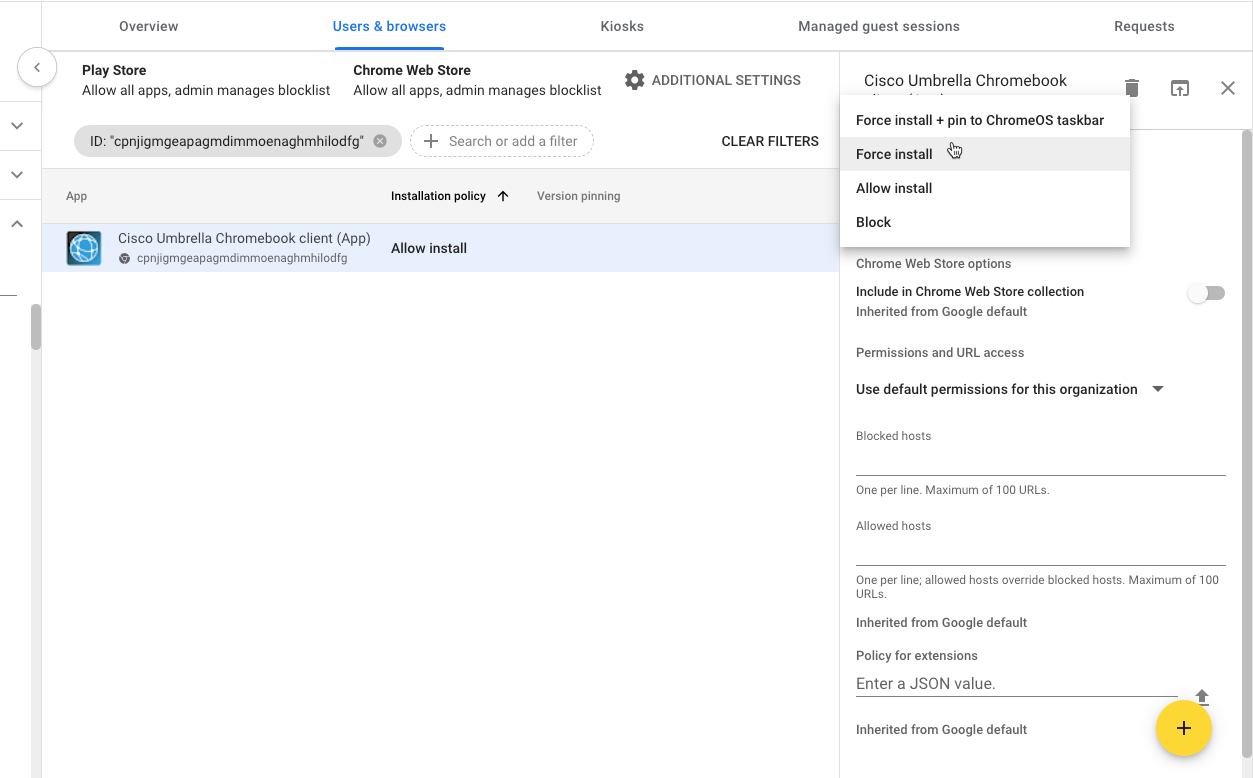
- Copy the JSON file that you downloaded during Step 1: Download Umbrella Chromebook Configuration and paste it into the Policy for Extensions section.
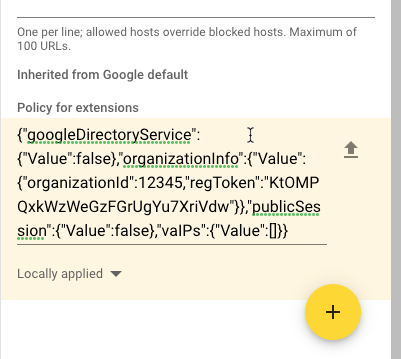
- Click Save.
The Cisco Umbrella Chromebook client app is installed and the configuration file uploaded.

It can take Google upwards of eight hours to push the Umbrella Chromebook client to all of your Chromebooks. After the Umbrella Chromebook client is installed in a Chromebook, allow a few hours for Chromebook traffic to begin appearing in your Umbrella dashboard.
Note: Chromebooks must be connected and logged in.
Apply Policies
Apply policies to your organization's Chromebooks. For more information, see Add a Chromebook Specific Policy.
Google Workspace Identity Service < Deploy the Chromebook Client > Add a Chromebook Specific Policy
Updated about 1 year ago
