Add a Network Identity
You register a fixed network to Umbrella by adding a Network identity that is configured to include the fixed network's public IP space. If the public IP space is found in an existing Network identity, you can not use the IP address to register a new fixed network. In Umbrella, all traffic originating from that IP space is identified as coming from that network. Thus, to register a network to Umbrella, you add the public IP space, or IP range, which defines the scope of the identity.
For Network identities, Umbrella supports both IPv4 and IPv6 IP addresses.
Once you've registered a network by adding a Network identity, you build policies to extend Umbrella's protection to any device that connects to the internet from behind that network. For more information about policies, see Manage Policies.
Table of Contents
Prerequisites
- Full Admin access to the Umbrella dashboard. See Manage User Roles.
- Your network's IP address must be unique within Umbrella.
- Determine if you have a dynamic IP address. Dynamic IP addresses are only supported for IPv4. Most home, small school, and small business networks are typically provisioned by Internet Service Providers (ISPs) with a dynamic IP address (IPv4) when defining each unique internet network. For more information, see IPv4 dynamic IP address.
Procedure
To start protecting your network, complete the following steps.
- Step 1 – Select the Appropriate Network
- Step 2 – Set up the Network Identity
- Step 3 – Change the DNS Settings on Your Relevant Network Device
- Step 4 – Test Your Network
Step 1 – Select the Appropriate Network
First, determine the IP address of your network.
- Go to http://www.whatismyip.com.
Your IP address and location are displayed. Both IPv4 and IPv6 IP addresses are displayed.
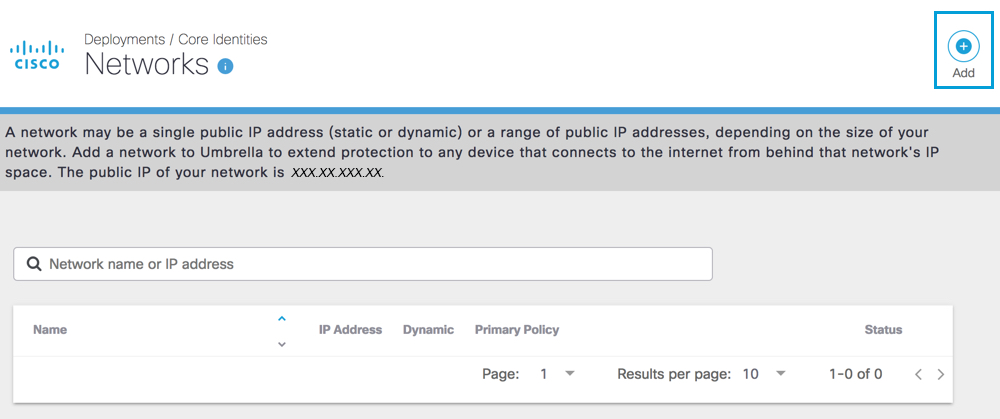
or - In Umbrella, navigate to Deployments > Core Identities > Networks.
You'll find your IP address listed at the top of the page. If you don't see your IP address, click the i (Information) icon.

Pre-registering Your Networks
If you plan to have multiple network identities, it's a good idea to immediately register all of your networks with Umbrella. Chances are that if you have more than one public egress IP in your organization, you'll have more than one network identity. Having the networks pre-registered ensures that they're available right away when you do point traffic. It also ensures that all the IP space that belongs to your company is correctly assigned in our systems. Until traffic is pointed to Umbrella's DNS service, no protection is available and there is no reporting so there's no harm in adding all networks beforehand.
Note: Depending on your package, if you attempt to add a network other than the one currently being used to access the Umbrella dashboard, Umbrella may prompt you to contact Support for manual verification. If this occurs, you'll also need manual verification from Support for IPv4 ranges larger than a /29 network and IPv6 ranges than a /56 network. Verification cases are created automatically and you'll receive an update as soon as it's reviewed. If you are not sure of your current package, contact your sales representative. See also, Cisco Umbrella Packages.
Step 2 – Set up the Network Identity
- Navigate to Deployments > Core Identities > Networks and click Add.

Note: If possible, add the network from the IP being registered; otherwise, an email is generated, which requires that a link is visited from the IP address of the network being registered.
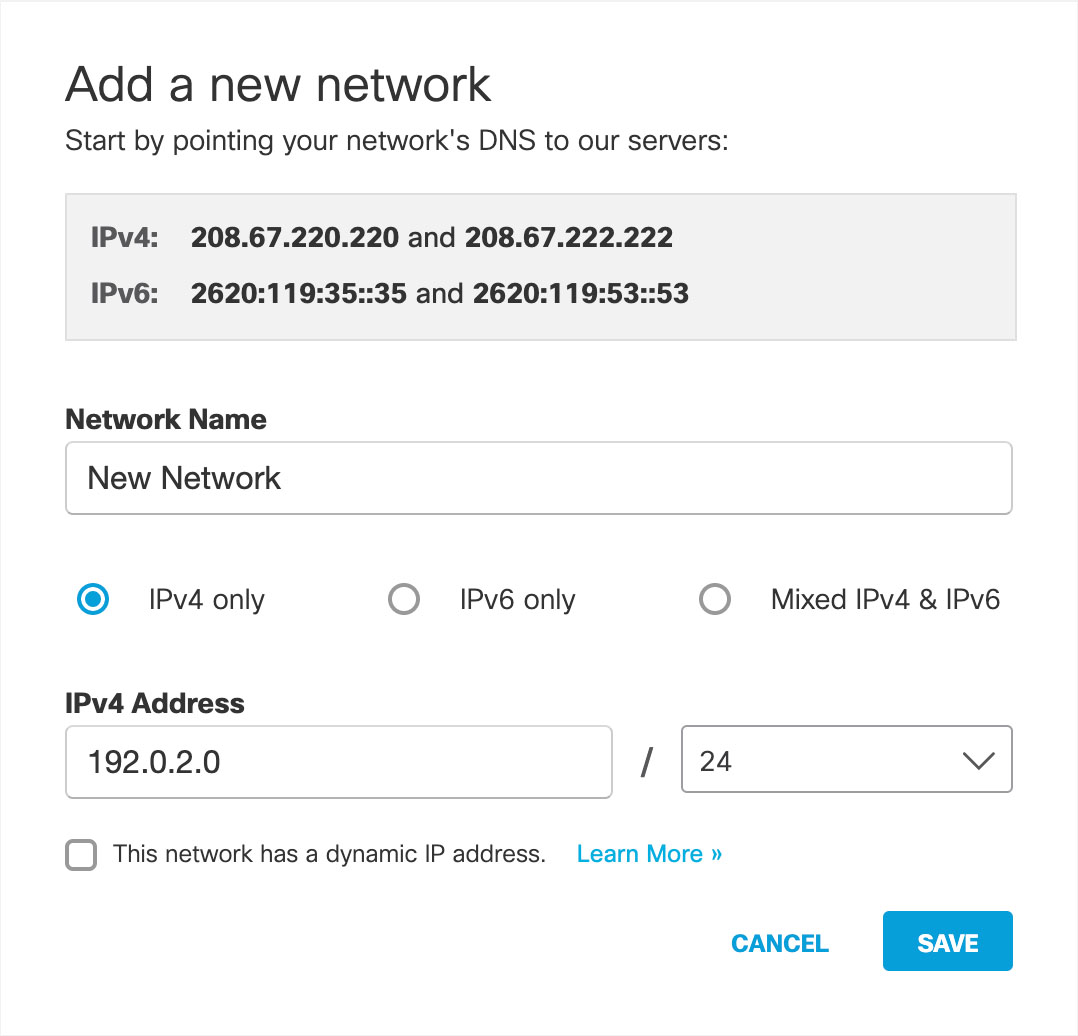
- Give your Network identity a meaningful Network Name.
Giving your identity a good network name will help you find it easily when you later add a policy against it through the Policy wizard.
Note: Dynamic IP addresses are only supported for IPv4.

- Select an internet protocol: IPv4, IPv6, or Mixed IPv4 & IPv6.
Select a protocol based on the Umbrella IP address to which you have configured your router. - Add the network's IP address and choose a subnet mask.
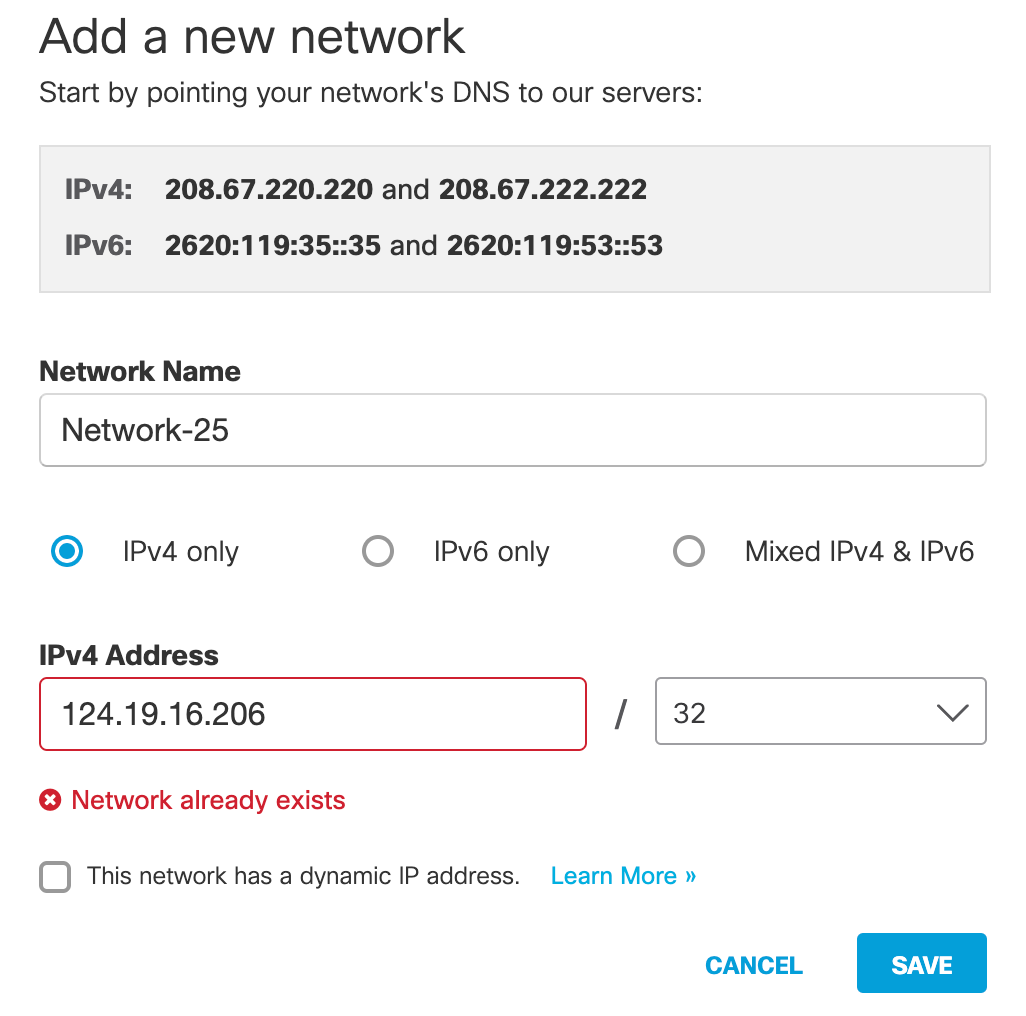
The network must be unique within Umbrella. If Umbrella displays theNetwork already existserror message, create a support case at [email protected].

5. For IPv4 only, if it's a dynamic IP address, check This network has a dynamic IP address and download the Umbrella Dynamic IP Updater:
Note: Most Dynamic DNS (DDNS) clients work toward keeping your network updated; however, Umbrella does not support third-party DDNS clients.
Dynamic IP Address—IPv4 Only
A dynamic IP address means that the 'public' IP of your network changes over time when the 'lease' for that IP address changes. Your IP may stay the same for several weeks, but the lease will eventually expire and be given to another customer of your ISP. When the IP address you've registered with Umbrella changes, Umbrella's security settings no longer apply. These settings no longer match your account information and must be updated. To avoid having to manually update this information, install the Umbrella Dynamic IP Updater on at least one computer within the network that you've registered in Umbrella. The Umbrella Dynamic IP Updater automates the discovery and registration of a network's IP address to your Umbrella account whenever the dynamic IP address changes. If you do not do this, you must manually re-enter your IP address each time it changes. For more information, see Networks with Dynamic IP Addresses.
To maintain and automatically update your IPv4 dynamic IP when it changes, following these guidelines:
- The computer should be stationary to the network and not a laptop (only used in the network on which you are configuring Umbrella).
- The computer should always be powered on or turned on before any other computers log onto the network.
- Click Save.
Once the service validates your IP address, the network is listed at Deployments > Core Identities > Networks. Initially, Umbrella lists your new network identity's status as Inactive. Network status only changes to Active when DNS traffic is sent to Umbrella from the network.
The policy applied to your new identity depends on your policy configurations. If you have a policy configured that includes network identities, Umbrella applies that policy; otherwise; Umbrella applies the Default policy.


Step 3 – Change the DNS Settings on Your Relevant Network Device
You need only do this on your edge DNS equipment, typically a DNS or DHCP server, or a router—this could be your DSL router or cable modem if that's the only router in your network.
For instructions on how to configure computers (including laptops) or routers, see Point Your DNS to Cisco Umbrella.
Note: The client on which you test must have either retrieved a new set of DNS servers from the DNS/DHCP server or router, or have had its DNS settings changed manually for you to be able to verify successfully.
Step 4 – Test Your Network
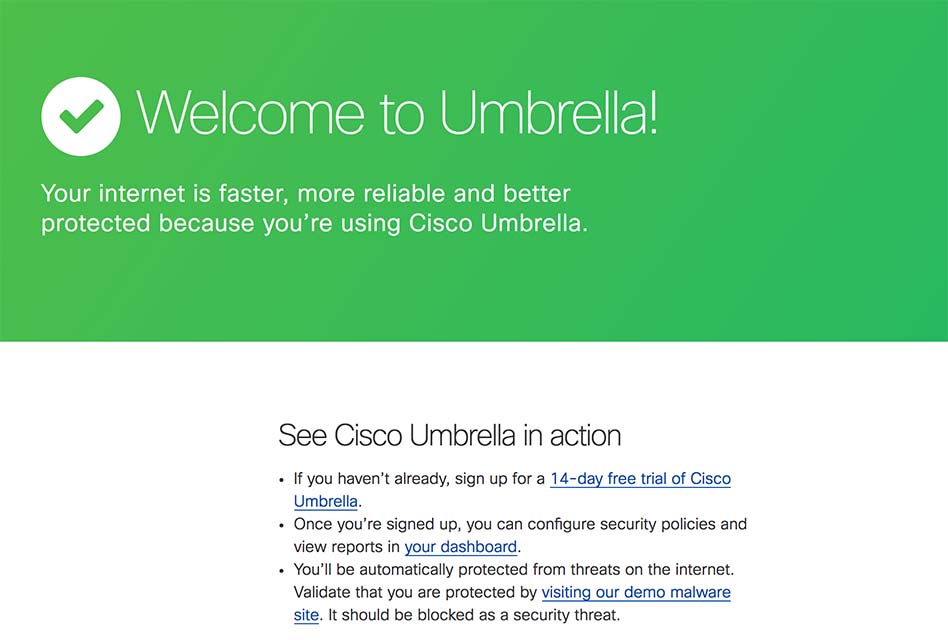
Verify that your DNS connections are routed through Cisco Umbrella's global network by navigating to the following page in your client's browser: https://welcome.umbrella.com/. You should see the Welcome to Umbrella page.
Note: You may need to restart your client's network interface or your computer.
To test your security settings, navigate to http://examplemalwaredomain.com/.

Manage Identities < Add a Network Identity > Delete a Network Identity
Updated almost 2 years ago
