
Secure Firewall Management Center and Secure Firewall Threat Defense
This configuration guide covers the steps to provision the Umbrella Module in the Secure Firewall Management Center for version 6.5 or later. The provisioned module is applied to Secure Firewall Threat Defense managed by the management center.
Prerequisites to provision the Umbrella Module
- Access to the Cisco Umbrella Dashboard.
- Access to management center or threat defense, as this version adds support for additional AnyConnect modules. For versions earlier than 6.7, FlexConfig can be used to deploy the module, you can refer to the Cisco documentation for details.
- Umbrella Module Profile (orginfo.json).
- AnyConnect VPN module configuration is already complete and functional on the management center or threat defense.
Procedure to enable Secure Client Umbrella Module in Management Center and Threat Defense
Follow these steps to enable Secure Client Umbrella Module in the management center:
- In the management center dashboard, go to Object > Objects Management.

- Navigate to VPN > Secure Client File .
- On the Secure Client File page, click the Add Secure Client File.
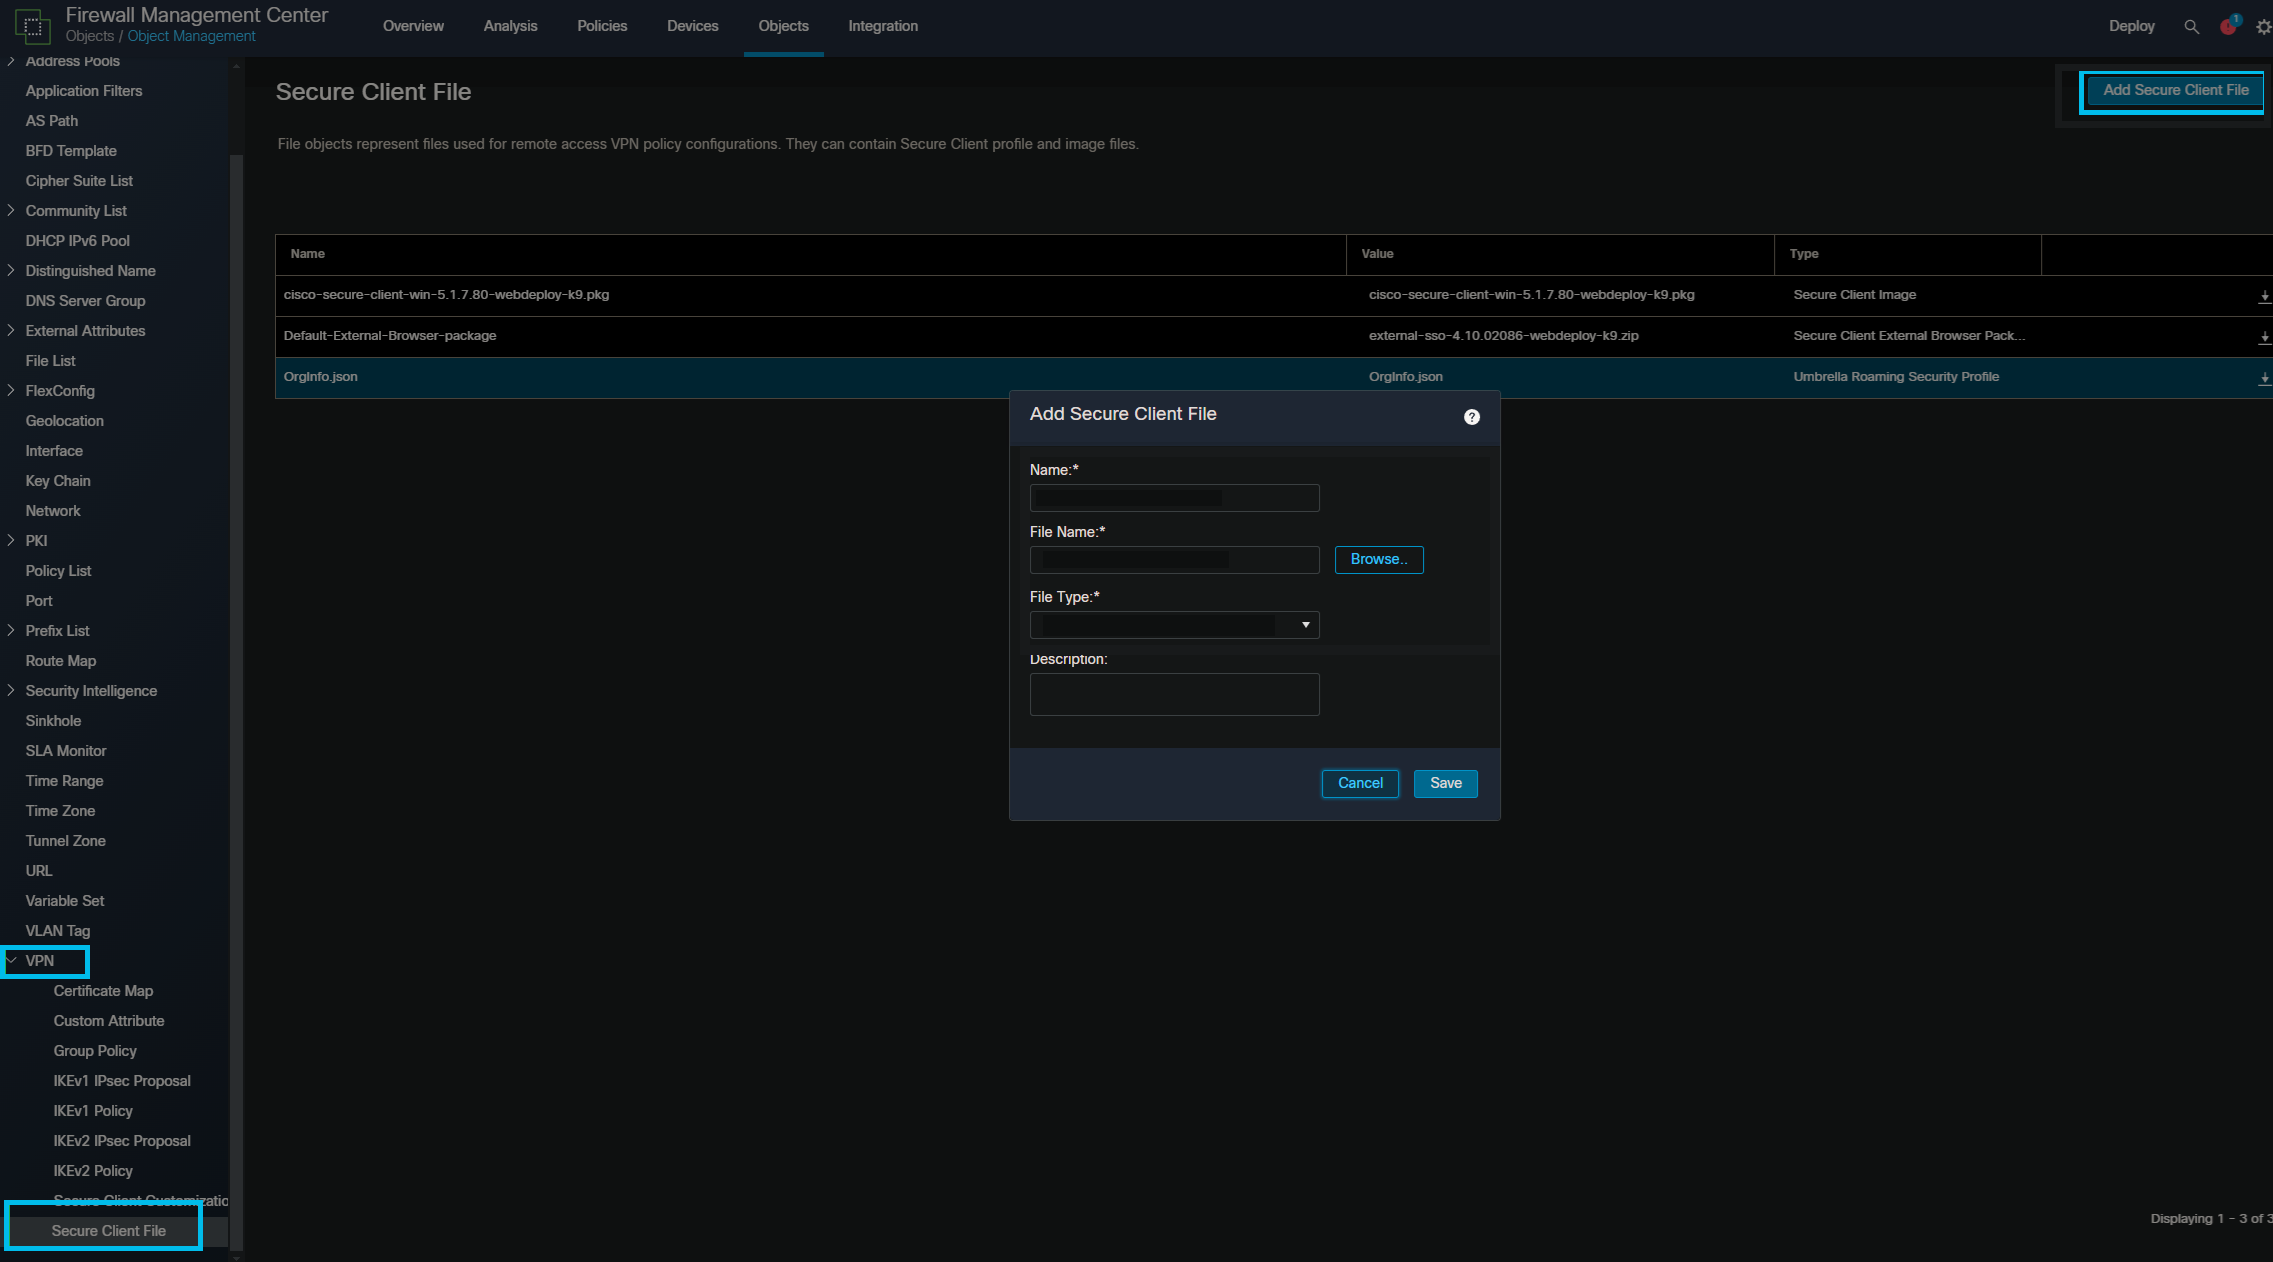
- In the Add Secure Client File window, complete the fields, including the following:
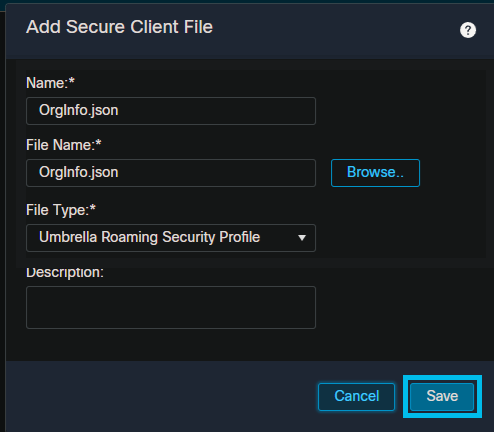
- Set a name for the profile (locally significant). From the File Name, click Browse to choose the JSON file that was downloaded from the Cisco Umbrella dashboard.
- From the File Type drop-down list, choose Umbrella Roaming Security Profile, and click Save.
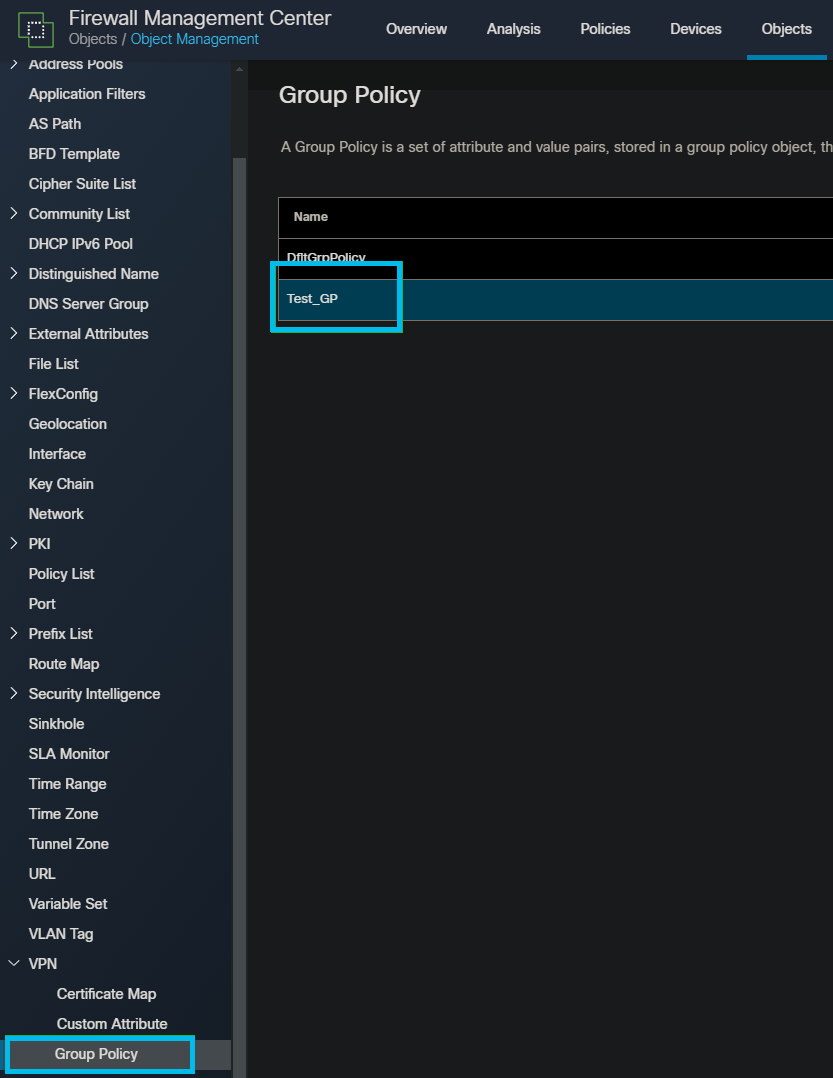
- On the Group Policy window, click Group Policy, and then select the group policy that you’re using to deploy Umbrella ("Test_GP" in this case).
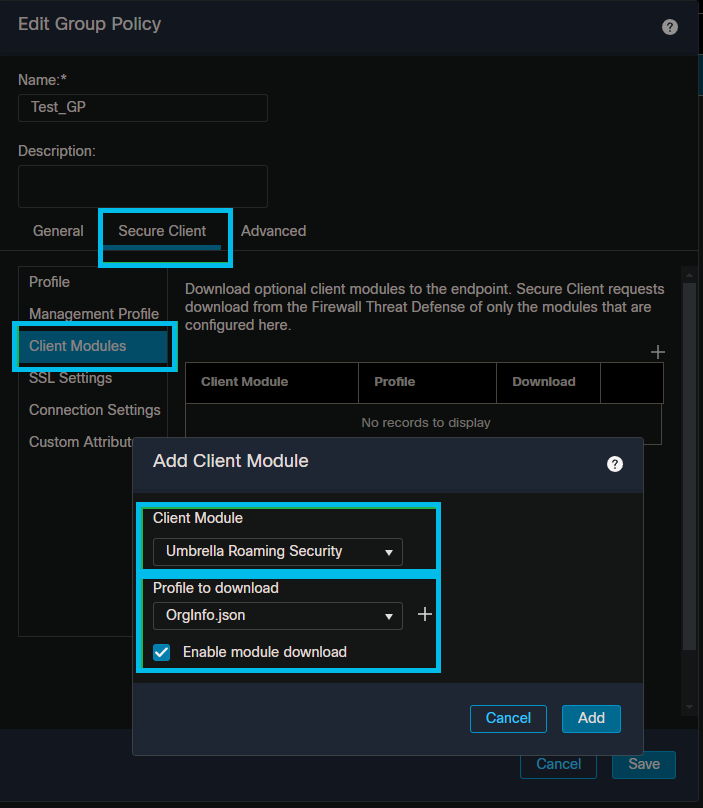
- Click the Secure Client tab, and then click Client Modules. Click + button to add a client module.
- In Add Client Module, from the Client Module drop-down list, choose Umbrella Roaming Security, and from Profile to download drop-down list, choose the profile that was added under step 4.
- Check Enable module download checkbox so that users connecting through Secure Client will automatically download the Umbrella JSON profile.
(OPTIONAL) VPN Local Authentication (Management Center 7.0 or later required)
If you want to test a separate profile with local authentication on the management center or threat defense, follow these steps:
-
Create a local realm.
- Local usernames and passwords are stored in local realms.
- When you create a realm (Integration > Other Integrations > Realms) and select or create a new LOCAL realm type, you are prompted to add one or more local users.
- click Add Realm > Local to create a local realm.

- Manage a local realm.
- Click Integration > Other Integrations > Realms.
- To delete a realm, click Delete.
- To edit a realm, click Edit next to the realm and make changes as described in Create an LDAP Realm or an Active Directory Realm and Realm Directory.
- To enable a realm, slide State to the right; to disable a realm, slide it to the left.
- To download users and user groups, click Download.
- To copy a realm, click Copy.
VPN Headend Deployment < Secure Firewall Management Center and Secure Firewall Threat Defense > Migration from Umbrella Roaming Client
Updated 8 months ago