Deploy VAs in Hyper-V for Windows 2012 or Higher
Two virtual appliances (VAs) are required for each Umbrella site. It is critical that these VAs are not cloned or copied in any way. Each VA must be set up and configured manually.
Table of Contents
Prerequisites
- Full Admin user role. For more information, see Manage Accounts.
- For information about the requirements for deploying Umbrella VAs, see Prerequisites.
- Basic knowledge of Hyper-V.
Configure Authentication for the Virtual Appliances
- For more information, see Configure Authentication for Virtual Appliances.
Procedural Overview
- Download the Hyper-V installer.
- Import the virtual appliance.
- Copy and rename image files.
- Select network adapter.
- Select hard drive.
- Power on the virtual machine.
- Repeat for the second virtual appliance.
1. Download the Hyper-V Installer
Download the software package for the Umbrella Virtual Appliance.
When you download the software package for the VA and if you did not configure API key credentials for your AD Connectors and VAs, Umbrella displays a warning message. We recommend that you configure API keys for your AD Connectors and Umbrella VAs. For more information, see Configure Authentication for Virtual Appliances.
a. Navigate to Deployments > Configuration > Sites and Active Directory and click Download.

b. For VA for Hyper-V, click Download.
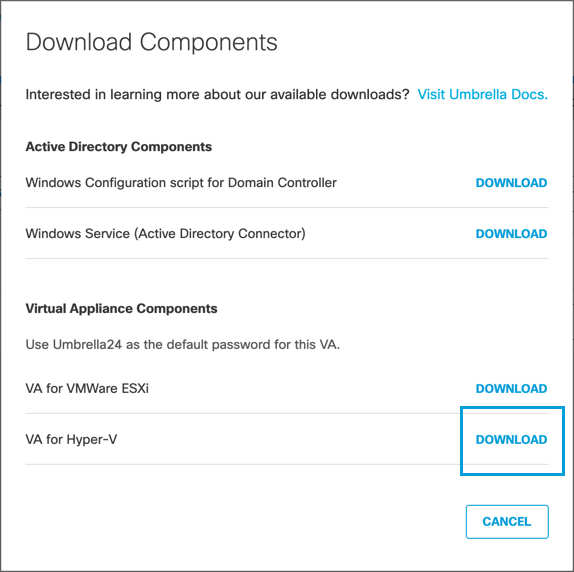
Umbrella generates and downloads a tar file unique to your deployment.
This tar file includes:
- a zip file containing the virtual hard disks that need to be deployed on Hyper-V
- a signature file
- a Cisco public certificate to validate the signature
- a readme file
c. Extract the contents of the tar file using the command
tar –xvf.
To verify the integrity of the downloaded file, validate the signature by following the instructions provided in the readme file. When successful, you see a message saying “Verified OK."d. Extract the .zip file. You'll find two folders—Virtual Hard Disks and Virtual Machines—and a config file.
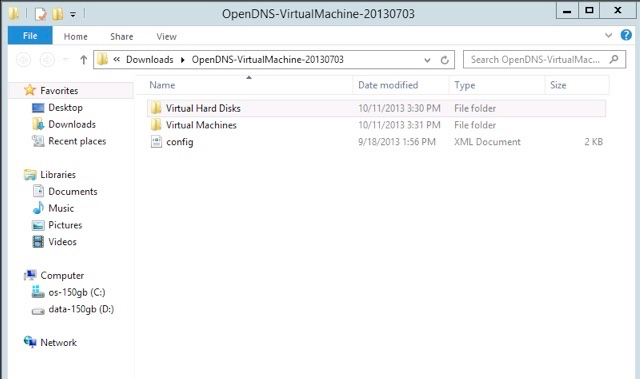
2. Import the Virtual Appliance
Using Windows 2012 R2 or Higher Versions
Microsoft has introduced a "Generation 2" style of VM profile on Hyper-V for Windows 2012 R2 and higher versions. As a result, the import steps below will fail with the error: "Hyper-V did not find virtual machines to import from location [path]"
You will need to create a new virtual machine as "Generation 1", then skip to 3. Copy and Rename Image Files.
For more information about Generation 1 vs. Generation 2, see Generation 2 Virtual Machine Overview.
Note: Step 2 in this article applies to Windows 2012 only, and not Windows 2012 R2.
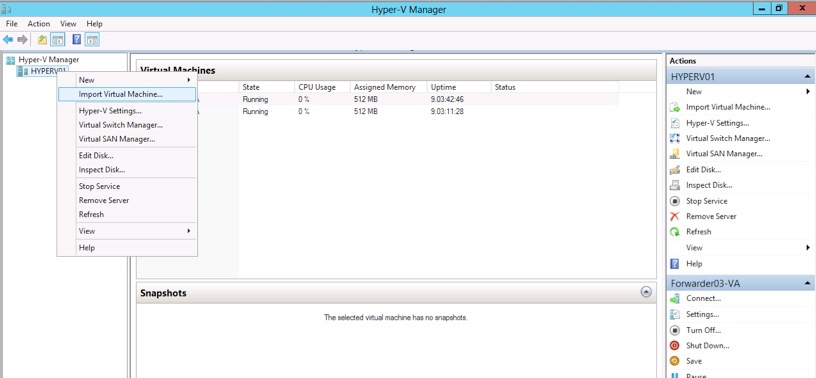
a. Select your Hyper-V server, right-click its name and select Import Virtual Machine from the menu.
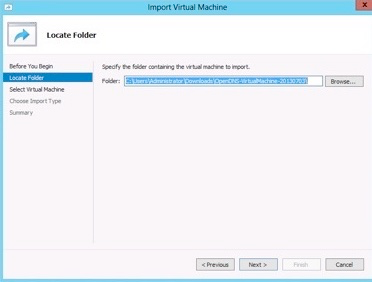
b. Navigate to the extraction folder from your download, select that folder to import, and then click Next.
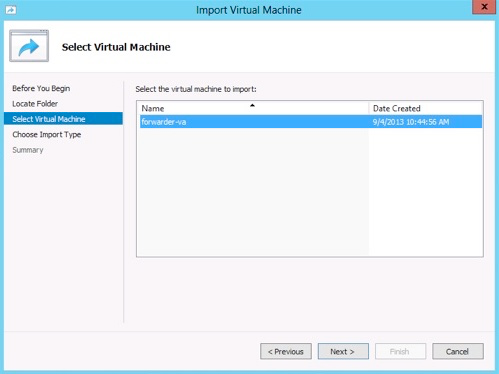
c. Select forwarder-va as the virtual machine to import and click Next.
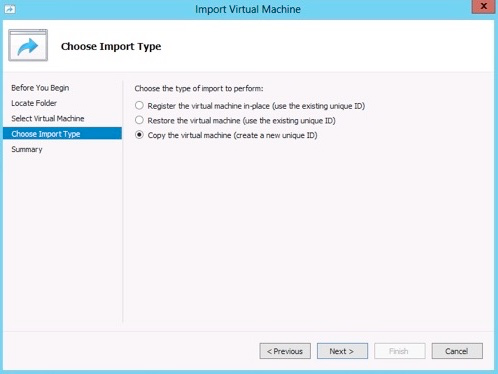
d. Select Copy the virtual machine (create a new unique ID) and click Next.
e. Choose destination folders to install to. By default, these are the Hyper-V Configuration folders, but you can choose another folder.
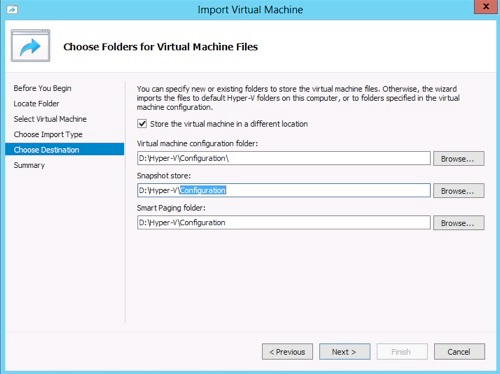
Note: If selecting a different folder, pick a drive with sufficient space and create a folder with a specific name for the virtual machine, such as \opendnsforwarder-1. This can be helpful to ensure you're able to distinguish between the two virtual appliances in your file structure.
f. Click Finish.
3. Copy and Rename Image Files
a. In Windows Explorer, navigate to the \Virtual Hard Disks** subfolder within the extracted download folder created in Step 1**.
b. Copy the two files from that location to the Virtual Machine Configuration Folder you specified in the previous step.
c. The two files, dynamic and forwarder-va. must be renamed in accordance with the VA that is being installed. For example, rename:
dynamic to Dynamic-VA-1
and
forwarder-va to Forwarder-VA-1If configuring your second VA, change the number accordingly. This can help ease management of multiple virtual appliances and avoids conflicts between filenames when configuring your second VA.
4. Select Network Adapter
a. In the Hyper-V Manager, select the virtual machine you've created, right-click and choose Settings.
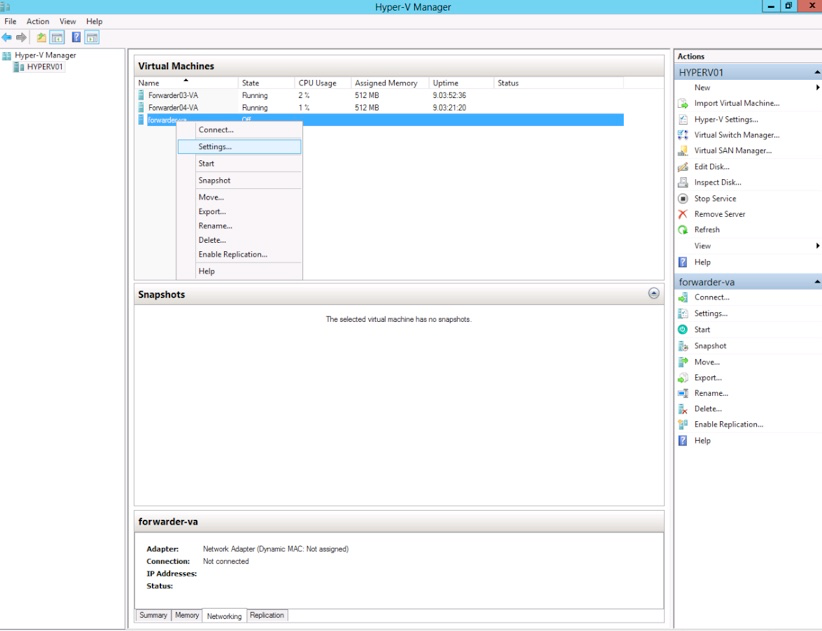
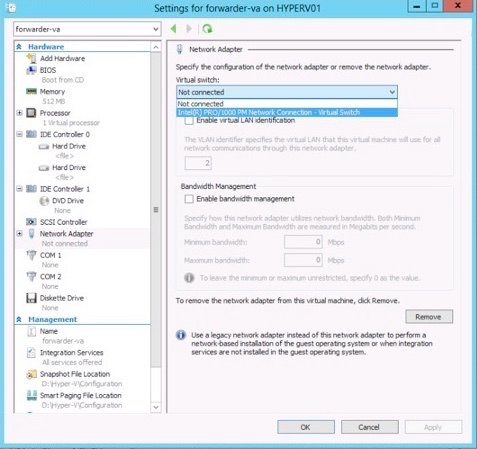
b. Under Hardware, select Network Adapter, and then assign a virtual switch that has internet access.
5. Select Hard Drive
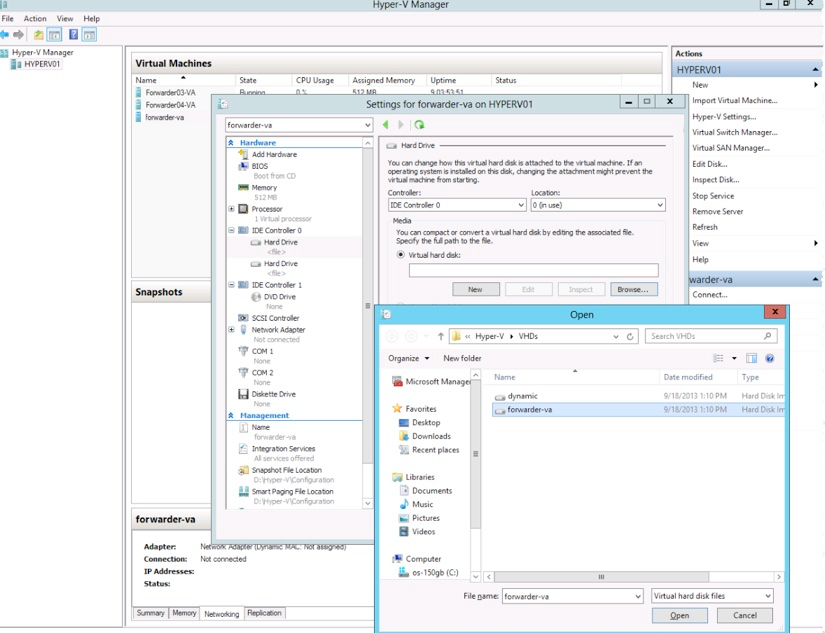
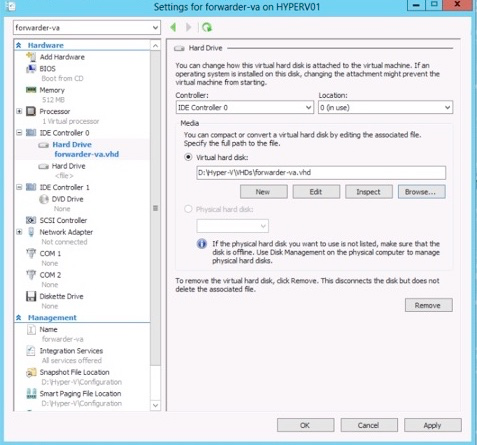
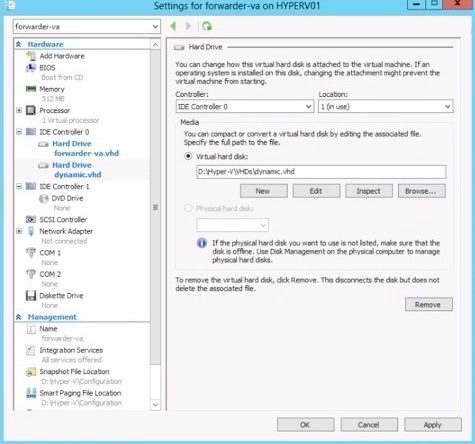
a. In Settings for Hardware, select the hard drives.
Ideally, they should be under the same IDE controller. For hard drive settings, browse to the Virtual Machine Configuration Folder and the first hard drive should be set to the forwarder file (Forwarder-va) and the second hard drive should be set to the dynamic (Dynamic) file.
b. Click Apply.
6. Power on the Virtual Machine
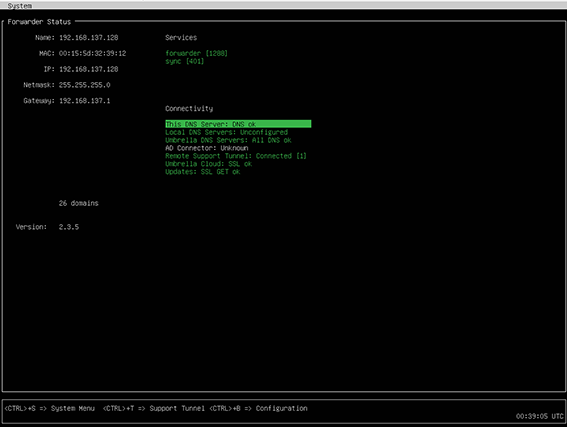
If all is well, you'll see the Virtual Appliance console screen. For information about configuring VAs, see Configure Virtual Appliances.
7. Repeat for the Second Virtual Appliance
Two VAs are required per Umbrella site. It is critical that these VAs are not cloned or copied in any way. Each VA must be set up and configured manually.
To build your second VA, repeat procedures starting at 2. Import the Virtual Appliance.
Configure Authentication for Virtual Appliances < Deploy VAs in Hyper-V for Windows 2012 or Higher > Deploy VAs in VMware
Updated 5 months ago
