Add Rules to a Ruleset
Plan Your Rules
Before you start adding rules to a ruleset, we recommend that you read through these sections in full. Decide before you start as to how rules will define access and security controls for your identities. Rules are evaluated in a top-down manner and evaluation stops when a match is made. Plan your rules so that they will "work" as intended and without access errors. For example, identities being unintentionally granted access to or block from indented destinations.
Some settings require the preconfiguration of policy component settings outside of the Web policy.
Once you've added and enabled a ruleset, you can add rules to it. Rules allow you to fine-tune your ruleset, setting what action—allow, warn, block, or isolate—takes place when an identity attempts to access a destination.
For each ruleset added to the Web policy, rules can be added for the following destination types:
- Application Settings – Control identity access to selected application-based destinations. Application settings organize application-based destinations into categories based on the type of processes or services provided.
- Content Categories – Control identity access to selected destinations based on the content served by the destination. Content Categories organize websites—destinations—into categories based on the type of information served by the site; for example, gambling, social networking, or alcohol. For a list of all categories and details for each, see Web Content Categories.
- Destination Lists – Control identity access to specific internet destinations. Before you can add a destination list to a rule, you must first add the destination list to Umbrella. For more information, see Add a Web Policy Destination List.
Note: For a destination list that includes HTTPS URLs, you must also enable HTTPS Inspection and install a CA root certificate. See HTTPS inspection.
For each ruleset added to the Web policy, rules can also be configured for the following:
- Schedule – Configure the time within which this rule is active.
- File Bypass Protection – Configure how encrypted files are treated: blocked or allowed
By default, rules are disabled and must be enabled to come into effect. Rules cannot be enabled until they are saved and rules cannot be saved unless they are configured correctly. Only enabled rules are evaluated.
Prerequisites
- Ruleset added and enabled. See Add a Ruleset to the Web Policy.
- HTTPS inspection must be enabled:
- If the Rule Action is Isolate or Warn.
- To enforce Application Settings.
- Certificates installed – If you enable HTTPS Inspection, you must install a CA root certificate—either Umbrella's or your own. Also, for Umbrella to properly display a block or warn page, a CA root certificate must be installed in all browsers. For more information and procedures, see Manage Certificates.
- Full Admin access to the Umbrella dashboard. See Manage User Roles.
Procedure
- Navigate to Policies > Management > Web Policy and expand a ruleset.

- Click Add Rule and for Rule Name give your rule a good meaningful name.
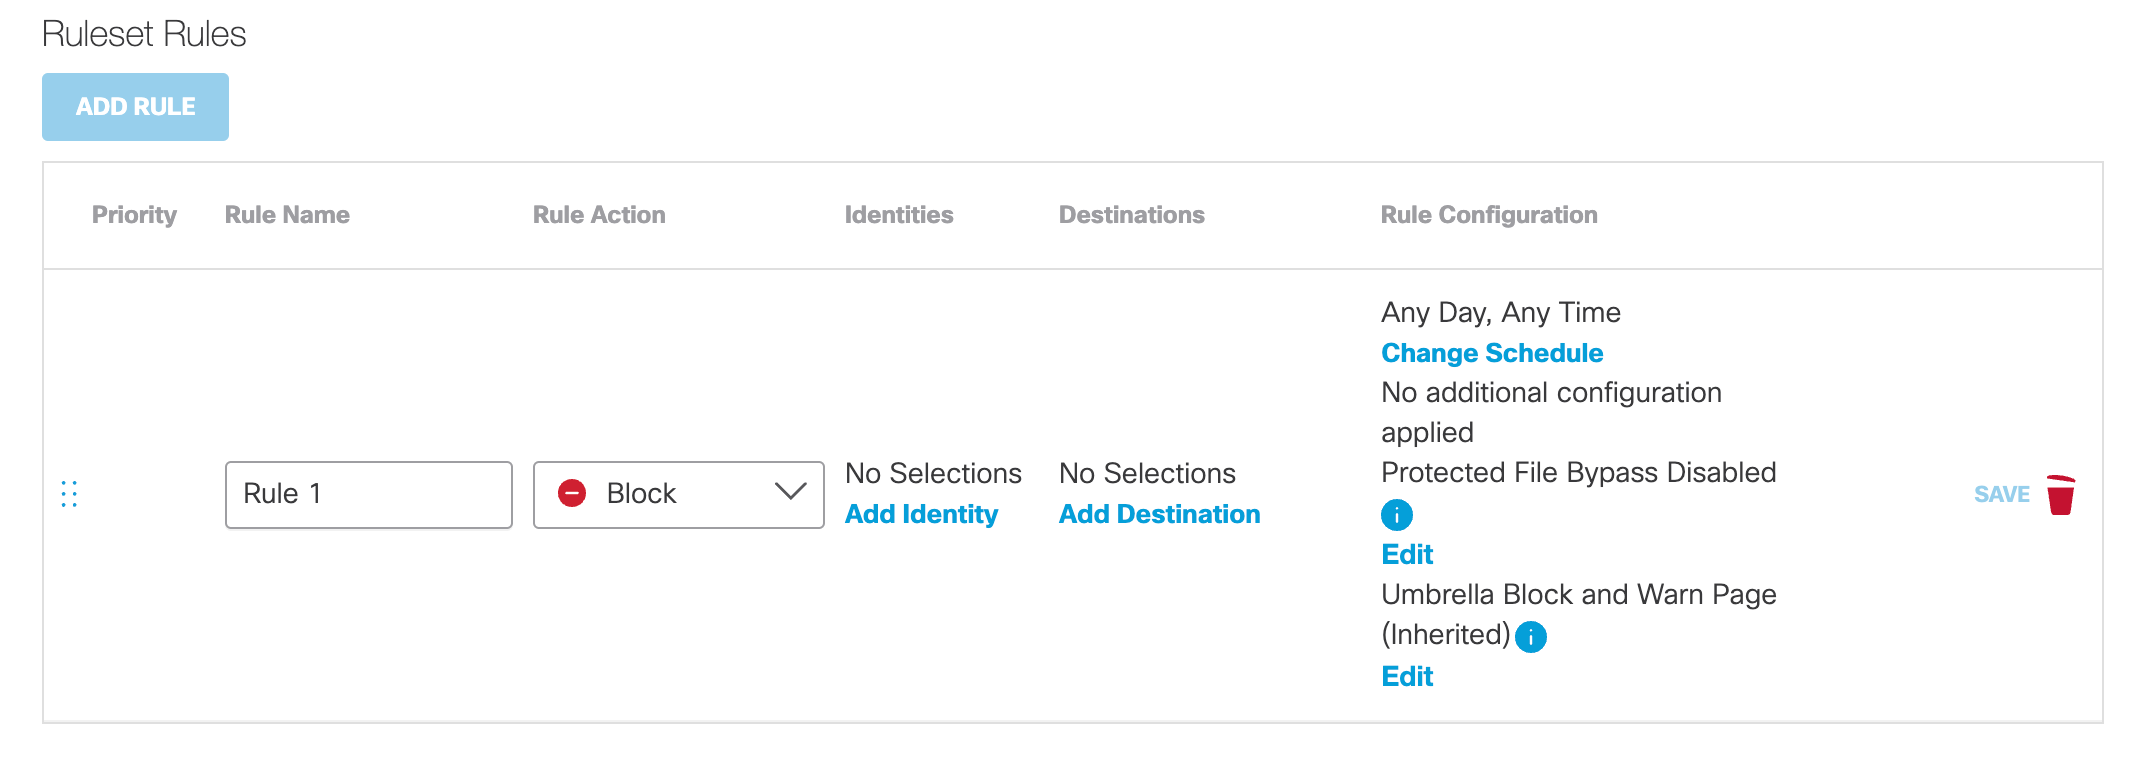
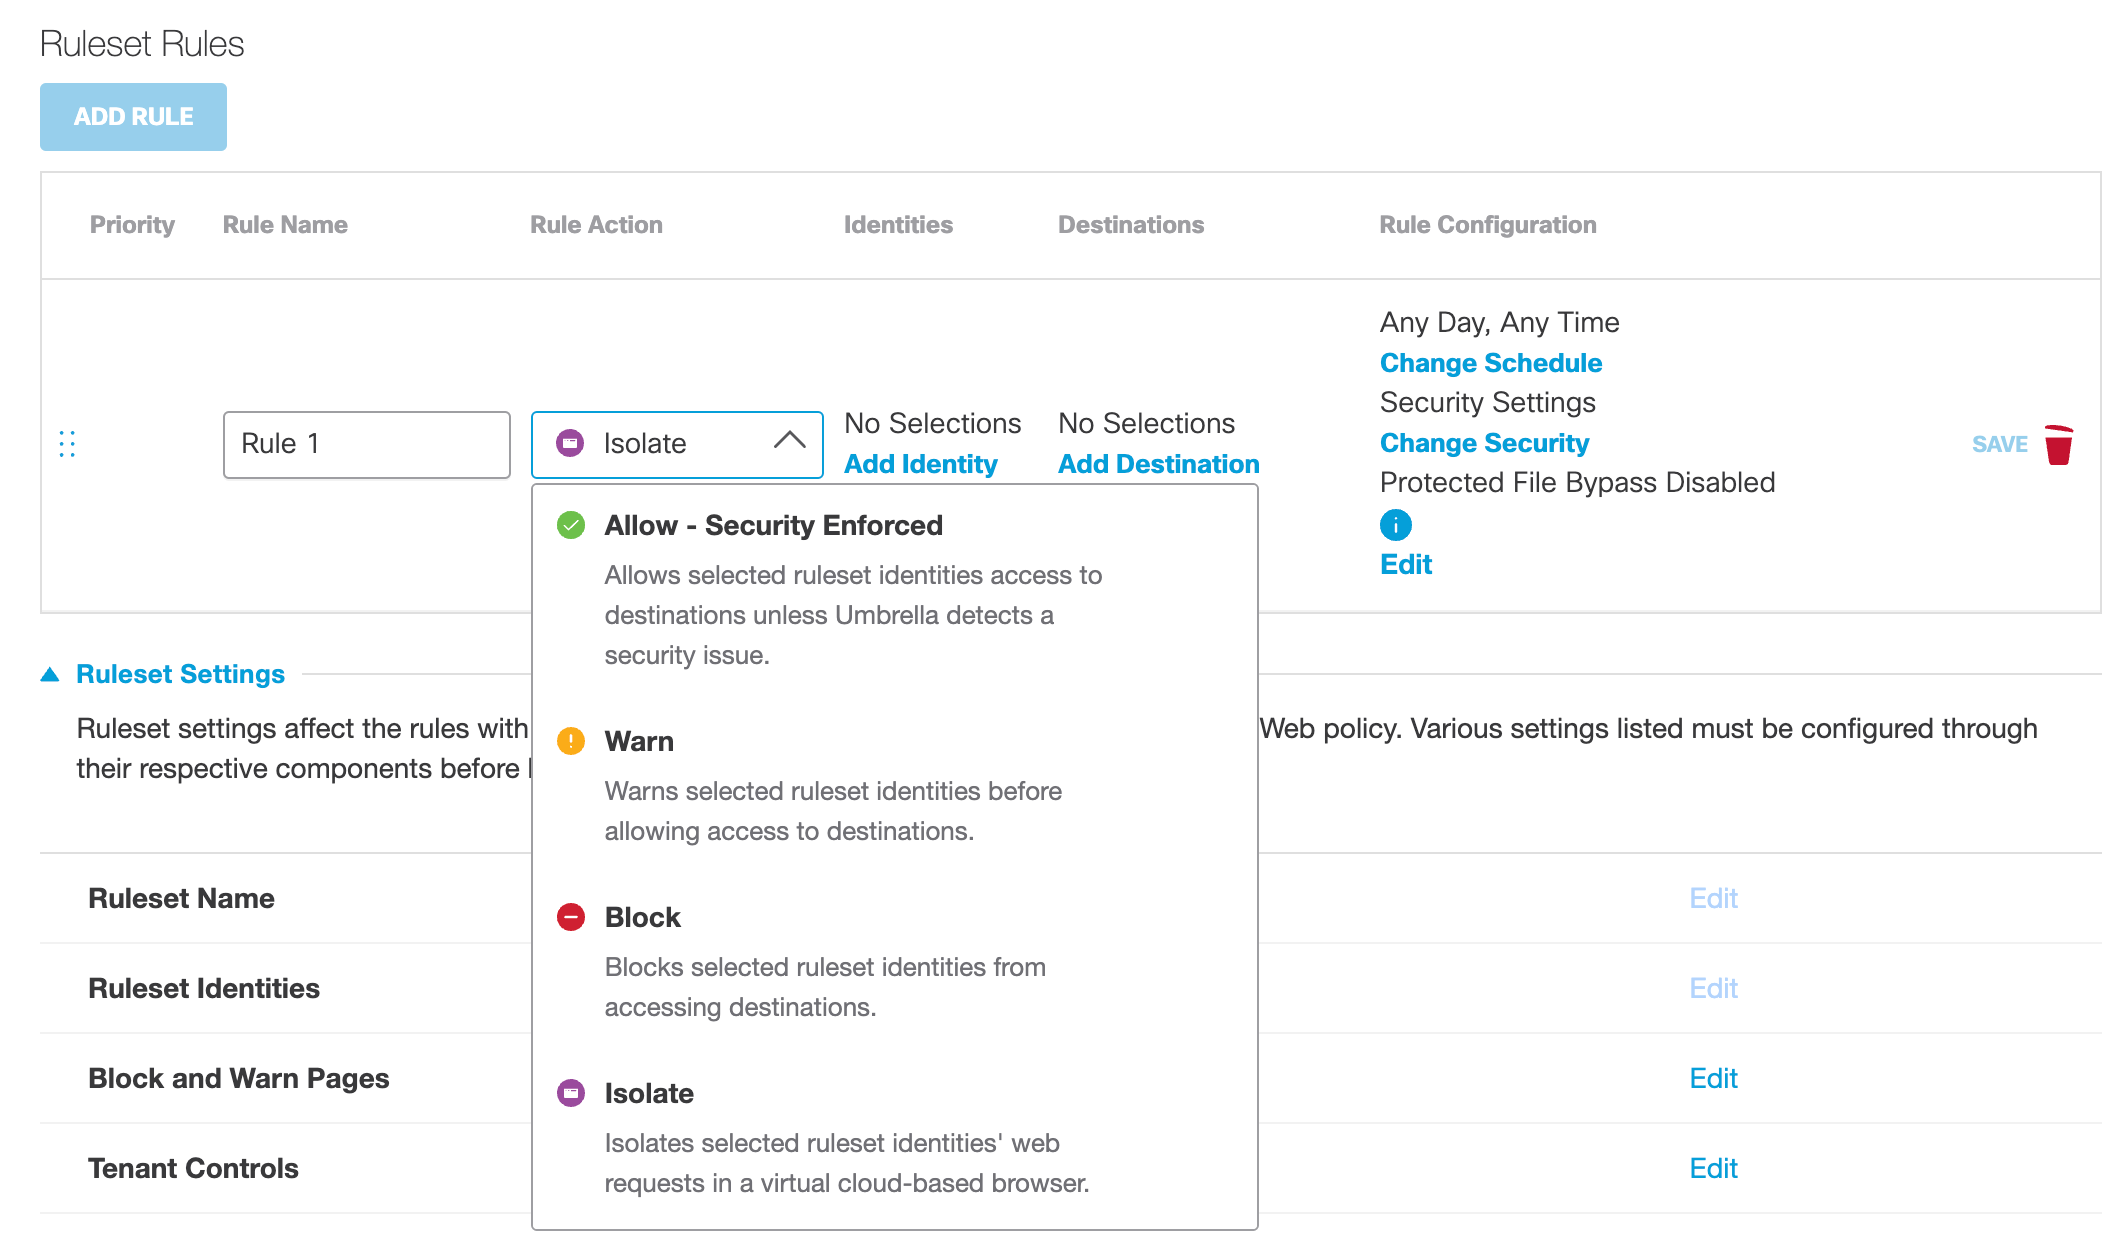
- For Rule Action, from the drop-down list, choose what action the rule performs when an identity makes a request:
- Allow – Security Enforced – Umbrella enforces its security features and blocks access to known malicious destinations even when allowed by the rule. If you choose Allow – Security Enforced, Override Security becomes available. See Override Security.
- Warn – Umbrella displays a Warn page that a user must click through before accessing a requested destination. Access to a requested destination is limited to one hour. After one hour, the Warn page reappears and the user must click through again to access the requested destination. When chosen, the destination type, Destination List is unavailable. You must enable HTTPS Inspection to enforce Warn.
- Block – Umbrella displays a Block page and access to the requested destination is denied.
- Isolate – If your Umbrella package includes the Isolate add-on, Umbrella creates a virtual browser that hosts destination access requests. If you choose Isolate, Security Settings become available for the selection of security categories. To enable a rule when Isolate is chosen as the action, at least one available destination option must be selected. For more information about Umbrella's virtual browser, see Understand Isolated Destinations.

Override Securitya. For Allow – Security Enforced, optionally click Override Security to override these security settings:
- File Analysis
- File Type Control
- Security Settings
- Umbrella's default blocking of access to suspected malicious sites.
Note: Content categories are unavailable if Override Security is selected.

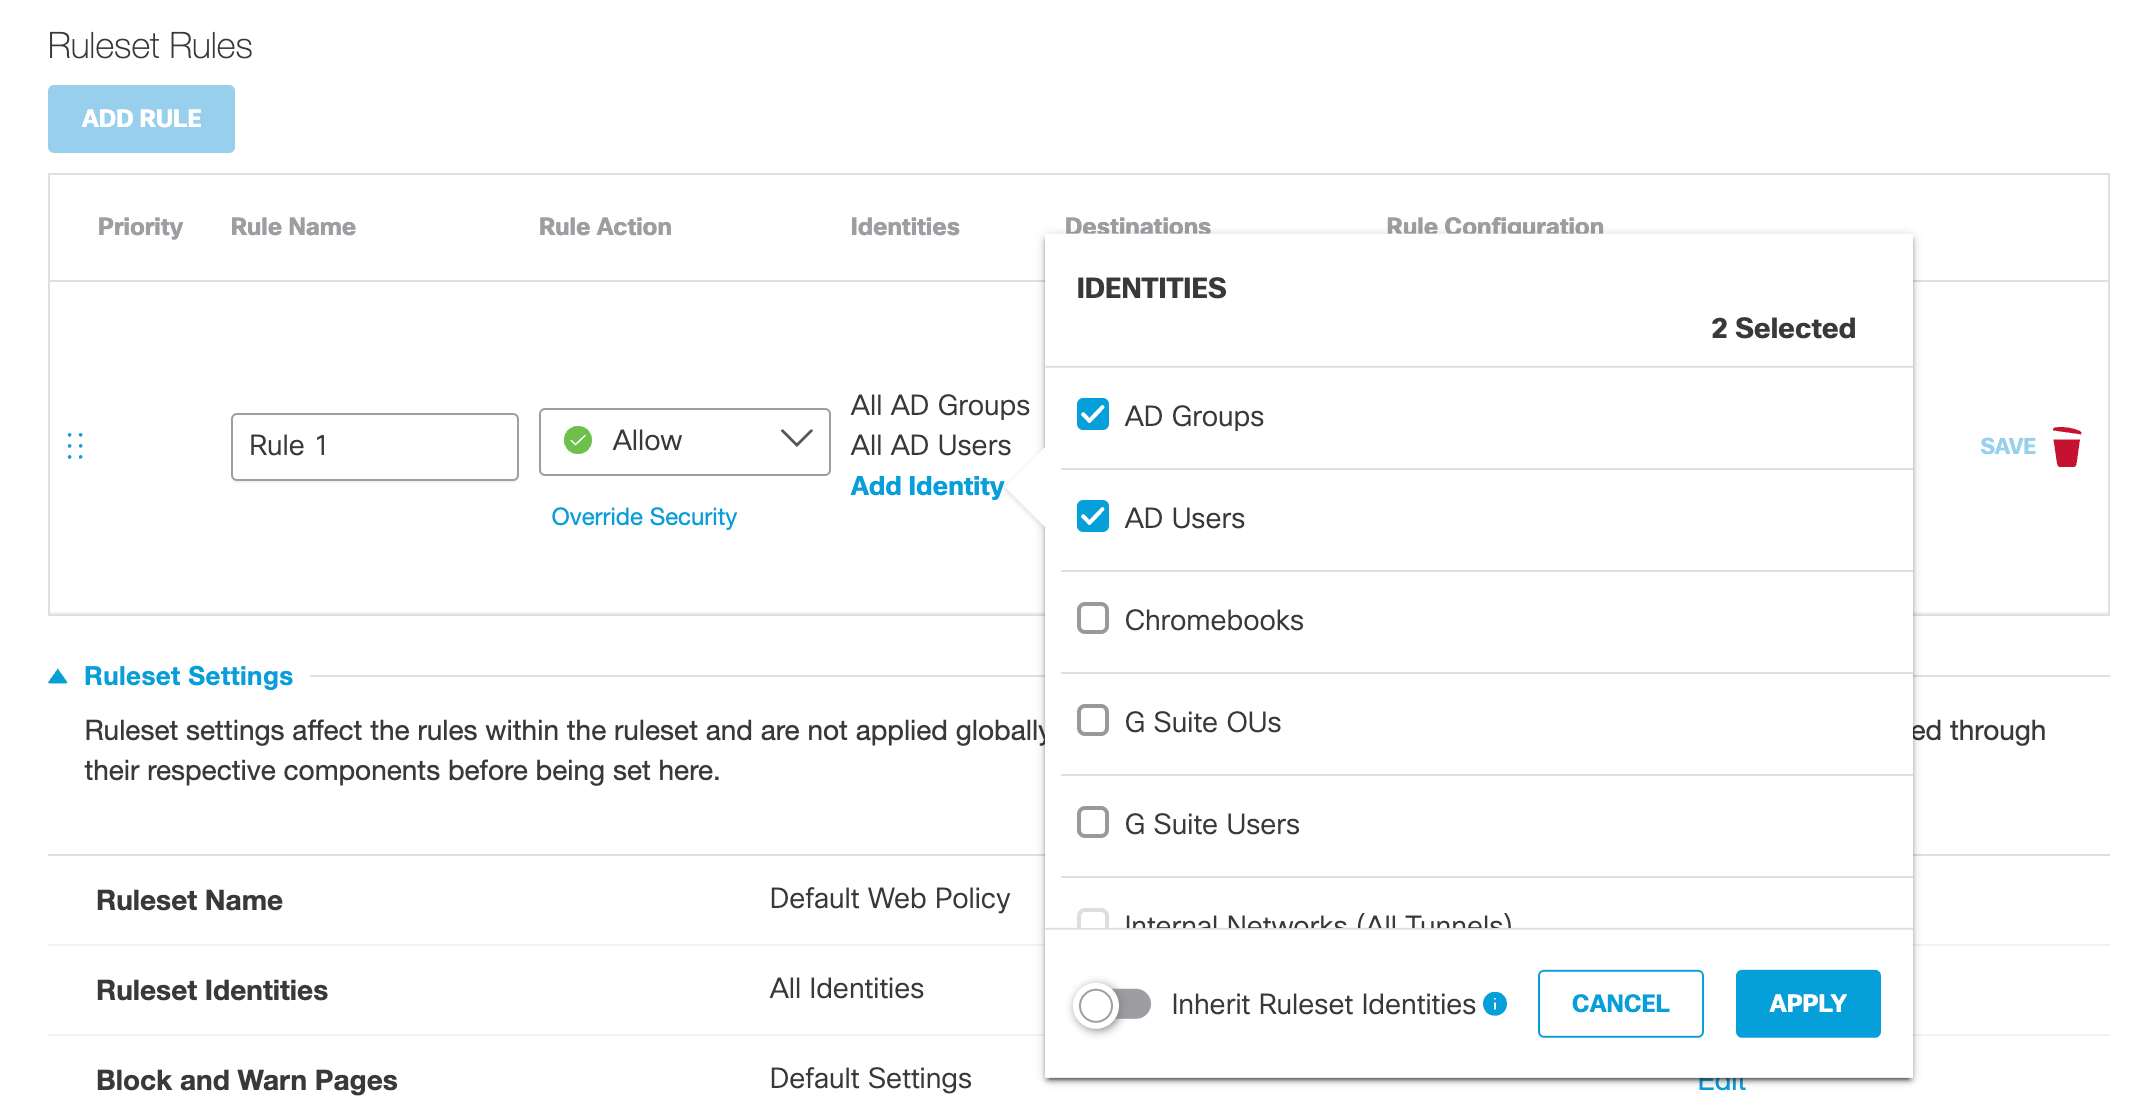
- For Identities, click Add Identity, select identities that will use this rule, and then click Apply.
You must select at least one identity.
Enable Inherit Ruleset Identities to select all rule identities to match all current and future ruleset identities. For more information, see Add a Ruleset to the Web Policy.
Note: Identities can be added to more than one rule; however, because rules are only evaluated until a match is made, we recommend that you add the same identities to as few rules as possible and avoid possible access errors. For example, identities being unintentionally granted access to or blocked from destinations.
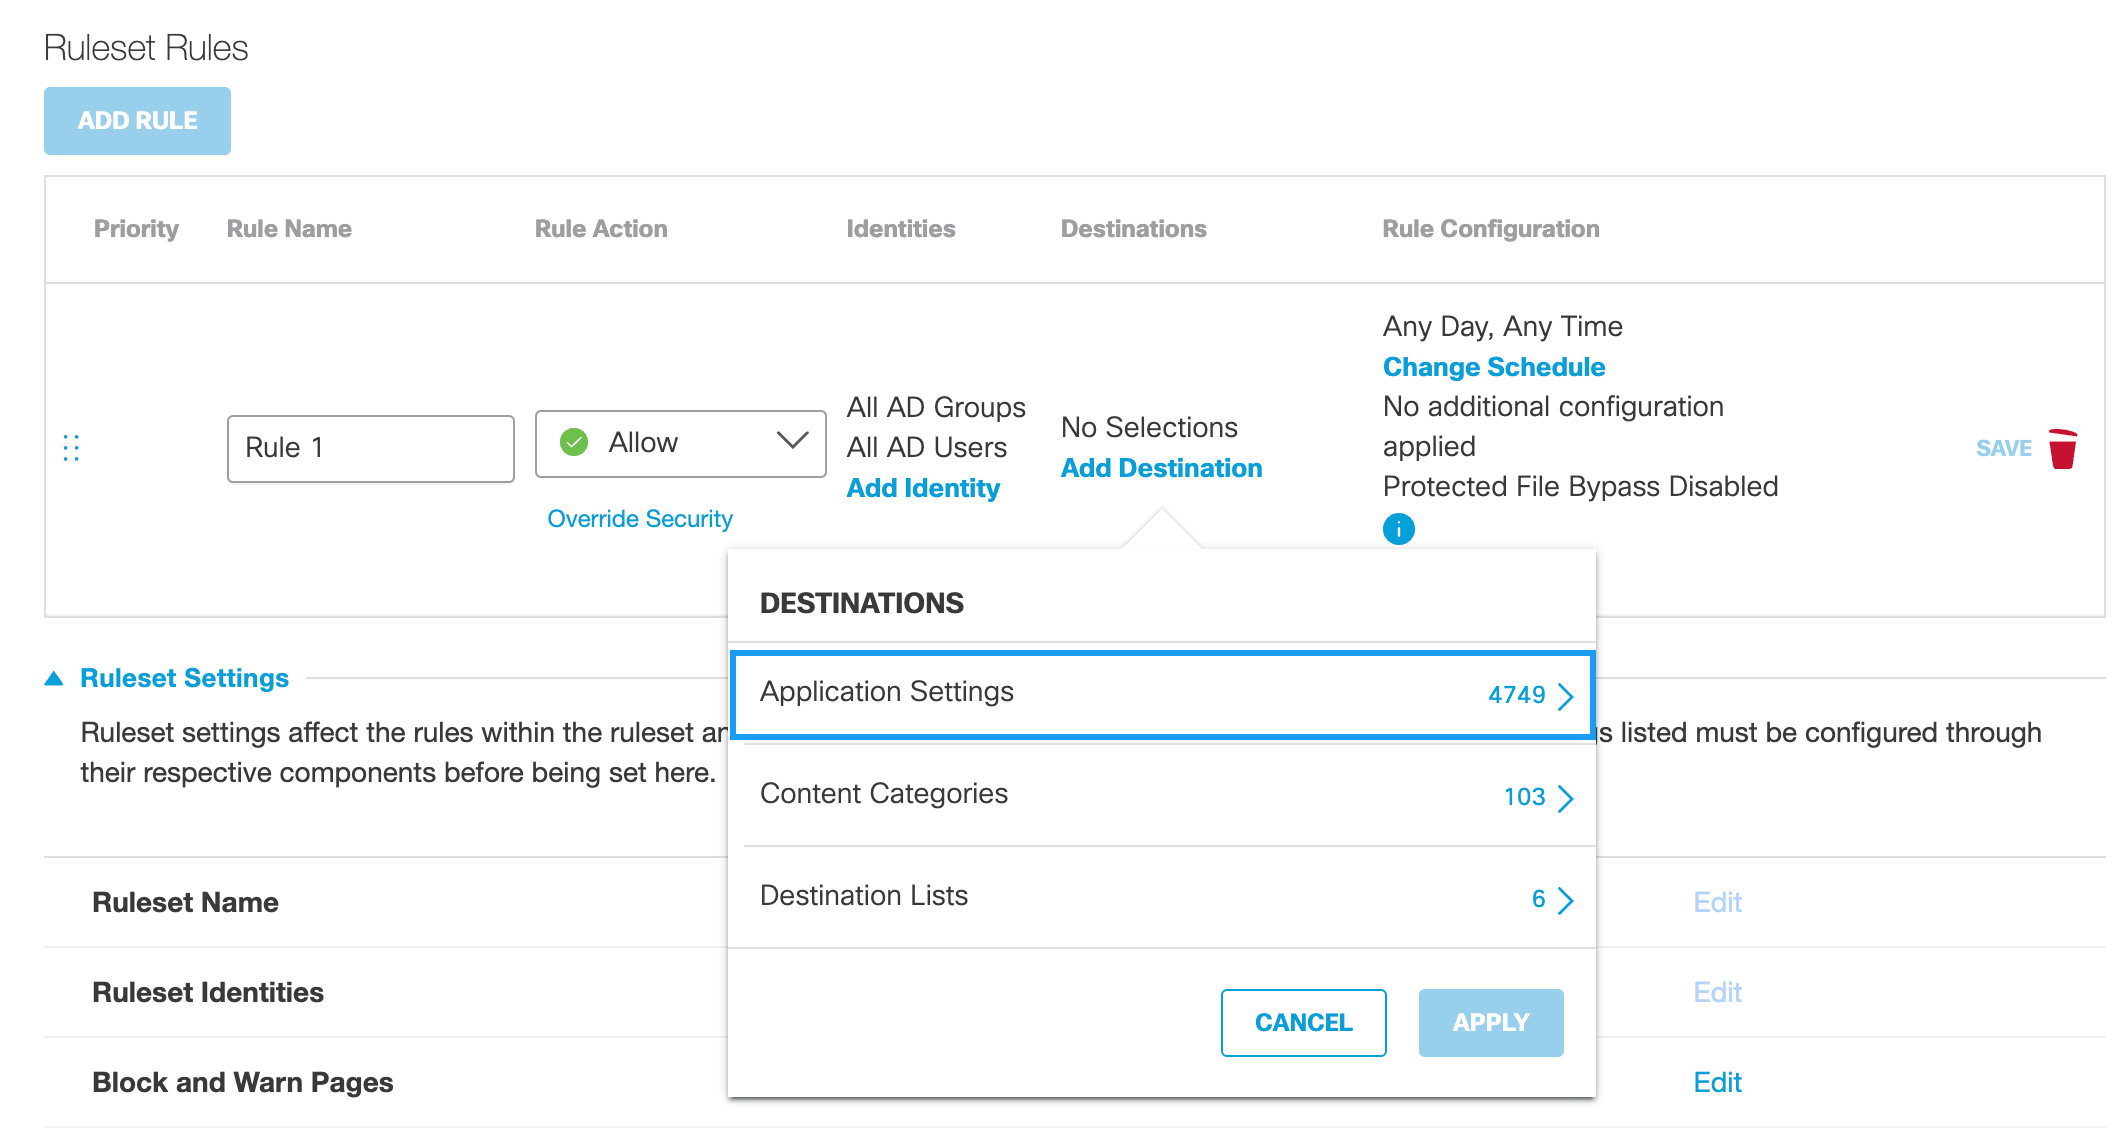
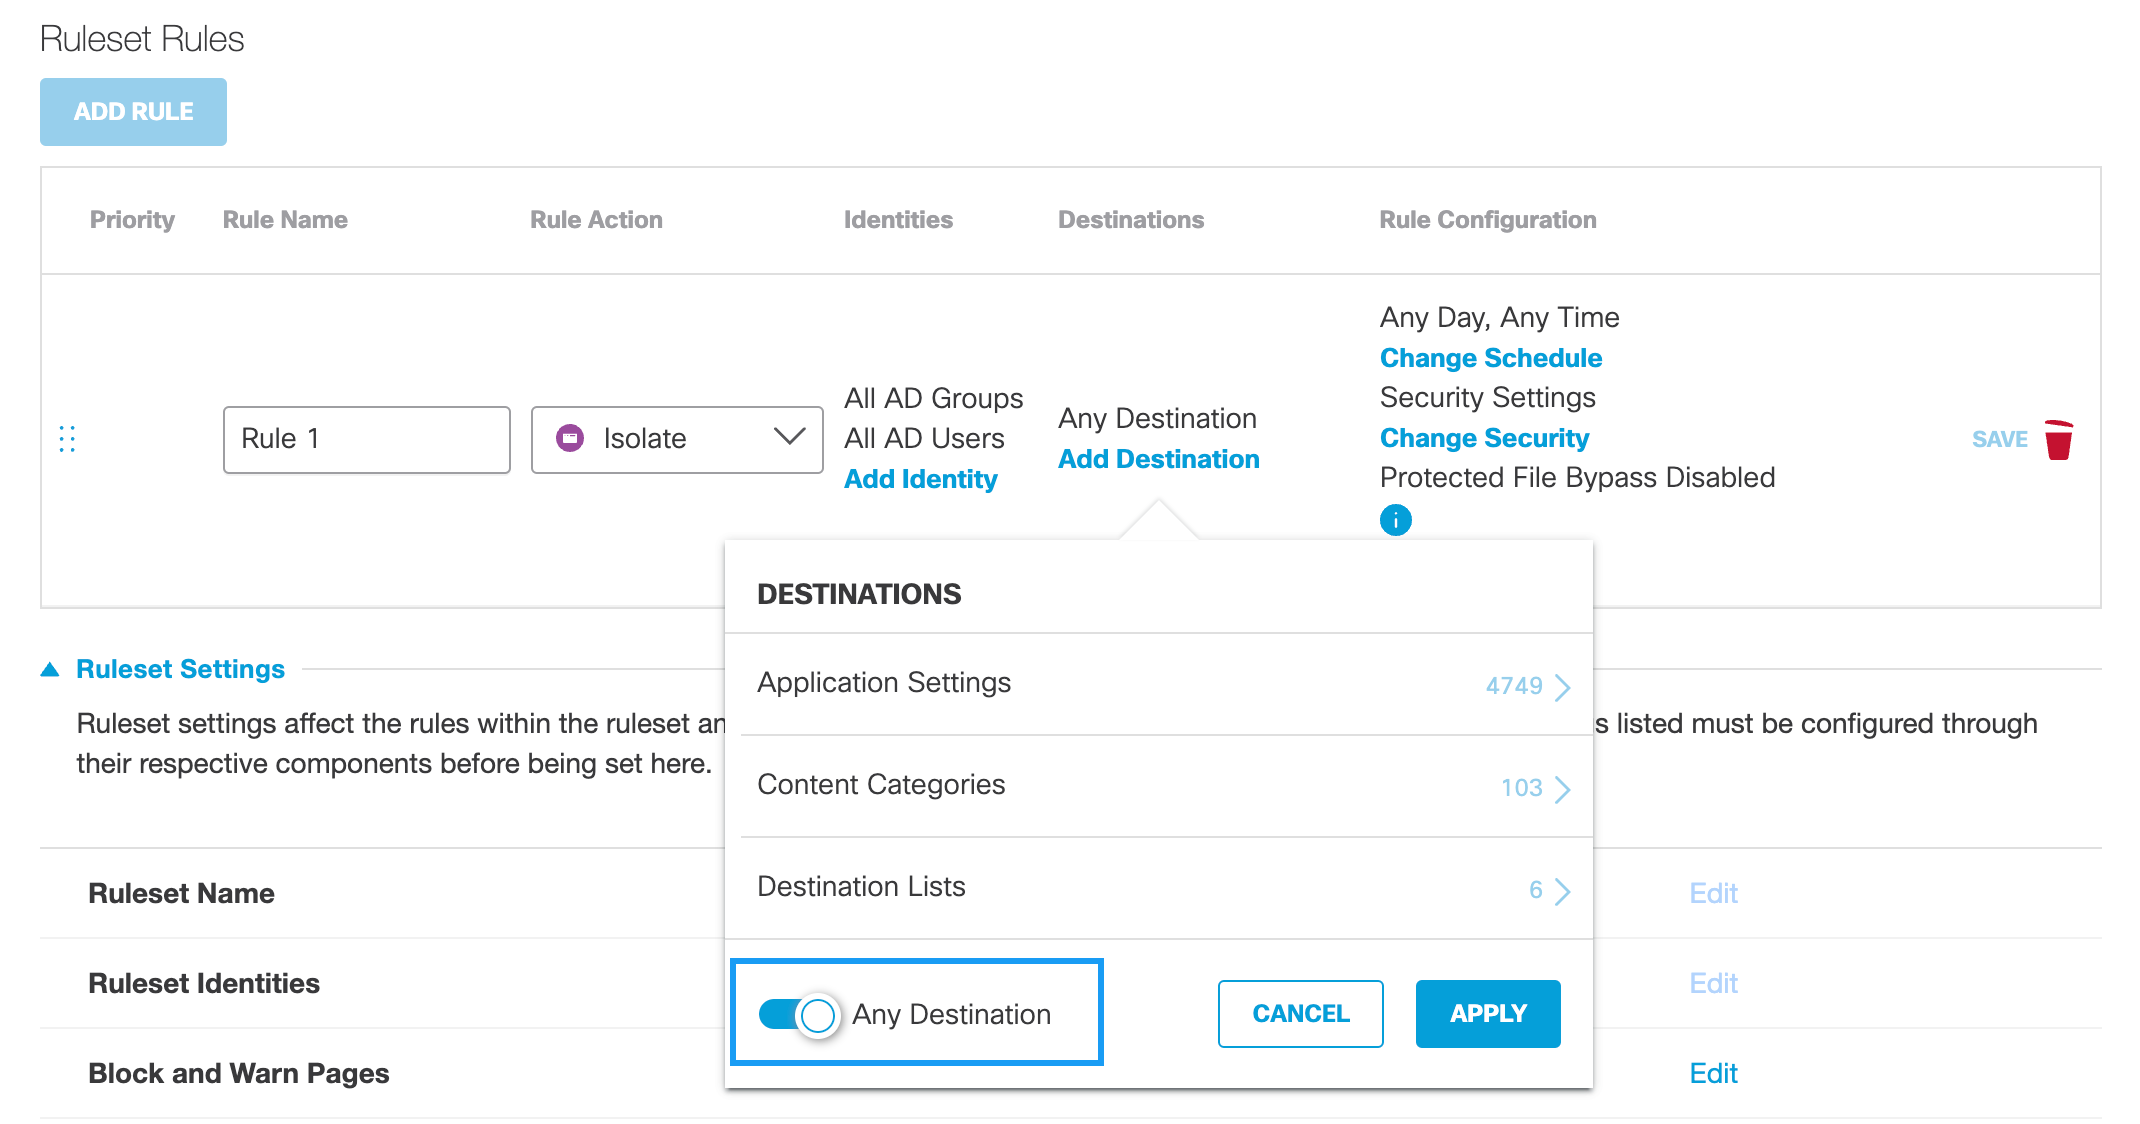
- For Destinations, configure identity access to available destination types based on the configured Rule Action. You must select at least one destination.
Note: If the Rule Action is Isolate, the availability of destinations for selection is based on your Umbrella package. For more information, see Umbrella Package RBI "Add-ons".
Application Settingsa. Click Add Destination and optionally choose Application Settings.
For more information about Application Settings, see Manage Application Settings.
Note: You must enable HTTPS inspection to enforce Application Settings. As well, if not already installed, you must download and install a CA root certificate. For more information, see Manage Certificates.
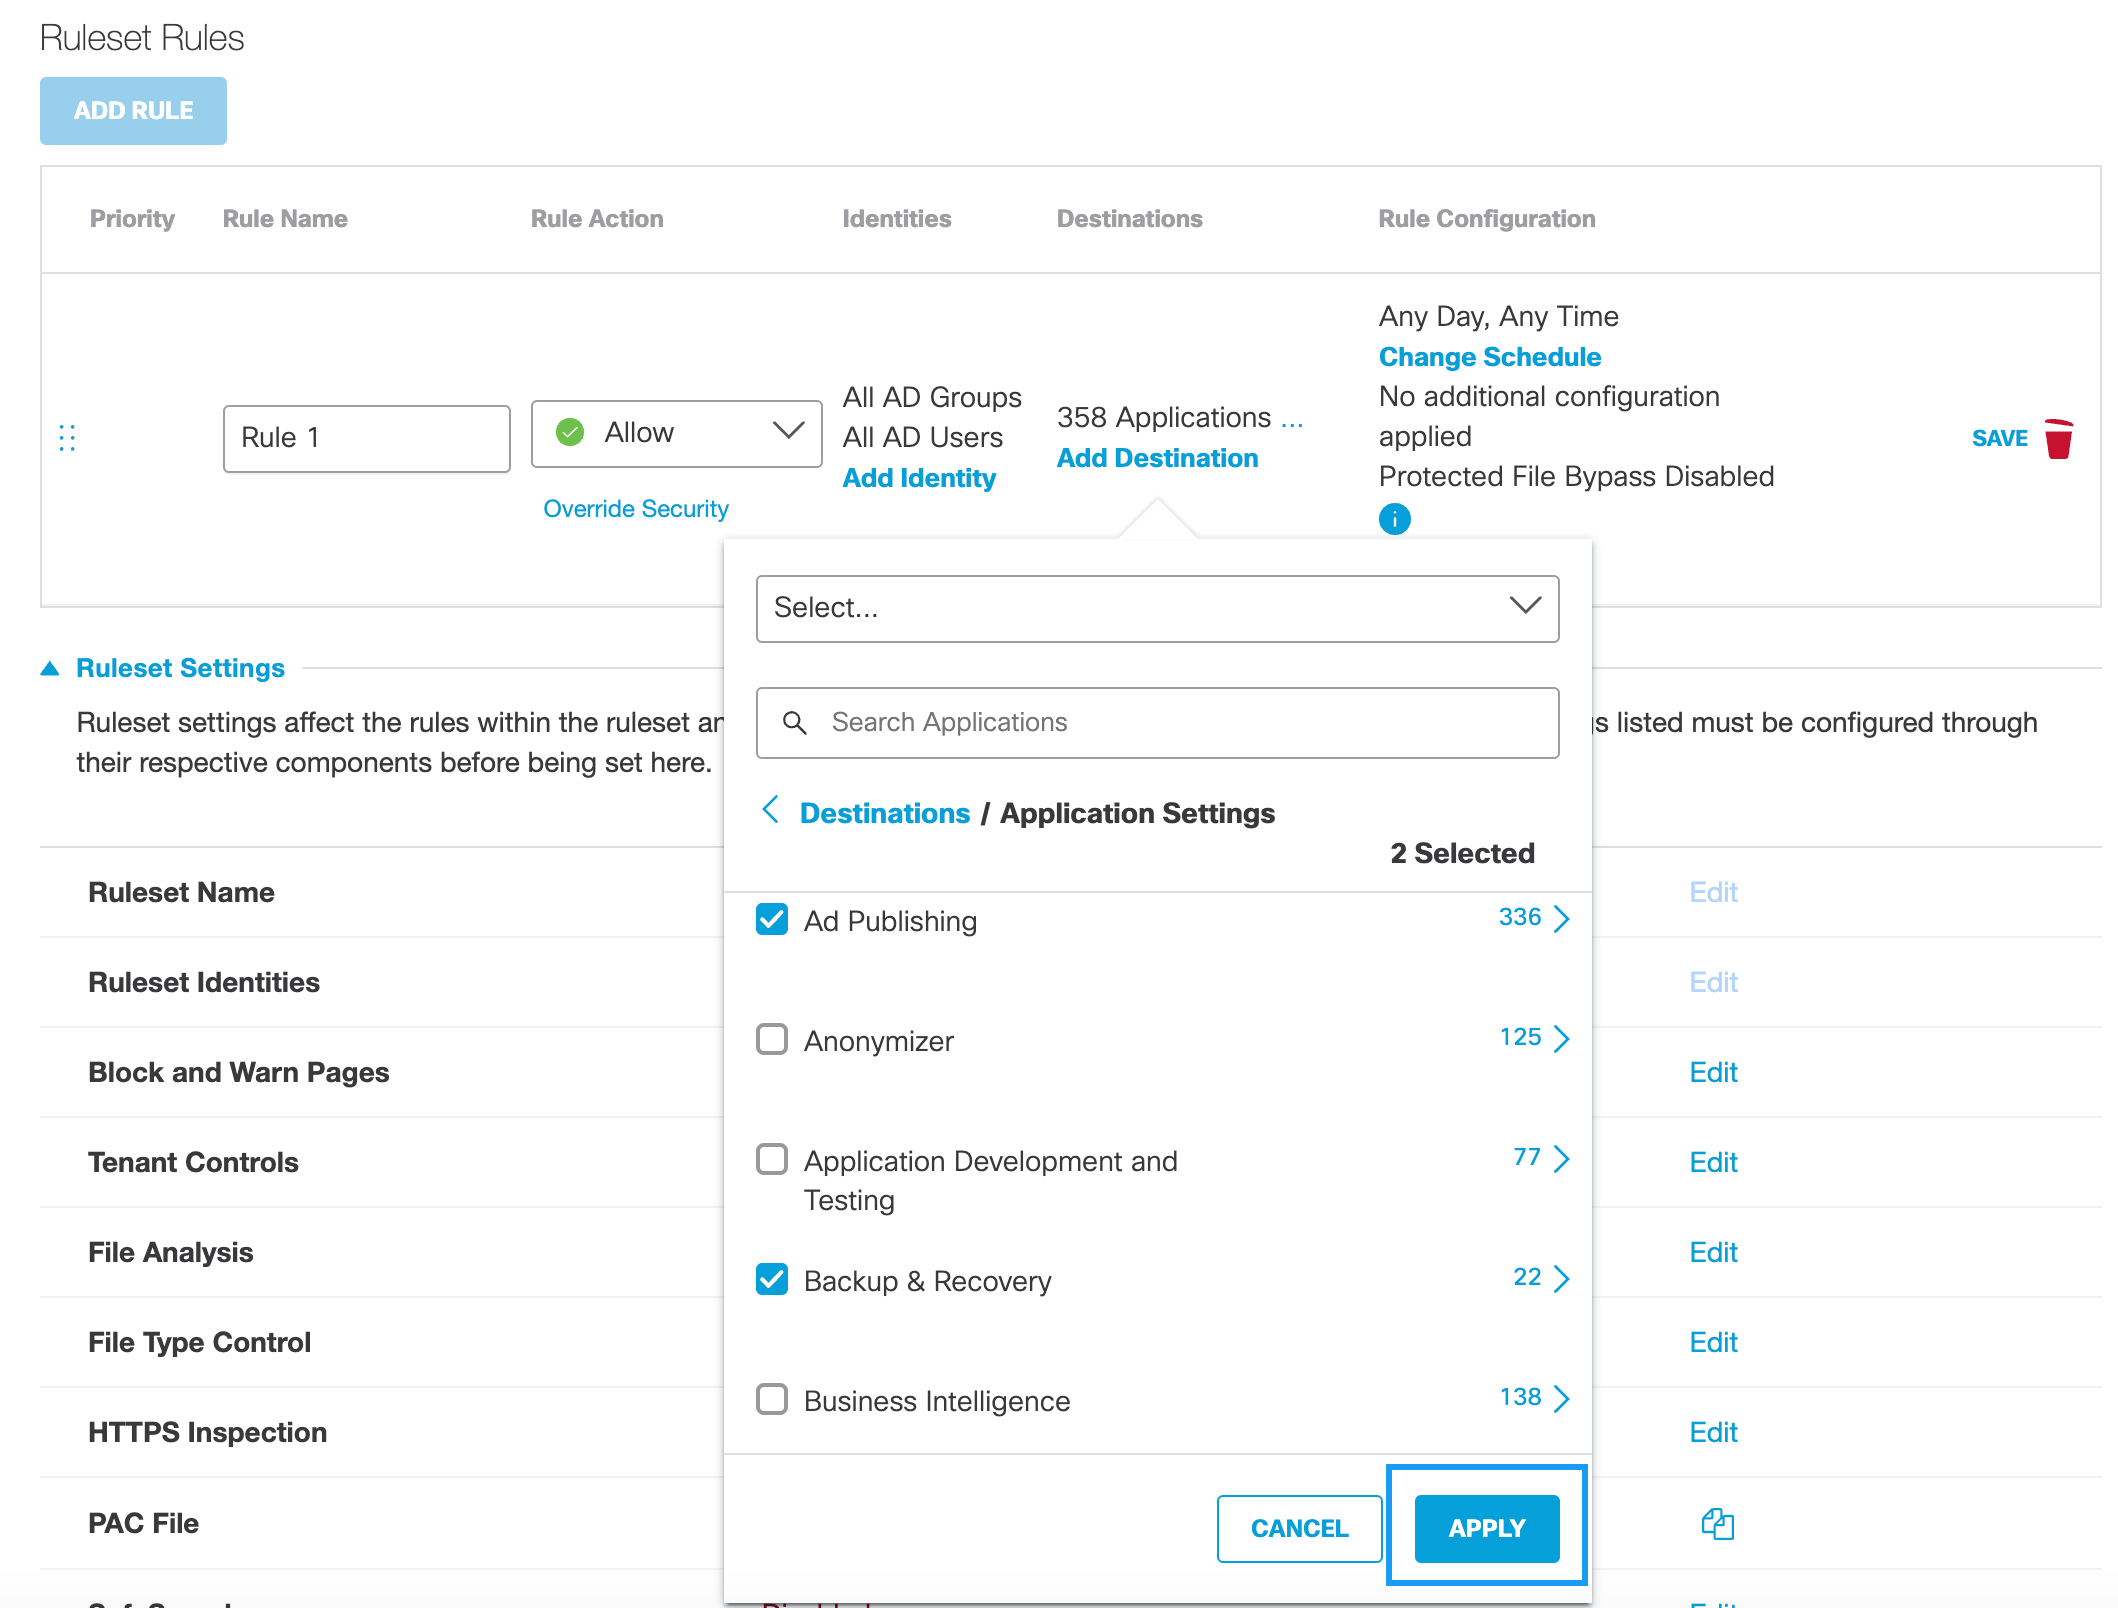
b. Select available applications and click Apply.
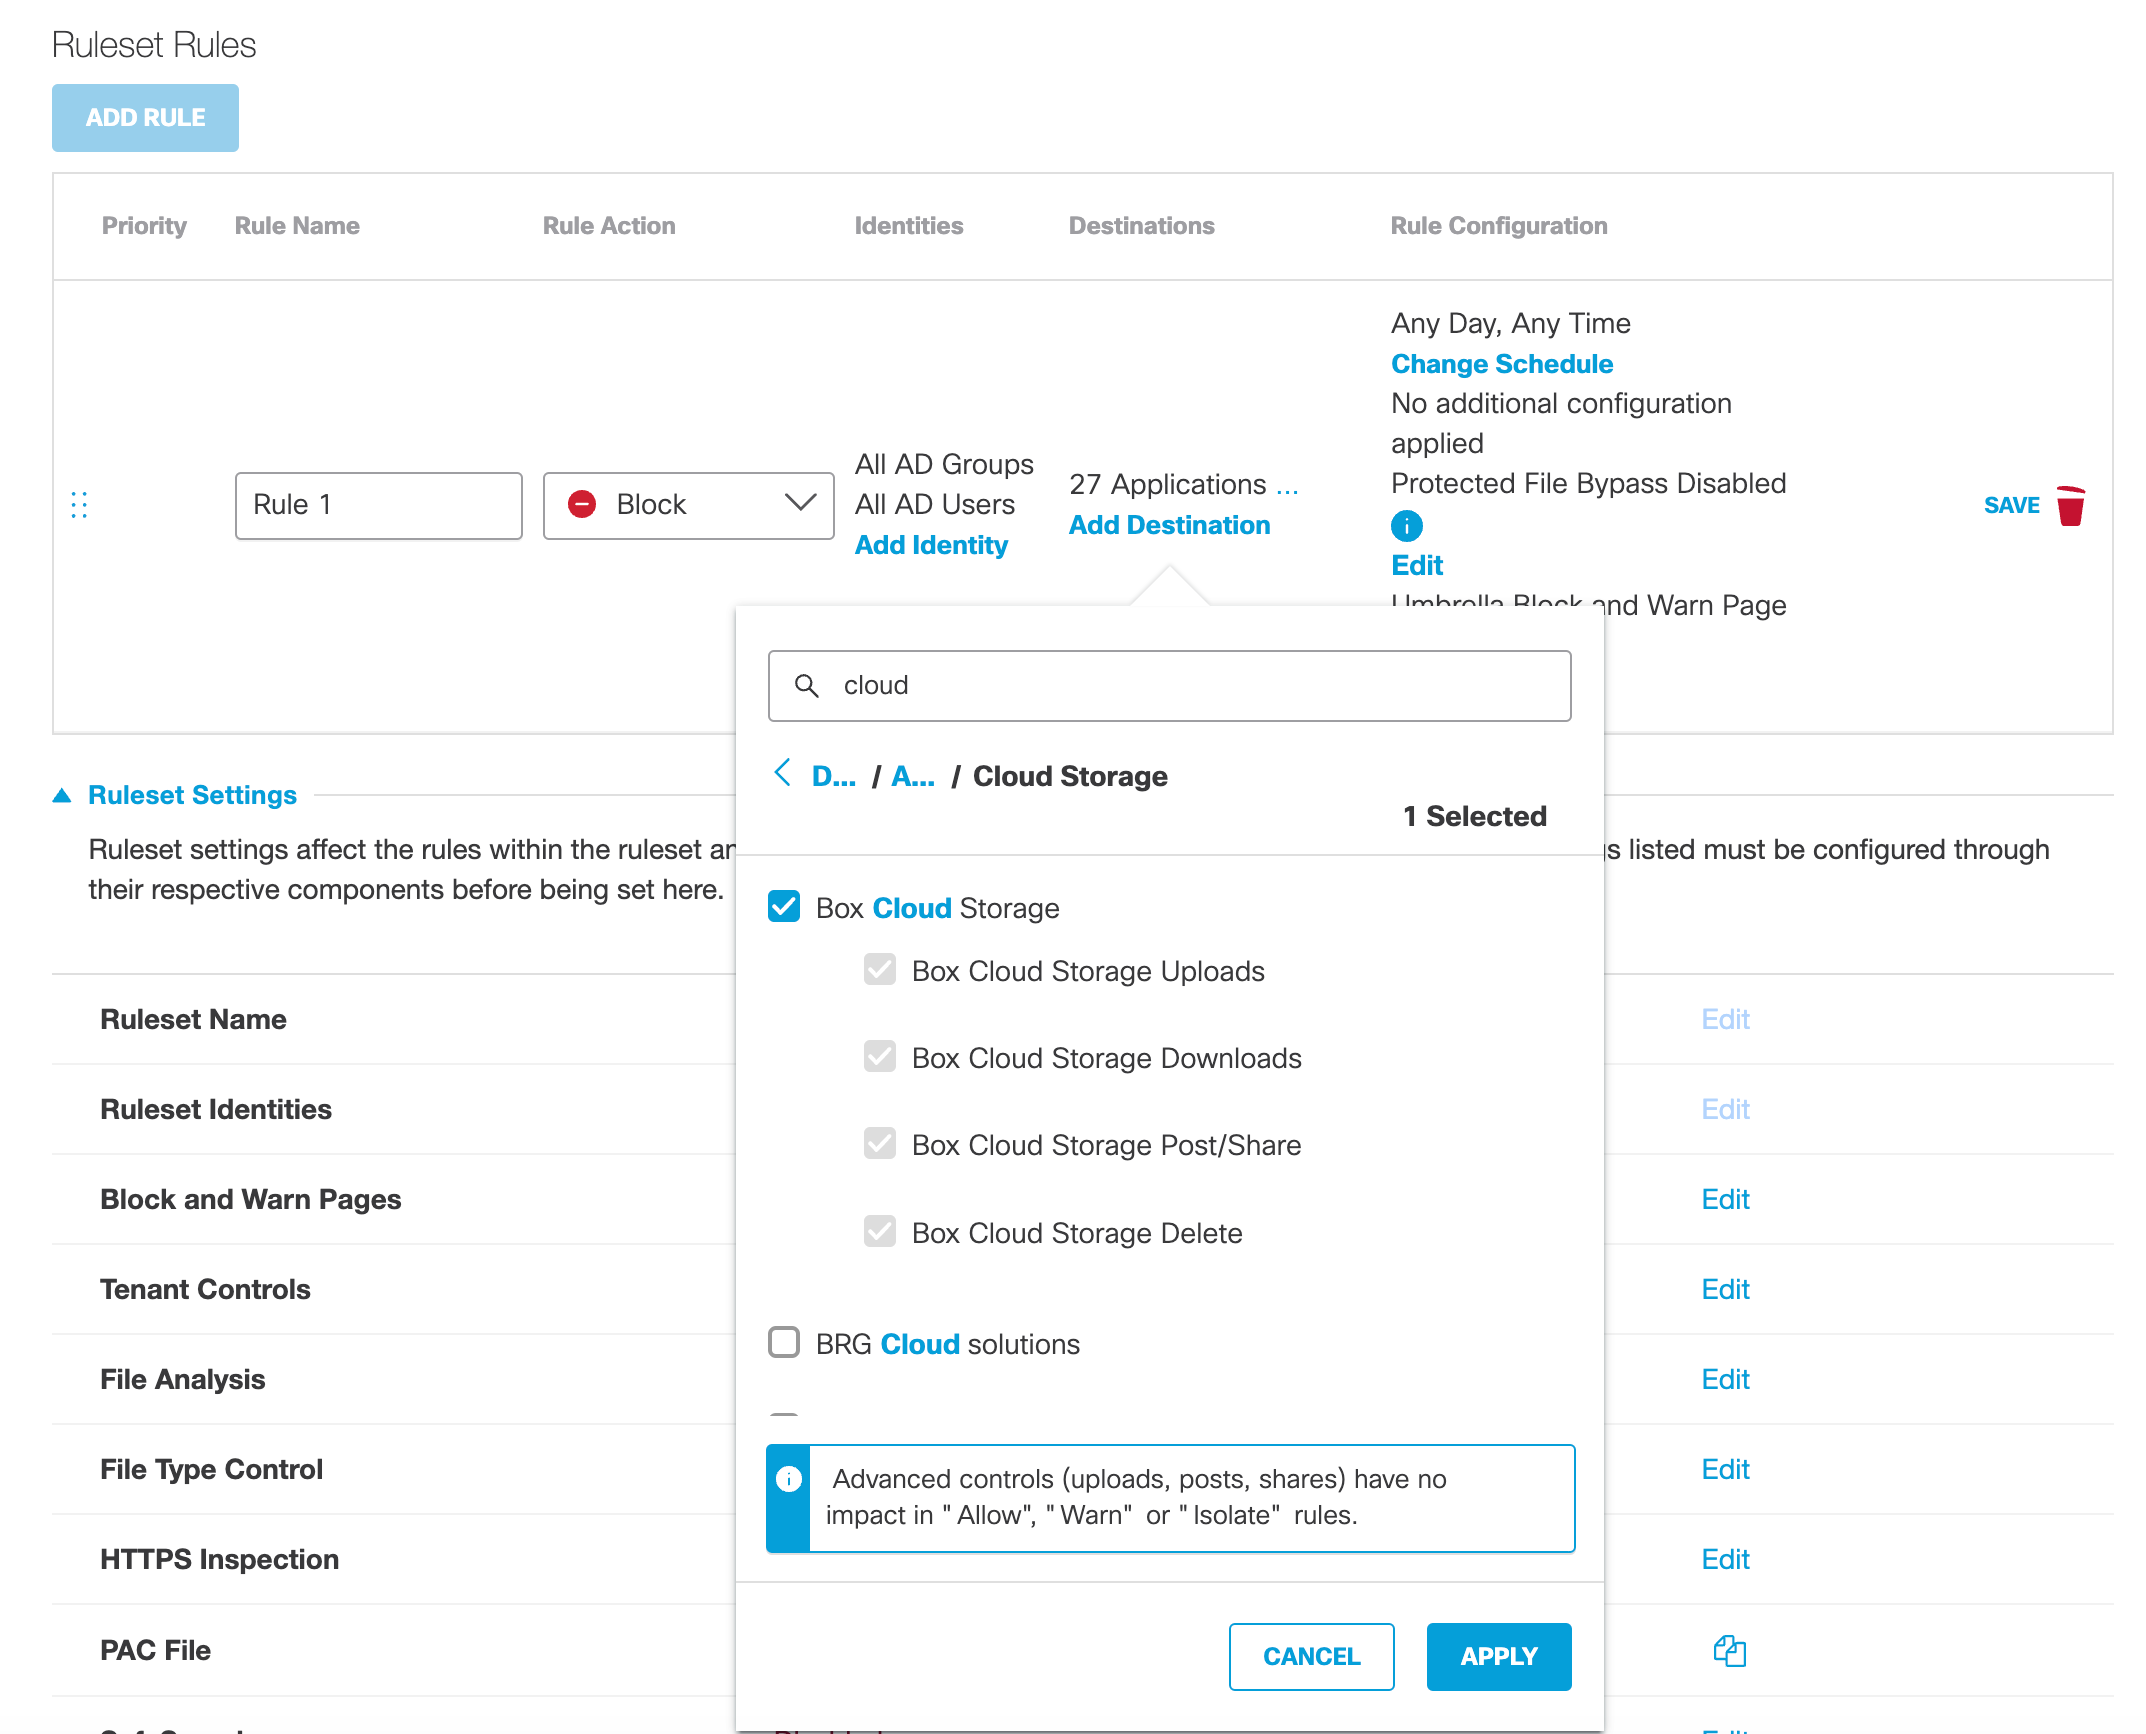
If the rule action is Block and an application has advanced app controls, you can choose to block specific actions instead of all content for the application.
- Check Uploads to block the application from uploading content.
- Check Downloads to block the application from downloading content.
- Check Post/Share to block the application from posting or sharing content.
- Check Delete to block the application from deleting content.
For more information about configuring application settings with advanced app controls, see Manage Advanced App Controls.
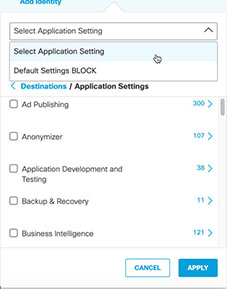
If you have previously created an Application Setting, you can choose it from the pull-down and then click Apply.
Note: Unavailable if the Rule Action is Isolate.
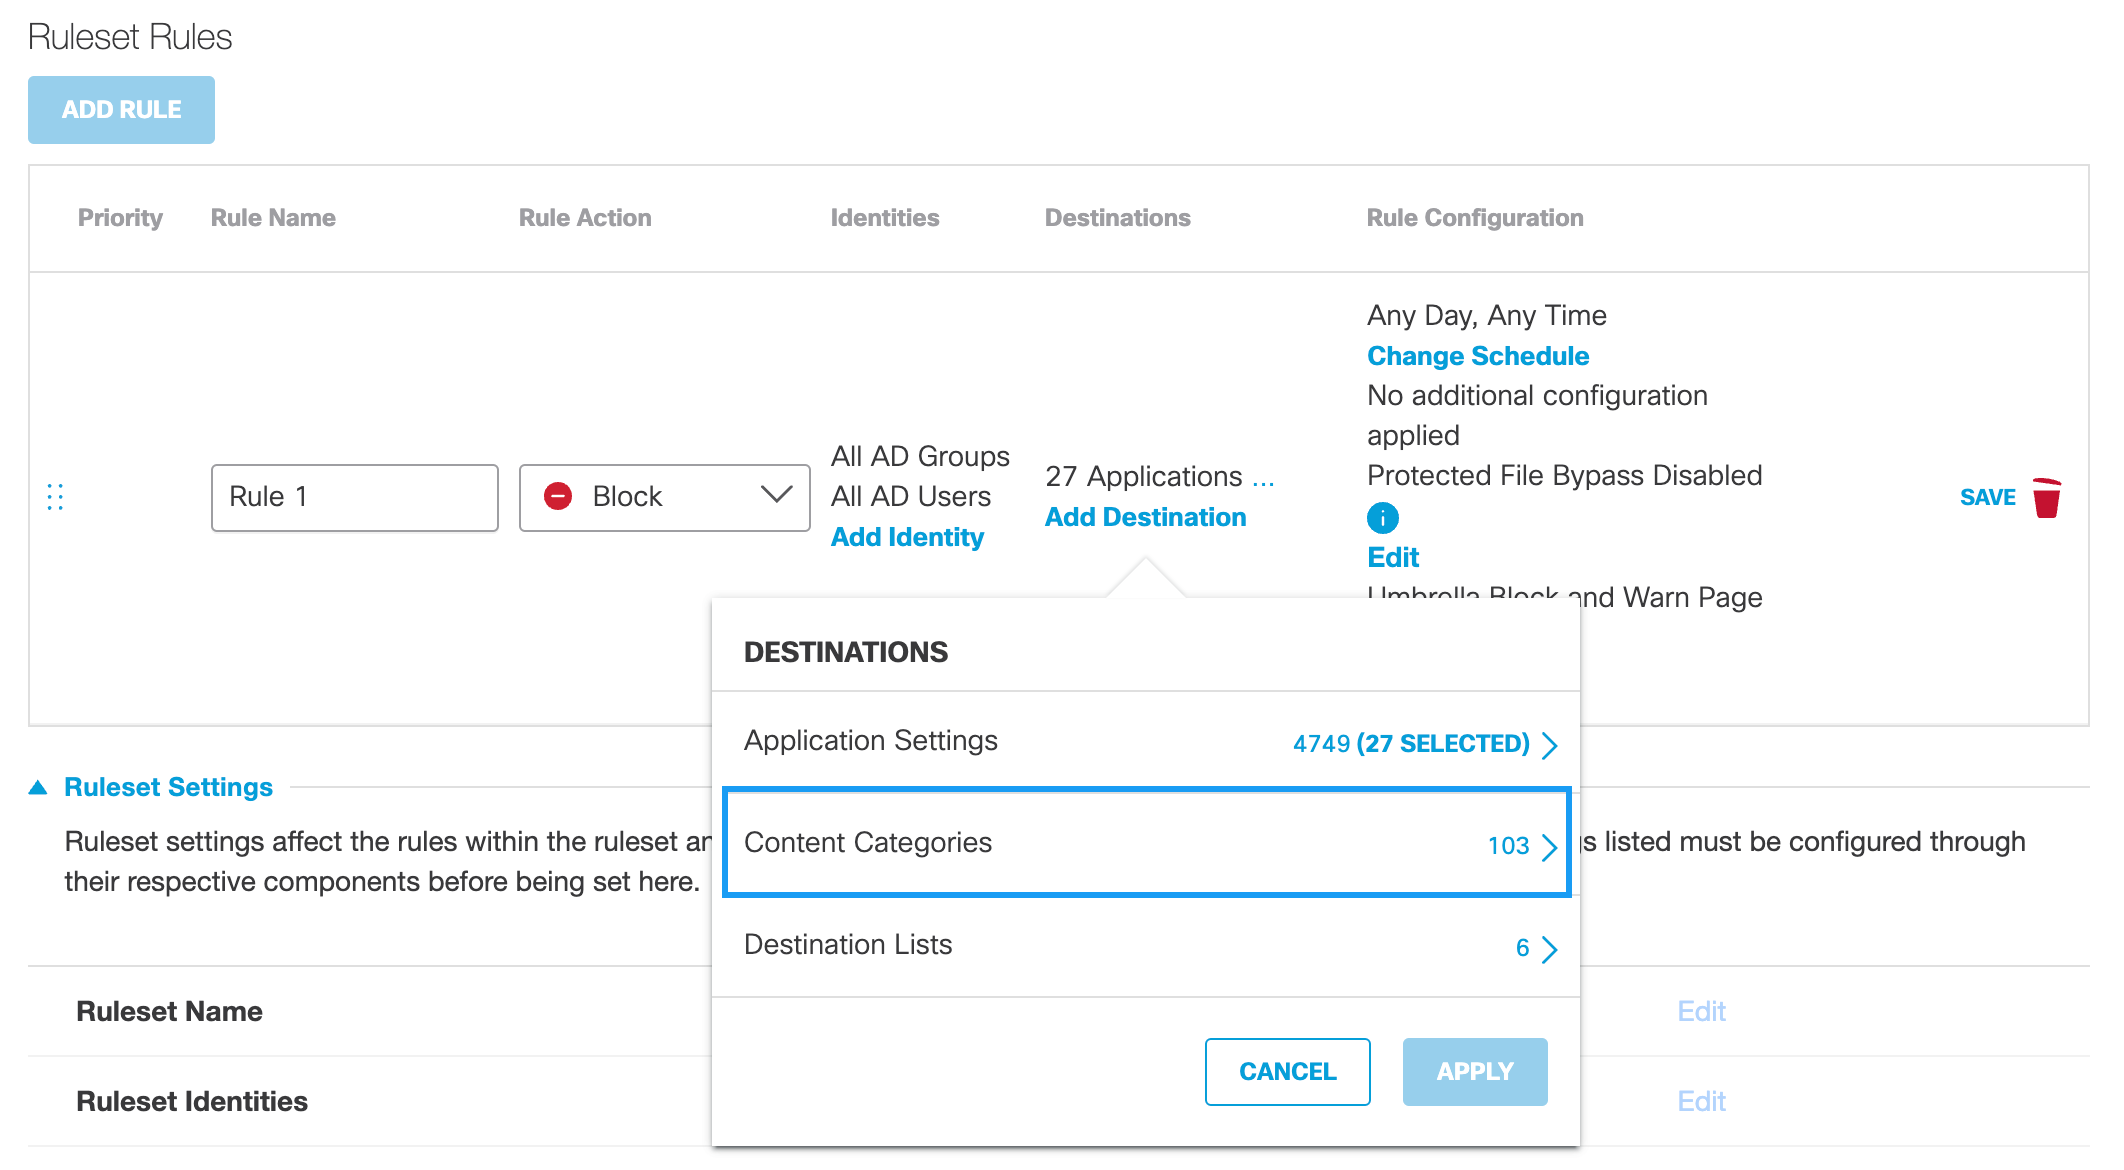
Content Categoriesc. Click Add Destination and optionally choose Content Categories.
For more information about Content Categories, see Web Content Categories.
d. Select available content categories and click Apply.
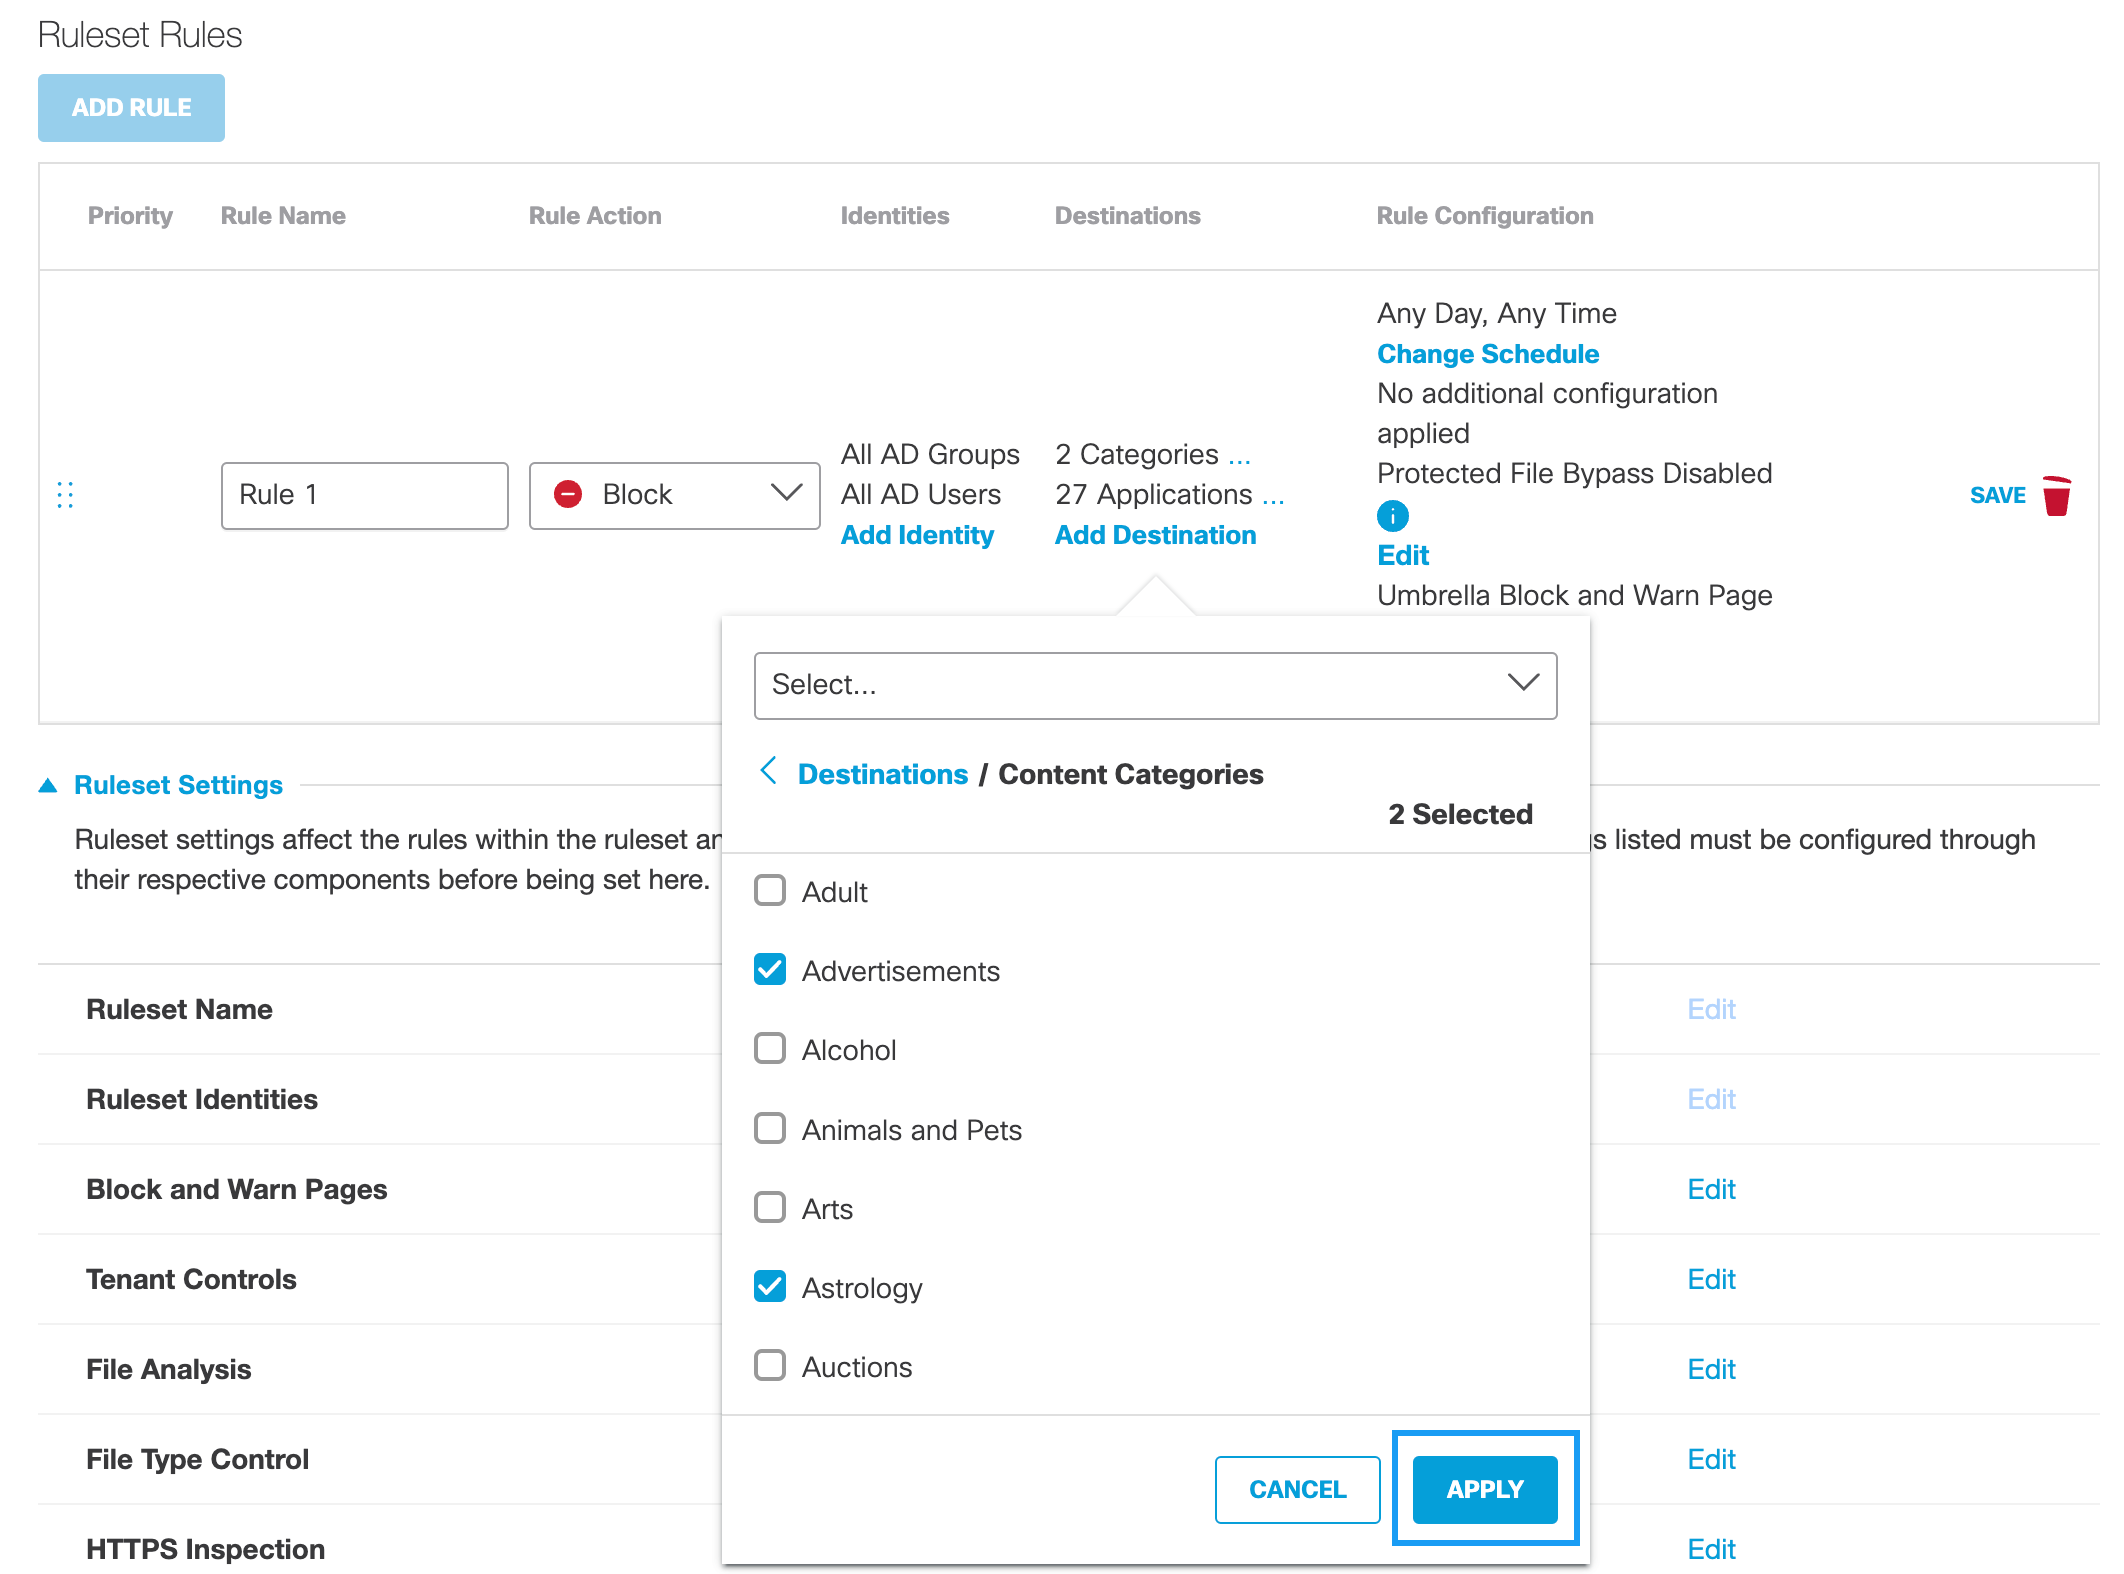
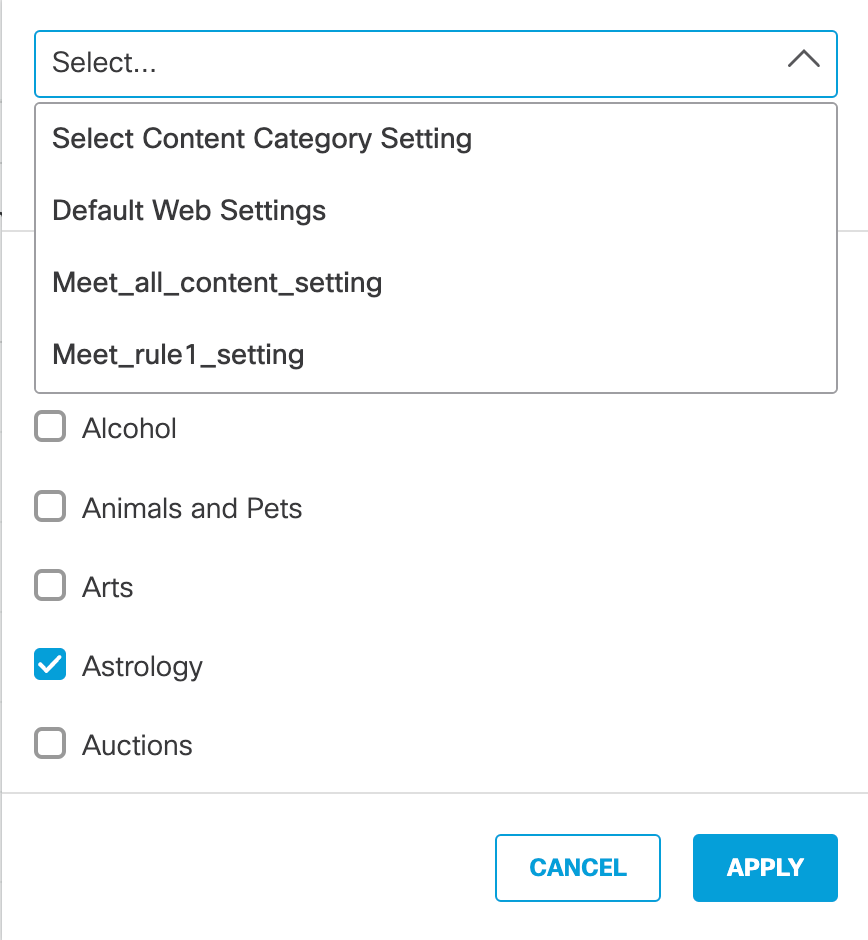
If you have previously created a Content Category setting, you can choose it from the pull-down and then click Apply.
Note: Unavailable if the Rule Action is Isolate.
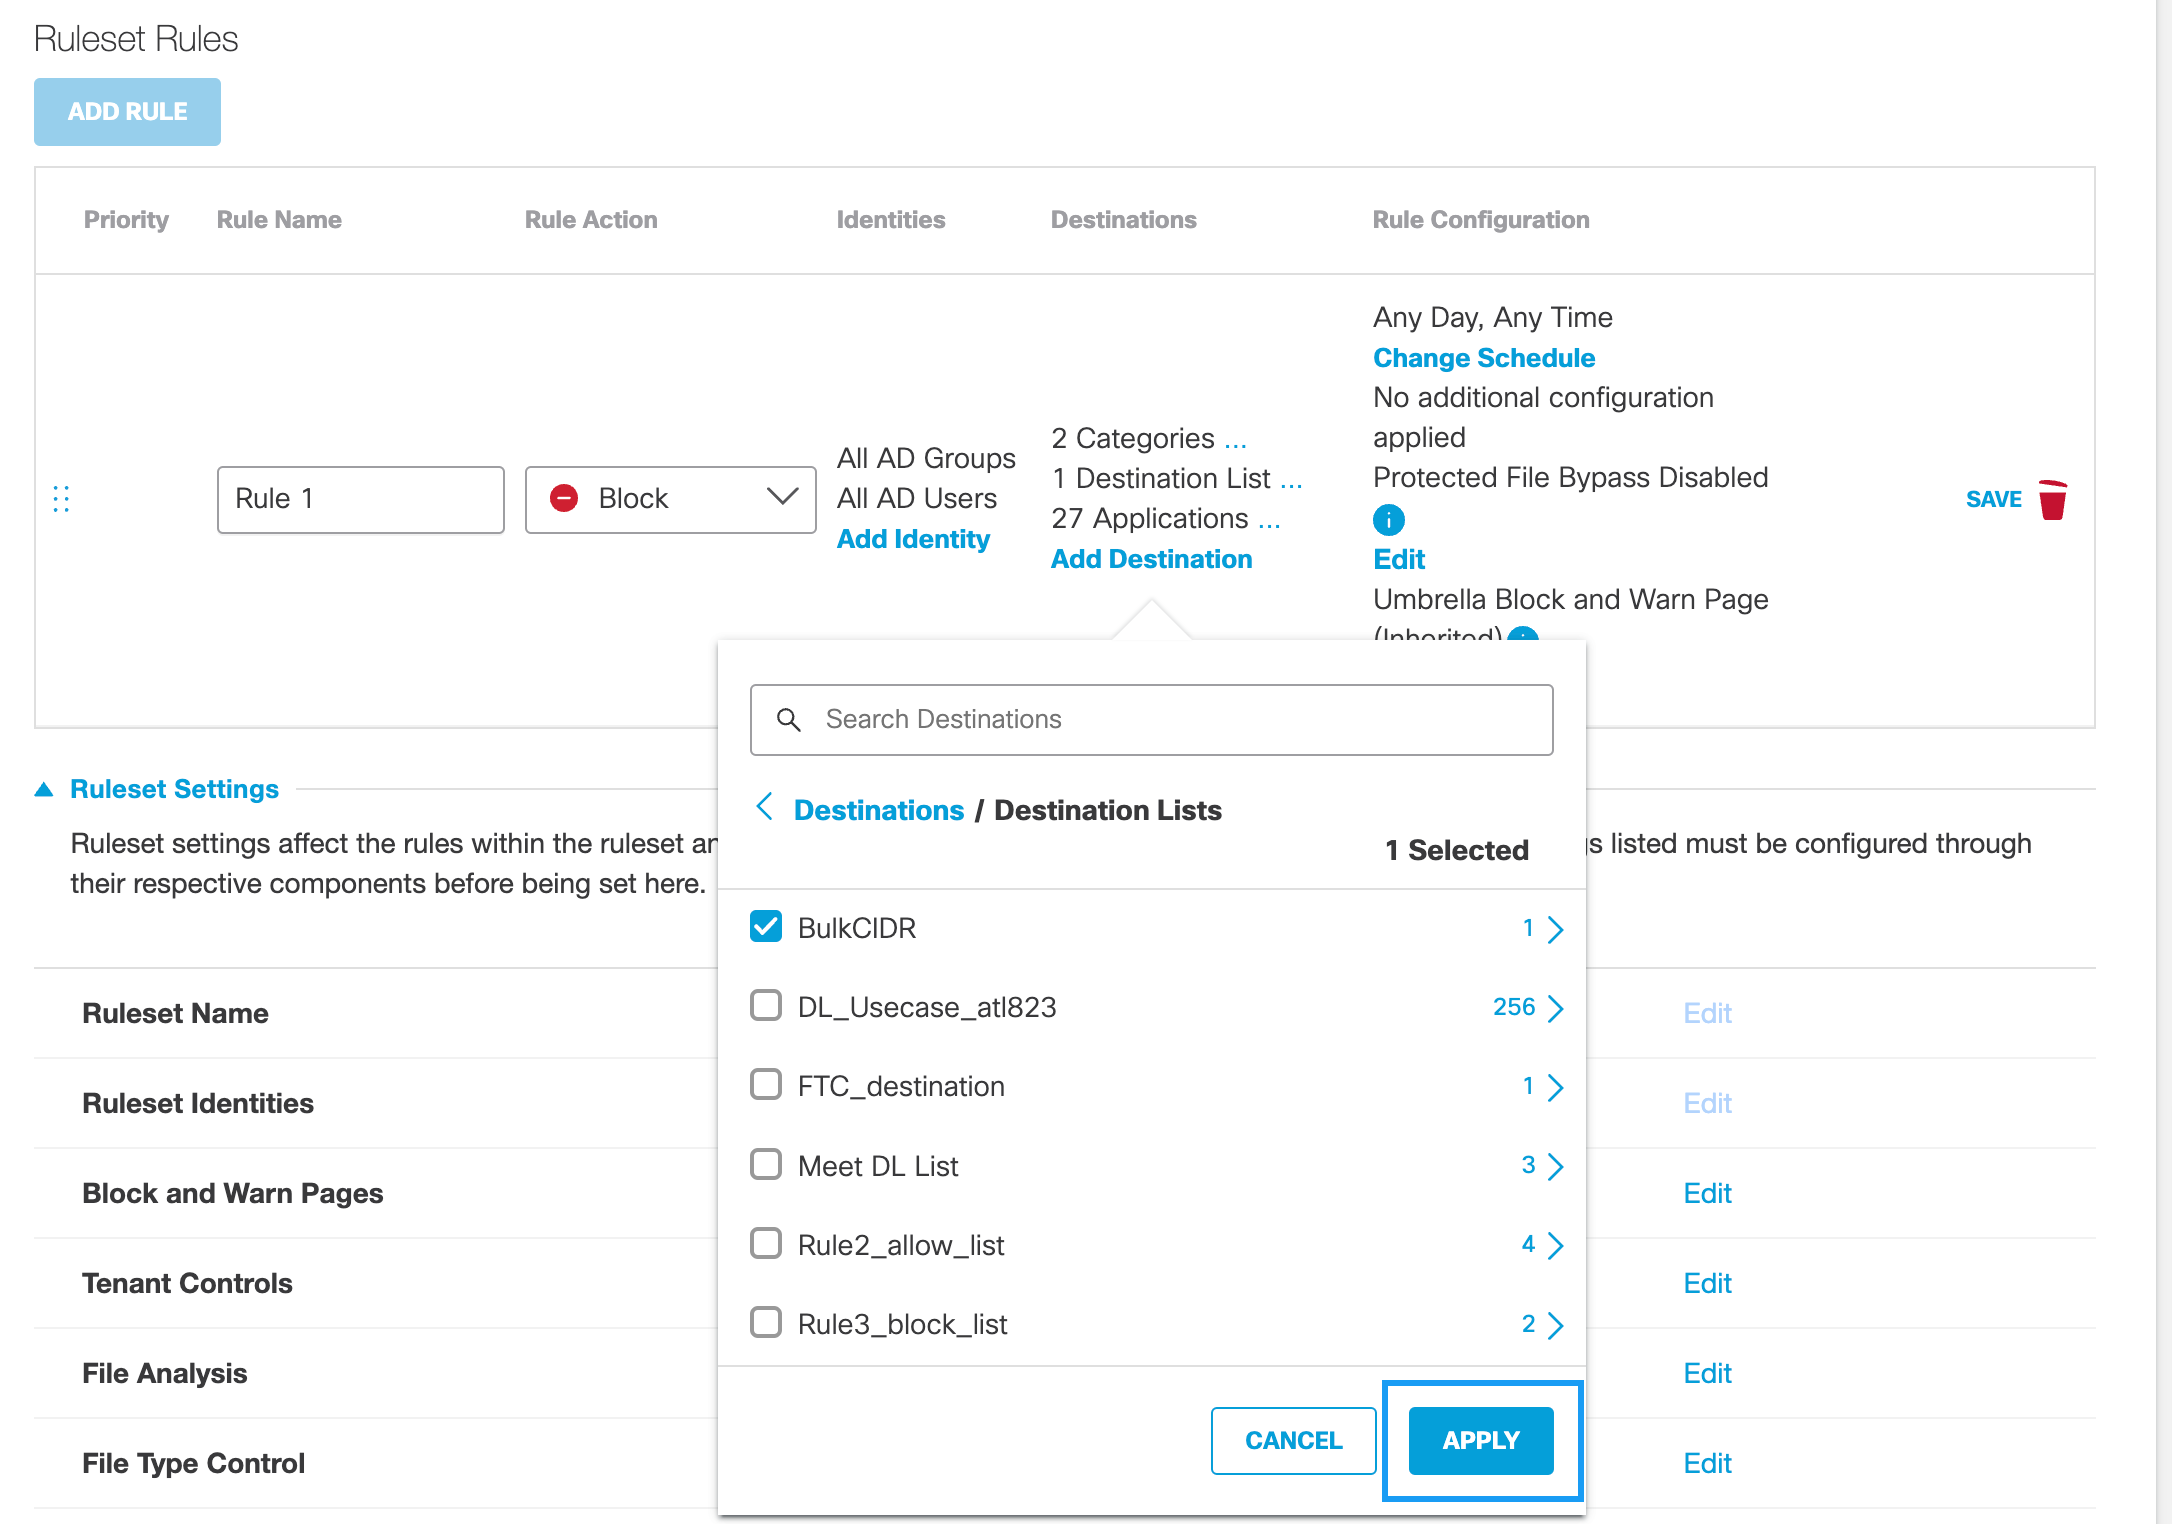
Destination Listse. Click Add Destination and optionally choose Destination Lists.
Unavailable if the Rule Action is Warn.
Note: Before you can add a destination list to a rule, you must first add the destination list to Umbrella through Umbrella's Policy Components section. For more information, see Add a Web Policy Destination List.
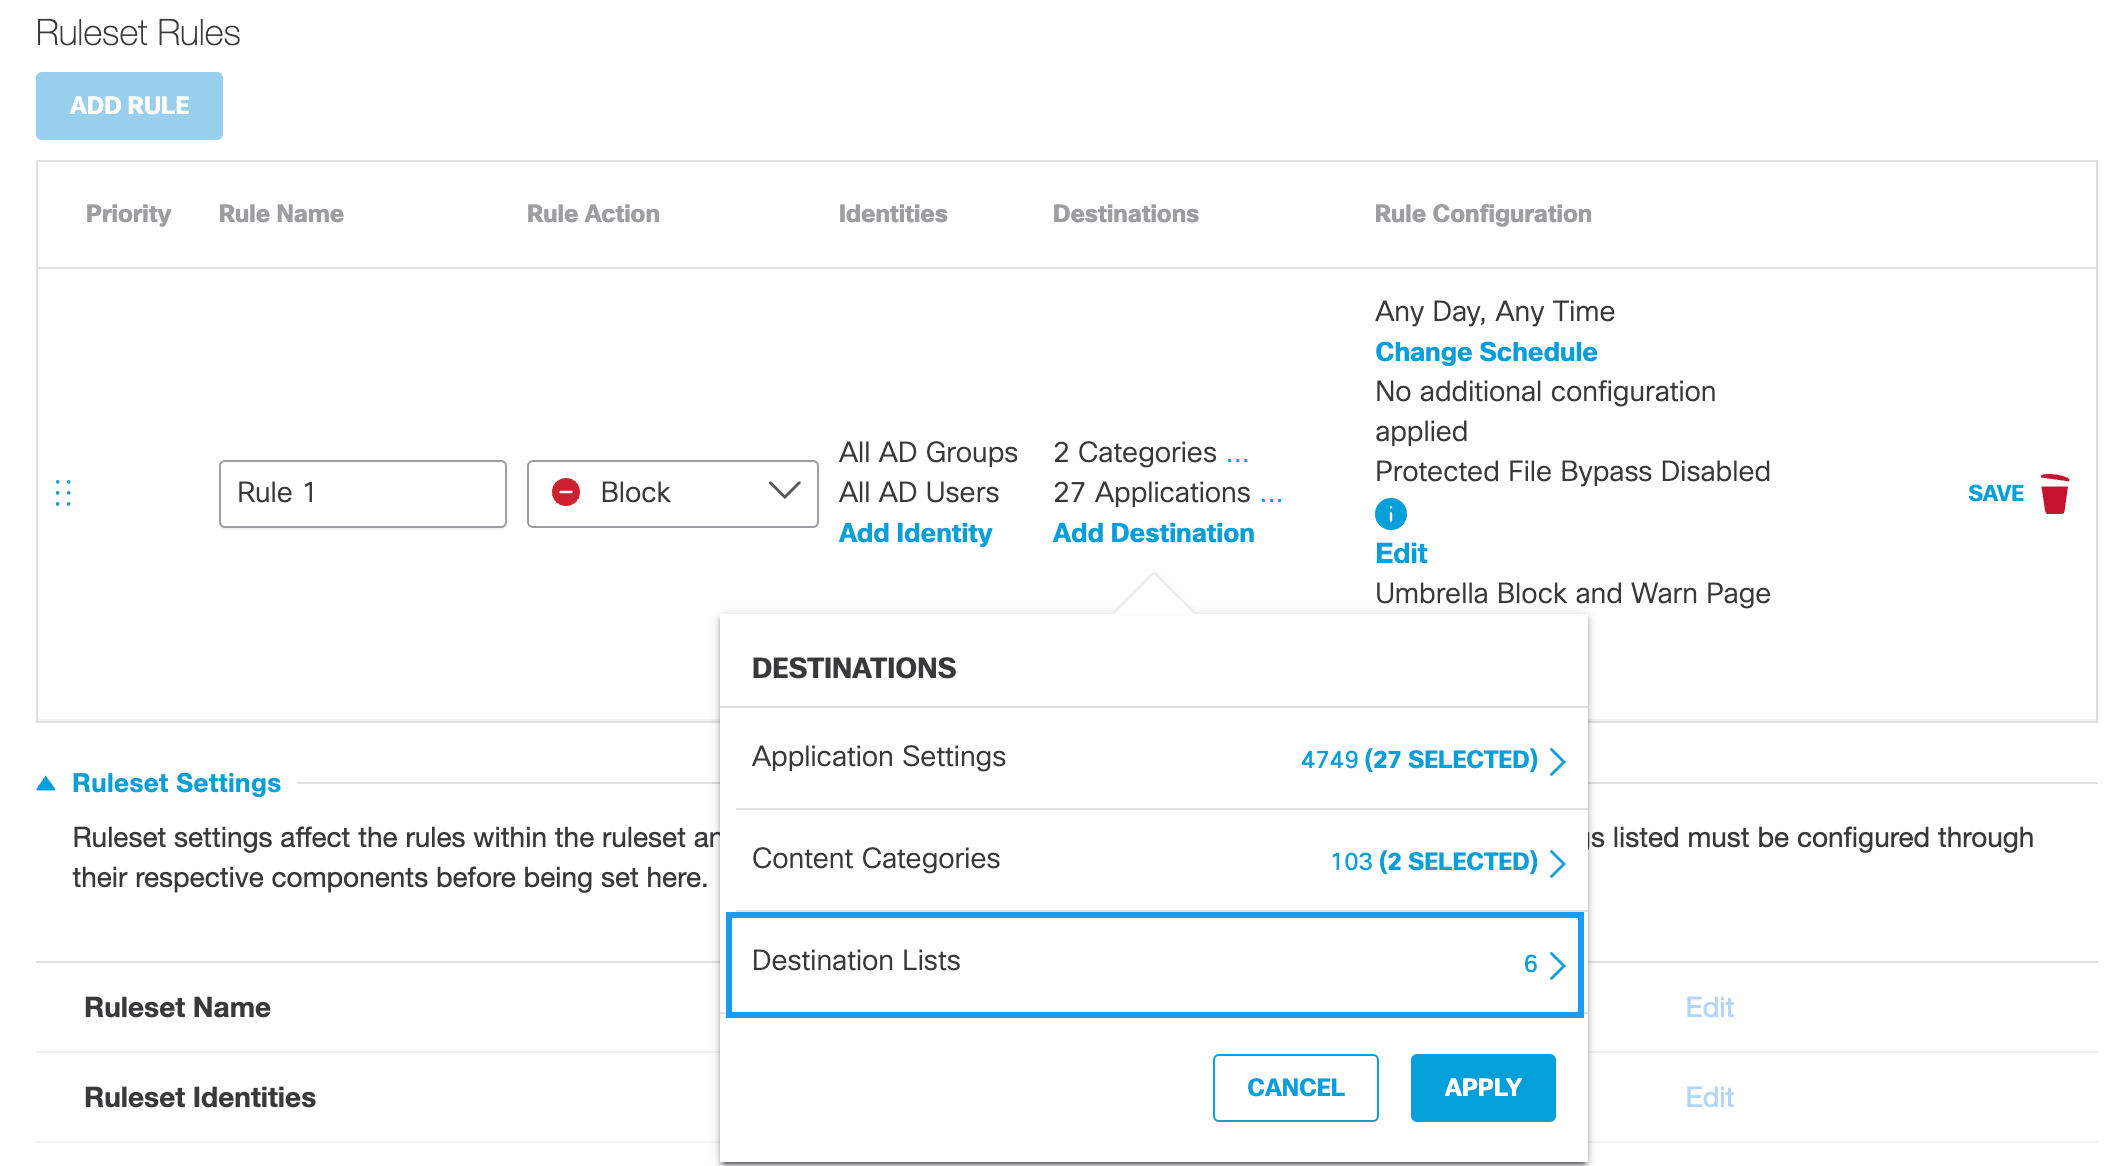
f. From the pull-down menu, choose a destination list and click Apply.
g. Optionally, if the Rule Action is Isolate, enable Any Destination.
All available destinations are selected. The availability of destinations is based on your Umbrella package. For more information, see Umbrella Package RBI "Add-ons".
- For Rule Configuration, configure general rule settings.
Change Schedulea. Click Change Schedule and then configure the time within which this rule is active.
Note: Umbrella automatically takes daylight savings into consideration when determining time.
- Time Zone—The time zone against which the setting Time is determined. This means that Umbrella does not use the local time of the identity to determine when an Action is active (enabled) Umbrella uses the time of the selected time zone.
- Time—The time—calculated from the selected Time Zone—within which the selected action occurs. When configuring Time, note that the time 23:59 runs to the end of the minute.
- Days—The days within which the selected action occurs.
Click Reset to clear all schedule settings.b. Click Apply.
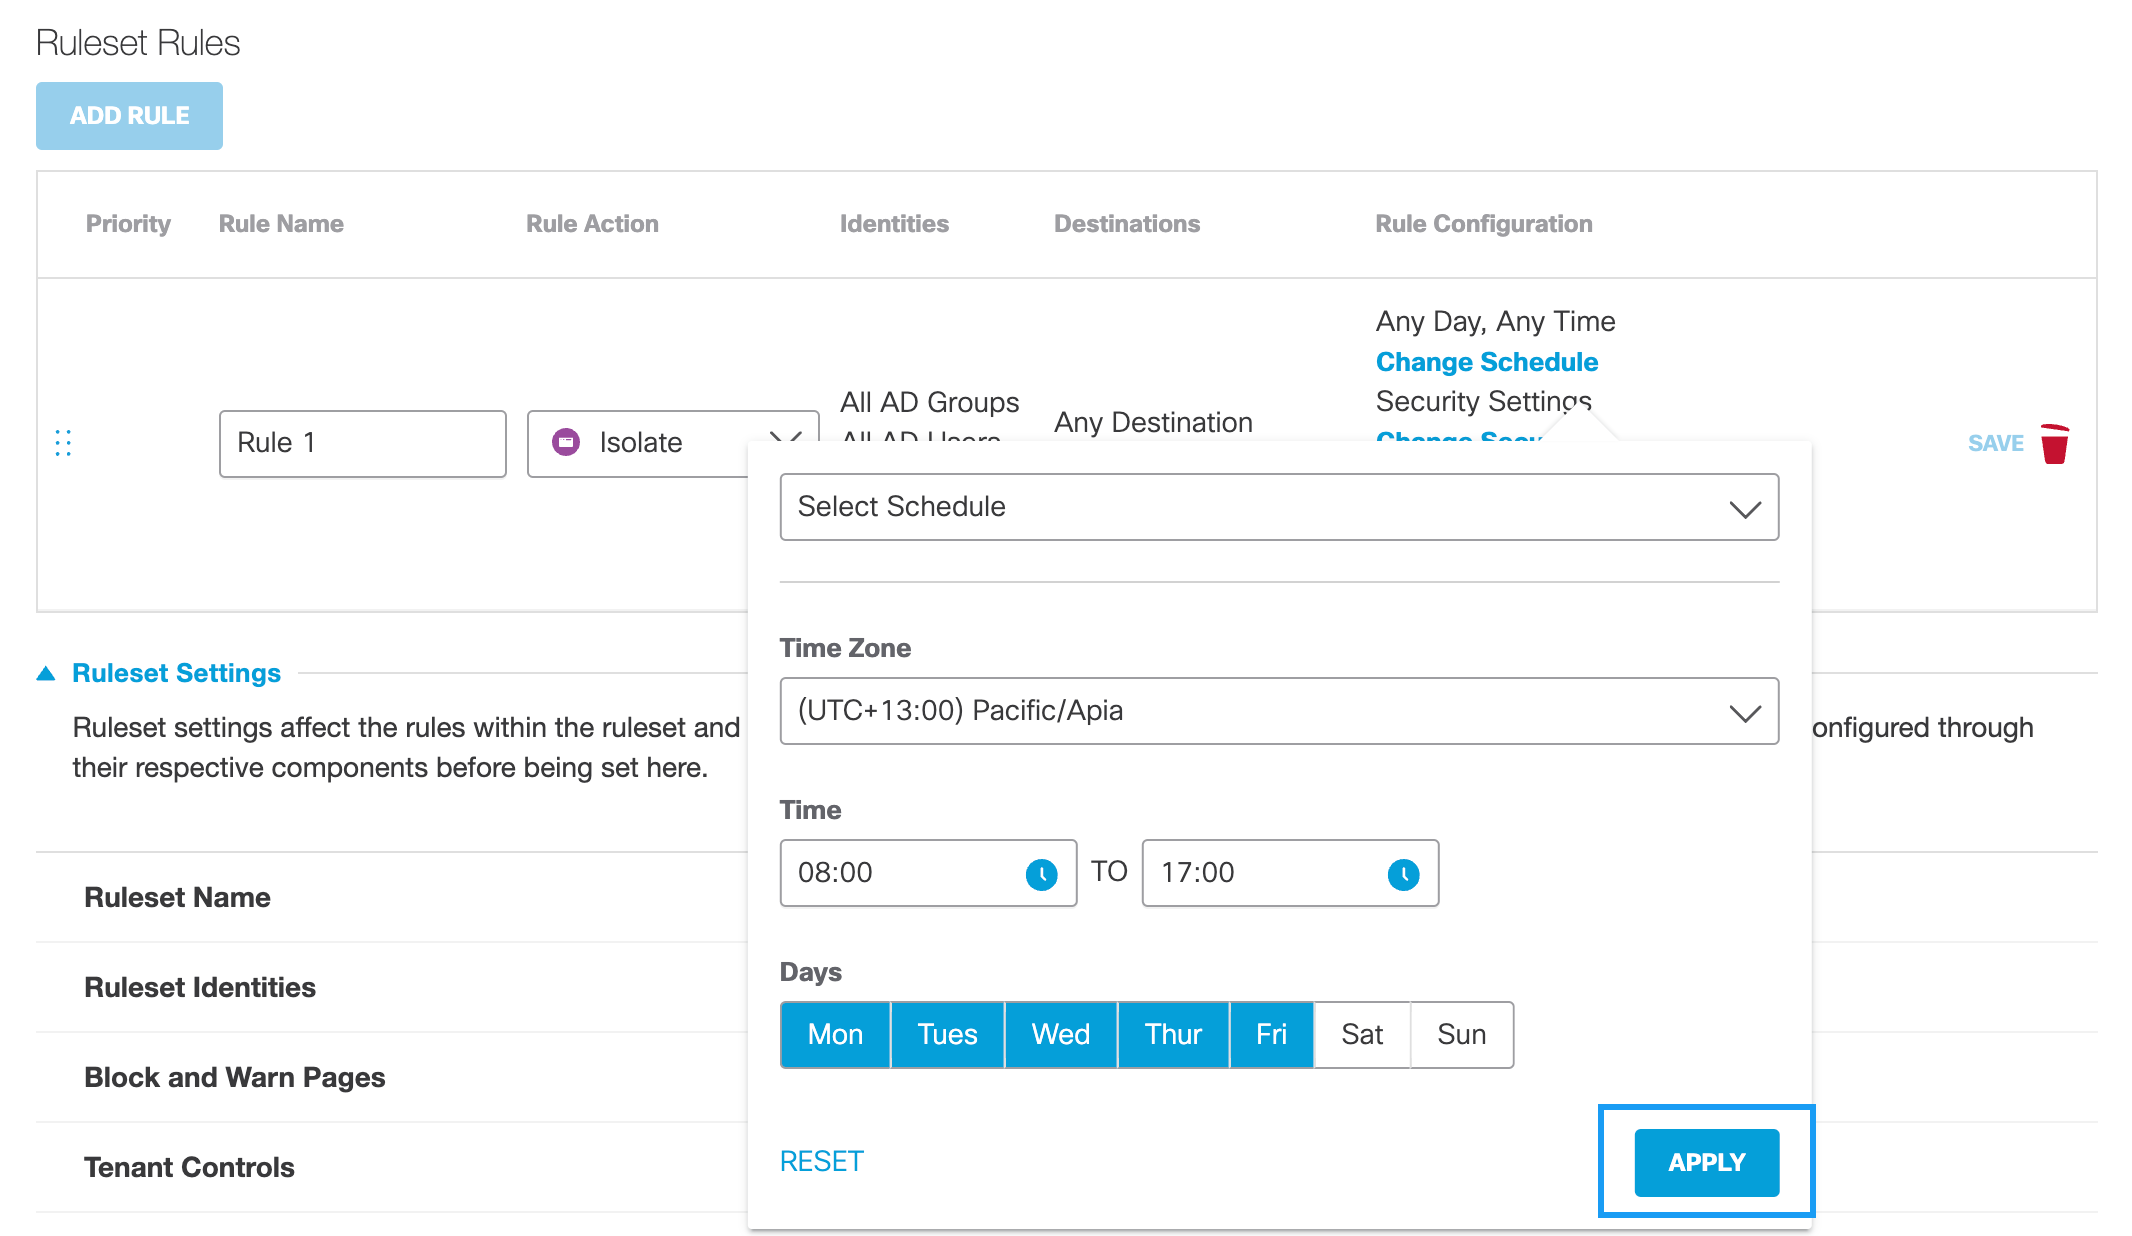
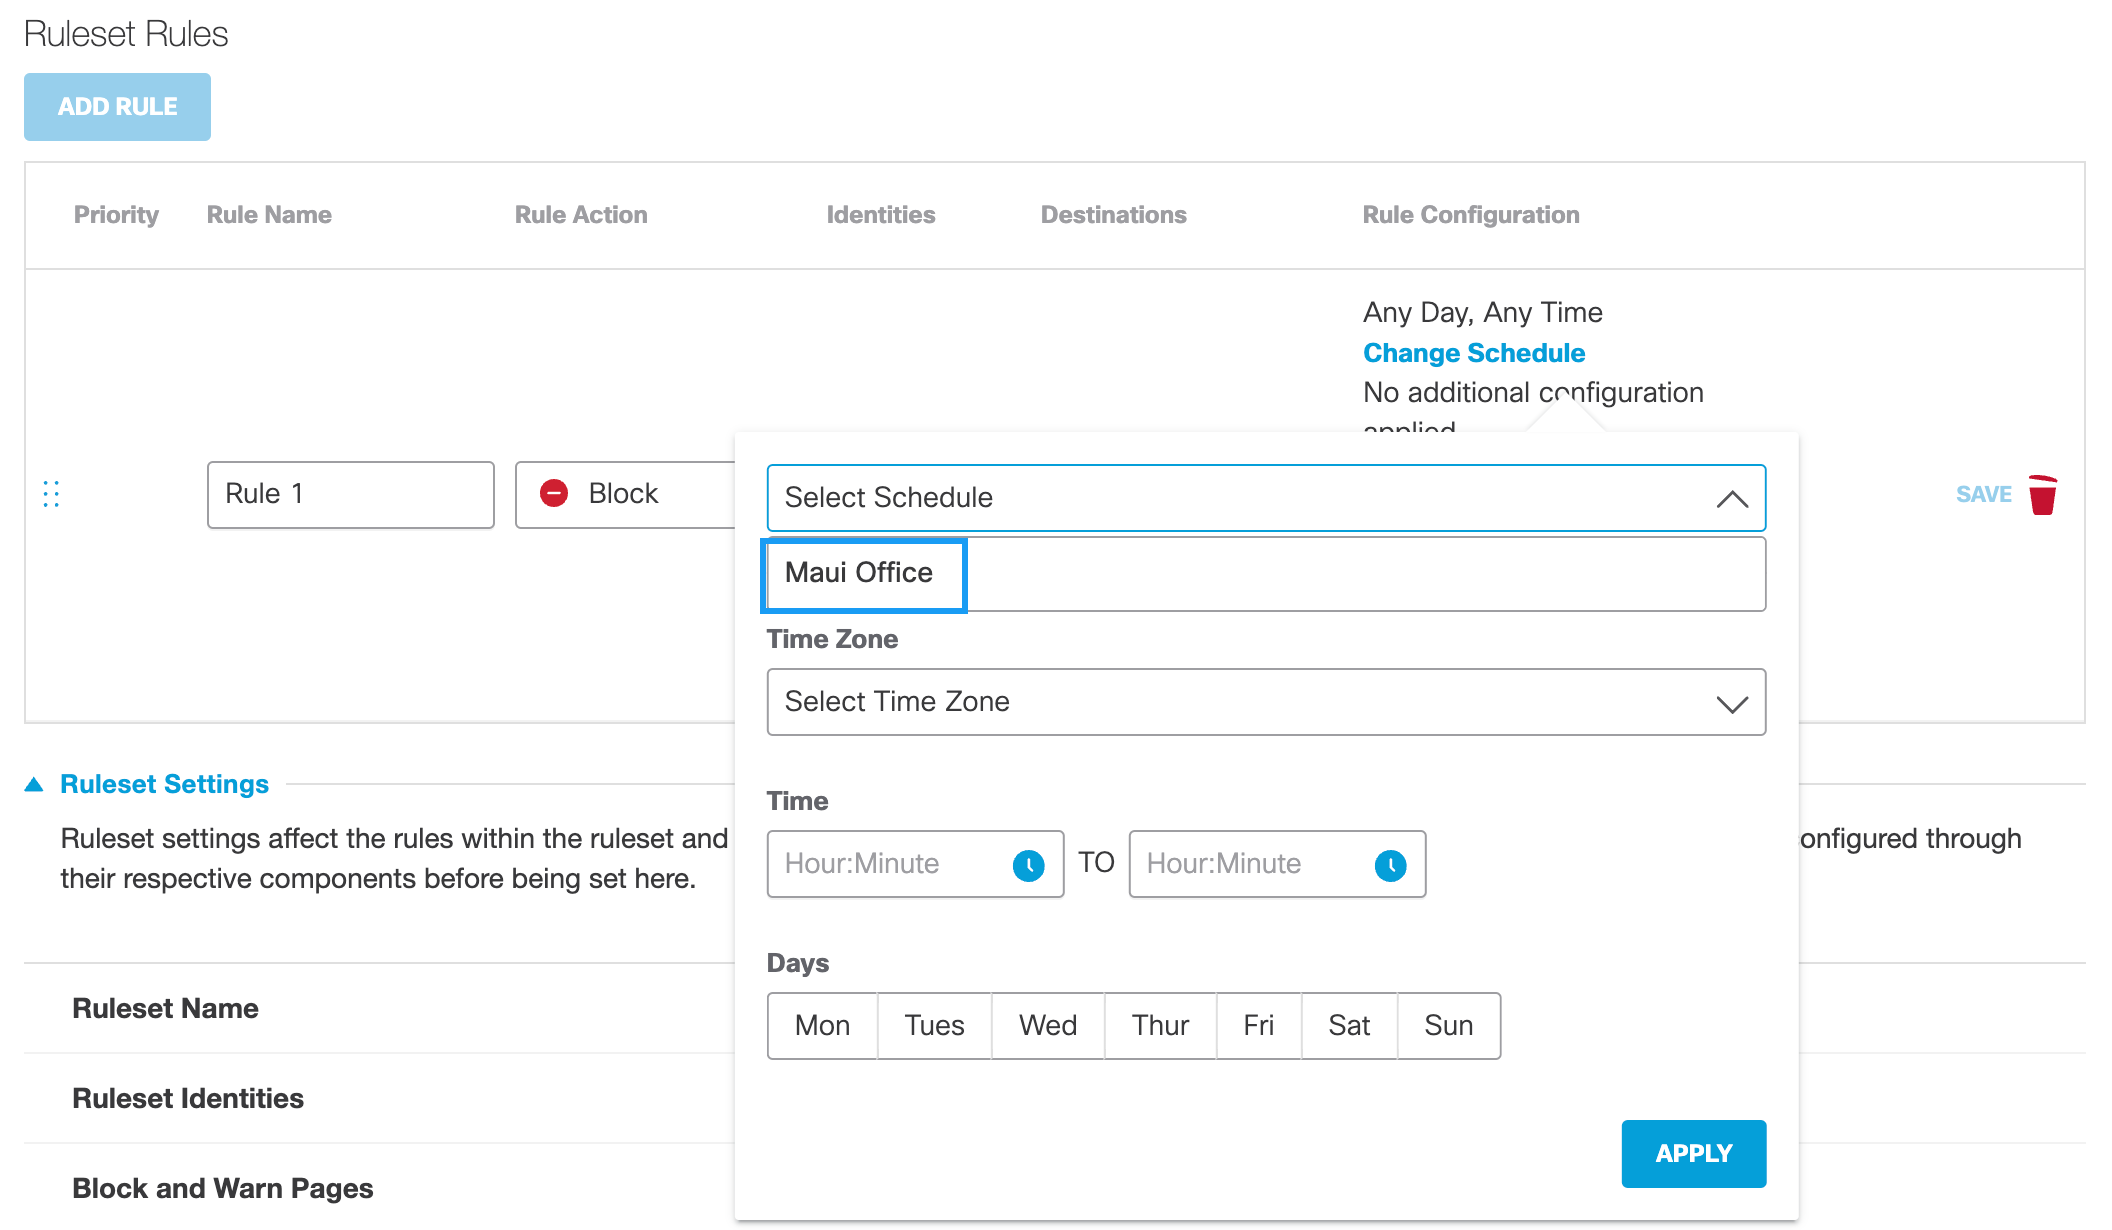
If you have previously created a Schedule setting, you can choose it from the Select Schedule pull-down and then click Apply. For more information, see Add a New Schedule Setting for the Web Policy.
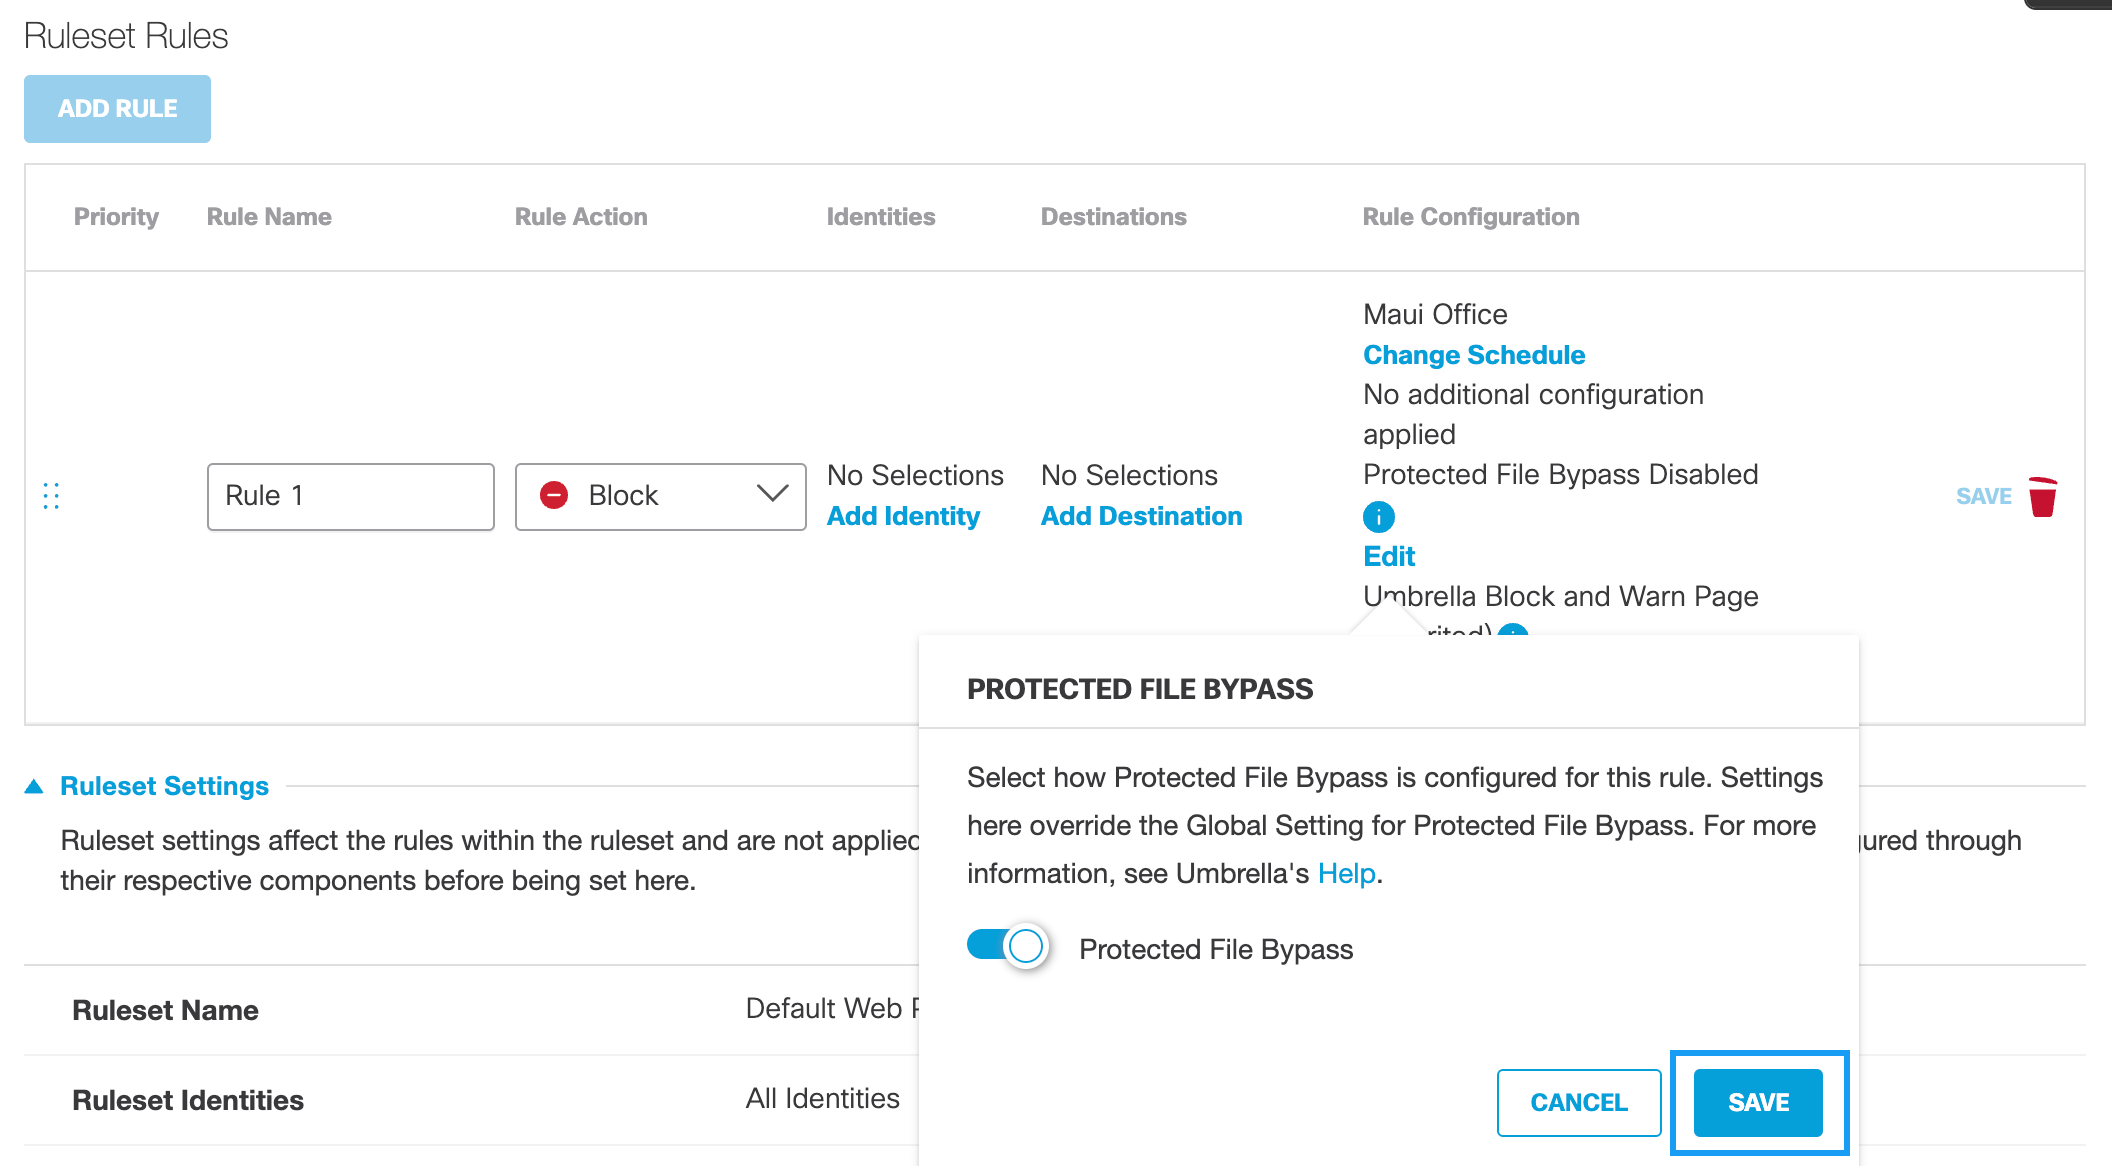
Protected File BypassProtected File Bypass can be enabled globally through the Web Policy's global settings or for individual rules. For more information about the global setting, see Protected File Bypass.
If Protected File Bypass is disabled globally, you can enable it for a rule. You can only disable it in a rule if Protected File Bypass is disabled globally.
a. Click Edit and then enable Protected File Bypass.
b. Click Save.
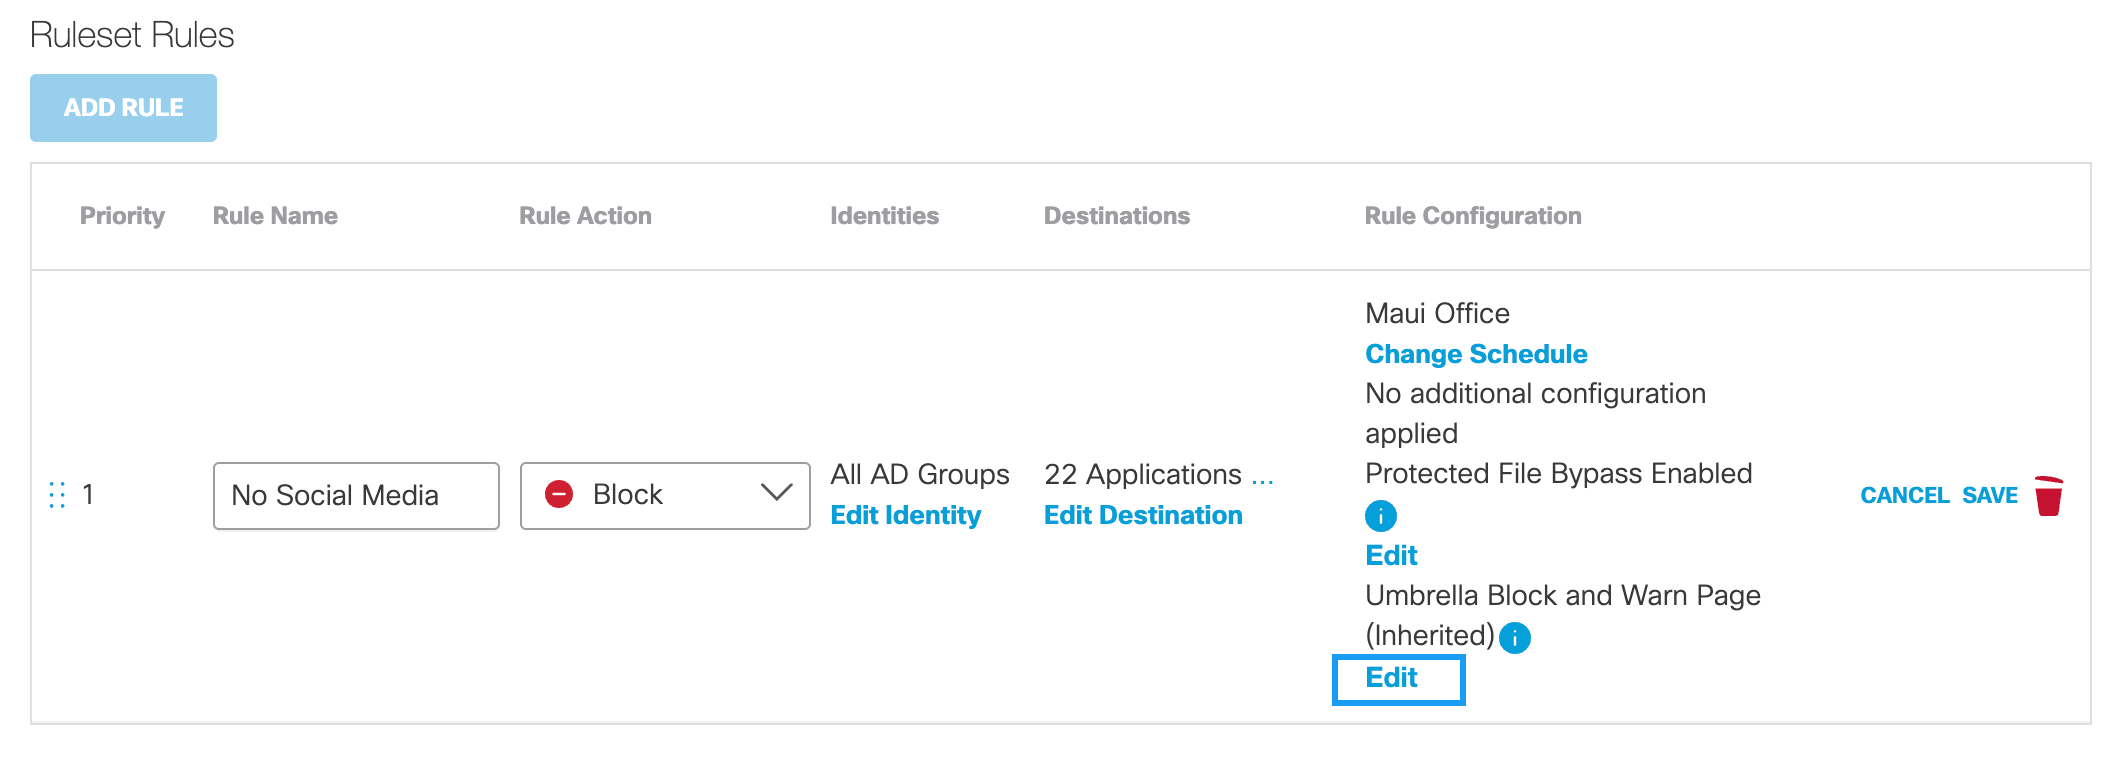
Umbrella Block and Warn Page (Inherited)Block and Warn page templates can be selected at the Rule Configuration level. This allows you to select a custom message that an identity will see when attempting to access a restricted page. By default, each rule inherits the default settings from the Ruleset. However, this inheritance can be overwritten at the Rule Configuration level.
a. Click Edit
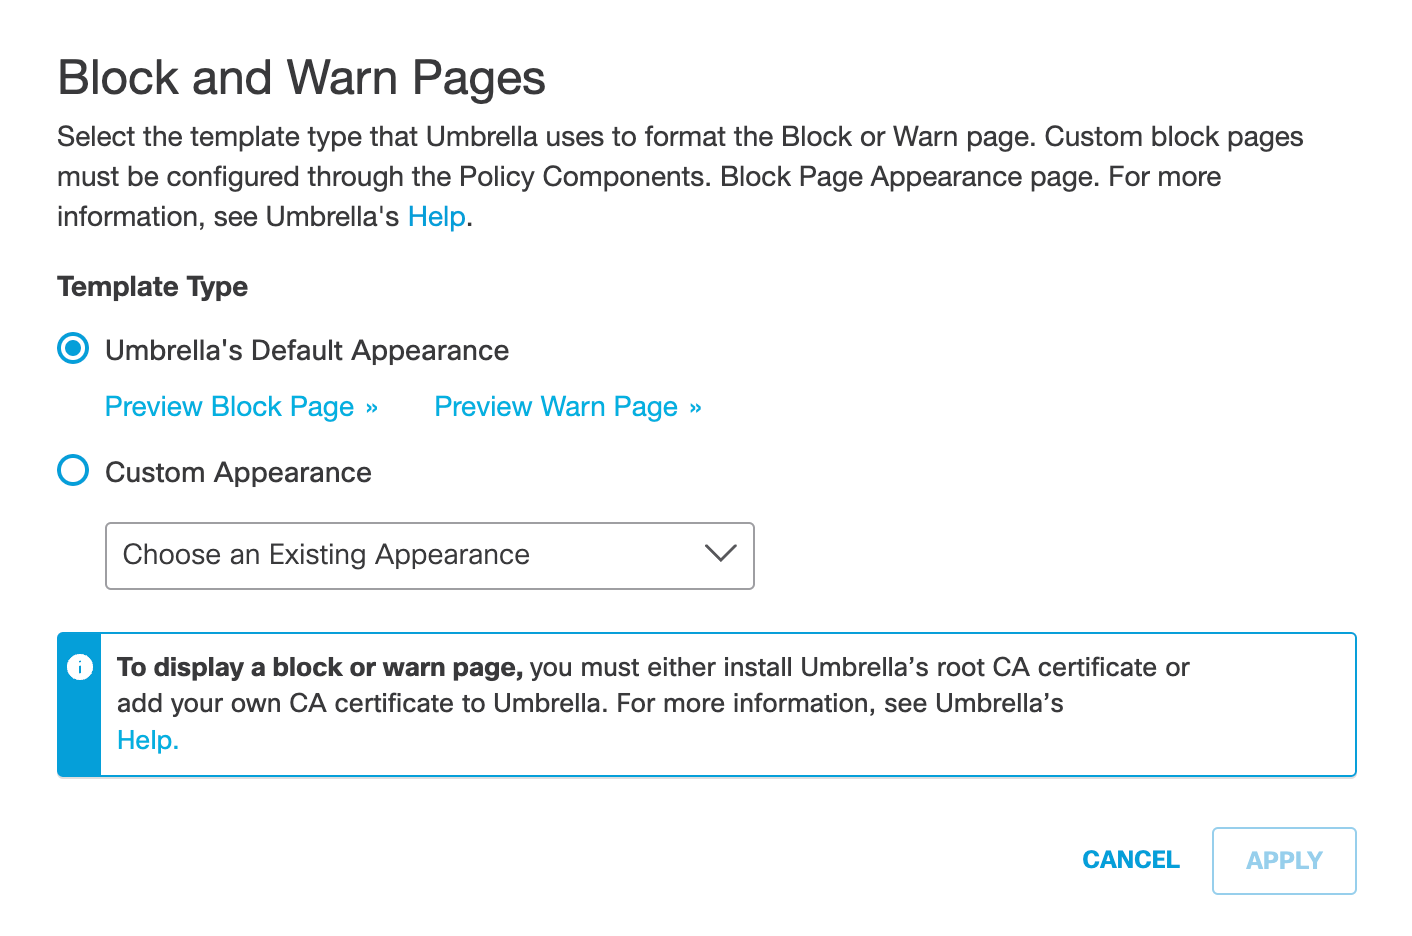
b. Select Umbrella's Default Appearance, or Custom Appearance template.
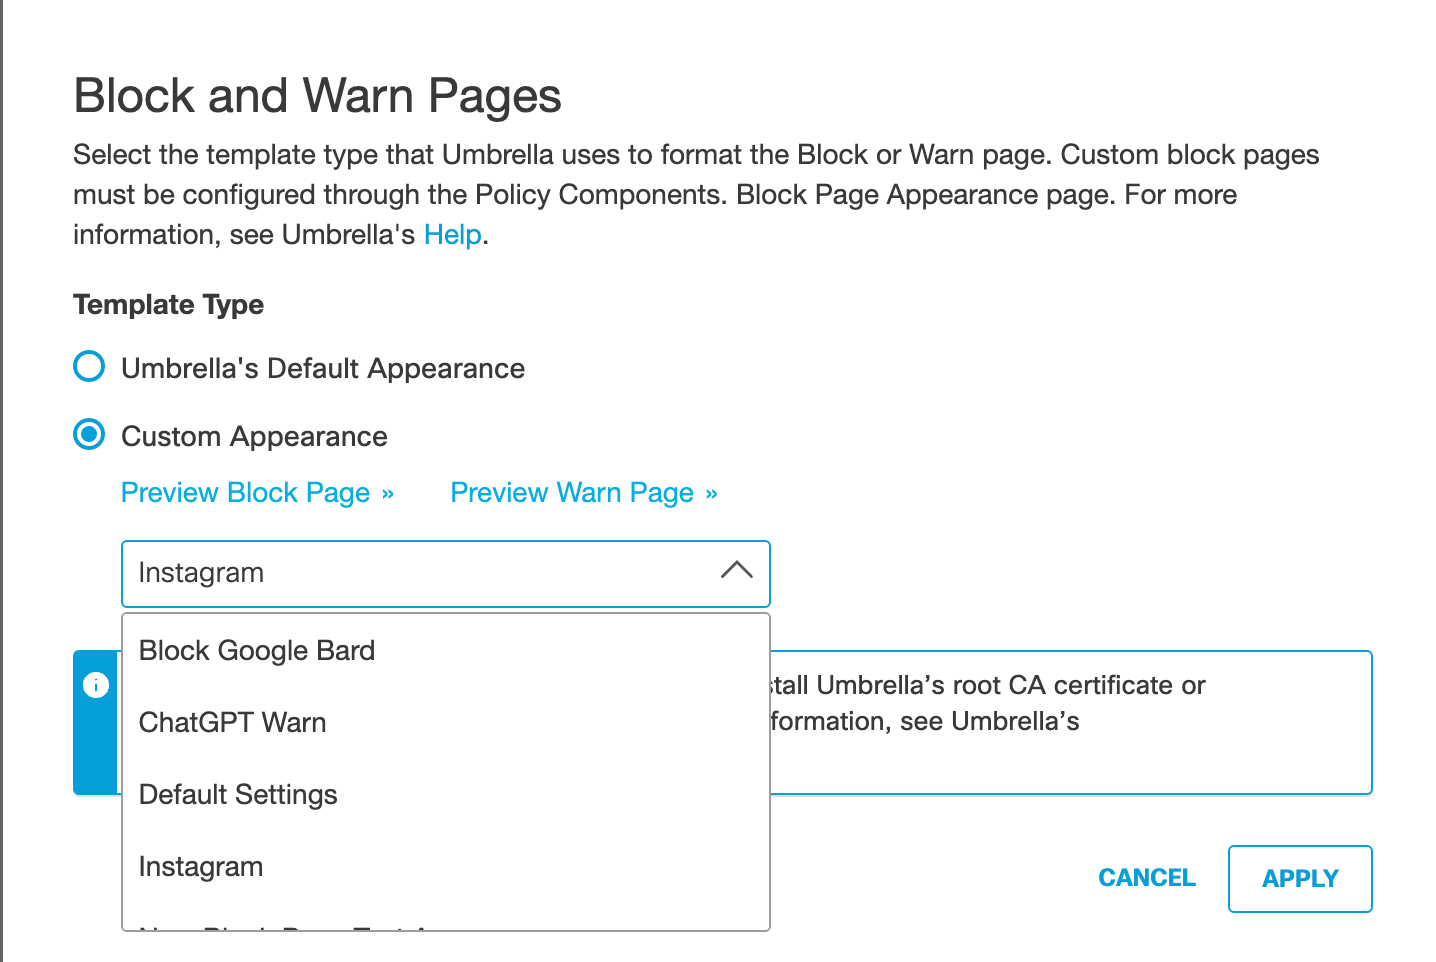
c. Select a template from the drop-down list for Custom Appearance and click Apply.
d. Click Save. The new rule is saved in the ruleset. Once enabled, the rule will over write the ruleset setting.

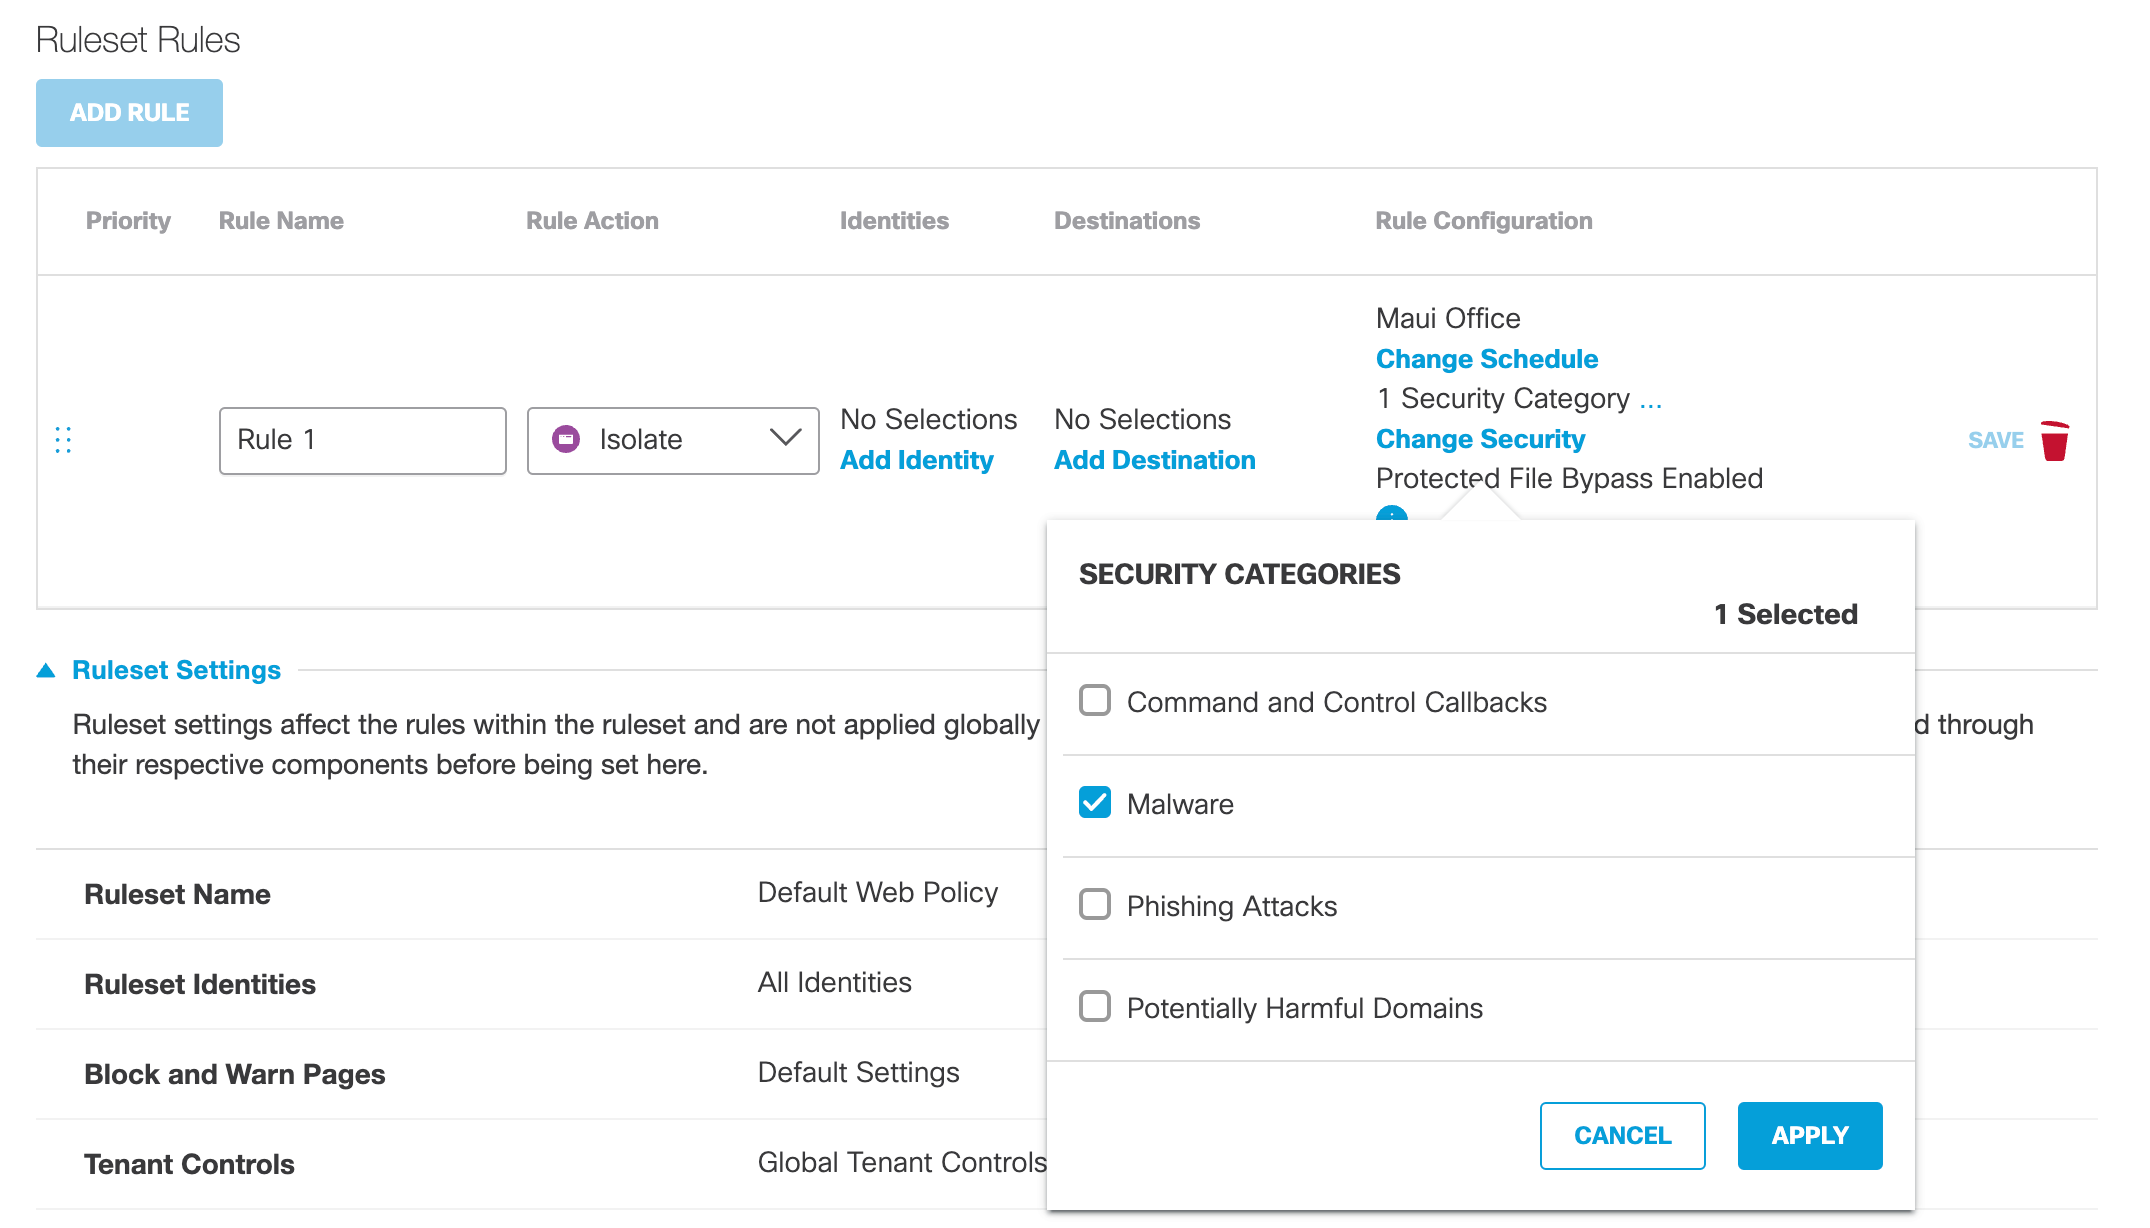
Change Securitya. If Isolate is chosen as the rule action, click Change Security, select Security Categories and then click Apply.
Change Security is only available when Isolate is chosen as the rule action.
Note: Selected security categories will override any security categories in the ruleset for this rule.
b. Click Apply.
- Click Save.
The new rule is saved in the ruleset. However, it must be enabled for Umbrella to evaluate the Web policy against requests.

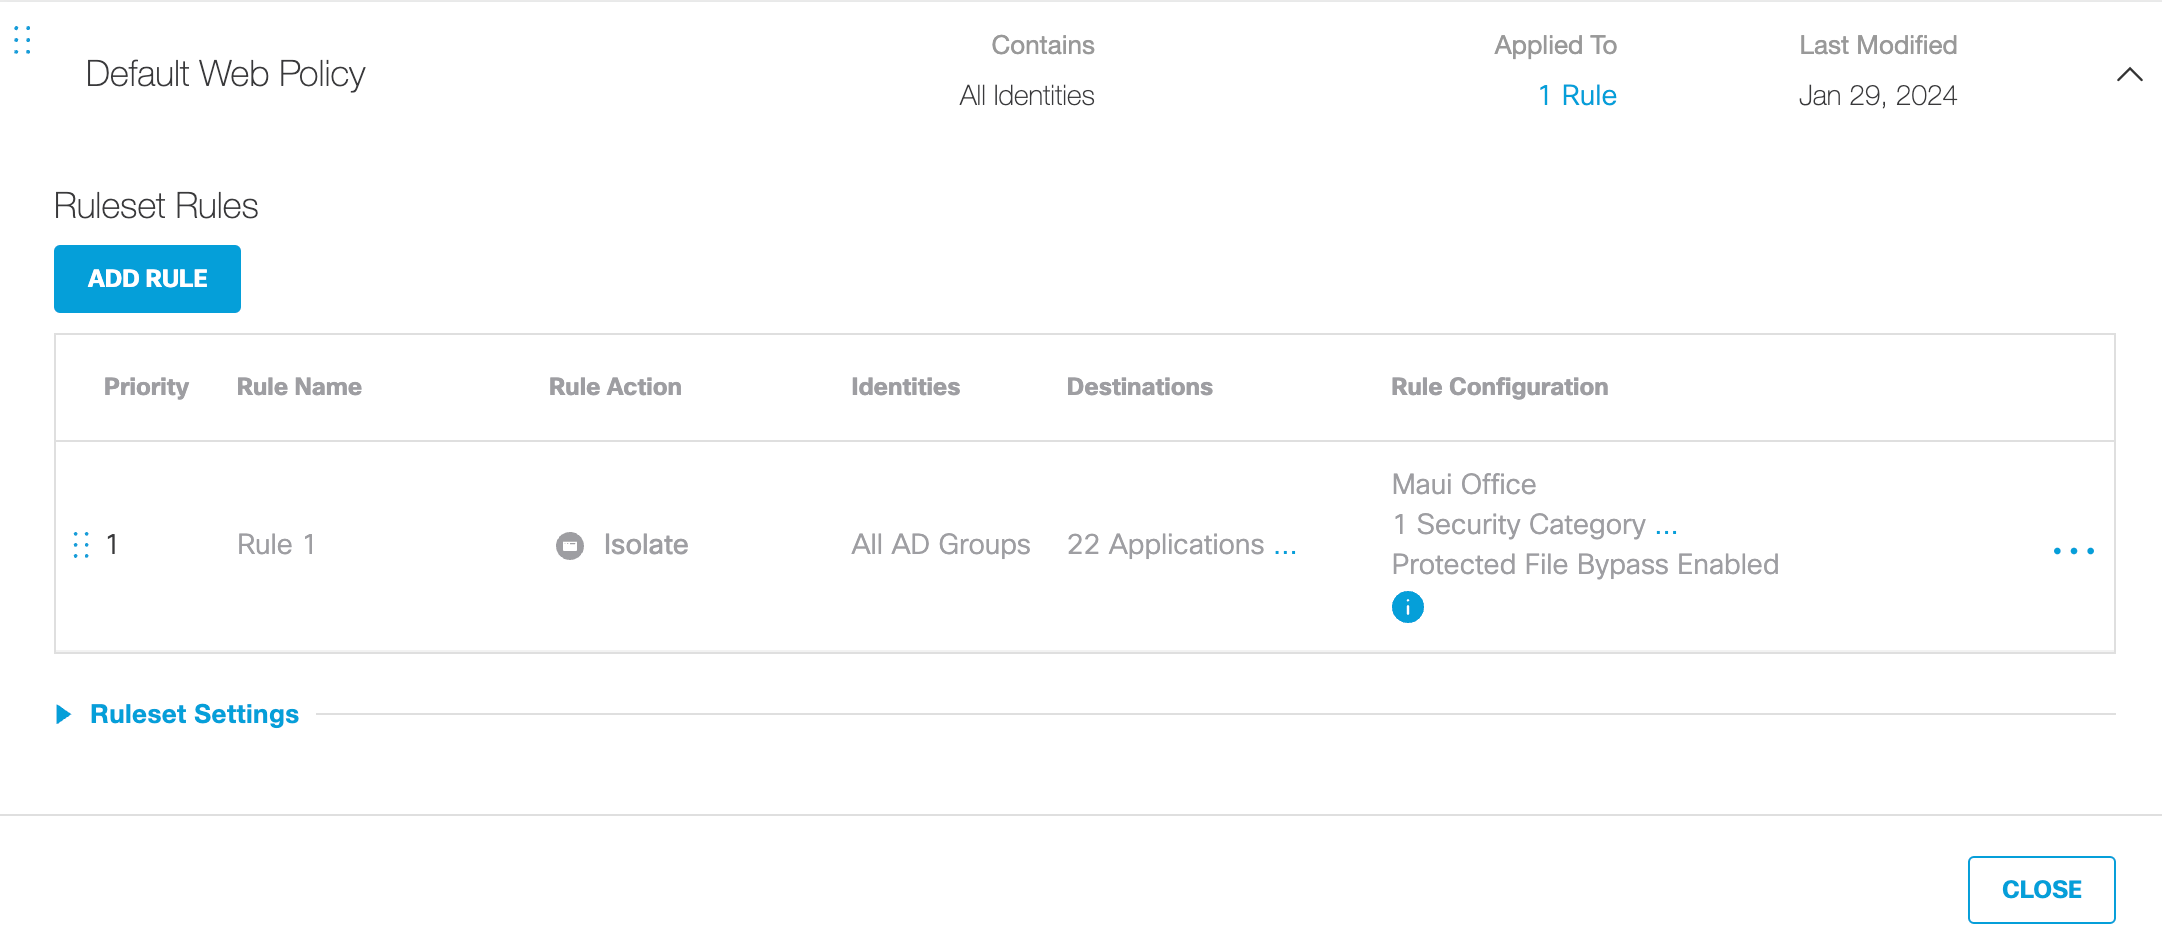
- Enable the rule.
By default, rules are disabled and must be enabled to come into effect.
a. Select the rule to be enabled.
Tip: Before enabling rules, prioritize them. When a ruleset has multiple enabled rules, they are evaluated in a "top-down" manner. The top listed rule first and then the next and so on until a match is made. Order—drag and drop—your rules accordingly so that rules are evaluated in the order you expect.
b. From the Action menu, enable Enable Rule.
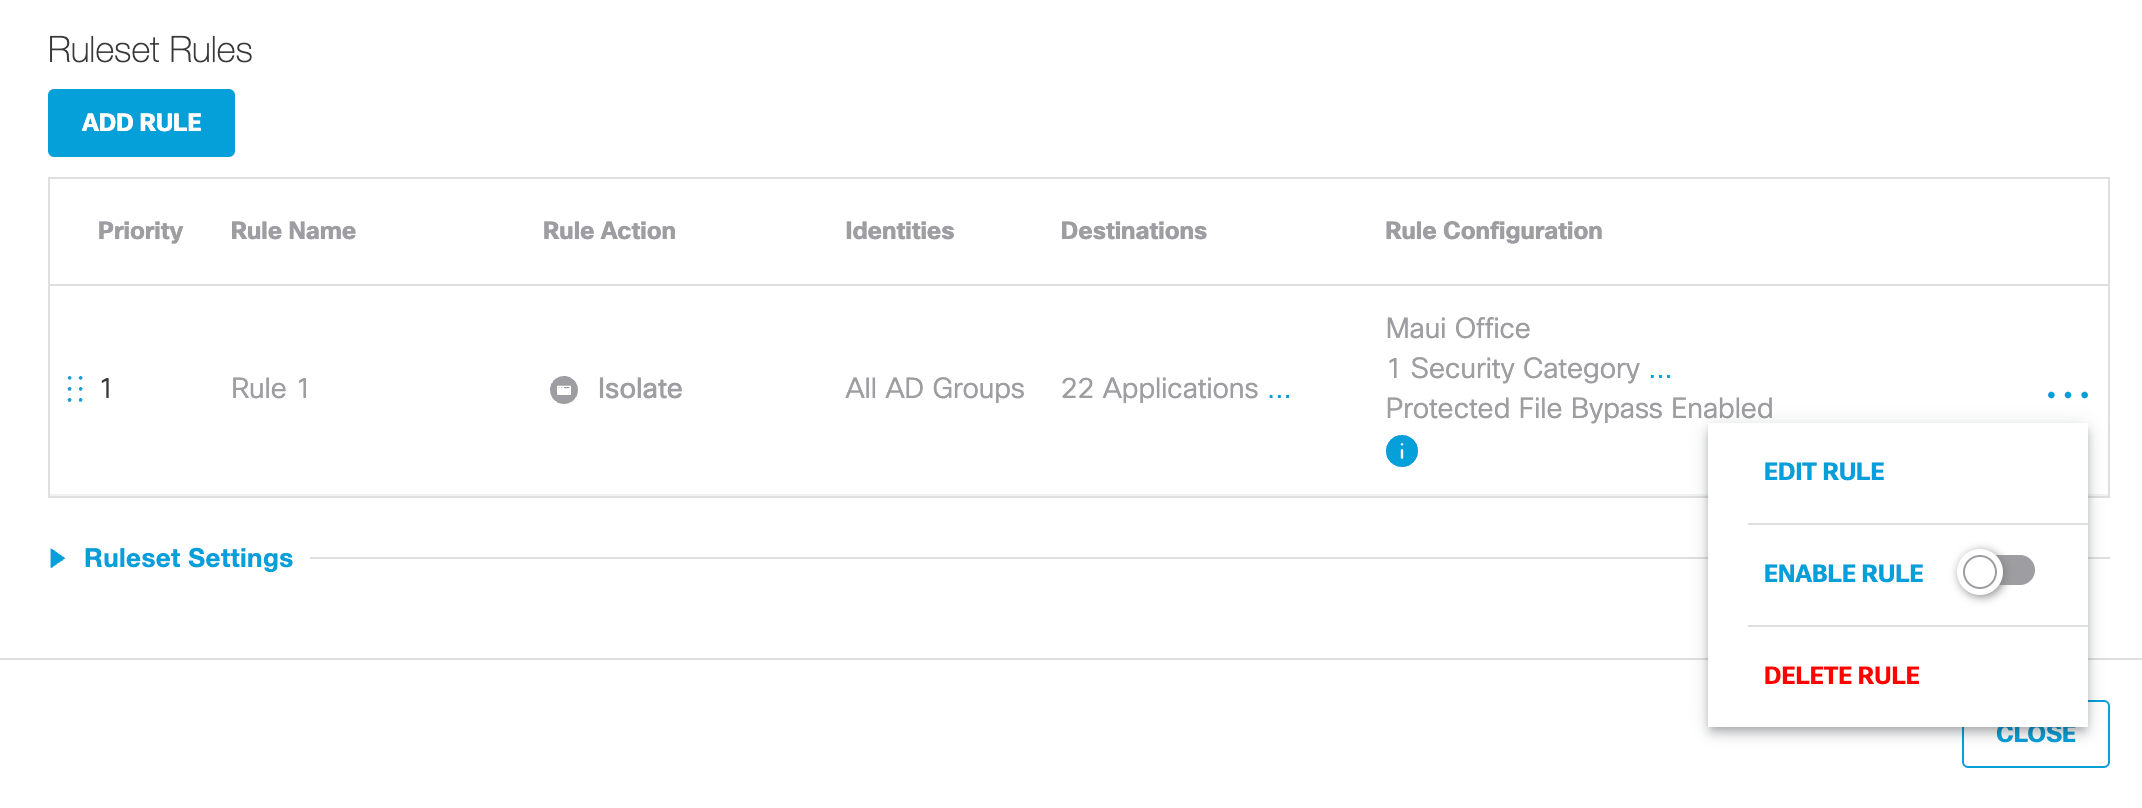
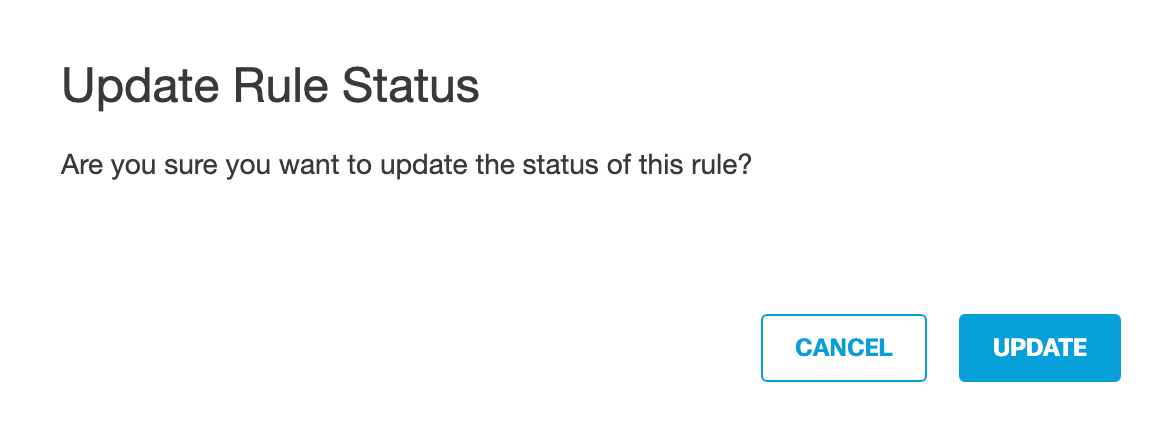
c. Click Update and then confirm the change.
The rule is enabled.
Add a Ruleset to the Web Policy < Add Rules to a Ruleset > Test the Web Policy
Updated over 1 year ago
