Enable File Inspection for DNS Policies
For DNS policies, File inspection determines the type of a file hosted on a website and scans the file to find out more about it. The request to the file is made from the intelligent proxy. When the file is downloaded to the proxy, the file is then passed to Cisco's Advanced Malware Protection (AMP), which analyzes the file simultaneously.
It's important to note that files are scanned by both engines, but if either engine detects it as being a known bad or malicious file, it will be blocked. If both engines detect a file, AMP detection is given a higher priority in Umbrella's reports and the detection will show up as an AMP event with antivirus information listed in the detail.
To review Umbrella's inspection activities, use the Security Activity and Activity Search reports.
Prerequisites
- The intelligent proxy must be enabled. See Enable the Intelligent Proxy.
- The Cisco Umbrella root certificate must be installed on all machines. For more information, see Install the Cisco Umbrella Root Certificate.
- Full admin access to the Umbrella dashboard. See Manage User Roles.
Procedure
File Inspection can only be enabled through the policy wizard.
- Navigate to Policies > Management > DNS Policies and click Add.

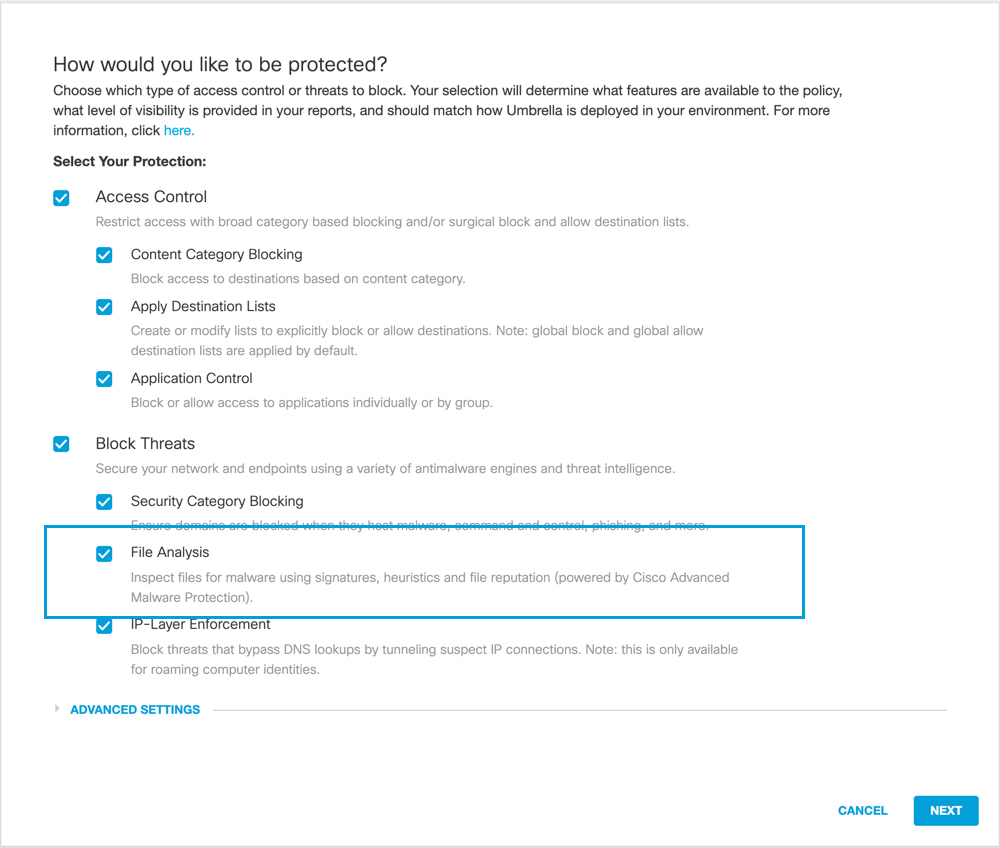
- Under How Would You Like to be Protected, select File Analysis.

- Under Advanced Settings, turn on Enable Intelligent Proxy and optionally select SSL Decryption.
Although not required, we recommend selecting SSL decryption. When selected, both secure and insecure traffic is proxied and files inspected. If you're editing an existing policy, confirm that File Inspection is enabled on the summary page (under Advanced Settings) after you’ve enabled the intelligent proxy.

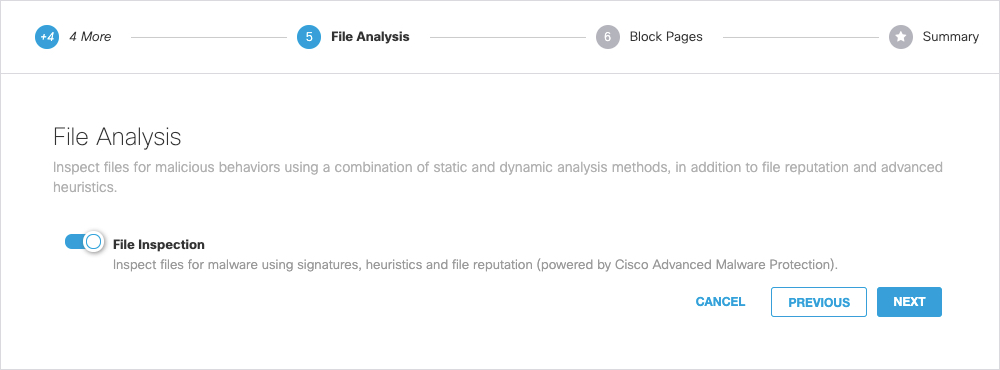
- Proceed through the policy wizard to the File Analysis step and enable File Inspection.

- Click Next, complete the wizard and click Save.
When testing, ensure that the policy with file inspection enabled is at or near the top of the policy list so that this policy takes precedence.
Manage File Analysis < Enable File Inspection for DNS Policies > Enable File Inspection for the Web Policy
Updated almost 2 years ago
