
Enable Cloud Malware Protection for Webex Teams Tenants
Table of Contents
Prerequisites
- Chrome or Firefox (recommended) with pop-up blockers and ad blockers disabled (only for the duration of authorization)
- Full Administrator Privileges in Webex Teams and the Compliance Officer role
- The
EventsAPIin your Webex Teams instance must be enabled. Contact your Webex Teams support team to ensure that theEventsAPIis turned on.
Limitation
- A tenant that fails to authenticate cannot be deleted.
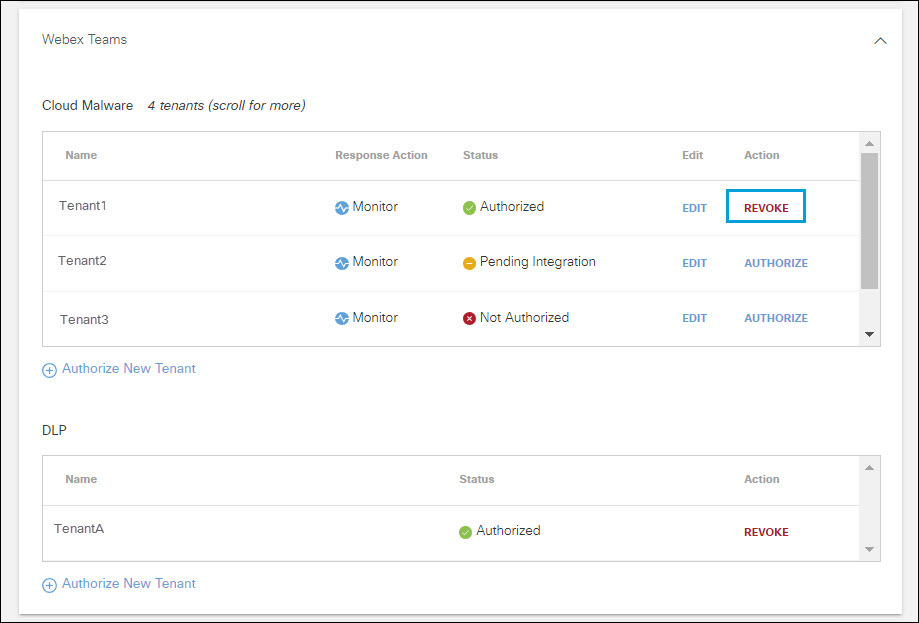
Authorize a Tenant
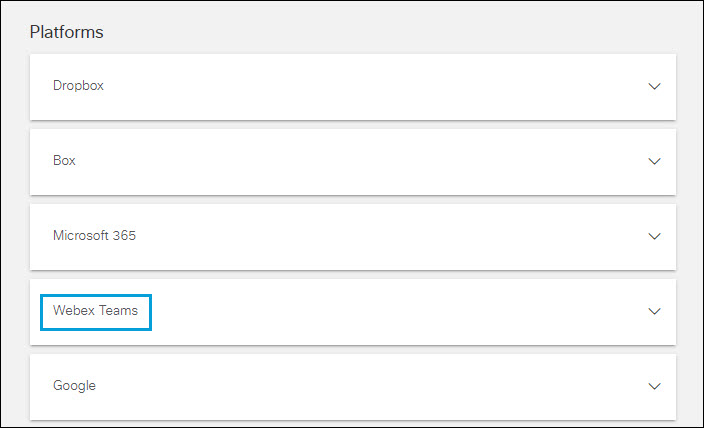
- Navigate to Admin > Authentication.
- In the Platforms section, click Webex Teams.
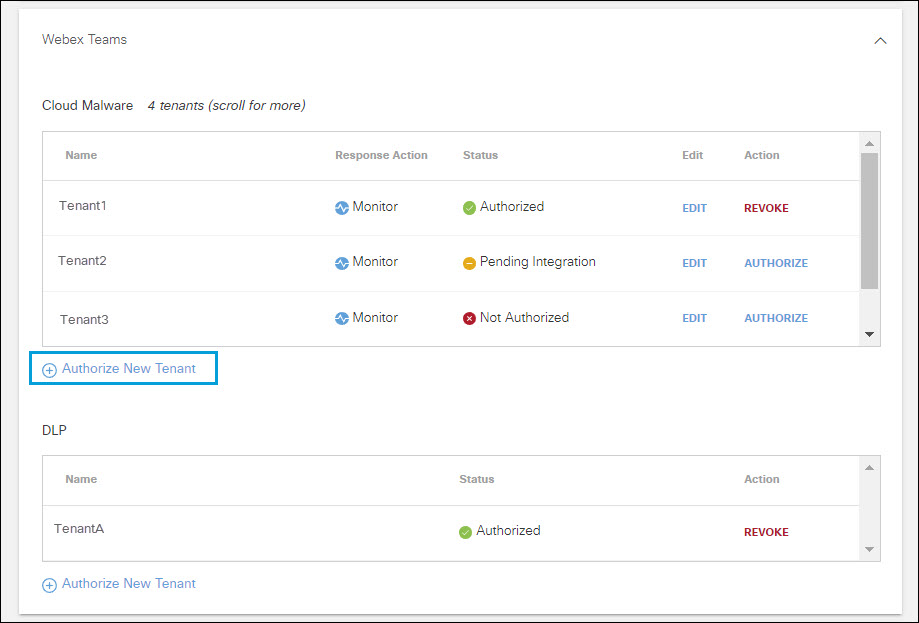
- In the Cloud Malware subsection, click Authorize New Tenant to add a Webex Teams tenant to Umbrella.
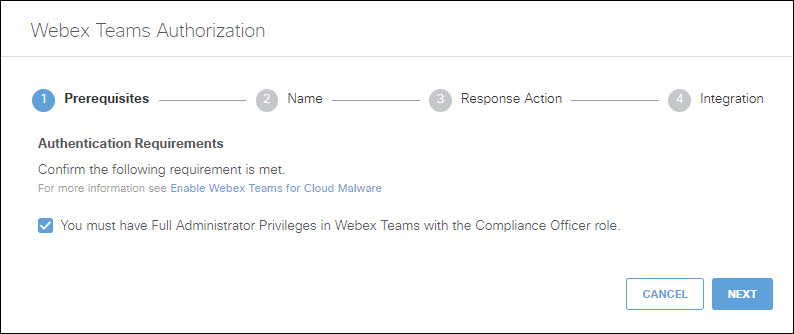
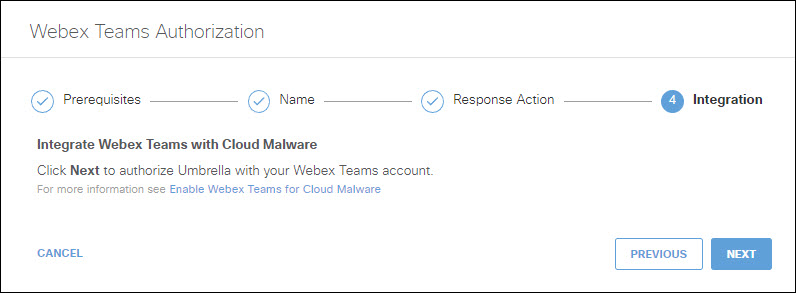
- In the Webex Teams Authorization dialog, select the checkbox to verify you meet the prerequisite and then click Next.
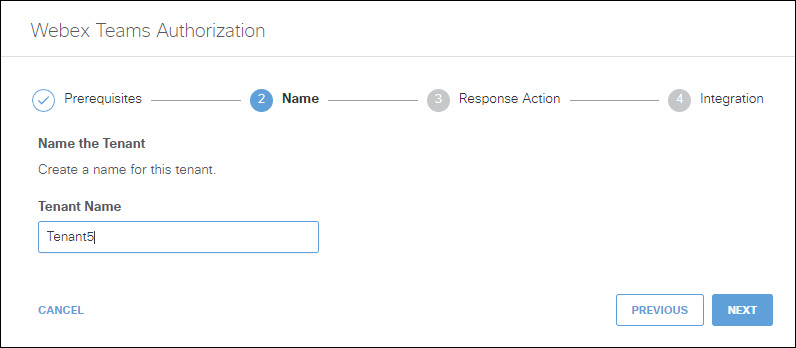
- Add a Tenant Name and then click Next.
- Select a Response Action for Umbrella to apply to Webex Teams files found with malware and then click Next.
- Choose Monitor to cause Umbrella to log files detected with malware. You will be able to manually delete these files from the Cloud Malware report.
- Choose Delete to delete the file.
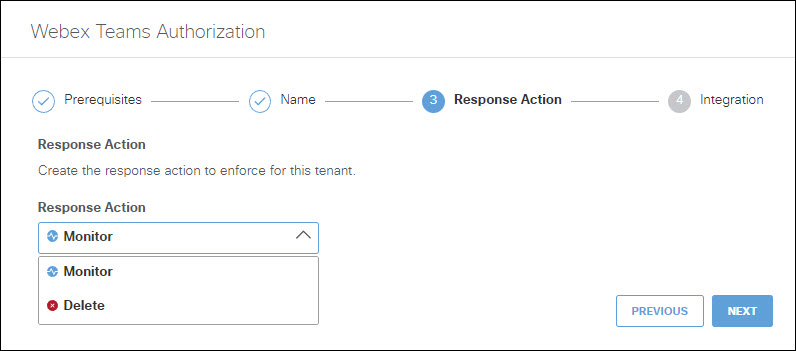
- Click Next.

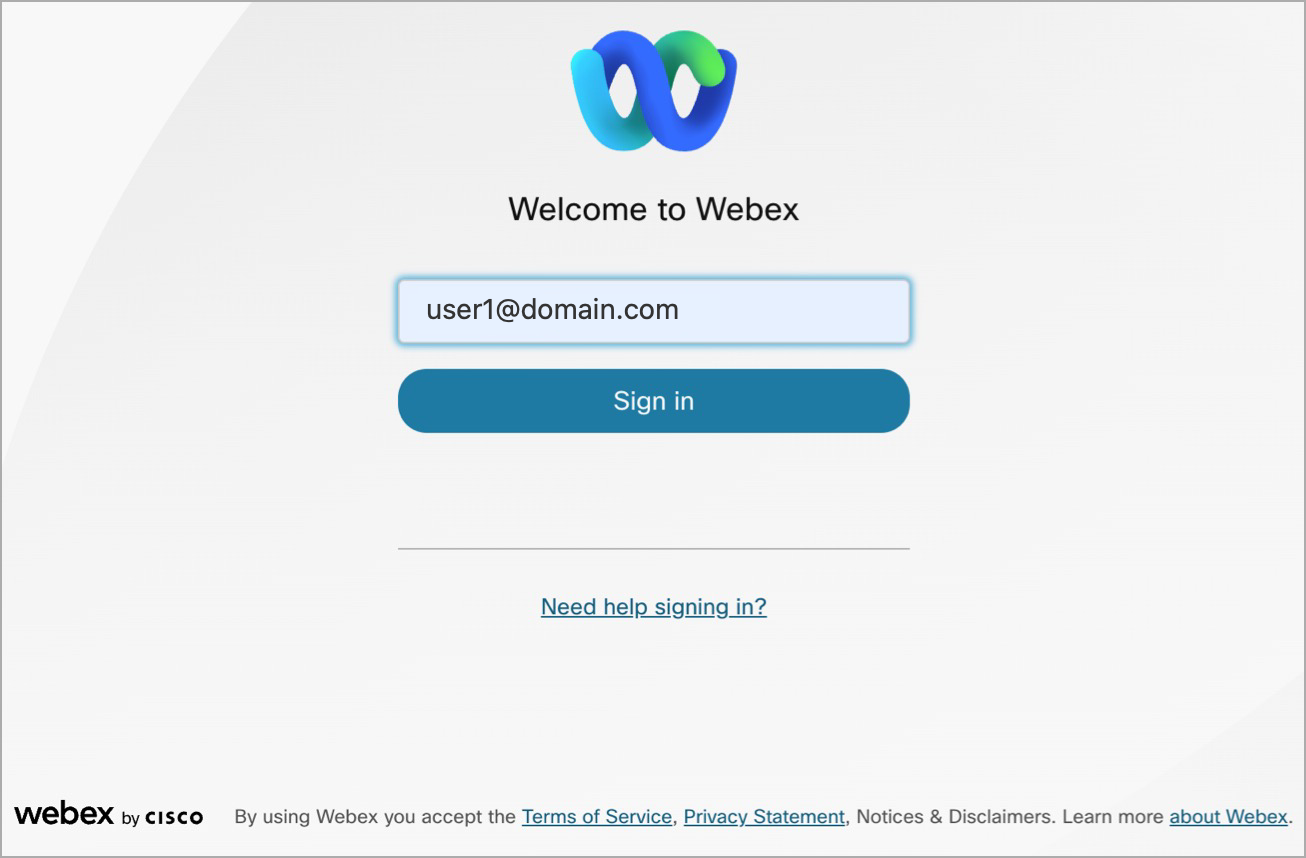
- Add your credentials and click Sign in.
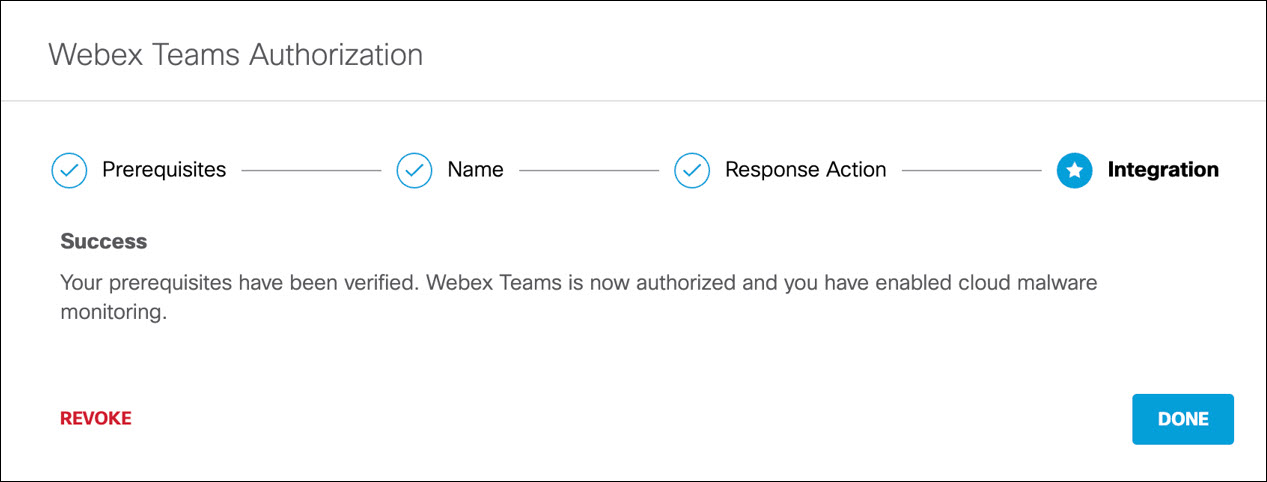
- You are redirected to Umbrella and a message appears showing the integration was successful. It may be up to 24 hours for the integration to be confirmed and appear as Authorized. Click Done.
Edit a Tenant
You can change the Response Action you have selected for a tenant.
- Navigate to Admin > Authentication.
- In the Platforms section, click Webex Teams.
- In the Cloud Malware section , from the Edit column, click Edit. You can edit any tenant.
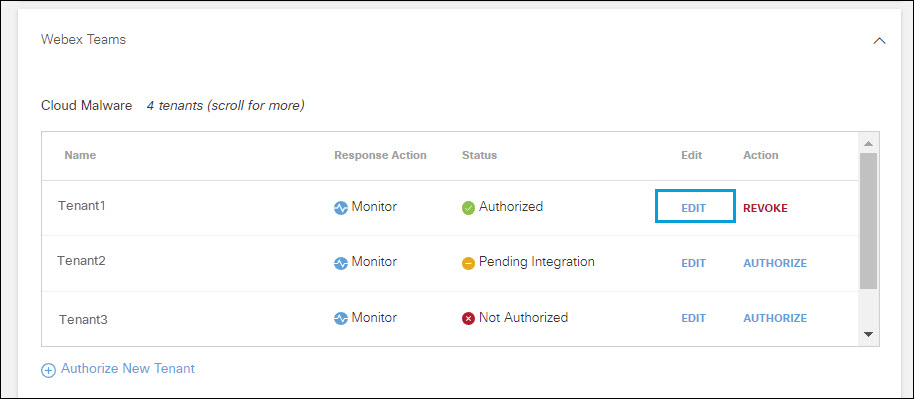
- Select a Response Action for Umbrella to apply to Webex Teams files found with malware and then click Next.
- Choose Monitor to cause Umbrella to log files detected with malware. You will be able to manually delete these files from the Cloud Malware report.
- Choose Delete to delete the file.

- Click Next to continue.
- The new Response Action is displayed.

Revoke Authorization
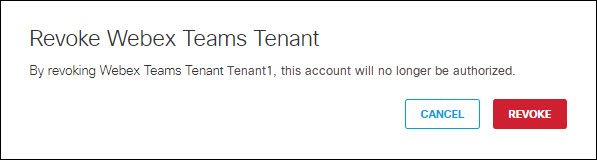
- From the Action colum, click Revoke. You can revoke any authorized tenant.
- Click Revoke. The selected account is no longer authorized.
Enable Cloud Malware Protection for Slack Tenants < Enable Cloud Malware Protection for Webex Teams Tenants > Manage SaaS API Data Loss Prevention
Updated 8 months ago