Configure Tunnels with Meraki MX
Cisco Meraki MX is an SD-WAN security appliance that supports distributed deployments of networks that require remote administration. You can configure and deploy an IPsec (Internet Protocol Security) IKEv2 (Internet Key Exchange, version 2) tunnel in Meraki MX and connect to an Umbrella data center and the Umbrella Secure Internet Gateway (SIG) services. This guide describes how to establish an IPsec tunnel from Meraki MX to Umbrella.
Table of Contents
- Prerequisites
- Step 1: Add a Network Tunnel Identity
- Step 2: Configure Tunnel in Meraki MX
- Optional Configurations
- Verification and Troubleshooting
Prerequisites
- Cisco Meraki MX with software version 15.3 or later
- Cisco Umbrella SIG Essentials or SIG Add-On subscription, or a free Umbrella SIG trial.
Step 1: Add a Network Tunnel Identity
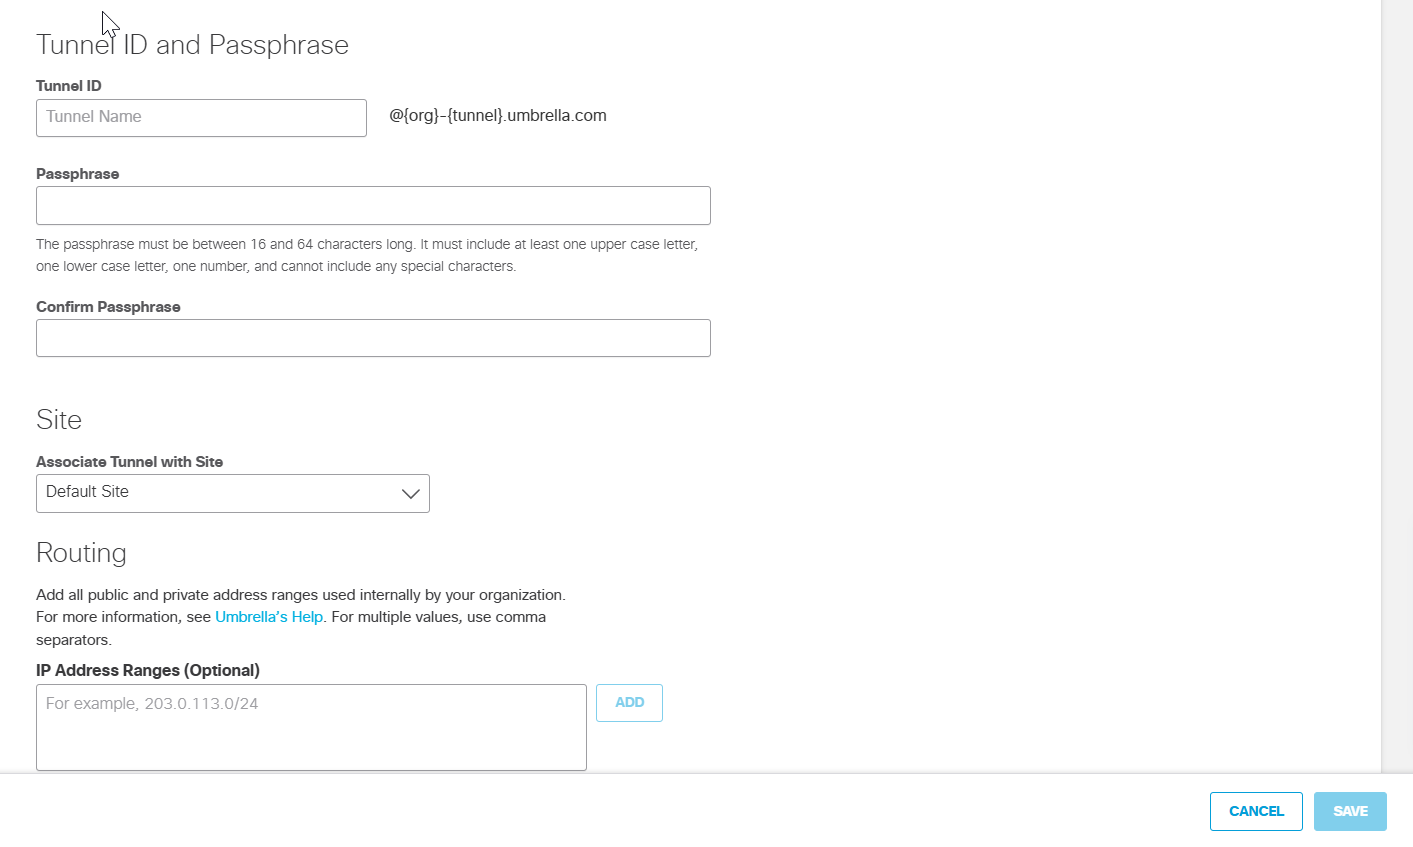
- Navigate to Deployments > Core Identities > Network Tunnels and click Add.
- Give your tunnel a meaningful Tunnel Name.
- From the Device Type pull-down choose Meraki MX.

- Enter a Tunnel ID and Passphrase.
- Choose an appropriate site from the Associate Tunnel with Site drop-down list and optionally, enter an IP address to the IP Address Ranges field which you would like to send to Umbrella SIG.

- Click Save and then copy the Tunnel ID and Passphrase.
In the next step, use the tunnel ID and passphrase to configure the tunnel in the Meraki dashboard.
Step 2: Configure Tunnel in Meraki MX
Configure an IPsec tunnel in the Meraki MX dashboard.
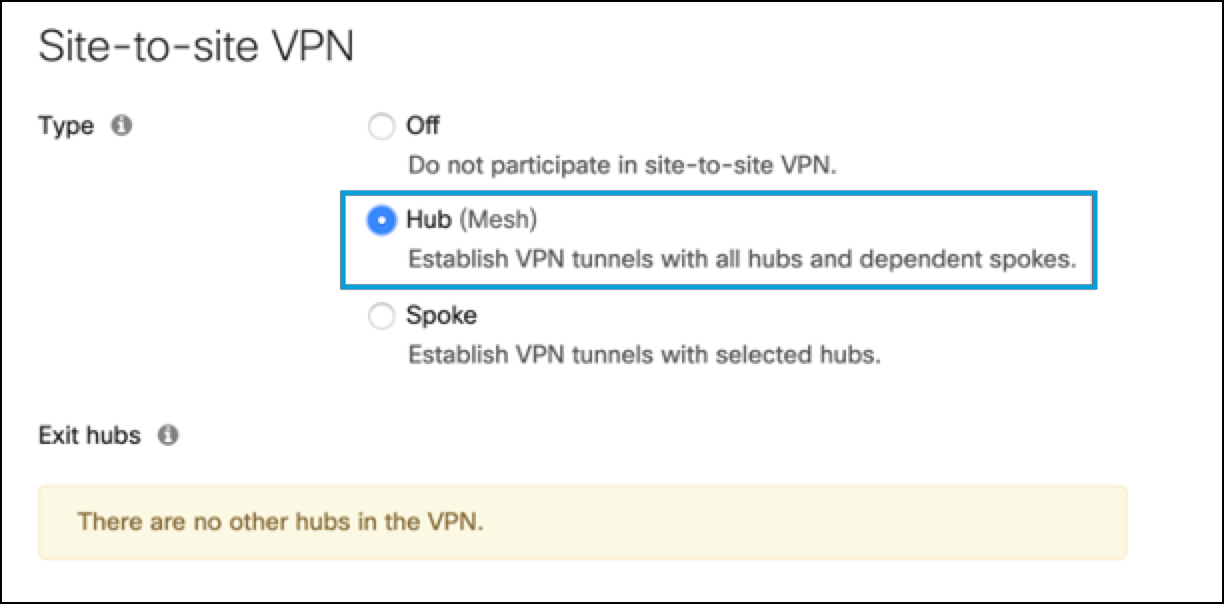
- From the Meraki dashboard, navigate to Security & SD-WAN > Configure Site-to-site VPN, and choose Hub (Mesh).

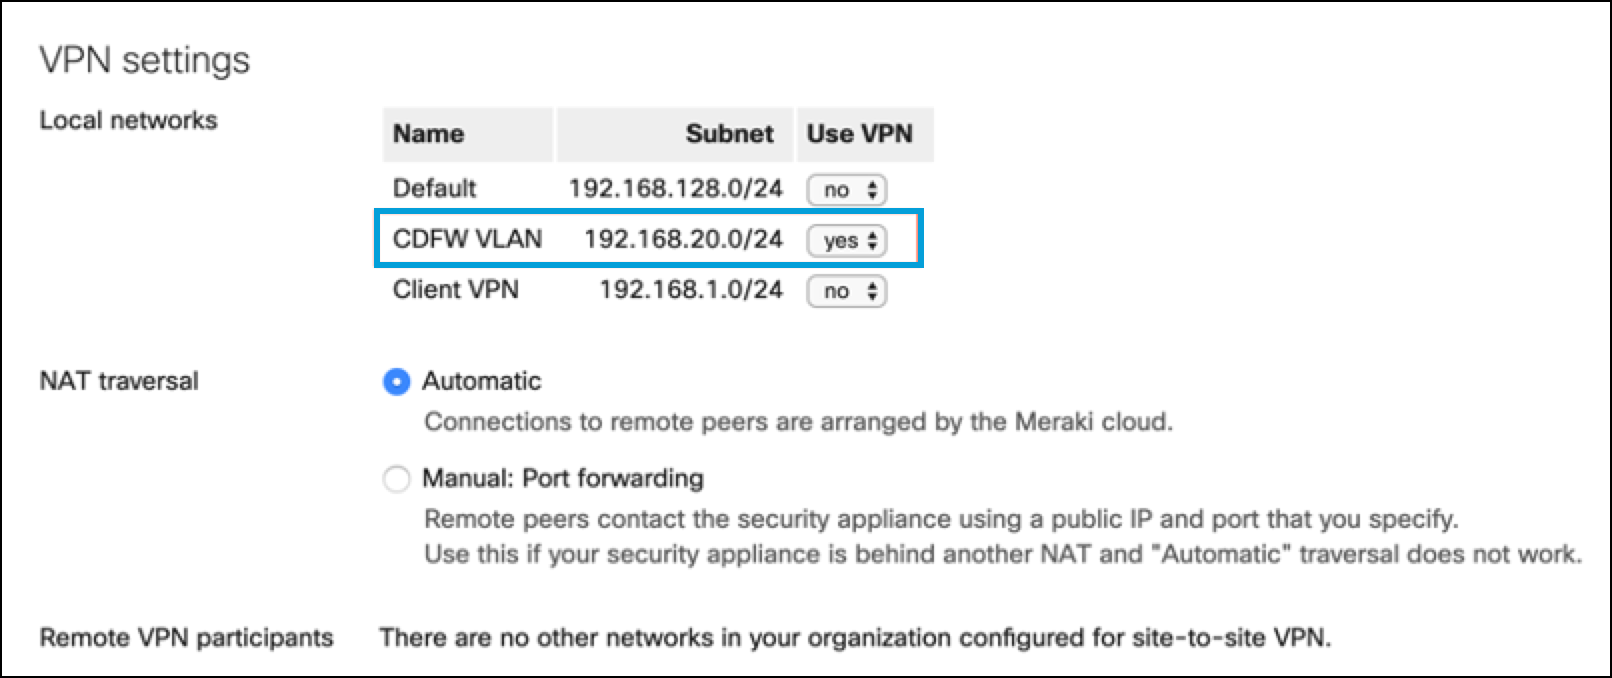
- In VPN Settings, choose Yes for the new VLAN you created.

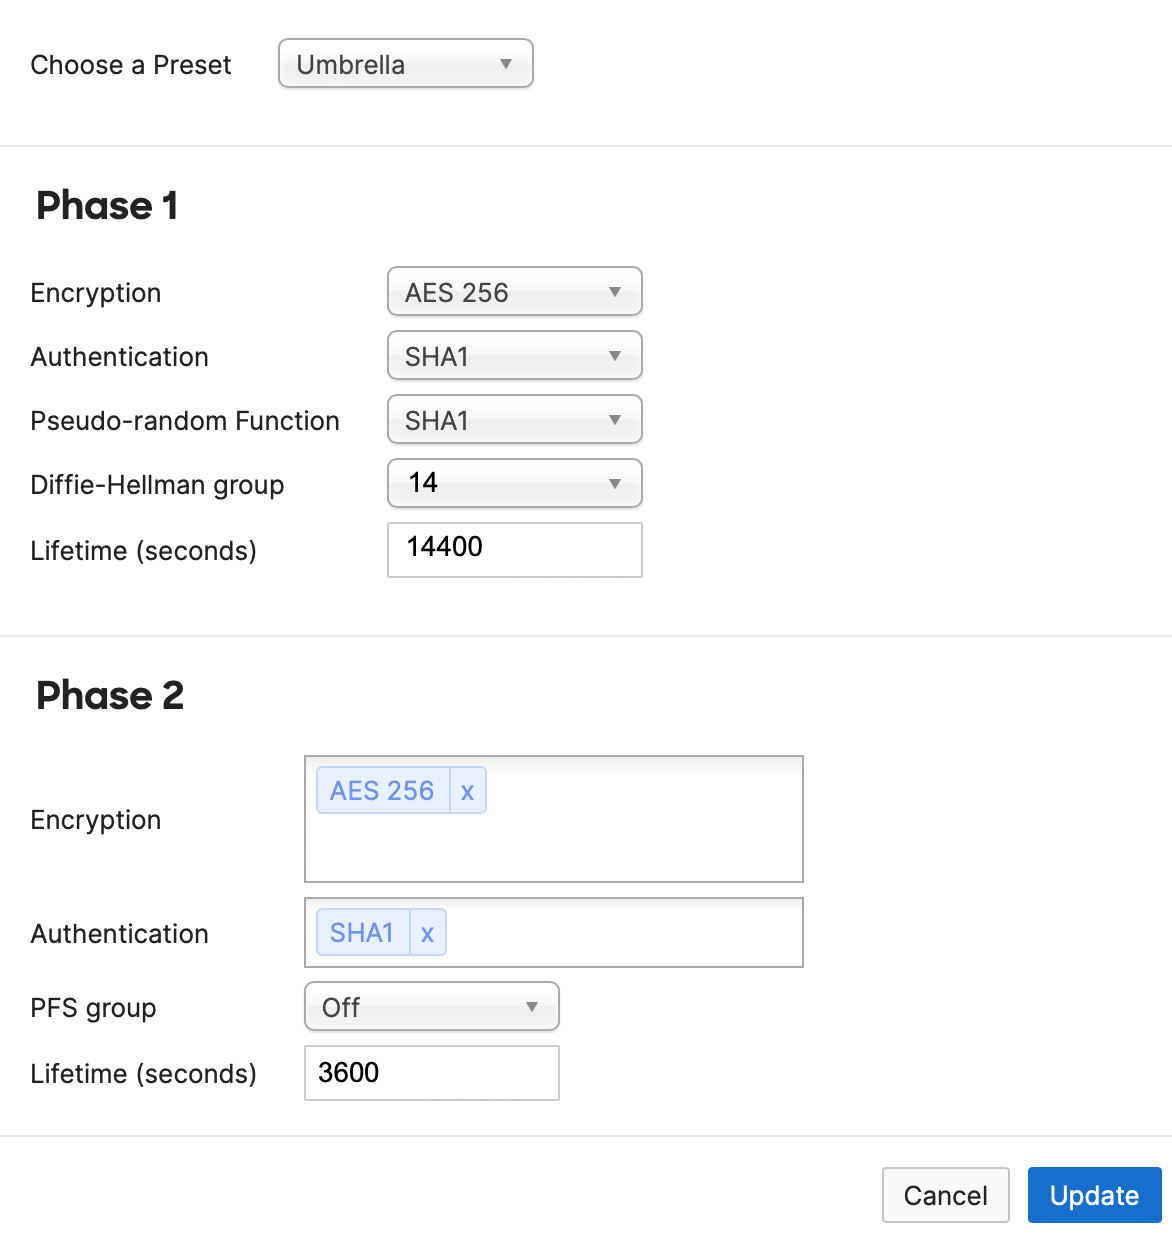
- In Org-Wide Settings > Non-Meraki VPN Peers, click Add a peer and then add the tunnel ID and tunnel passphrase that you created in Step 1: Add a Network Tunnel Identity. Configure the other IPsec parameter settings.
Note: The following values may not match the Meraki defaults. Use the values shown in the parameter descriptions.
- Name—Provide a meaningful name for the tunnel.
- IKE Version—Select
IKEv2. - IPsec policies—Choose the predefined Umbrella configuration, see Supported IPsec Parameters.
- Public IP—IP address to connect to Umbrella headend data center. See Connect to Cisco Umbrella Through Tunnel.
- Local ID—The tunnel ID for the Network Tunnel identity that you created in the Umbrella dashboard.
- Remote ID—Leave this blank.
- Private subnets—This is always 0.0.0.0/0 (all internet bound traffic is directed into the tunnels).
- Preshared secret—The tunnel passphrase for the Network Tunnel identity that you created in the Umbrella dashboard.
- Availability—Enter the tag you defined earlier for the MX appliance that builds the tunnels to Umbrella.

- Click Update.
Optional Configurations
- To tag the MX device associated with the tunnel, see Manage Tags.
- To create a VLAN for the subnet to redirect to Umbrella, see Configuring VLANs on the MX Security Appliance.
- To create a new SSID for the VLAN, see Configuring Simple Guest and Internal Wireless Networks.
Verification and Troubleshooting
- Run
pingtests from the new VLAN to the internet. For more information, see Using the Ping Live Tool. - Check the status of the VPN tunnel. For more information, see VPN Status Page.
- Follow the VPN troubleshooting procedures. For more information, see Troubleshooting Non-Meraki Site-to-site VPN.
Note: Cisco Meraki does not support policy based routing. It is not possible to do client side routing to determine if specific traffic belongs inside or outside the tunnel. However, it is possible to choose if an entire VLAN is tunneled to Umbrella or not.
Configure Tunnels Automatically with Catalyst SD-WAN cEdge and vEdge < Configure Tunnels with Meraki MX > Configure Tunnels with Cisco Adaptive Security Appliance (ASA)
Updated about 1 month ago
