
VMware Workspace ONE
This section explains how to deploy the Cisco Umbrella AnyConnect module on Android devices using zero-touch deployment. The method described here ensures seamless protection by automatically enabling Always On VPN through Mobile Device Manager (MDM) Workspace One, without manual intervention.
The Umbrella AnyConnect module in Cisco Secure Client provides robust protection against threats by securing both applications and internet-based traffic at the DNS layer on Android devices.
Workspace ONE Details
For more information about using the Cisco Umbrella AnyConnect module with the Workspace ONE MDM, refer to the Workspace ONE documentation available online on VMWare's documentation website.
Important
Install the Cisco Secure Client only after you have published and installed the Always On VPN profile in Workspace One Intelligent Hub.
Table of Contents
Prerequisites for Deployment
- Complete the Android Enterprise Mobility Management (EMM) registration, device enrollment, and a work profile creation.
- Ensure that the MDM app hub is visible within the work profile.
Deployment Procedure
Create an Always On VPN Profile
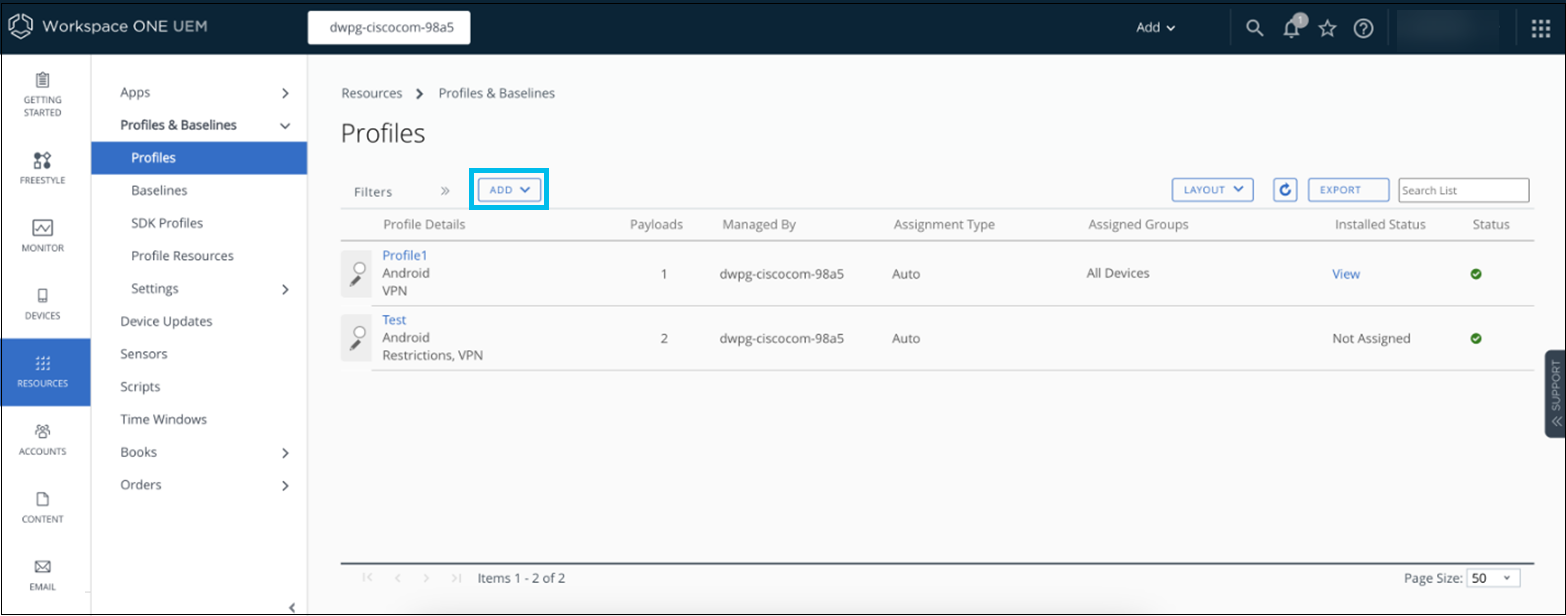
- In the the Workspace ONE UEM console, navigate to Resources > Profiles & Baselines > Profiles.
- Click Add and choose Add Profile from the drop-down list.
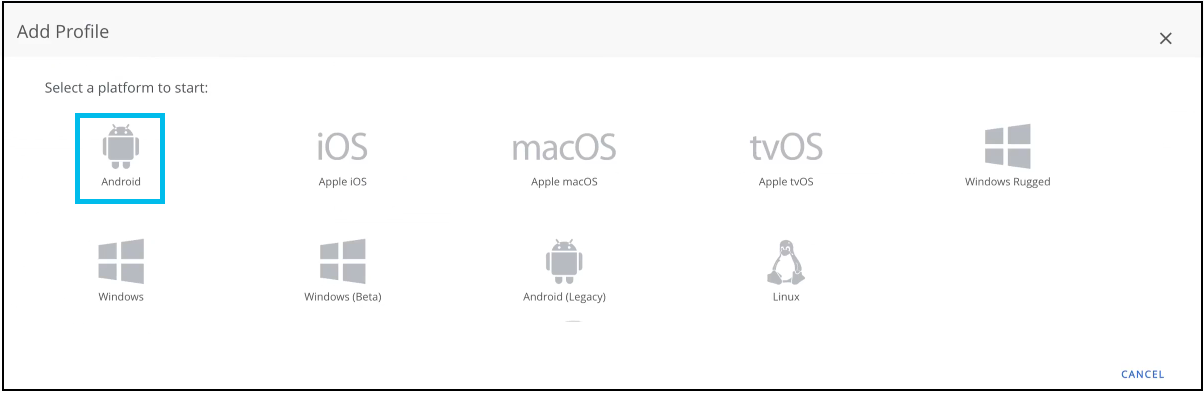
- Select Android as the platform.
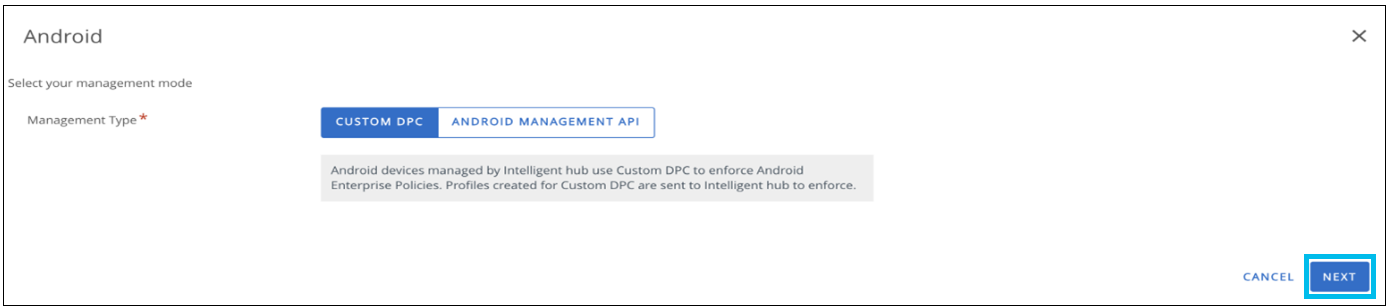
- Select CUSTOM DPC or ANDROID MANAGEMENT API as the Management Type and click Next.
- Enter a name for your profile, for example, Always On VPN.
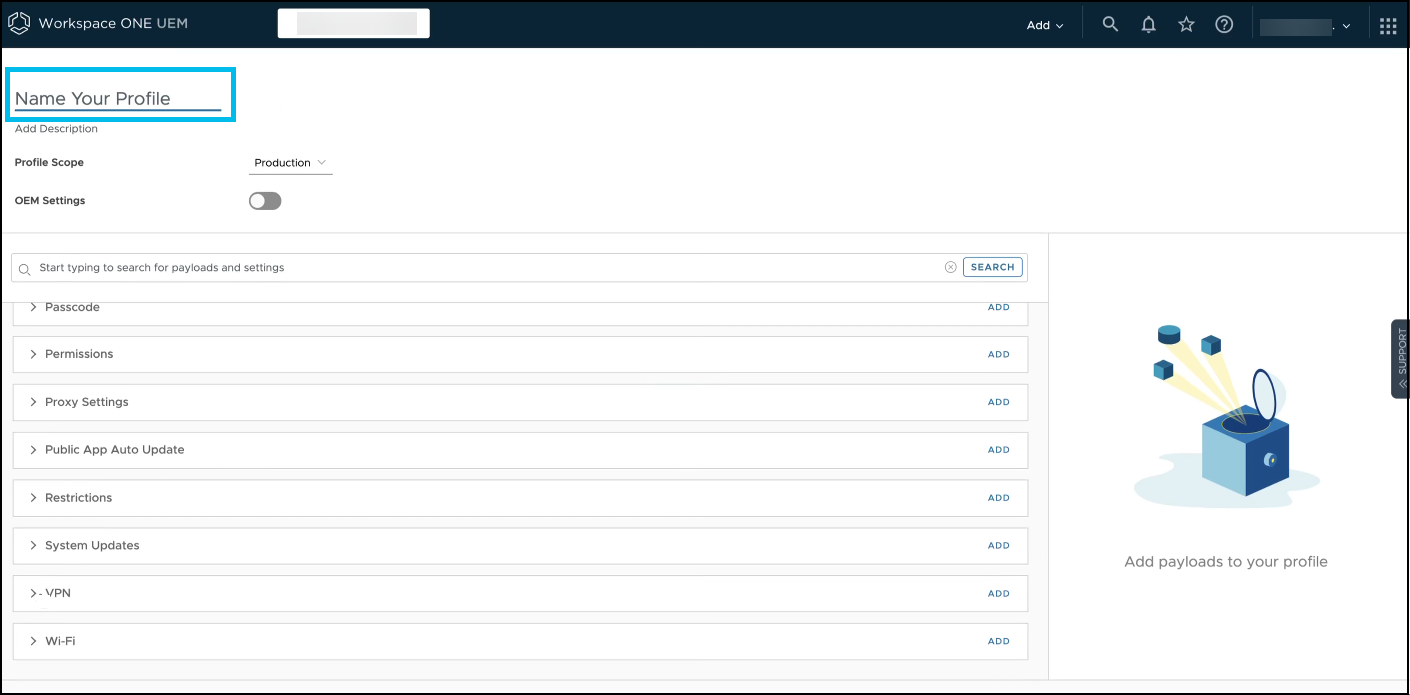
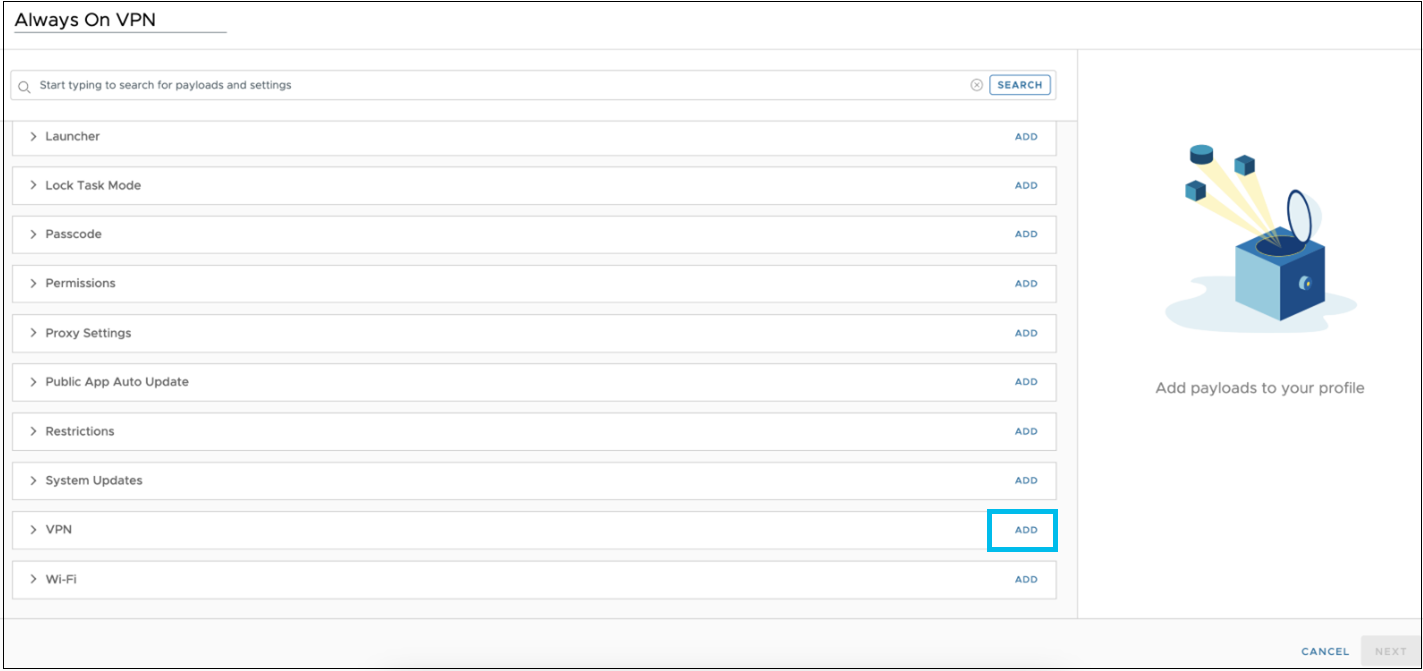
- Navigate to VPN and click Add.
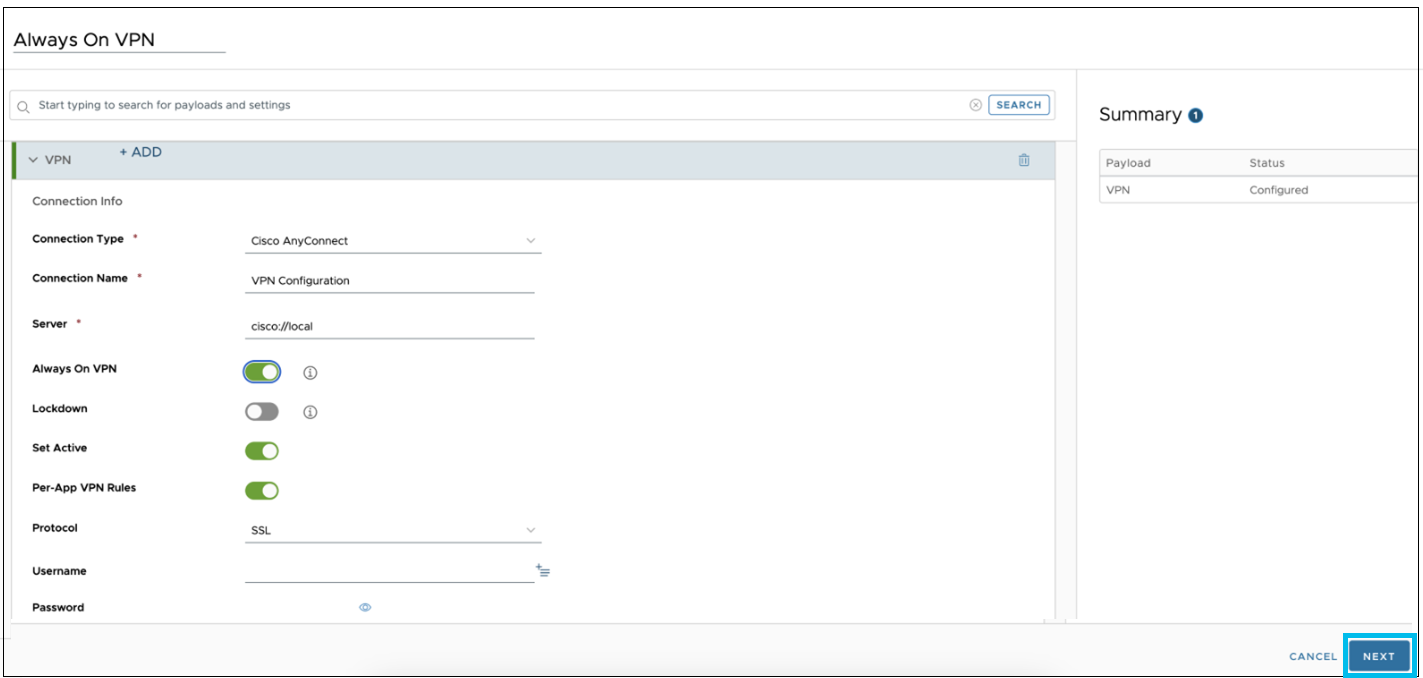
- In the VPN setting configuration section, provide information, including the following:
- From the Connection Type drop-down list, choose Cisco AnyConnect.
- In the Server field, enter cisco://local.
- In the Connection Name field, enter a name.
- Click the Always On VPN toogle button to enable this functionality.
- Click the Set Active toogle button to enable this functionality.
- Click the Per-App VPN Rules toogle button to enable this functionality.
- Click Next.
- Navigate to Credentials section, and click Add.

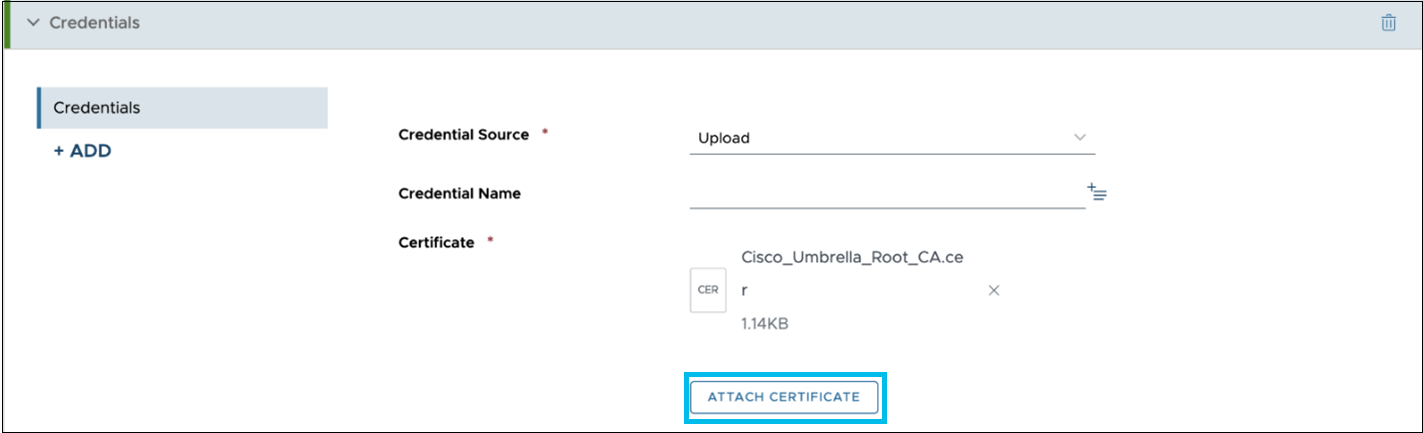
- In the Credential section, do the following:
a. From the Credential Source drop-down list, choose Upload.
b. Click Choose File to browse and select the Cisco_Umbrella_Root_CA Certificate that has been downloaded from Umbrella.
Note: In Umbrella, navigate to Deployments > Configuration > Root Certificate, expand Cisco Root Certificate Authority, and download the Cisco Umbrella root certificate. For more information, see Push the Umbrella Certificate to Managed Devices.
c. Click ATTACH CERTIFICATE.
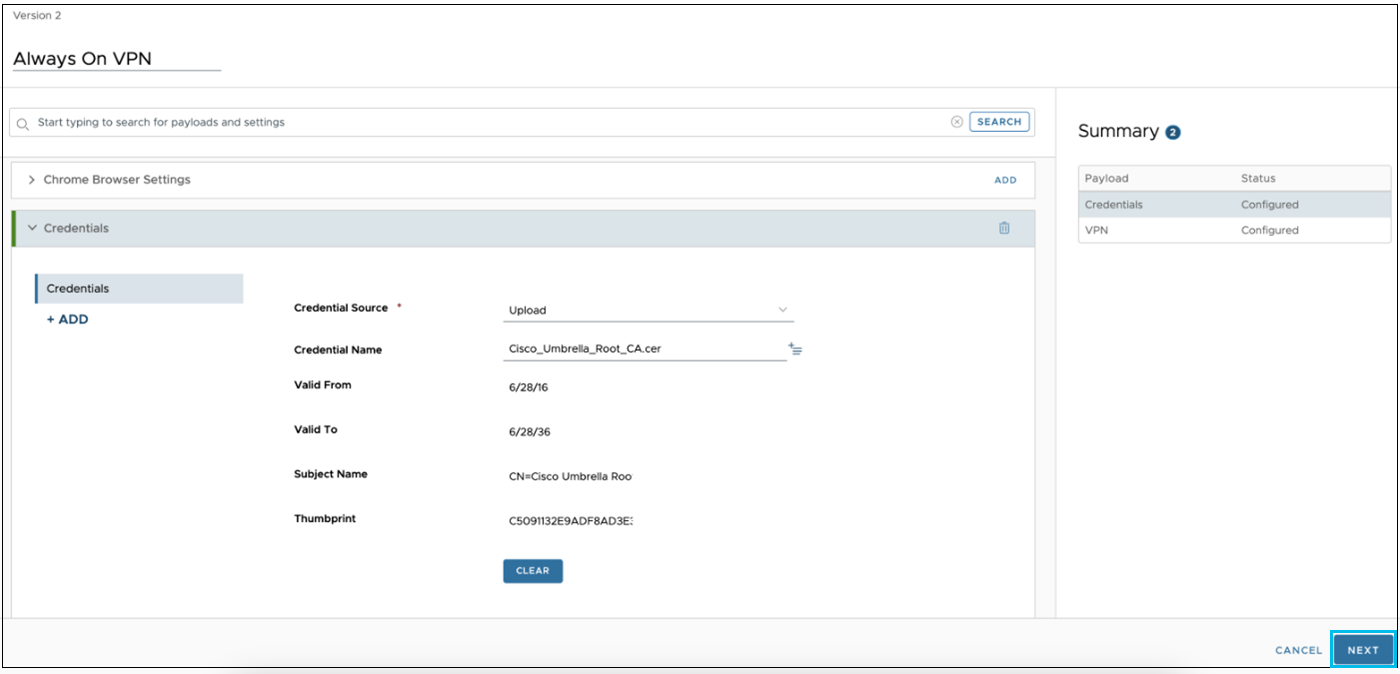
- After successfully uploading the certificate and the Credential Name is added, click Next.
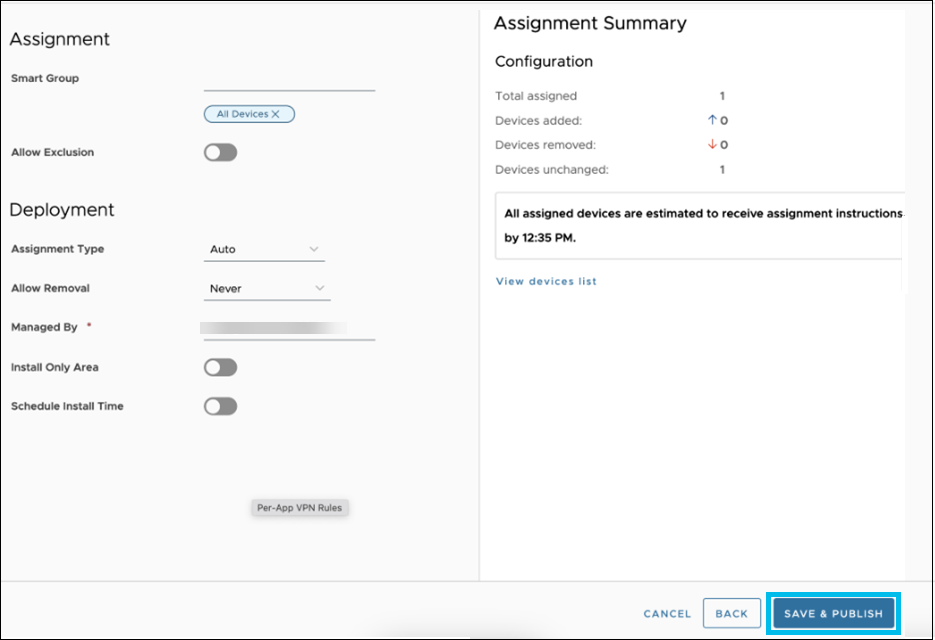
- In the Assignment and Deployment profile settings, including the following:
- In the Smart Group field, choose the group of devices to which the Always On VPN profile is to be assigned.
- Select the appropriate deployment values. Choose Auto from the Assignment Type drop-down list to automatically deploy the profile to all the devices.
- Click Save & Publish.
Add and Publish the Cisco Secure Client Application
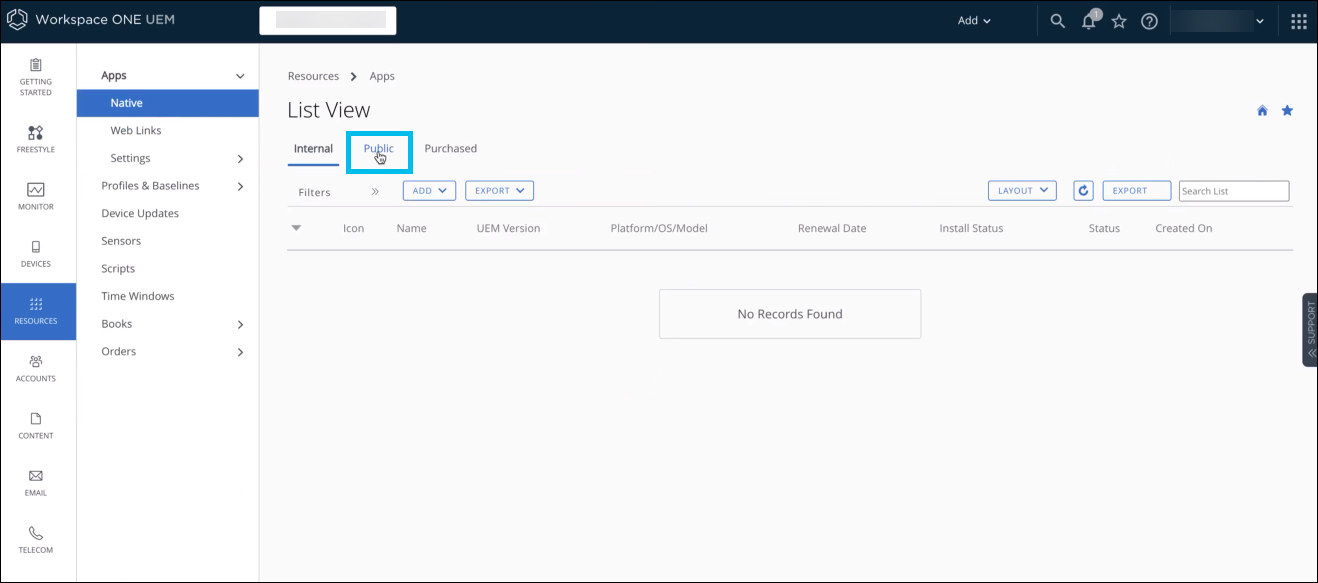
- In the Workspace ONE UEM console, navigate to Resources > Native > Public.
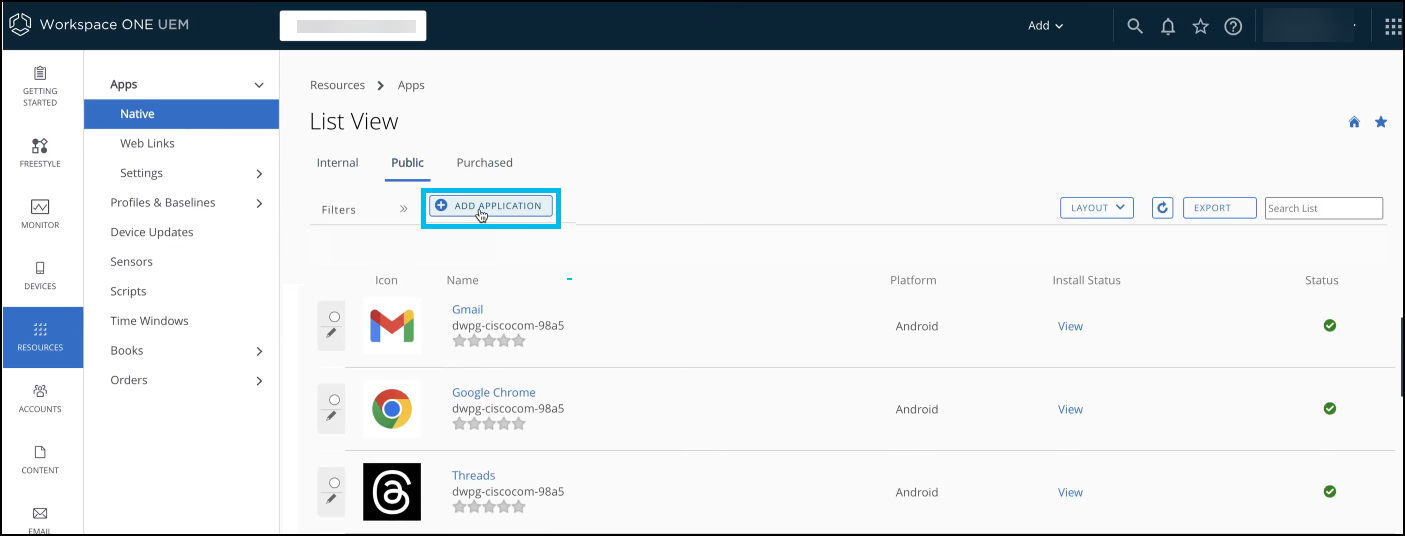
- Click Add Application.
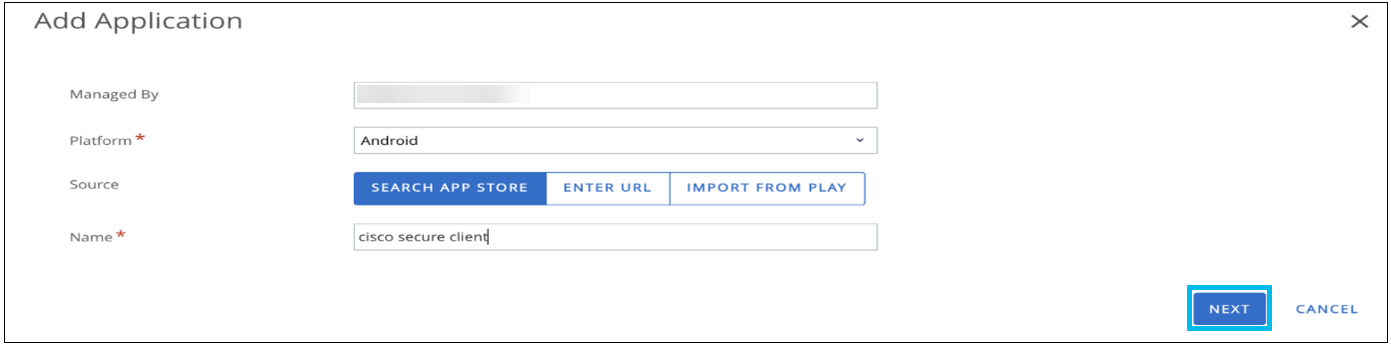
- To add the Cisco Secure Client application, provide the following details:
- The Manage By field is automatically filled based on how you set up the application management.
- From the Platform drop-down list, choose Android.
- In the Source field, select SEARCH APP STORE to search for the application in the app store.
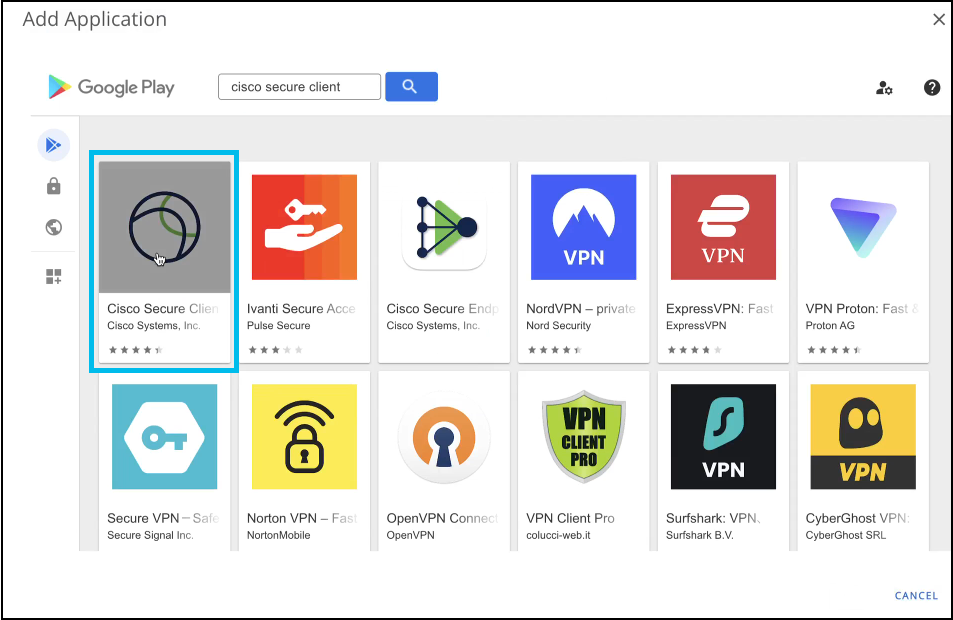
- In the Name field, enter Cisco Secure Client and click Next.
Google Play is launched.
- In the Google Play Store, click Cisco Secure Client AnyConnect.
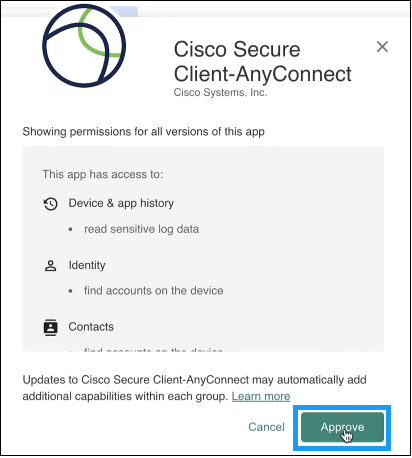
- Click Approve to accept the permission for all versions of the application.
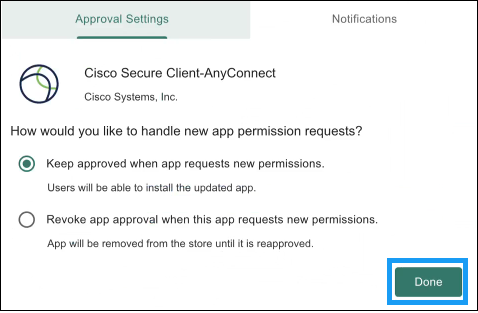
- Click Done to handle the new app's permission requests.
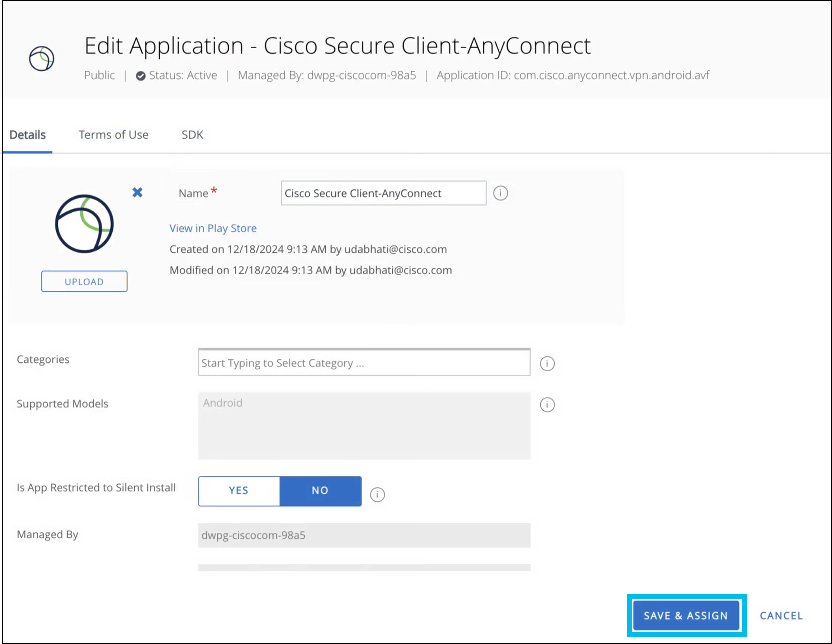
- Click Save & Assign.
The Cisco Secure Client-AnyConnect Assignment wizard is displayed.
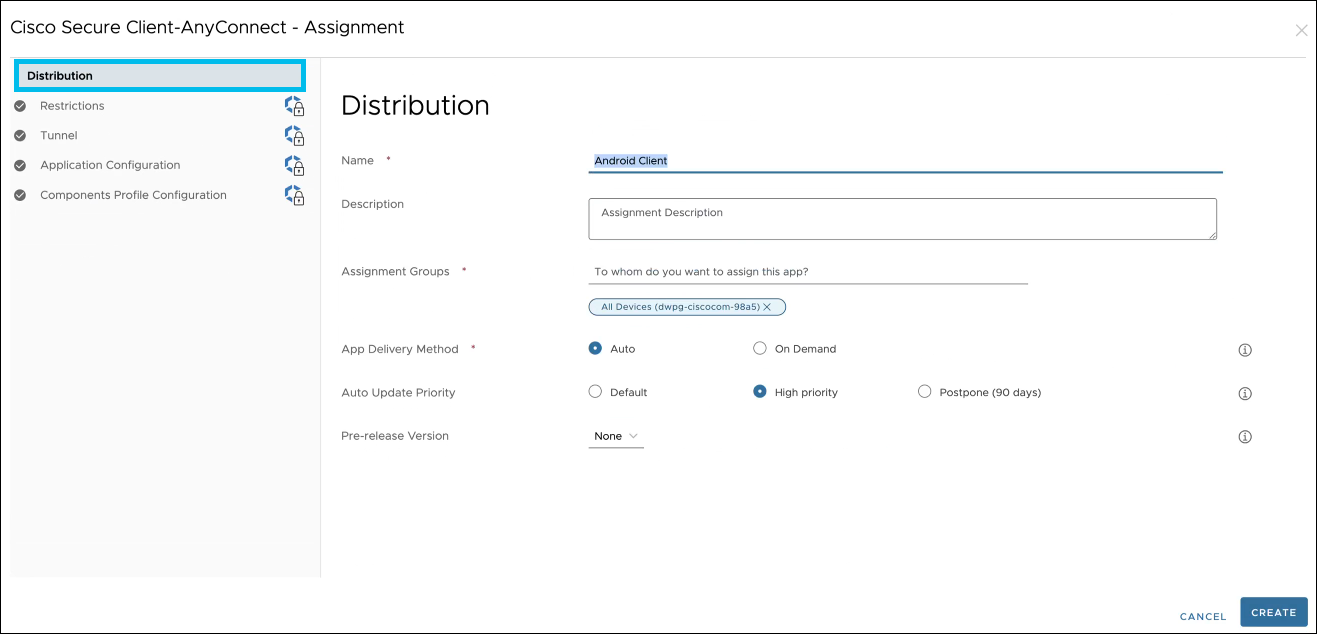
- In the Distribution page, enter the necessary details to define how the application will be distributed.
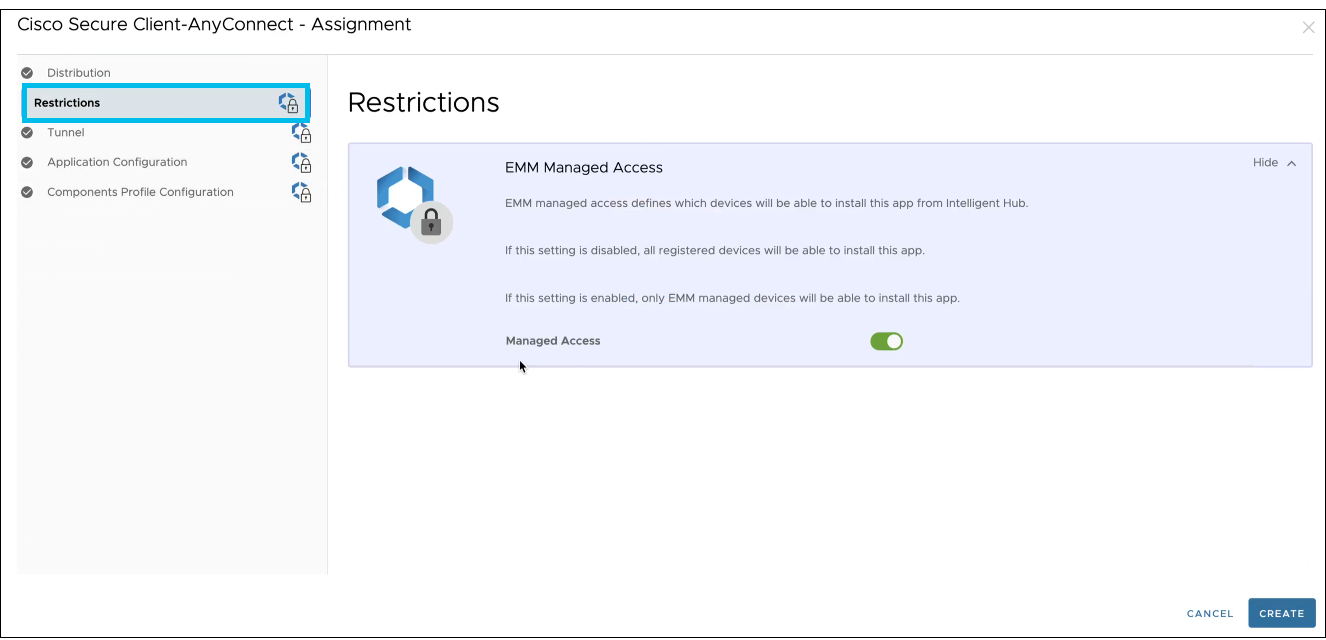
- In the left pane, click Restrictions.
- In the Restrictions page, click the Managed Access toggle button to allow only EMM-managed devices to install the application.
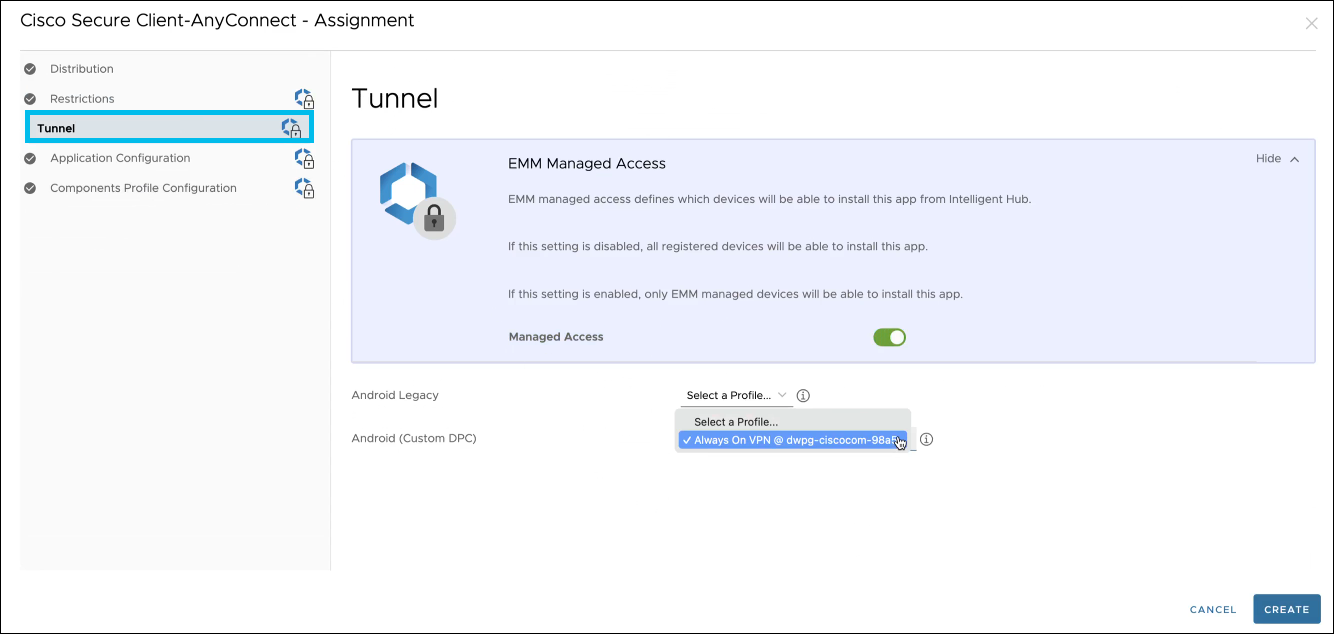
- In the left pane, click Tunnel.
- In the Tunnel page, from the Android (Custom DPC) drop-down list, choose the Always On VPN profile created earlier.
- This enables the Always On VPN profile for the managed devices.
- In the left pane, click Application Configuration.
The Application Configuration page is displayed.
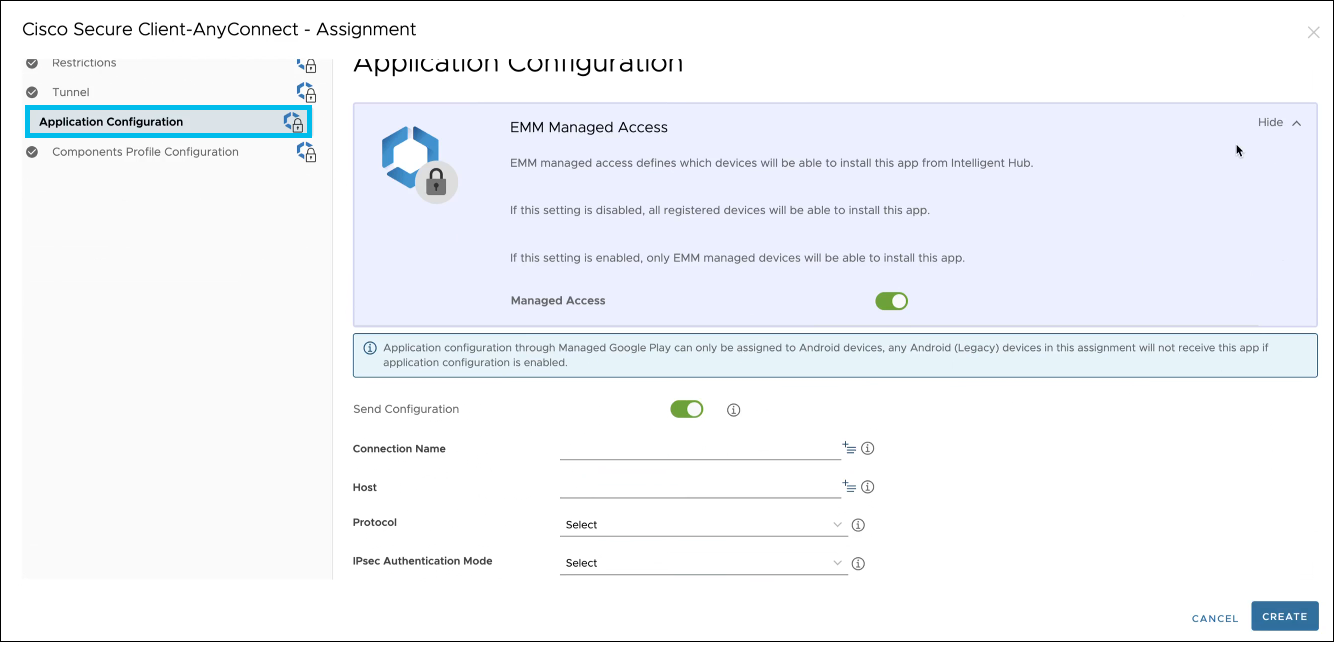
- In the Application Configuration page, provide values, including the following:
- Leave the Host field empty because as the server details are taken from the profile.
- From the Accept SEULA For Users drop-down list, choose Enable to prevent users from manually accepting the SEULA banner.
- From the Enable Always On VPN Mode for Umbrella Protection Only drop-down list, choose Enable to allow the Cisco Secure Client application to automatically manage Umbrella protection and seamlessly accept VPN connection requests when Umbrella protection is activated.
- From the Block users from creating new VPN connections drop-down list, choose Enable.
- Enter the application configuration details, such as, Umbrella Organization Id and Umbrella Registration Token, by referring to the Android Config File downloaded from the Umbrella dashboard. For more information on how to download Android Config File, see Android Configuration Download.
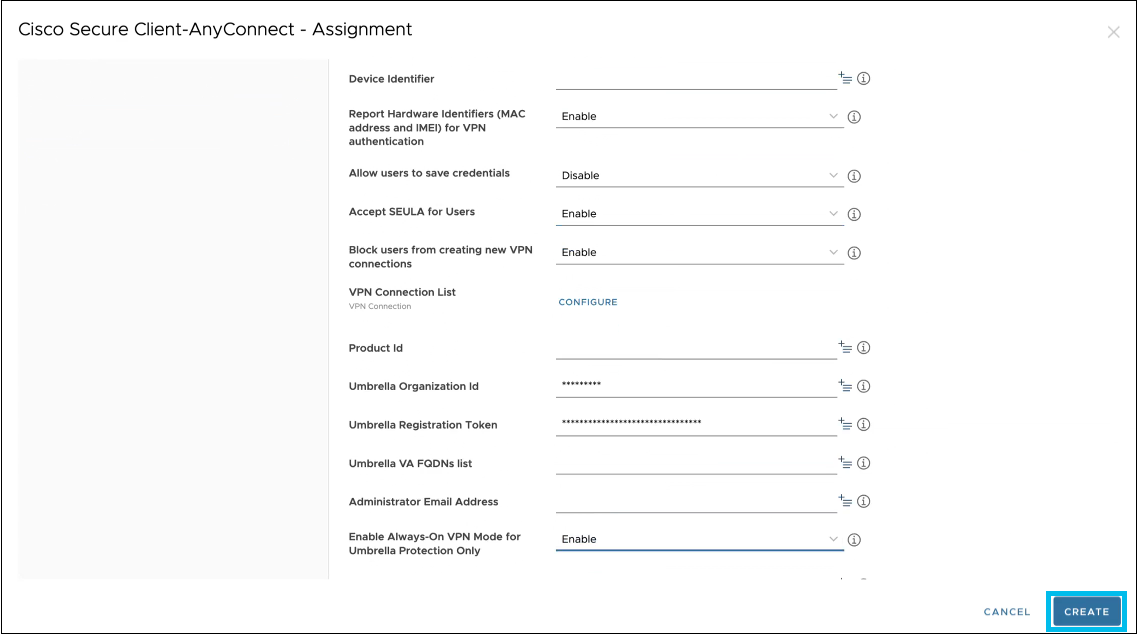
- Click Components Profile Configuration.
- Click Create.
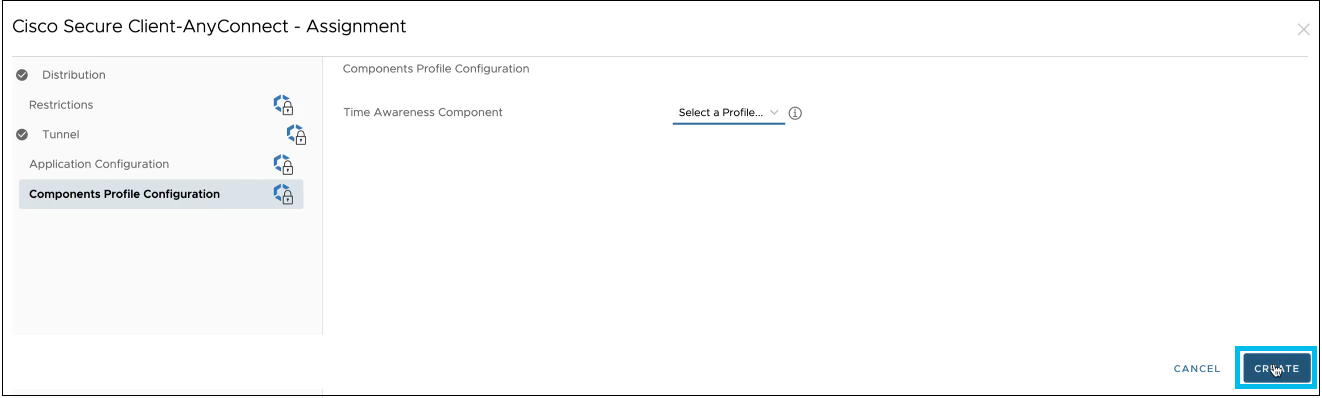
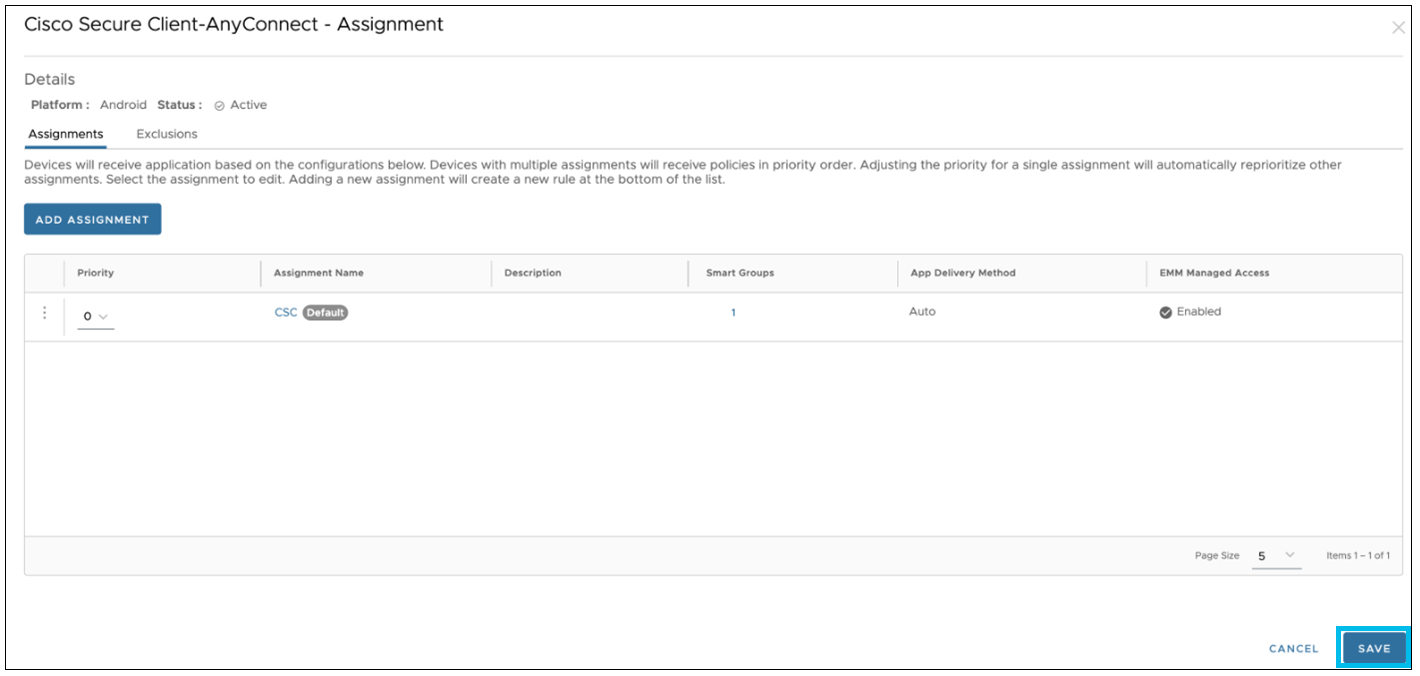
The Cisco Secure Client-AnyConnect app assignment is created.
- Click Save.
- Click Publish to publish the Cisco Secure Client Application.
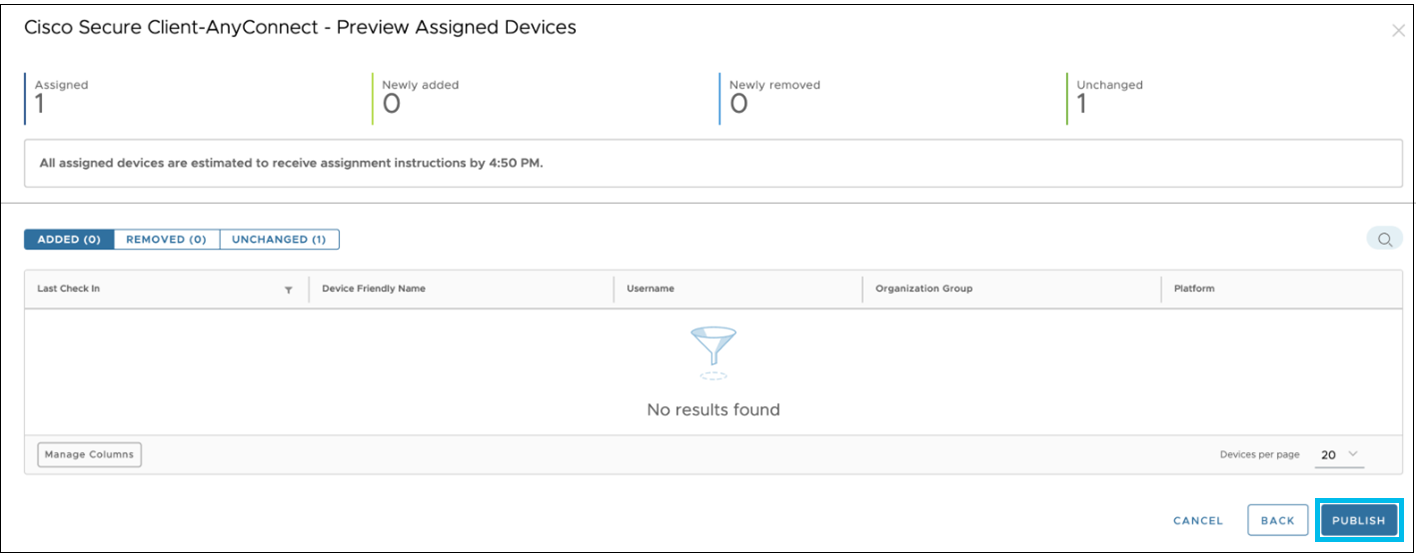
Because the app delivery method is set to auto on the distribution page, the application is installed automatically on the device and is displayed in both the console and on your device.
MobileIron MDM < VMware Workspace ONE > Microsoft Intune MDM
Updated 9 months ago