
Cloud Management
Contents
- Overview
- Deploying Cisco Secure Client
- Profiles
- Uploading the Orginfo.json profile
- Create a Deployment
- Post Deployment
Overview
Cisco Secure Client can now be deployed from Cisco cloud utilizing Cisco XDR or Cisco Secure Client Cloud Management.
Cisco XDR is a cloud-based security solution that simplifies operations by helping security teams detect, prioritize, and respond to threats. It integrates Cisco and third-party tools into a single platform for comprehensive threat management. Cisco Secure Client with Client Management is the next-generation Secure Mobility Client that combines the existing features of both AnyConnect and Secure Endpoint with a Cloud Management solution in a single, unified end-user interface.
For customers who are not using Cisco XDR, Cisco offers Cisco Secure Client Cloud Management at no additional cost. This service is available to those with an active Cisco Secure Client or Umbrella license.
Both solutions support the creation and uploading of Cisco Secure Client profiles, including the Umbrella Orginfo.json file. Deployments can then be configured to specify Cisco Secure Client modules using these profiles. The Cloud Management module is essential, enabling the client to check in with the cloud every 2, 4, 6, or 8 hours. This ensures that clients remain up to date, as any changes to their deployment are pushed during these check-ins. Additionally, administrators receive a client inventory that displays installed versions, modules, and the last check-in time.
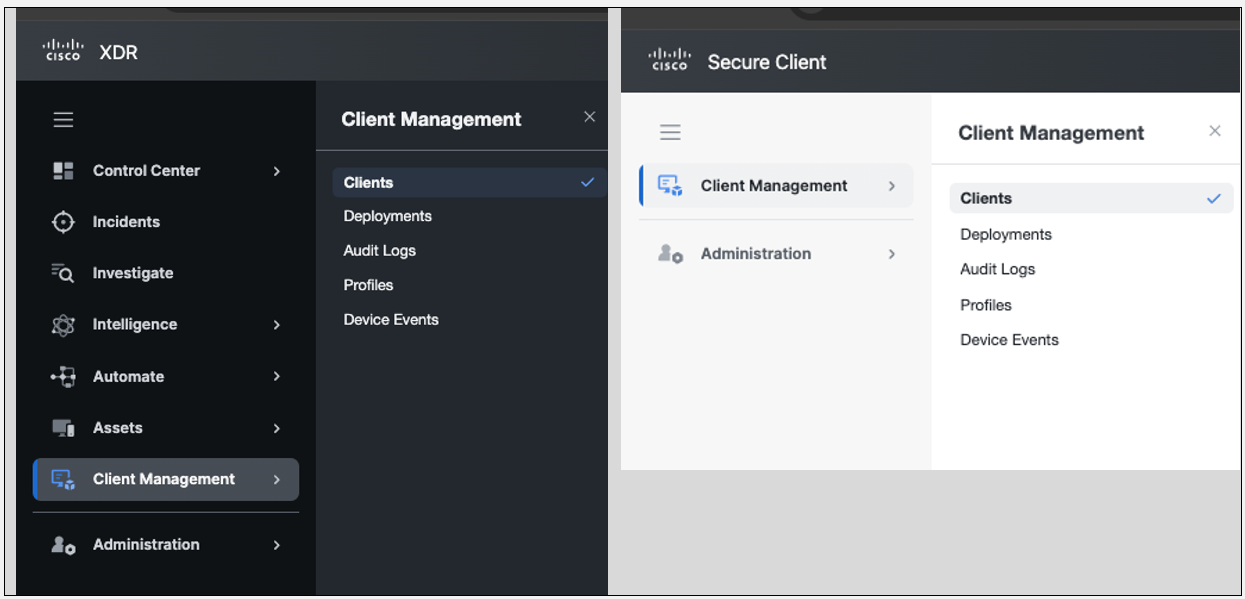
The following image shows the XDR Client Management and Cisco Secure cloud management:
Deploying Cisco Secure Client
In this instance, XDR will be utilized; However, the procedure remains the same when using Cisco Secure Client Cloud Management too.
Profiles
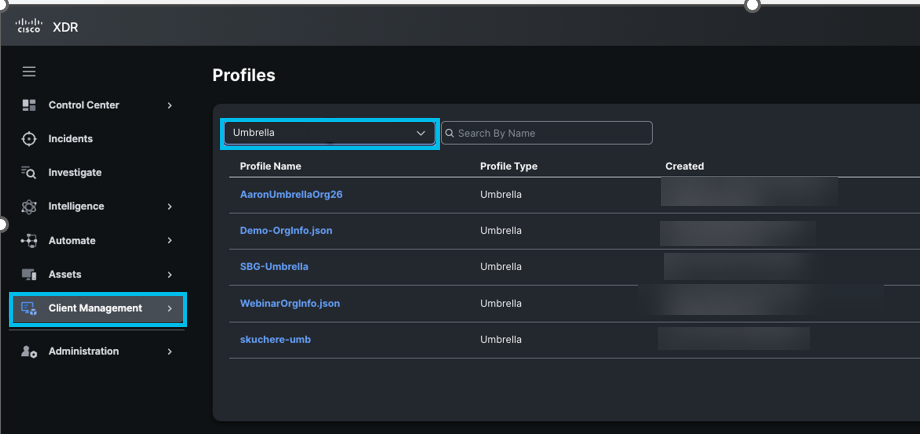
The Profiles page provides a list of all the Cisco Secure Client profiles in your Cisco XDR organization and allows you to create profiles that control the Cisco Secure Client endpoint software.
We recommend that you start by gathering existing profiles or using the profile editor in Client Management to create new ones. The online profile editor can create profiles for the modules listed here. For the Network Access Manager (802.1x supplicant) and the Umbrella Orginfo.json, these profiles must be uploaded.
Note:
There are only two default profiles, and this is directly from the XDR Client Management Help. The NVM Cloud Default Profile is mandatory but the Cloud Managment default profile is optional.
Cisco XDR includes the following default profiles to help you get started with Cisco Secure Client deployments:
- Cloud Management Default Profile
- NVM Cloud Default Profile
The default profiles are associated with the XDR default deployment, which can be installed on your endpoints to improve detections and enrich incidents in Cisco XDR. These profiles can also be applied to any user created deployments. For more information, see XDR Profiles
Uploading the Orginfo.json profile
Upload the rginfo.json file that you previously downloaded from the Umbrella dashboard.
- Navigate to Client Management > Profiles > Upload, select Umbrella from the list and click Next.
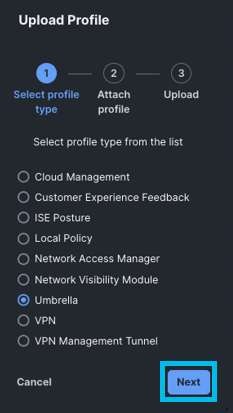
A pop-up is displayed.
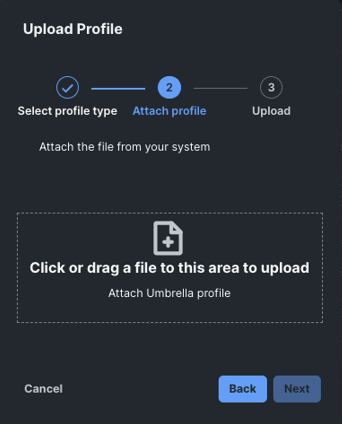
- You can either drag and drop the Orginfo.json file or navigate to its location to add this profile and make it available for deployments.
- After the file is uploaded, go to Client Management > Profiles and, if required, apply a filter for Umbrella to display only the available Umbrella profiles. Typically, this step has to be performed only once. The profiles can be used in multiple deployments.
Create a Deployment
The Deployments page provides a list of all the Cisco Secure Client deployments in your Cisco XDR organization and allows users to define a list of all the packages and related profiles that must be installed on all the computers in a specific deployment within an organization (for example, QA department).
- To create a new deployment, navigate to Client Management > Deployments and click on New. You can also edit existing deployments from the list displayed.
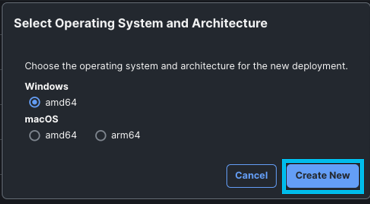
- When prompted, select the operating system for the deployment, that is, either Windows or macOS.
In this example, Windows is selected. - Click Create New.
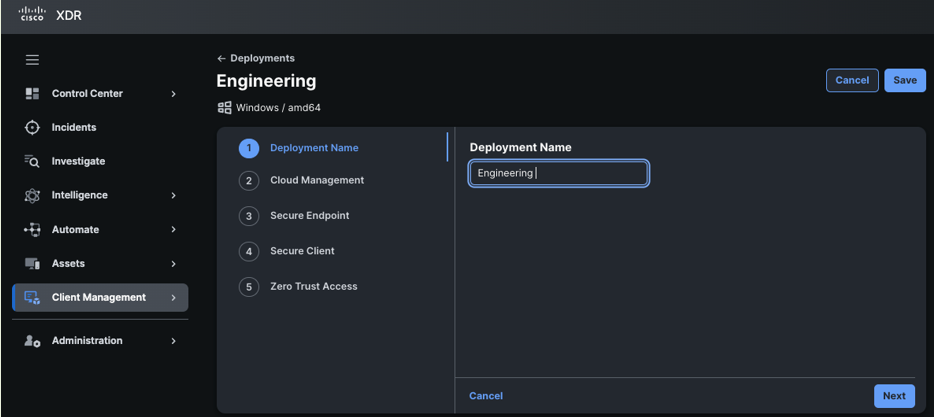
- Specify a name for the deployment: This name will be included in the file name of the final package after the deployment configuration is complete.
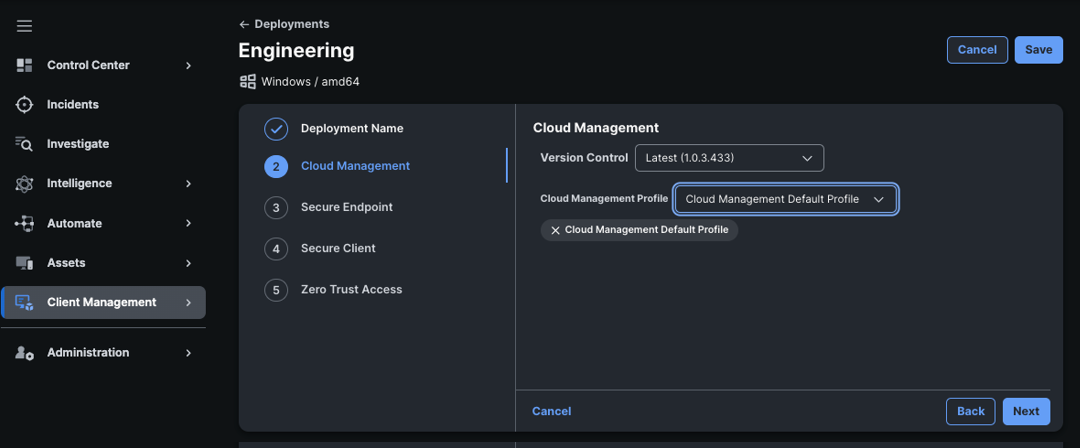
Every deployment includes the Cloud Management module and profile. Choose a version for both the Cloud Management module and the Cloud Management profile. While the default Cloud Management profile typically works well, administrators have the option to create a custom profile, if needed. For example, you might want different check-in intervals or update Windows for certain user groups.
- From the Version Control drop-down list, choose the Secure Endpoint connector version that you want to deploy. If you prefer to not include the Secure Endpoint module, choose Skip and proceed. In this example, Skip is chosen.
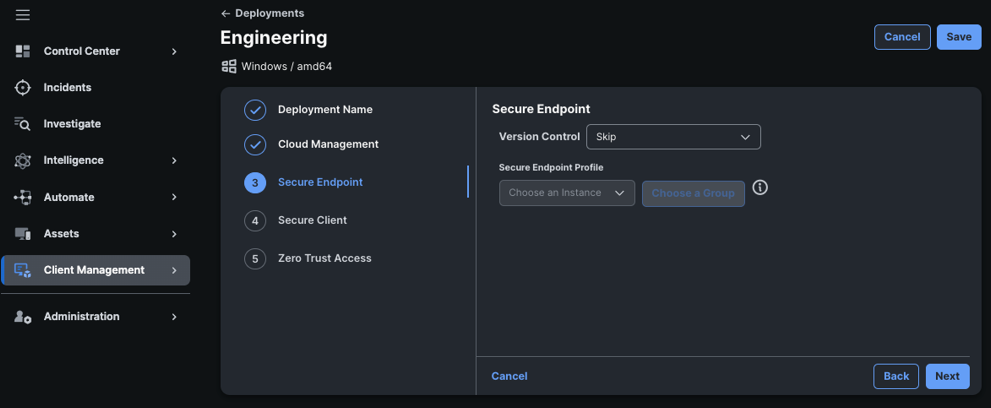
Next, configure the Cisco Secure Client section to include AnyConnect VPN, Umbrella, and DART in the deployment.
Note:
If you don’t plan to use AnyConnect VPN, you can skip adding a VPN profile. After completing the cloud deployment, push the VPNDisable_ServiceProfile.xm file to the VPN profile directory (as described earlier in Customize Windows Installation of Cisco Secure Client guide). This hides the AnyConnect VPN tile in the GUI.
To complete the Cisco Secure Client section of the deployment, we selected an existing VPN profile that was either uploaded or created in Client Management using the profile editor. Along with the VPN profile, we enabled the DART and the Umbrella module, specifying the previously uploaded Umbrella OrgInfo.json profile. This configuration generates a deployment package that includes the specified modules and profiles upon installation.
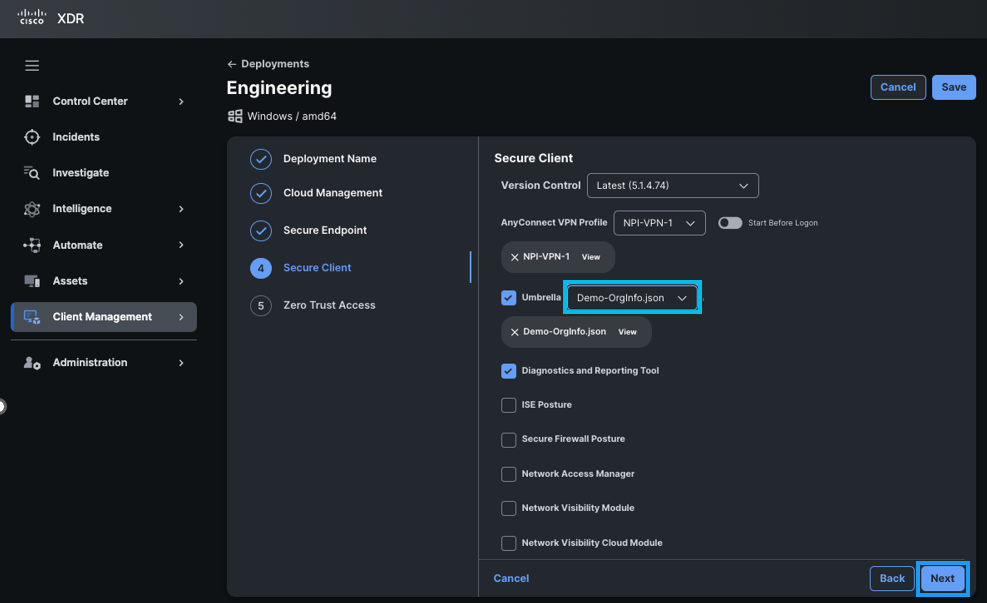
- After completing the deployment configuration, click Next.
For Windows deployments, the administrator will have the option to add the Zero Trust Access (ZTA) module for Cisco Secure Client. While the ZTA module is supported on macOS through other deployment methods, it is not yet supported for cloud deployments using XDR or Cisco Secure Cloud Client Management. The ZTA module is designed to work seamlessly with the Cisco Umbrella solution.
ZTA focuses on knowing, understanding, and controlling who and what is on your network:
- It grants appropriate access based on role or function.
- It controls application access at the network layer.
- By assuming that the network layer is untrustworthy, it helps prevent unauthorized access and breaches.
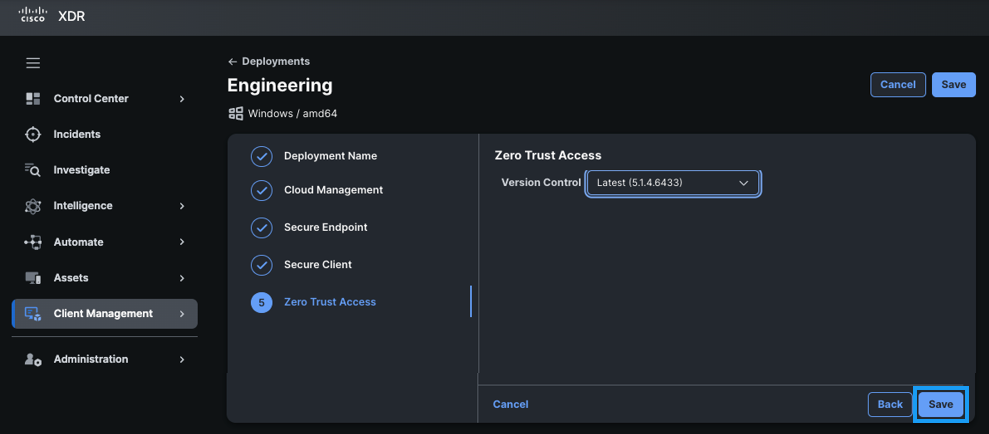
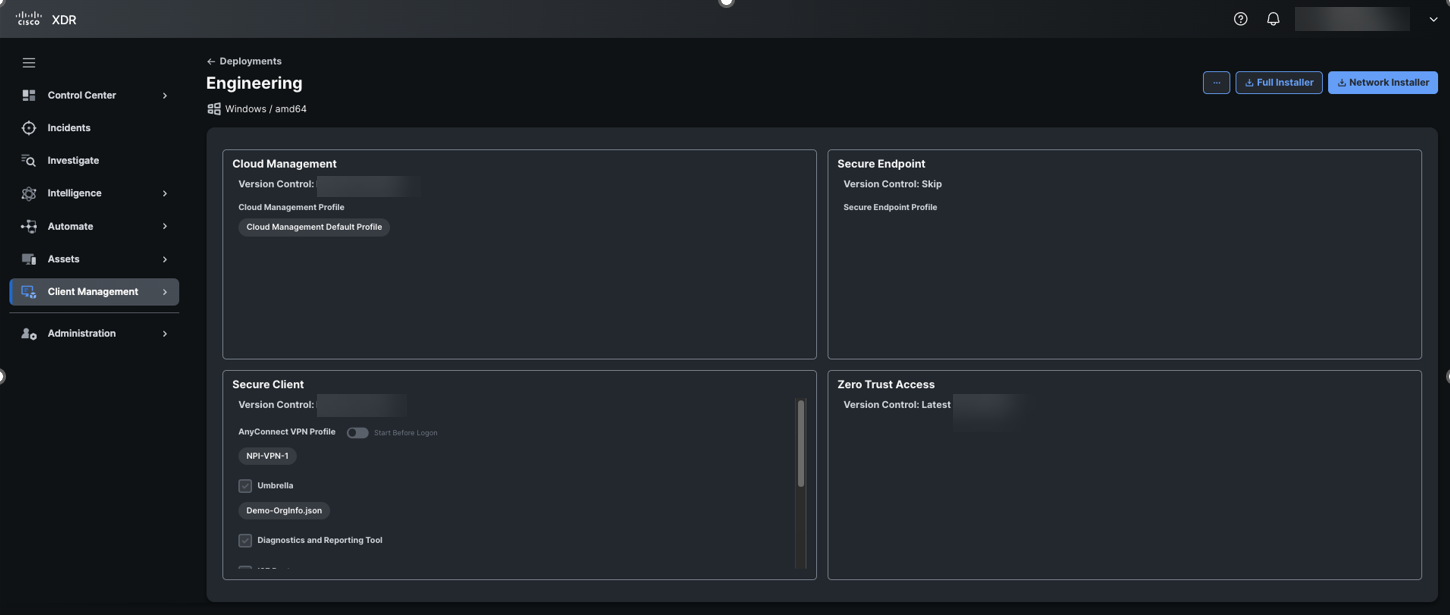
- When you click Save it finalizes the deployment configuration and presents the Administrator with two installation package options — Network Installer or Full Installer.
-
Network Installer: A streamlined installer that includes only the Cloud Management client. When using the Network Installer, it will download the remaining components specified in the deployment in the background.
-
Full Installer: A comprehensive package that includes all the installers and profiles configured for the deployment. It is larger than the Network Installer, and when used, it installs the Cloud Management client along with all associated packages from the deployment.
Both the Full and Network installers will link the device to the deployment from which the installer was created. Whenever the device connects to the cloud, it checks the installed packages against the deployment requirements. The device then updates the packages and profiles to match the deployment, but does not downgrade any packages that are newer than those specified in the deployment.
Post Deployment
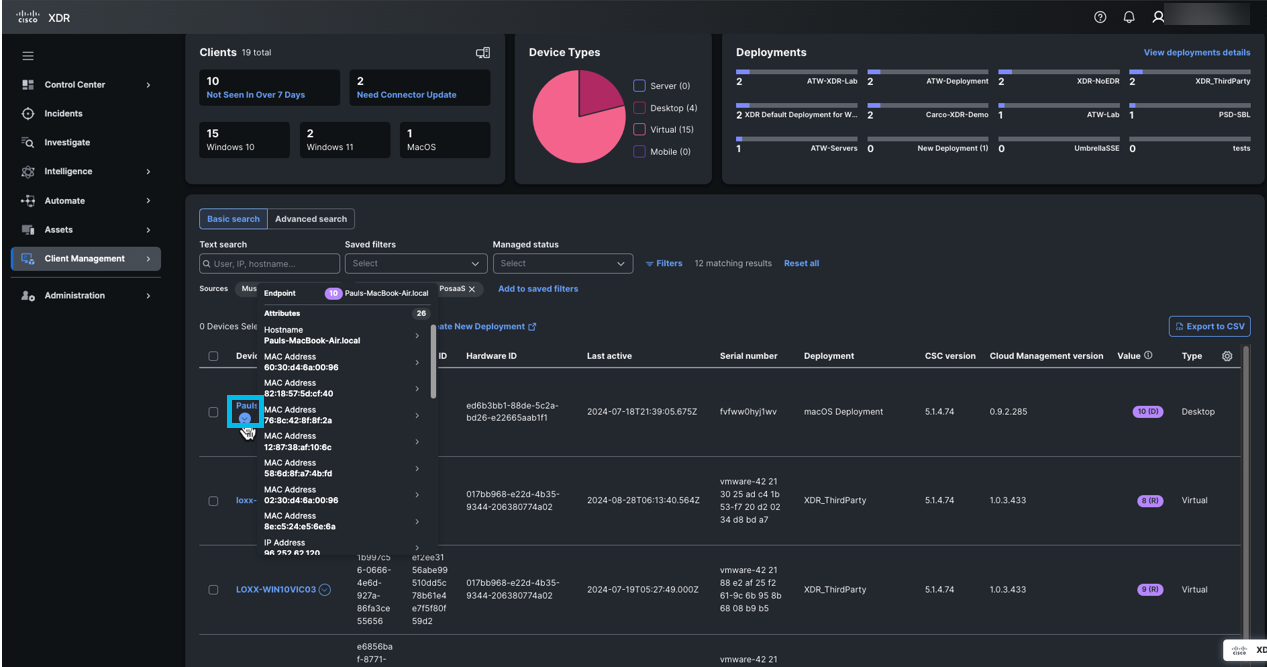
After deploying Cisco Secure Client with Cloud Management, both Cisco XDR and Cisco Secure Client Cloud Management offer valuable insights into the clients deployed to the cloud. The administrator can access a comprehensive inventory of these clients by navigating to Client Management > Clients.
A table lists all the Cisco Secure Client devices in your organization along with their data. The following information is also displayed:
- The total number of devices found.
- The number of devices selected.
- Move to Deployment: Click to move selected devices to a specific deployment.
- Create New Deployment: Click to open the Deployments page. From this page, Admin users can define a list of all the packages and related profiles that must be installed on all the computers in a specific deployment within an organization.
- Export to CSV: Click to download the table contents to a spreadsheet. Note that only the contents of the table will be downloaded.
- Each device includes a pivot menu icon that enables you to take action on it. You can perform some actions directly using pivot menu or pivot to the integrated product to perform additional actions.
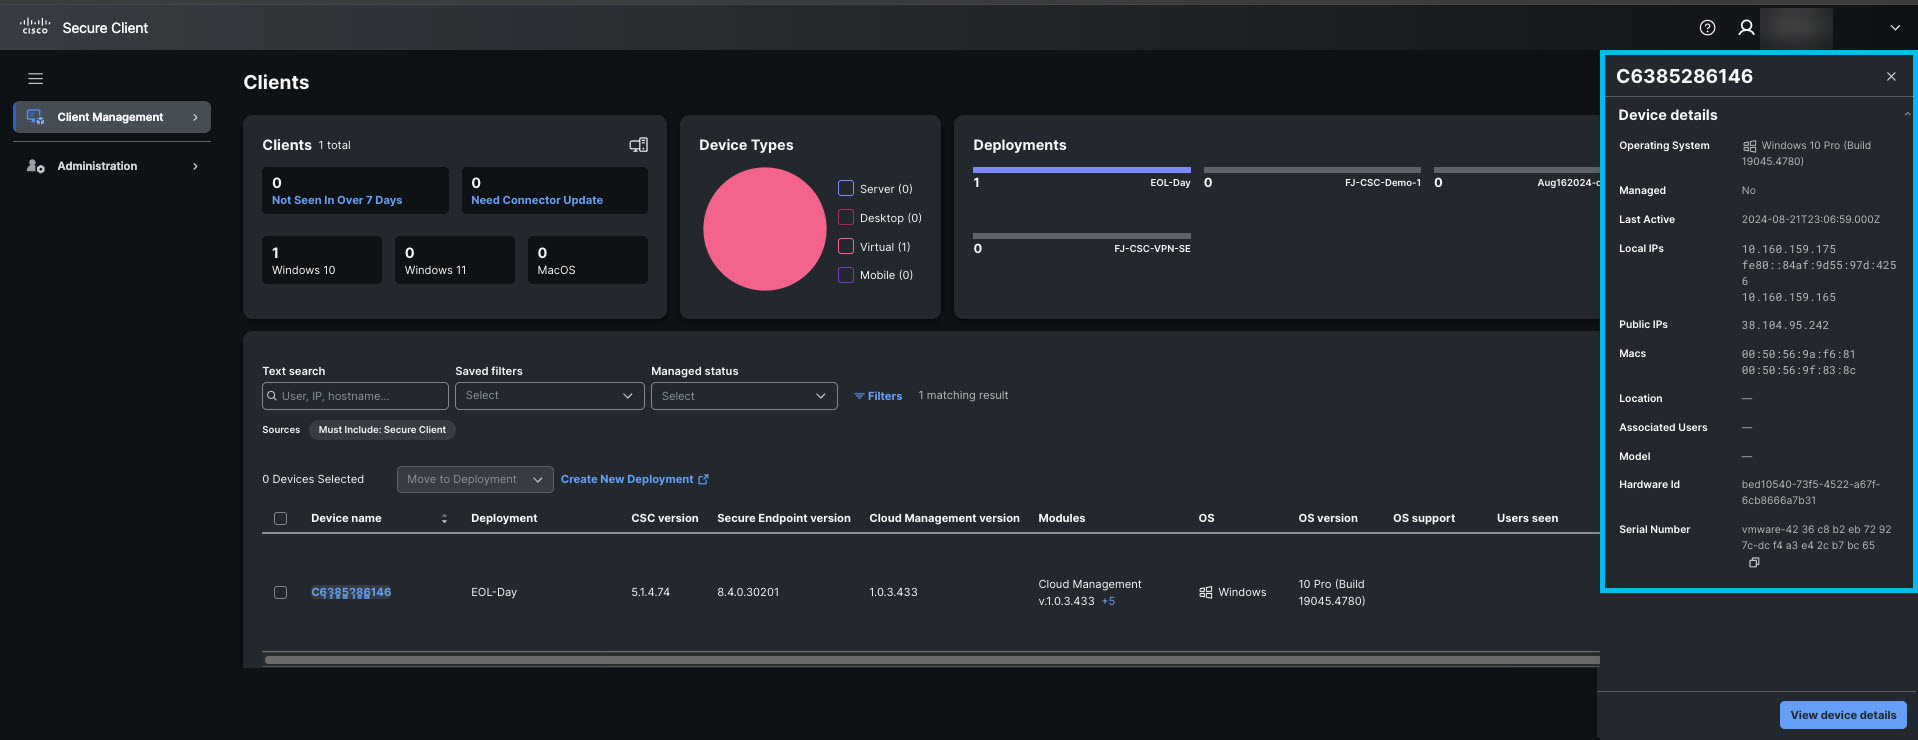
The behavior varies slightly when performed in Cisco Secure Client Cloud Management. However, the Administrator can switch to a detailed view for more information.
Additional Reference
For more information about Cisco Secure Client Cloud Management, please refer to the FAQ.
Automatic Updates < Cloud Management > Additional References
Updated 8 months ago