
Mass Deployment (Windows)
Contents
(Optional) Package Customization
You have the option to bundle the Umbrella profile within the installation source directory before running the Cisco Secure Client installer. The profile will then be automatically imported during installation.
This method creates a preconfigured deployment package, which can be executed without any additional script or configuration. However, note that for this method to work, one of the following is required:
- A shared network folder to act as the installation source.
- Endpoint management software that can create and distribute multifile installation packages.
Note:
See the following examples of software that can distribute multifile installation packages using the Windows Content Prep Tool or Jamf Composer:
- Provision Secure Client Umbrella Roaming Security via MS Intune (Windows)
- Deploy CSC to macOS Using JAMF with Umbrella Module
For more information, see Customize Windows Installations of Secure Client.
Add Umbrella Profile
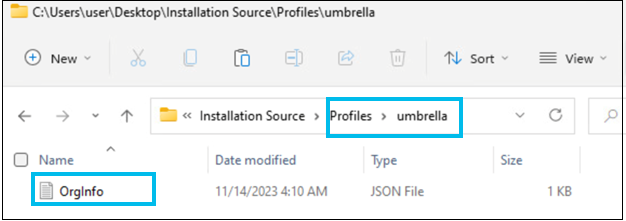
Add the OrgInfo.json file to a \\Profiles\\umbrella subdirectory within the installation package. The source installation folder must have the following contents:
cisco-secure-client-win-X.X.XXXXX-core-vpn-predeploy-k9.msi
cisco-secure-client-win-X.X.XXXXX-umbrella-predeploy-k9.msi
\\Profiles\\umbrella\\OrgInfo.json
For more information, see Automated deployment tutorial with bundled Umbrella profile.
Automated Installation (Windows)
Cisco Secure Client can be installed using an unattended process that uses a script and follows the same workflow as the manual installation process.
Install Cisco Secure Client
Use the following msiexec commands to install the required modules (Core + Umbrella):
msiexec /i "cisco-secure-client-win-5.X.XXXX-core-vpn-predeploy-k9.msi" /passive PRE_DEPLOY_DISABLE_VPN=1 /lvx_ vpninstall.log
msiexec /i "cisco-secure-client-win-5.X.XXXX-umbrella-predeploy-k9.msi" /passive PRE_DEPLOY_DISABLE_VPN=1 /lvx_ umbrellainstall.log
For more information, see Command-Line and RMM.
Note:
The PRE_DEPLOY_DISABLE_VPN=1 parameter disables the VPN functionality for customers not using Cisco Secure Client for VPN access. Note, however, that the Core VPN module must be installed.
Install the Umbrella Profile
This step is necessary unless the profile is already bundled within the installation package (see Package Customization). After installation, copy the Umbrella profile (downloaded from your Umbrella dashboard) to the correct folder in the local device to register and activate Umbrella. This can be done with a task or post install script.
Copy the Umbrella profile to the following location:
%ProgramData%\Cisco\Cisco Secure Client\Umbrella\OrgInfo.json
Note:
How to deploy Secure Client with Microsoft GPO article provides information on how to create an Umbrella profile using Microsoft Group Policy.
Instead of copying the Umbrella profile, you can create it with a script if your management software supports post-installation scripts.
The following example shows how to create an Umbrella profile using PowerShell. Replace ORG_ID, FINGERPRINT, and USER_ID values with the ones from your profile (OrgInfo.json) file:
$org_file = "%PROGRAMDATA%\\Cisco\\Cisco Secure Client\\Umbrella\\OrgInfo.json"
$data=@"
{
    "organizationId" : "ORG_ID",
    "fingerprint" : "FINGERPRINT",
    "userId" : "USER_ID"
}
"@

if(-not(Test-Path -Path $org_file))
{
	$data > $org_file
}
(Optional) Disable VPN Functionality (Post installation)
If the VPN functionality was not disabled during installation, it can optionally be disabled with a post-installation task or script. You can disable the Secure Client VPN functionality after installation by creating a special profile, VPNDisable_ServiceProfile.xml.
%ProgramData%\Cisco\Cisco Secure Client\VPN\Profile\**VPNDisable_ServiceProfile.xml**
Instead of copying the VPN profile, it can also be created with a script. This is useful if your endpoint management software supports post install scripts. The following example shows how to create the VPNDisable_ServiceProfile.xml using bash script.
$profile_file = "%PROGRAMDATA%\\Cisco\\Cisco Secure Client\\VPN\\Profile\\ VPNDisable_ServiceProfile.xml "
$data=@"
{
?\<xml version="1.0" encoding="utf-8"?>
<AnyConnectProfile xmlns="http://schemas.xmlsoap.org/encoding/" xmlns:xsi="http://www.w3.org/2001/XMLSchema-instance" xsi:schemaLocation="http://schemas.xmlsoap.org/encoding/ AnyConnectProfile.xsd">
  <ClientInitialization>
    <ServiceDisable>true</ServiceDisable>
  </ClientInitialization>
</AnyConnectProfile>
}
"@

if(-not(Test-Path -Path $profile_file))
{
	$data > $profile_file
}
For more information, see How to Disable VPN Functionality in Cisco Secure Client.
Mass Deployment Overview < Mass Deployment (Windows) > Customize Windows Installation of Cisco Secure Client
Updated 13 days ago