Create a Custom Warn Page
A Warn page is a "rule action" that you choose when adding a Web policy rule to a ruleset. A Warn page displays a page that a user must click through before accessing a requested destination. Access to a requested destination is limited to one hour. After one hour, the Warn page reappears and the user must click through again to access the requested destination.
You can create a custom Warn page, with a custom message, that you can choose when adding rules to a ruleset. Umbrella will then display this custom Warn page instead of the default Warn page.
Note: The Warn page is only available for the Web policy. You must enable HTTPS Inspection to enforce the Warn action. For more information about enabling HTTPS Inspection in a Web policy ruleset, see Add a Ruleset to the Web Policy.
Prerequisites
- Full admin access to the Umbrella dashboard. See Manage User Roles.
Procedure
- Navigate to Policies > Policy Components > Block Page Appearance and click Add or expand the setting you want to edit.

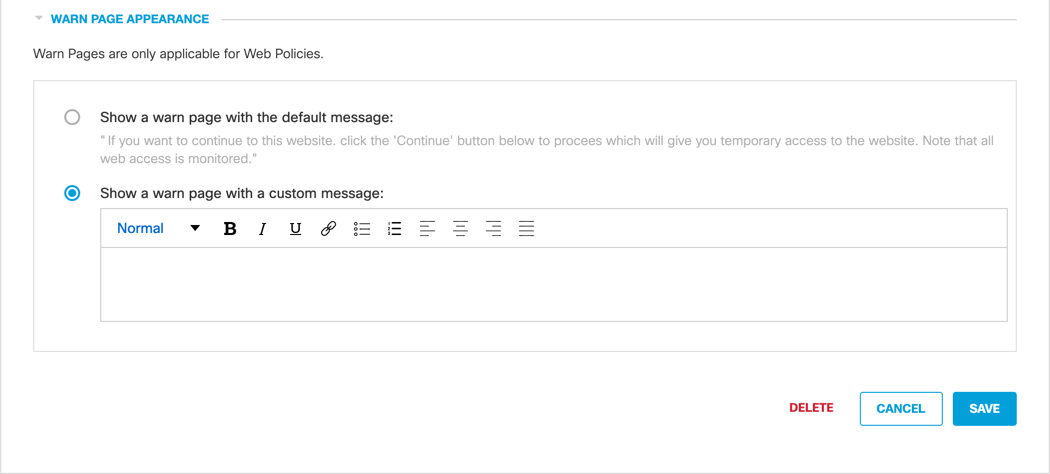
- Expand Warn Page Appearance and select Show a warn page with a custom message.

- Specify your custom message.
You can adjust the size of text, as well as bold, italicize, underline, or strikethrough it. You can also add hyperlinks, numbered lists, and bulleted lists. You can also use the following variables within your message.
- [domain]—Substitutes to the actual domain name that the end-user tried to browse to.
- [client_ip]—Substitutes to the external IP address of the client that is hitting the block page.

- Click Save.
Create a Custom Block Page < Create a Custom Warn Page > Allow Users to Contact an Administrator
Updated almost 2 years ago
