Enable Cloud Malware Protection for AWS Tenants
Umbrella supports Cloud Malware protection for files within your AWS deployment. To enable this feature:
- Enable CloudTrail Event Logging for S3 Buckets and Objects from the AWS console. (You need only enable this feature once for your account; you need not do it for each AWS tenant you authorize.)
- Authorize an AWS Tenant in Umbrella.
- For each region within which your tenant has resources deployed, Create an AWS Stack from the AWS console.
An AWS account can support at most one SaaS API DLP tenant and one Cloud Malware tenant at the same time. You cannot authorize multiple Cloud Malware tenants for a single AWS account.
Table of Contents
- Prerequisites
- Limitation
- Enable CloudTrail Event Logging for S3 Buckets and Objects
- Obtain Your AWS Account ID
- Authorize an AWS Tenant
- Create an AWS Stack
- Revoke Authorization
Prerequisites
- You must have full admin access to the Umbrella dashboard. See Manage User Roles.
- You must have an active AWS tenant and the person doing the installation must be an AWS Administrator.
- You must Enable CloudTrail Event Logging for S3 Buckets and Objects from the AWS console. (You need only enable this feature once for your account; you need not do it for each AWS tenant you authorize.)
- You must Obtain your AWS Account ID .
- Chrome or Firefox (recommended) with pop-up blockers and ad blockers disabled (only for the duration of authorization).
Limitation
- A tenant that fails to authenticate cannot be deleted.
Enable CloudTrail Event Logging for S3 Buckets and Objects
We require that you enable CloudTrail event logging to provide you with a record of activities in your AWS account. You need only enable this feature once for your account; you need not do it for each AWS tenant you authorize.
- In the AWS console, navigate to CloudTrail and choose Create Trail.
- Provide a meaningful Trail name for your trail.
- Under Events, choose Data Events to log data events.
- For Storage location, choose Use existing S3 bucket, and choose Browse to choose an S3 bucket in your account.
- You may optionally choose to enable Log file SSE KMS encryption for your log files. (If you choose this option, see Step 11.)
- On theChoose log events page, choose Data events.
- For Data event source choose S3.
- You can choose from:
- Log all current and future S3 buckets (This is the default.)
Choose to log Write events.
- Individual bucket selection (This can be a more economical choice.)
Browse for existing buckets and click Add bucket to log data events for each. Choose to log Write events.
- For the remaining options in the CloudTrail creation wizard, choose the settings appropriate to your environment.
Obtain Your AWS Account ID
- Log in to the AWS Management Console with an Admin account.
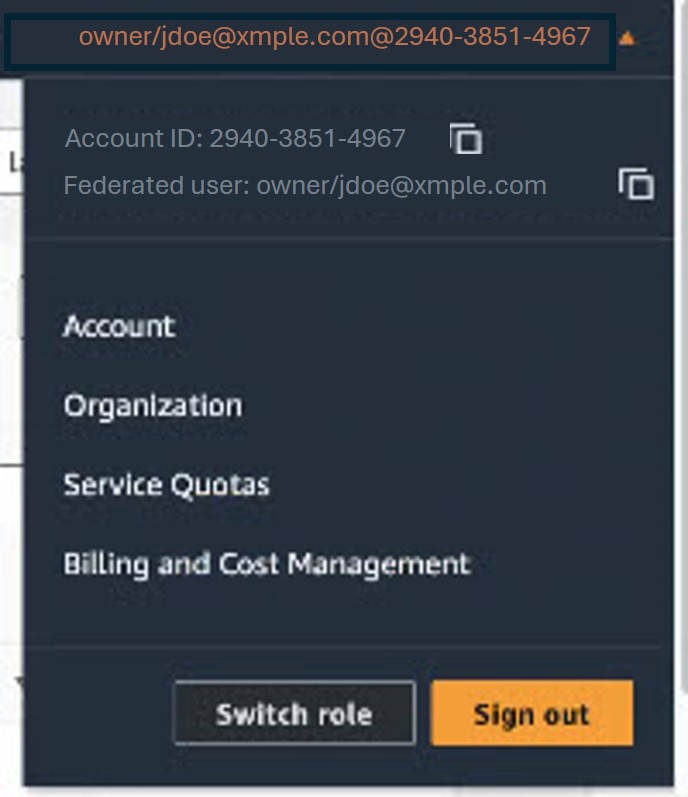
- In the navigation bar at the upper right, click on your user name. The account ID is displayed above your user name.
- Click the Copy icon to the right of the Account ID to copy it.
Authorize an AWS Tenant
- Navigate to Admin > Authentication.
- In the SaaS API Platforms section, click AWS S3.
- In the Cloud Malware section, click Authorize New Tenant to add an AWS tenant to your Umbrella environment.

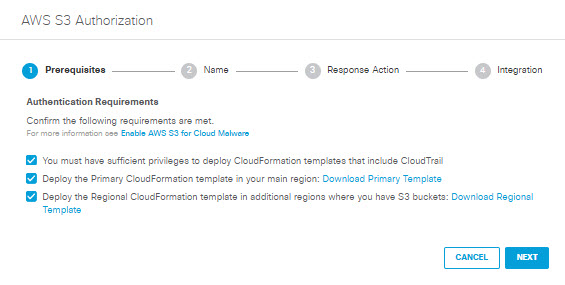
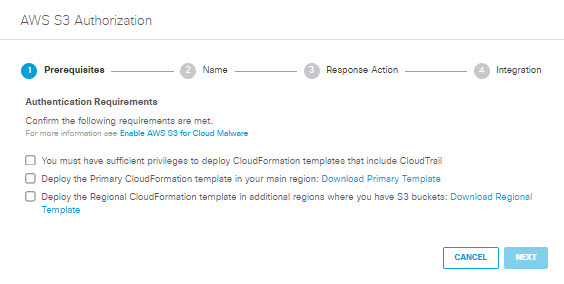
- In the AWS S3 Authorization dialog box, click Download Primary Template to download an AWS CloudFormation template for your main region (primary-cloudformation-template.json). If you have S3 buckets in additional regions, click Download Regional Template to download an AWS CloudFormation template for those regions (regional-cloudformation-template.json). Save the templates to your local machine, and for each region where you have S3 buckets, Create an AWS Stack before proceeding to the next step.
Note: If you enable both Cloud Malware and DLP protection for a region, a single stack can serve both purposes. If you have already created an AWS stack for DLP protection for a region, you need not create another for Cloud Malware.
- In the AWS S3 Authorization dialog box, check the checkboxes to verify you meet the prerequisites, then click Next.
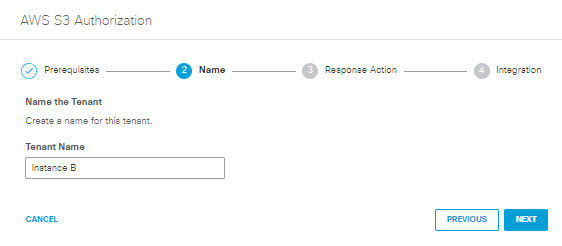
- Add a Tenant Name that is meaningful for your environment, then click Next.
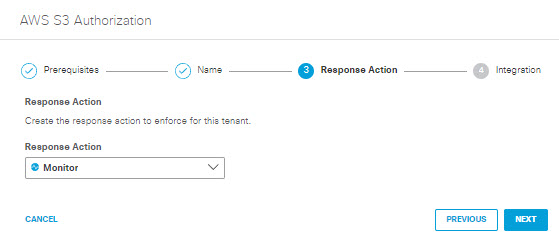
- Choose Monitor for the Response Action and click Next.
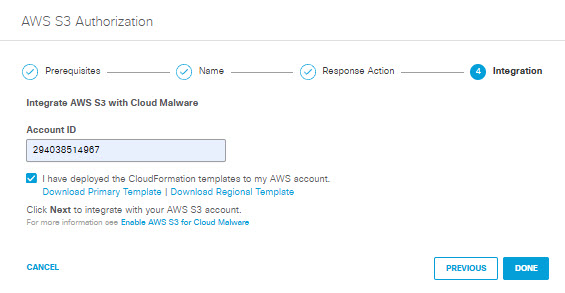
- Paste your AWS Account ID in the text box, confirm that you have deployed template(s) to create the necessary AWS stack(s), then click Done. (It may take up to 24 hours for the integration to be confirmed and appear as Authorized on the Authentication page)
Create an AWS Stack
Umbrella requires an AWS stack to monitor and communicate with your S3 resources, to monitor and communicate with those resources. If you have more than one AWS tenant, you need a stack for each region within which each tenant has resources deployed. If you enable both Cloud Malware and DLP protection for a region, a single stack can serve for both purposes.
NOTE: If you enable both Cloud Malware and DLP protection for an AWS region, and then disable one of those two forms of protection, you must leave the stack intact to support the remaining protection.
Important:Perform this task after you have downloaded a CloudFormation Template in Step 4 of Authorize an AWS Tenant. Once you have created all the necessary stacks, return to Step 5 of that task.
For more information about AWS Stacks, see the Amazon AWS Cloud Formation User Guide.
- Log in to the AWS Management Console with an Admin account.
- In the AWS console, navigate to CloudFormation > Stacks and choose Create new stack > With new resources.
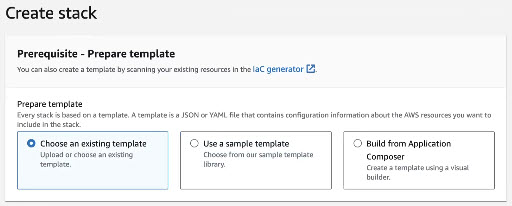
- On the Create stack page, under Prerequisite - Prepare template, select Choose an existing template.
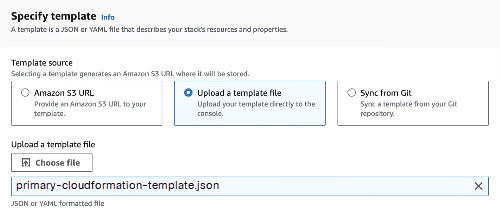
- On the Create stack page, under Specify template, select Upload a template file, then click Choose file and navigate to and select the JSON file on your local system which you downloaded when you authorized the AWS tenant in Umbrella. (primary-cloudformation-template.json for your main region, or regional-cloudformation-template.json for any additional regions.)
- (Optional) Click View in Application Composer to open a new tab displaying a graphical representation of the stack deployment.
- Click Next.
- For the remaining options in the stack creation wizard, choose the settings appropriate to your environment. We recommend the following best practices:
- Provide a stack name that is meaningful within your environment.
- Under Stack failure options, choose Role back stack resources and Delete all newly created resources.
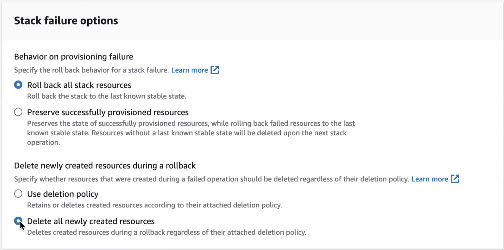
- Acknowledge that AWS CloudFormation may create IAM resources with custom names within your AWS account.
- Click Submit.
- In the AWS console the status of all stack in your account is displayed under CloudFormation > Stacks. Wait until the status for your new stack is displayed as CREATE_COMPLETE.
- Continue with Step 5 of Authorize an AWS Tenant.
Revoke Authorization
- Navigate to Admin > Authentication.
- In the Platforms section, click AWS S3.
- From the Action column, click Revoke. You can revoke any authorized tenant.

- Click Revoke. The selected tenant is no longer authorized.

Consider deleting the AWS stack you created if it is not needed for other purposes.
Revoke Authorization for a Platform < Enable Cloud Malware Protection for AWS Tenants > Enable Cloud Malware Protection for Azure Tenants
Updated about 1 month ago


