
Deploy Umbrella module in Cisco Secure Client
Since Cisco Umbrella Roaming Client is approaching End of Support, existing customers should migrate to the Cisco Umbrella module in Cisco Secure Client. For more information, see Announcements in End-of-Life for Cisco Umbrella Roaming Client.
Note:
All customers with valid licenses and active Umbrella support contracts are eligible to migrate to Cisco Secure Client for entitlement to the Umbrella Roaming Security Module at no additional cost.
Cisco Secure Client includes all the Umbrella capabilities provided in the Umbrella Roaming Client and Cisco AnyConnect. Cisco Secure Client software packages support multiple deployment methods. This section describes how to install Cisco Secure Client with the client modules and deploy the Umbrella profile on Windows or macOS devices.
Migrating to Cisco Secure Client from an existing Umbrella Roaming Client deployment will automatically copy over the configuration of the standalone client and uninstall it. Migrating to Cisco Secure Client from AnyConnect will install Cisco Secure Client the same way an upgrade from an earlier AnyConnect version to a new one occurs. When migrating, ensure that all the software management systems are updated such that they only distribute Cisco Secure Client.
Contents
- Manual Installation of Cisco Secure Client (Windows and macOS)
- Mass Deployment Overview
- Mass Deployment (Windows)
- Customize Windows Installation of Cisco Secure Client
- Mass Deployment (macOS)
- Customize macOS Installation of Cisco Secure Client
- VPN Headend Deployment
- Secure Firewall Management Center and Secure Firewall Threat Defense
- Migration from Umbrella Roaming Client
- Install the Root CA
- Automatic Updates
- Cloud Management
- Additional References
- Remote Monitoring and Management Deployment Tutorials
Deployment Overview
These are the primary steps for deploying the Cisco Umbrella Module:
| 1. | Install the Cisco Secure Client software. |
| 2. | (Optional), Disable the Secure Client VPN functionality for macOS and Windows . |
| 3. | Deploy your unique Cisco Umbrella organization profile (OrgInfo.json). |
| 4. | Give system extension permissions for MacOS. |
| 5. | Install the Cisco Umbrella root certificate. |
Download
- Software Download
The latest version of Cisco Secure Client is available for download from your Umbrella dashboard Deployment > Roaming Computers. For information on Pre-Deployment package and Headend Deployment pacakage , see Cisco Secure Client Admin Guide . - Profile Download
Your Umbrella Roaming Security Module profile is available from your Umbrella dashboard Deployment > Roaming Computers .
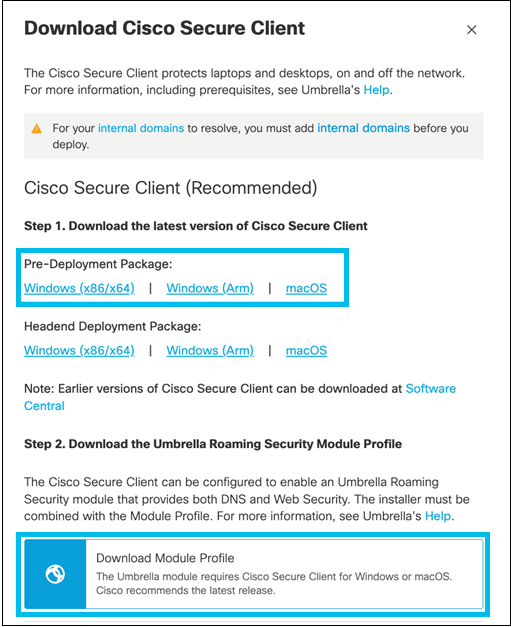
For more information, see How To: Download Cisco Secure Client.
Prerequisites < Deploy Umbrella module in Cisco Secure Client > Manual Installation of Cisco Secure Client (Windows and macOS)
Updated 8 months ago