Deploy VAs in VMware
Deploy Umbrella Virtual Appliances (VAs) in VMware.
An Umbrella site requires two Virtual Appliances (VAs). It is critical that these VAs are not cloned or copied in any way. You must set up and configure each VA manually.
Table of Contents
Prerequisites
- Basic knowledge of VMware.
- Full Admin user role. For more information, see Manage Accounts.
- For information about the requirements for deploying Umbrella VAs, see Prerequisites.
Note: ESXi 8.0 U3 support will be available in VA 3.8.0. For more information about the supported versions of VMware ESXi, see Umbrella Software Release Notes.
Configure Authentication for the Virtual Appliances
- For more information, see Configure Authentication for Virtual Appliances.
Procedure
- Step 1: Download OVF Template
- Step 2: Deploy OVF Template
- Step 3: Deploy a Second Virtual Appliance
- Step 4: Power on the Virtual Machines
Step 1: Download OVF Template
Download the software package for the Umbrella Virtual Appliance.
When you download the software package for the VA and if you did not configure API key credentials for your AD Connectors and VAs, Umbrella displays a warning message. We recommend that you configure API keys for your AD Connectors and Umbrella VAs. For more information, see Configure Authentication for Virtual Appliances.
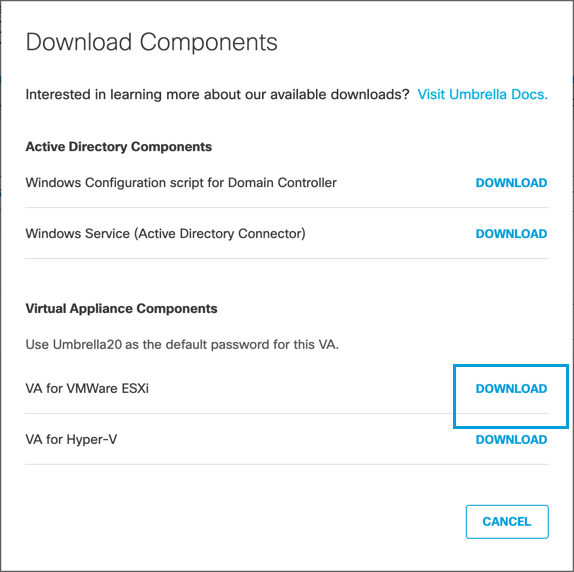
a. Navigate to Deployments > Configuration > Sites and Active Directory and click Download.

b. Click Download for VA VMWare ESXi.

Umbrella generates and downloads a .tar file unique to your deployment.
This tar file includes:
- an .ovf template containing the virtual hard disks that need to be deployed on VMware
- a signature file
- a Cisco public certificate to validate the signature
- a readme file
c. Extract the contents of the tar file using the command
tar –xvf <.
To verify the integrity of the downloaded file, validate the signature by following the instructions provided in the readme file. On successful signature validation, you should see a message saying “Verified OK."
Step 2: Deploy OVF Template
a. Log into your VMware vSphere client and select the File tab.
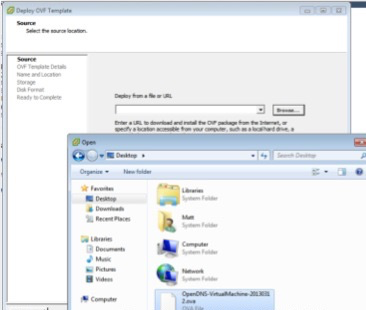
b. Click Deploy OVF Template, choosing the downloaded .ova template.

c. Follow the deployment wizard prompts, but be sure to follow these steps:
- For the source, browse to the .ova file you just downloaded.
- Specify a unique name and location for your VA.

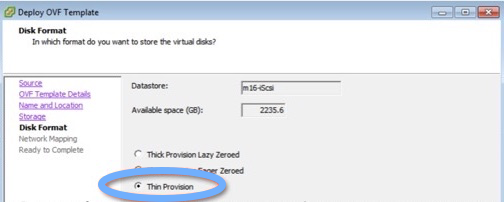
d. Select the disks appropriate to your environment. It is recommended to select Thin Provision for the disk format, but it is not mandatory.

e. Select or map a network.

f. Click Finish.
The system begins to deploy the VA. During the deployment, subsequent prompts update you about the status of the deployment.
Step 3: Deploy a Second Virtual Appliance
While the first VA is deploying, repeat the previous two steps to configure your second VA.
Note: Two VAs are required per Umbrella site. It is critical that these VAs are not cloned or copied in any way. Each VA must be set up and configured manually.

Step 4: Power on the Virtual Machines
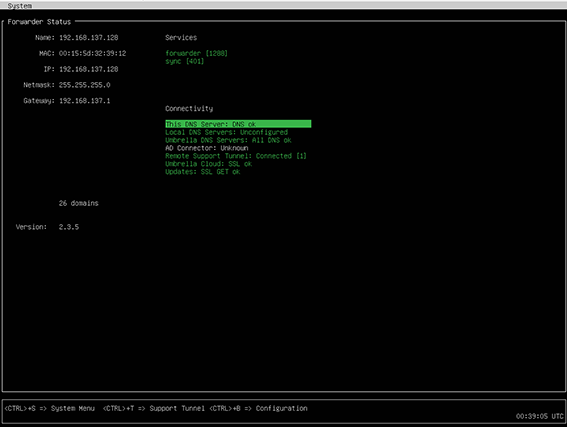
If the deployment succeeded, you'll see the VA console screen. For information about configuring VAs, see Configure Virtual Appliances.

Deploy VAs in Hyper-V for Windows 2012 or Higher < Deploy VAs in VMware > Deploy VAs in Microsoft Azure
Updated 4 months ago
